はじめに
プッシュ通知の実装は難しいものだと思ってずっと避けてきましたが、めっちゃ簡単だったので記事にしておきます。
古い記事を見るとめっちゃ複雑で難しそうなのですが、多分簡単になってます。
Firebaseにアプリは設定されている前提での記事になります。
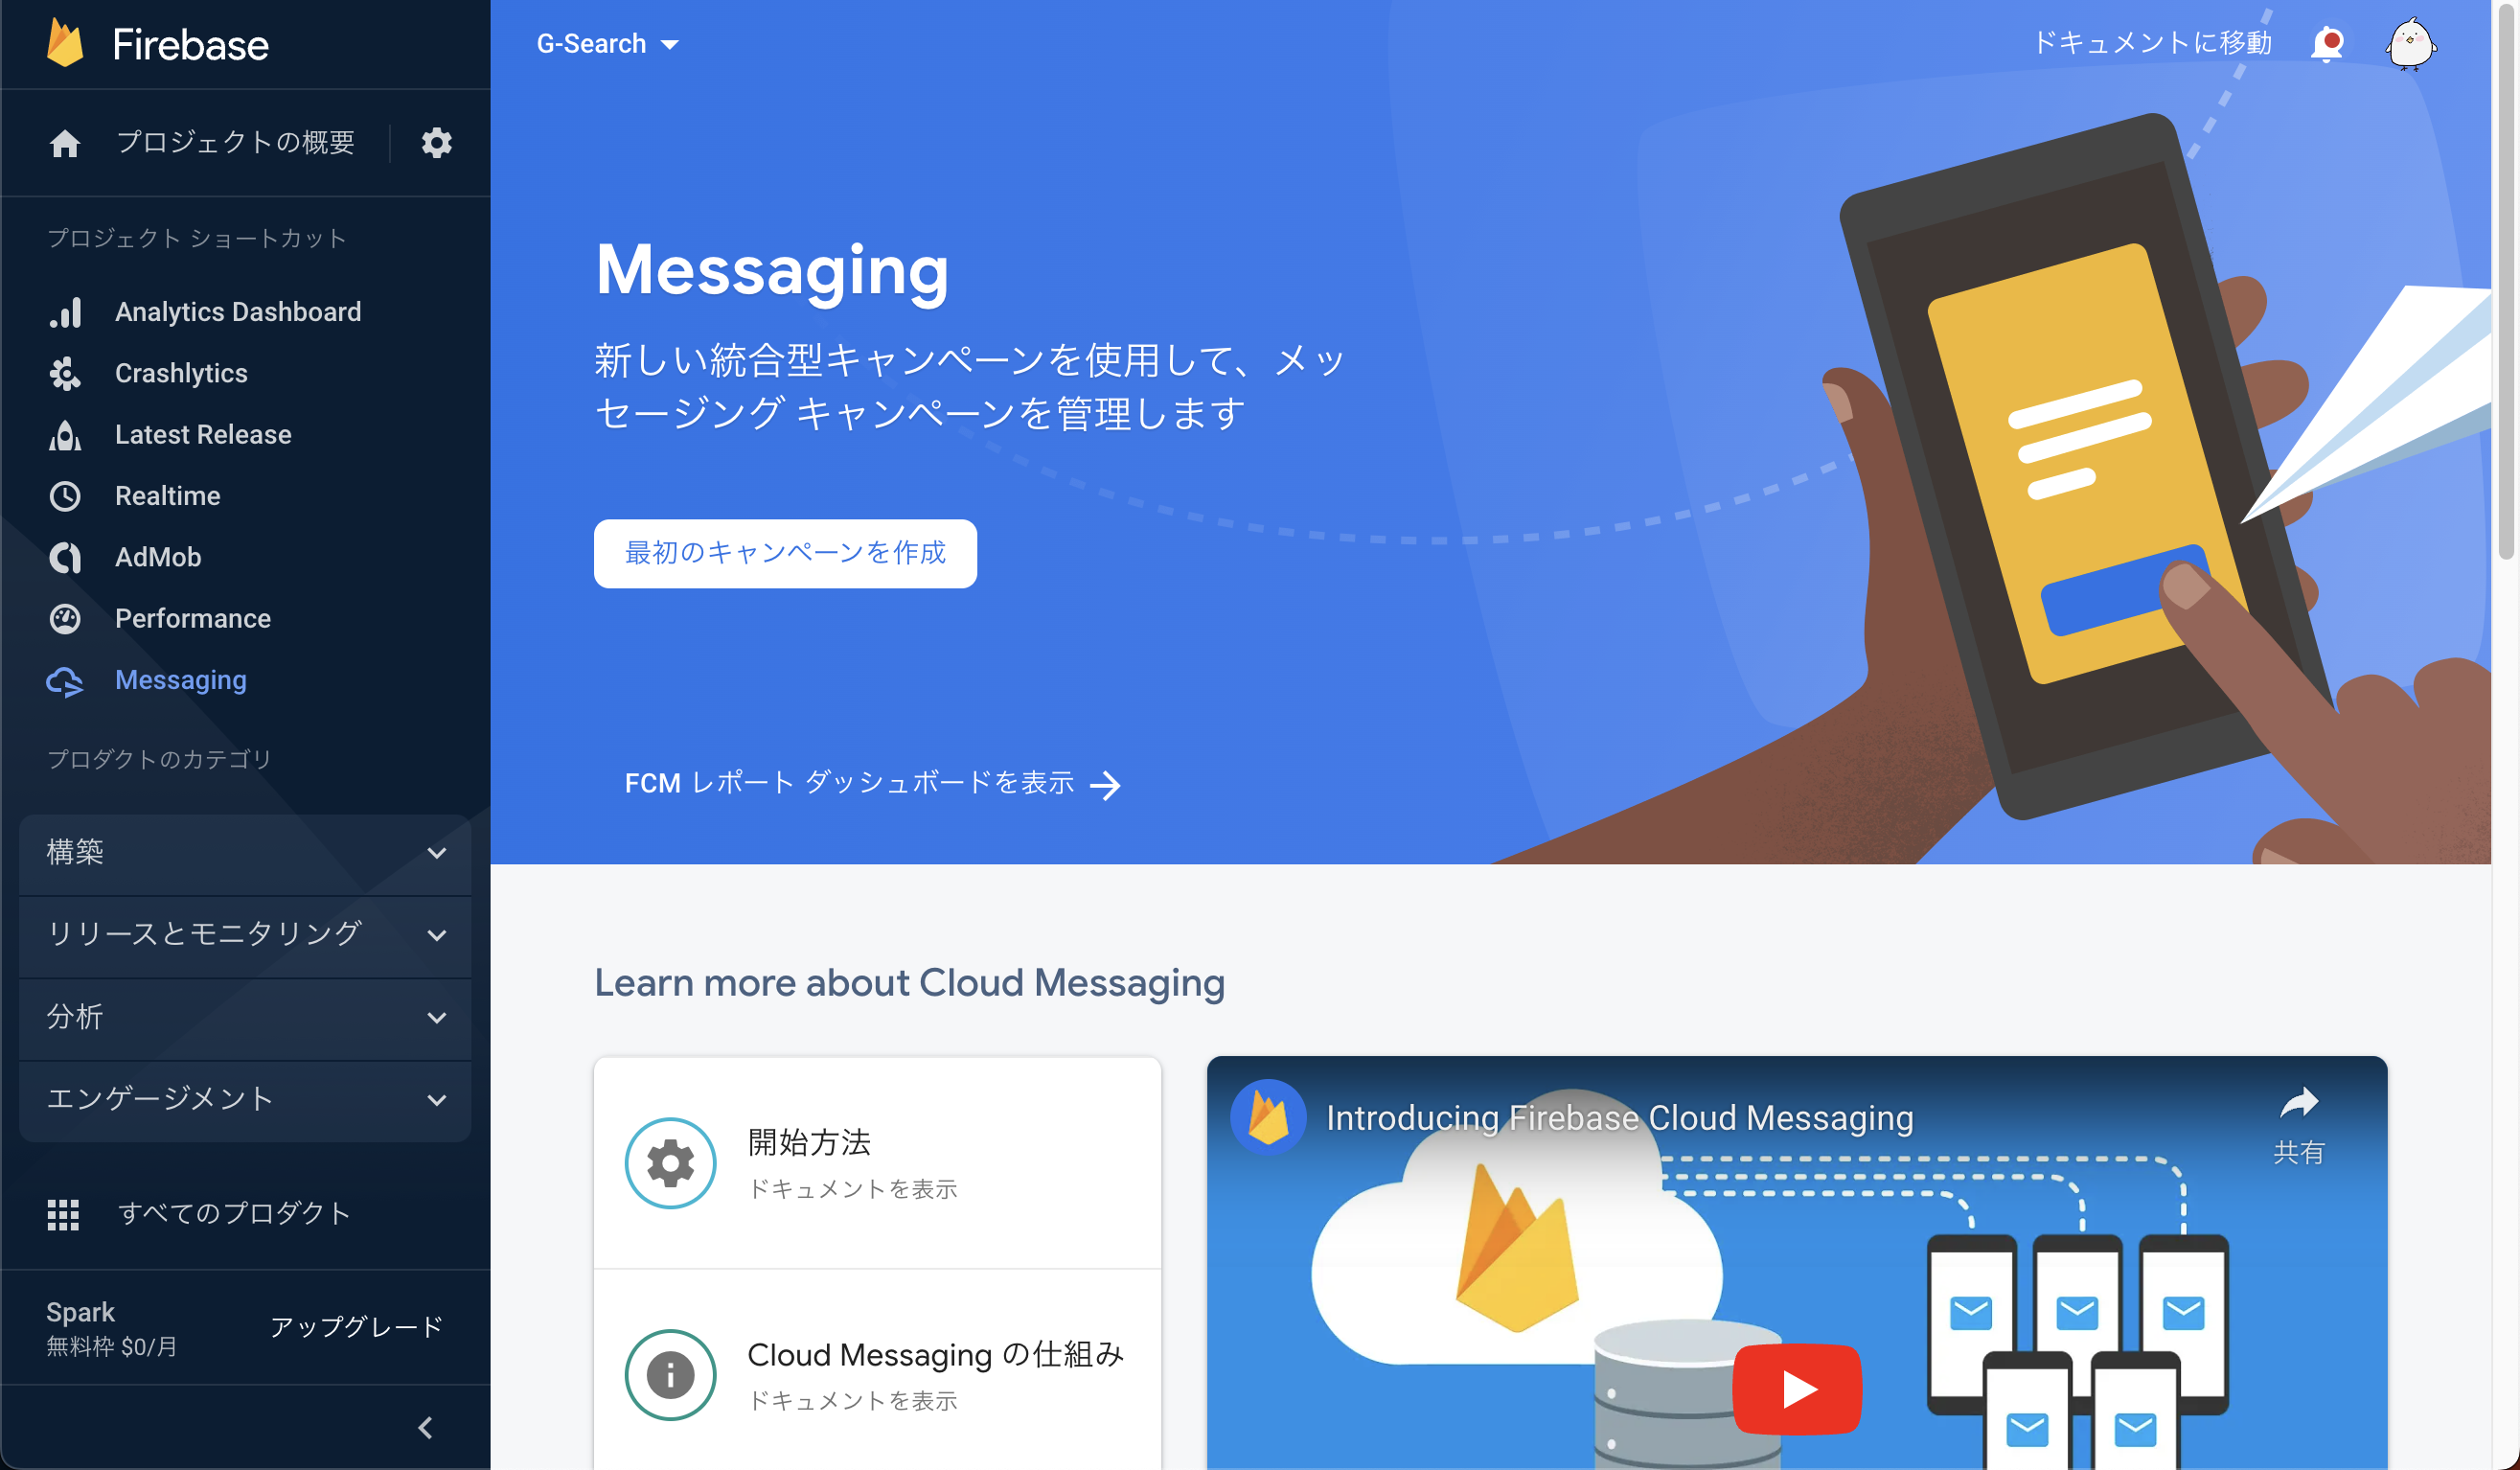
まだ、以下のようなページがない場合は設定してください。
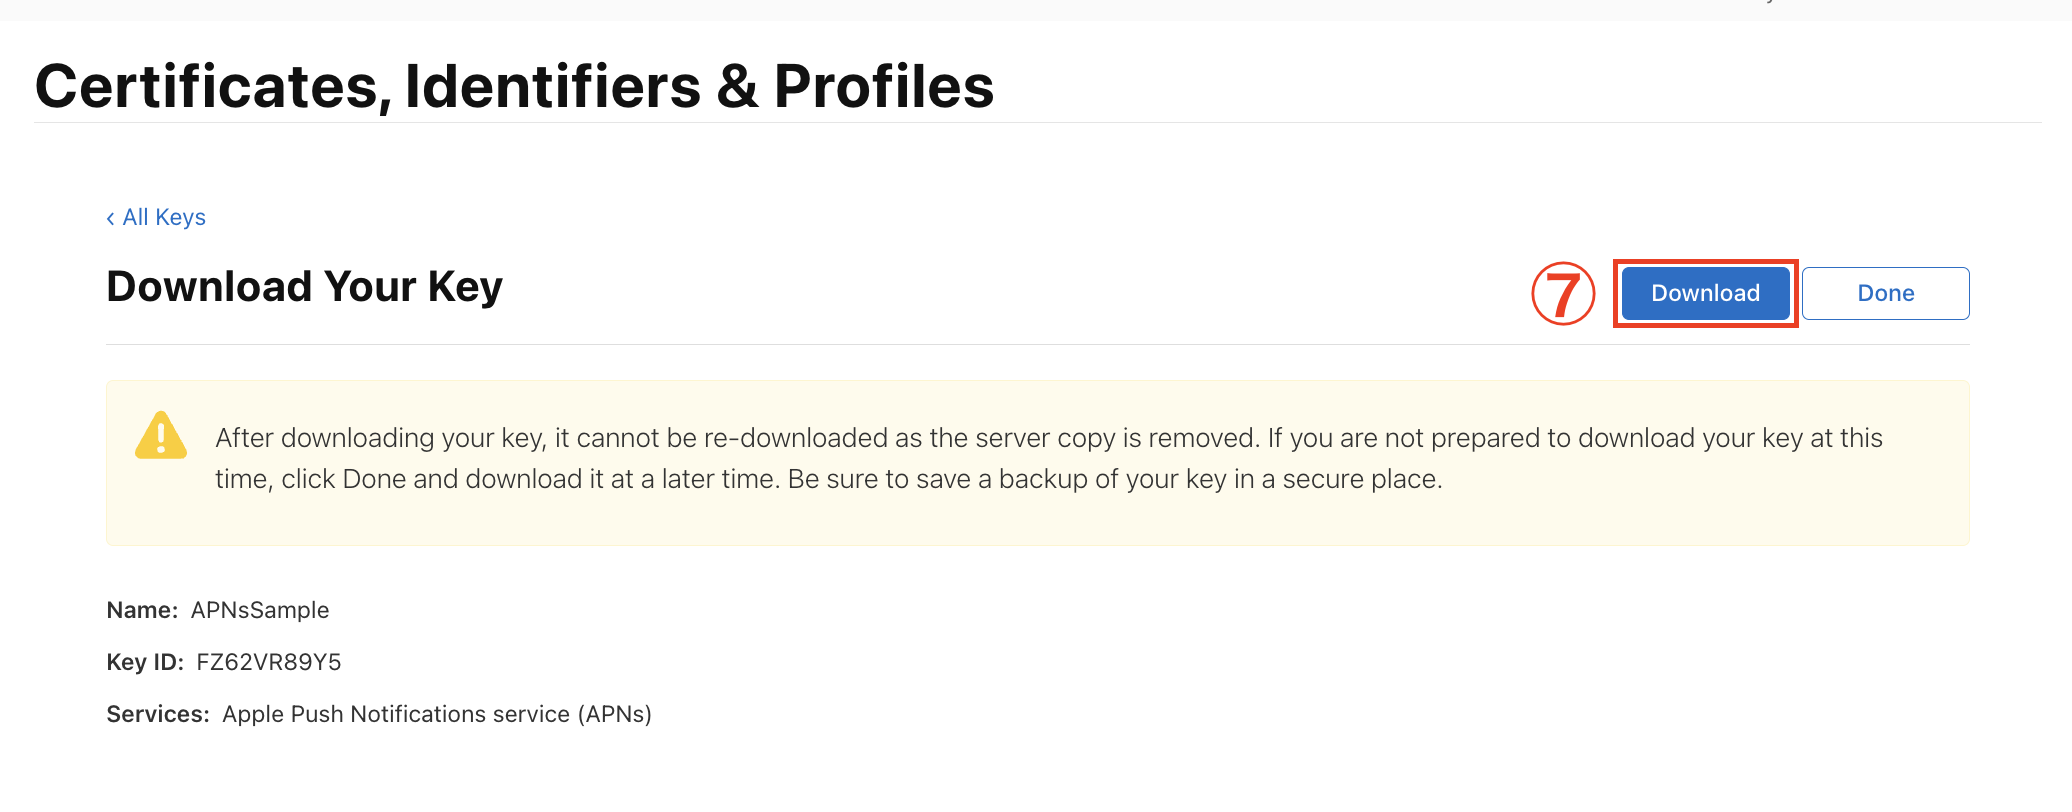
APNs認証キーの作成
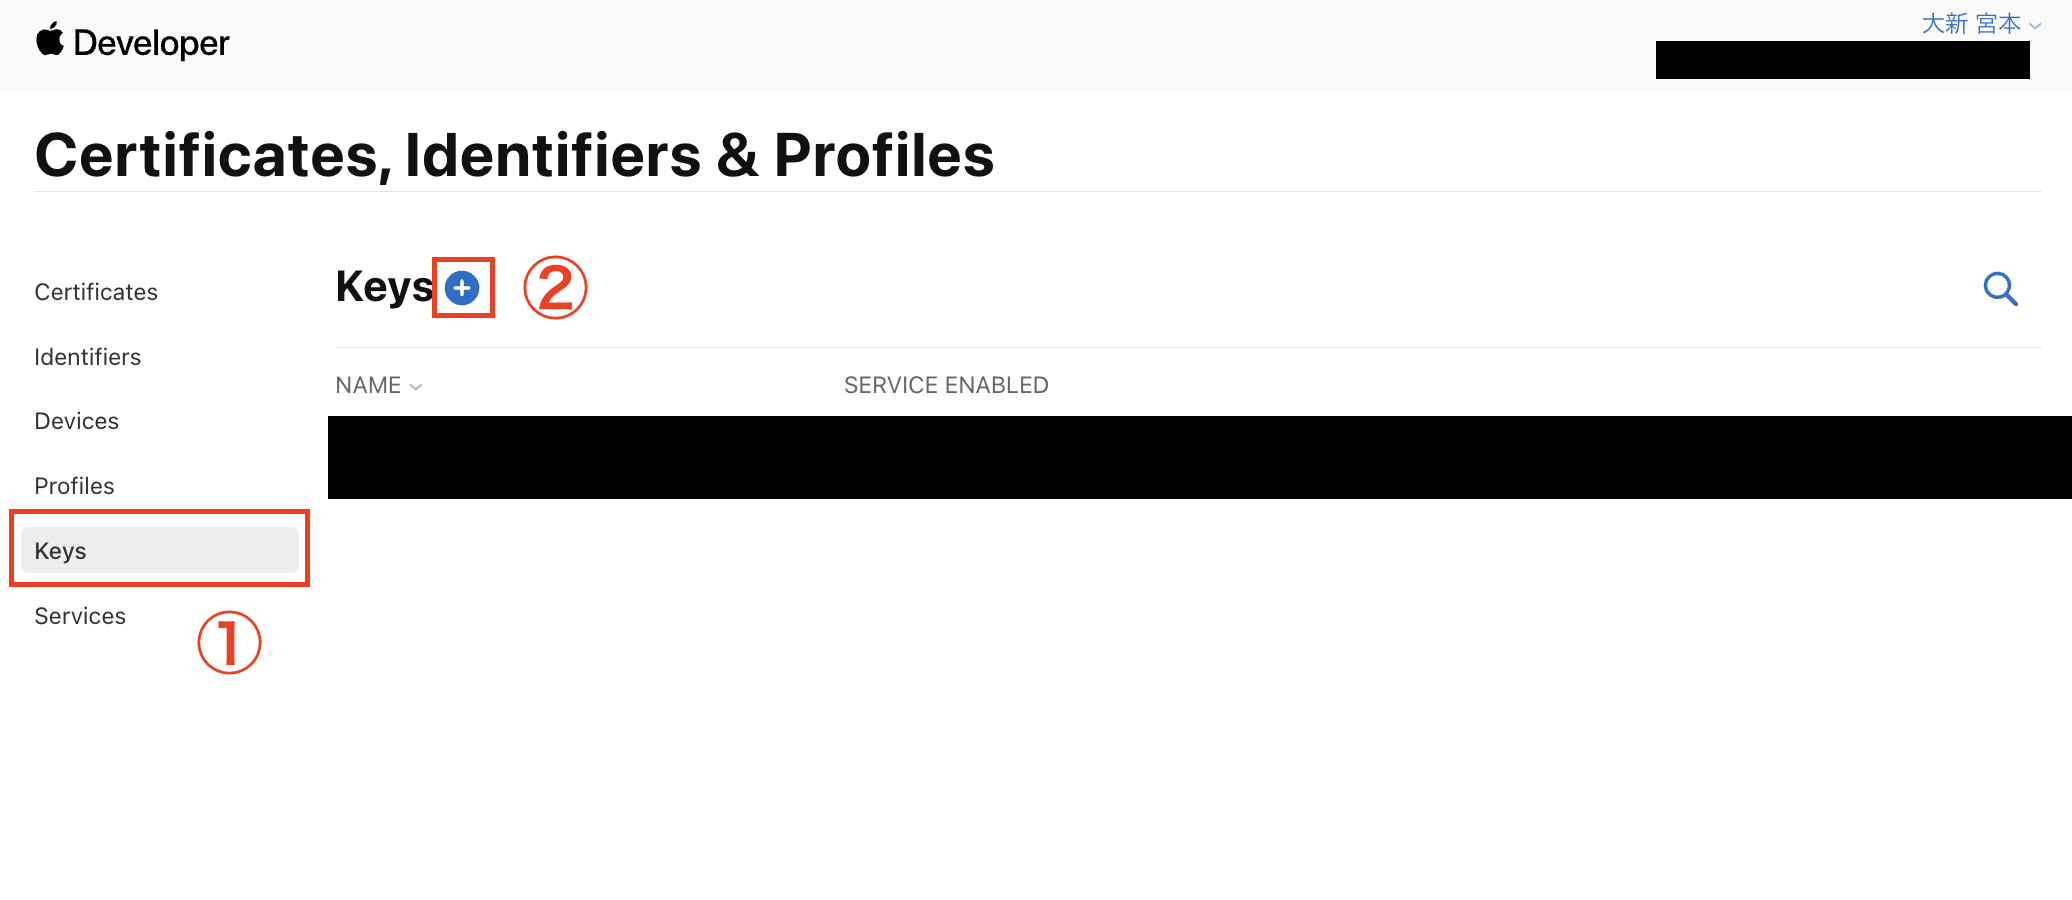
こちらから「Certificates, Identifiers & Profiles」を開きます。
① 「Keys」を選択します
② 「+」を選択します
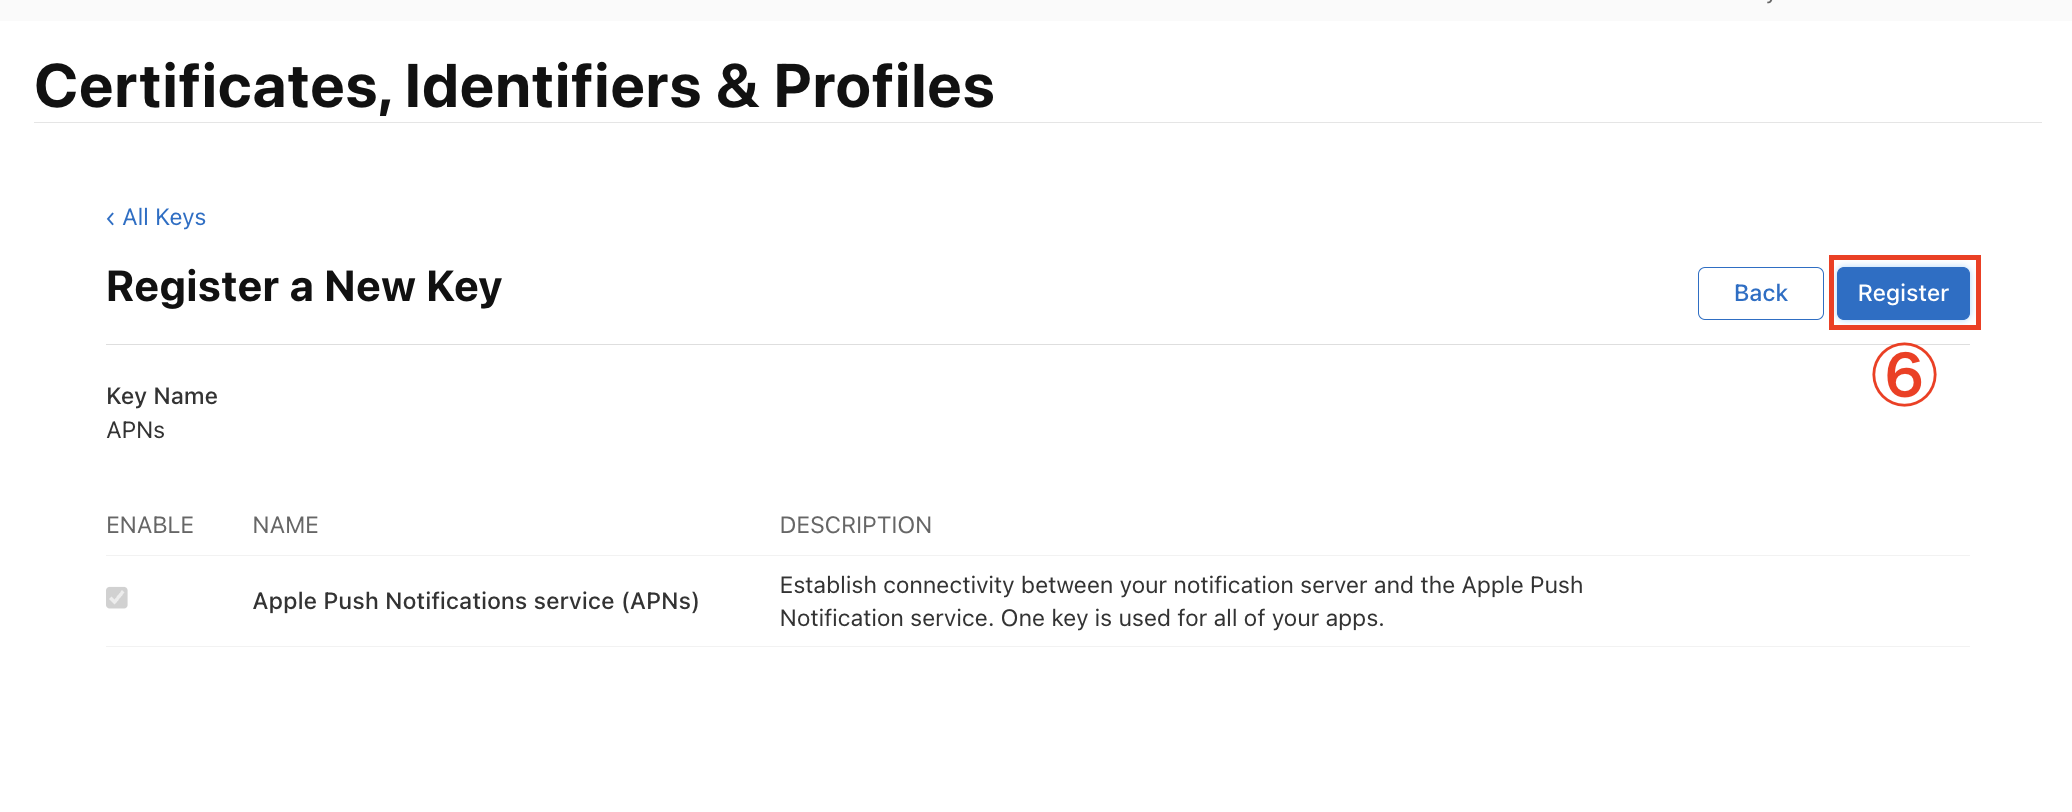
③ 「Key Name」を決めます(ここはなんでもいい)
④ 「Apple Push Notifications service (APNs)」にチェックを入れます
⑤ 「Continue」を選択します

APNs認証キーのアップロード
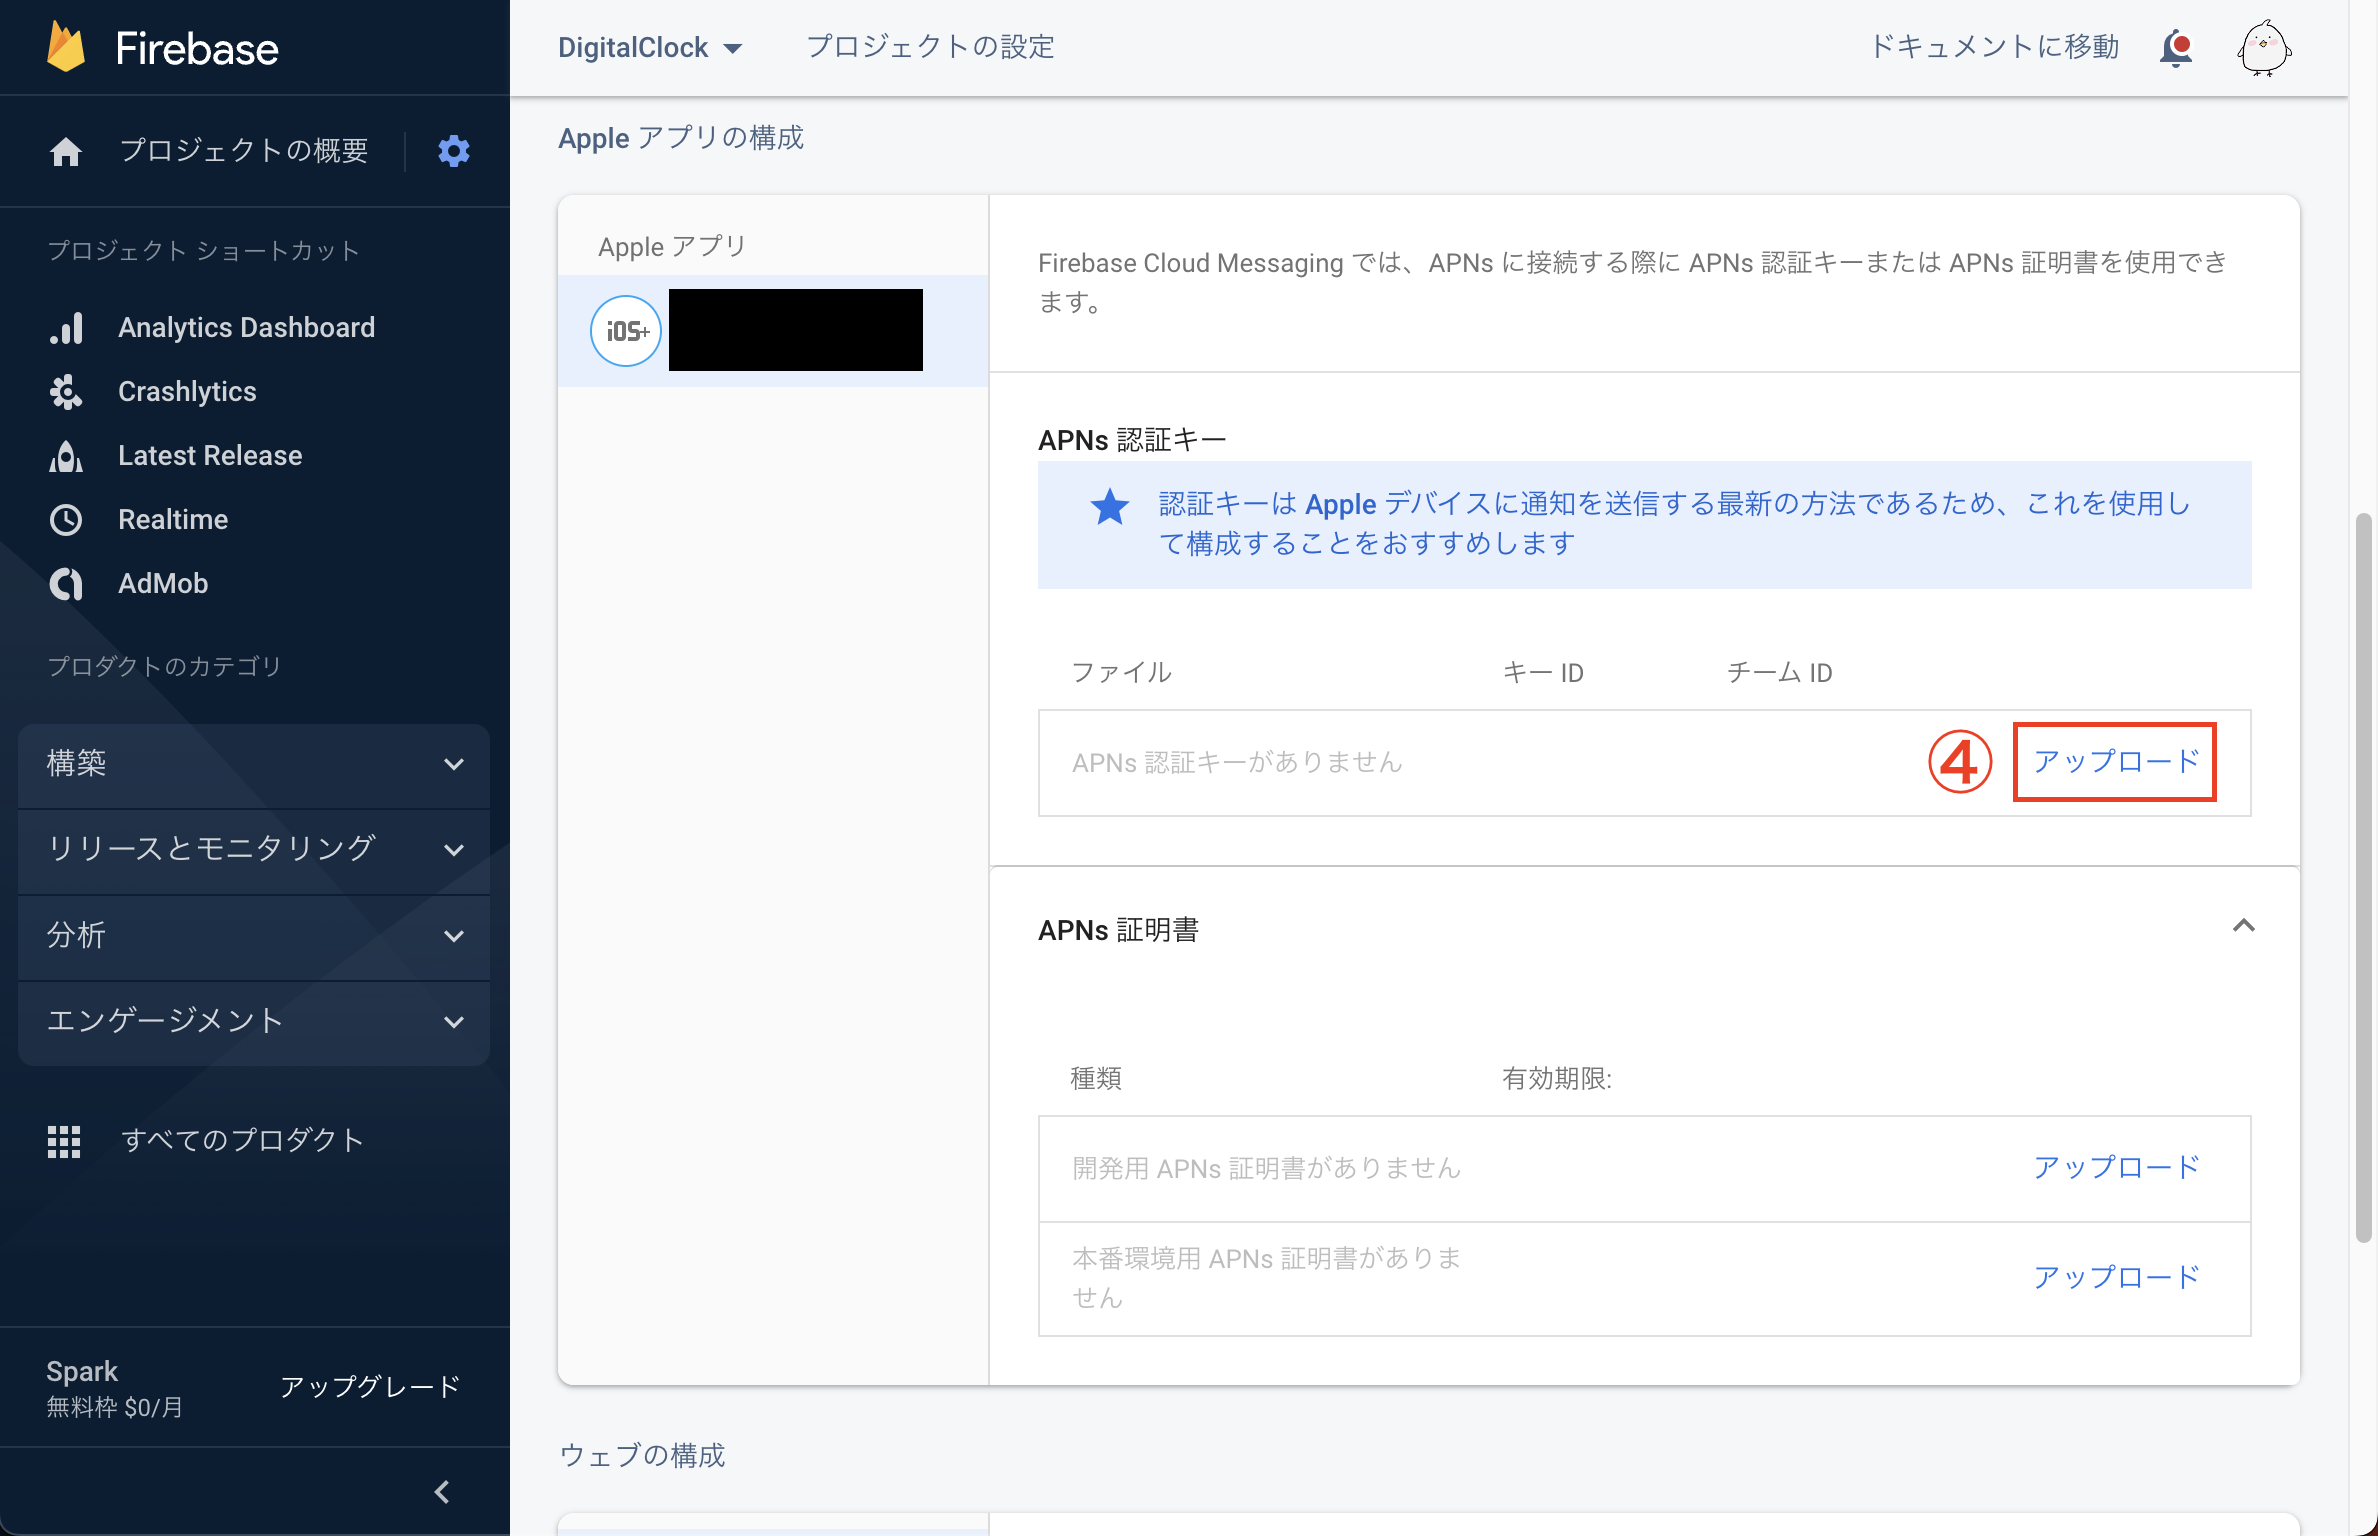
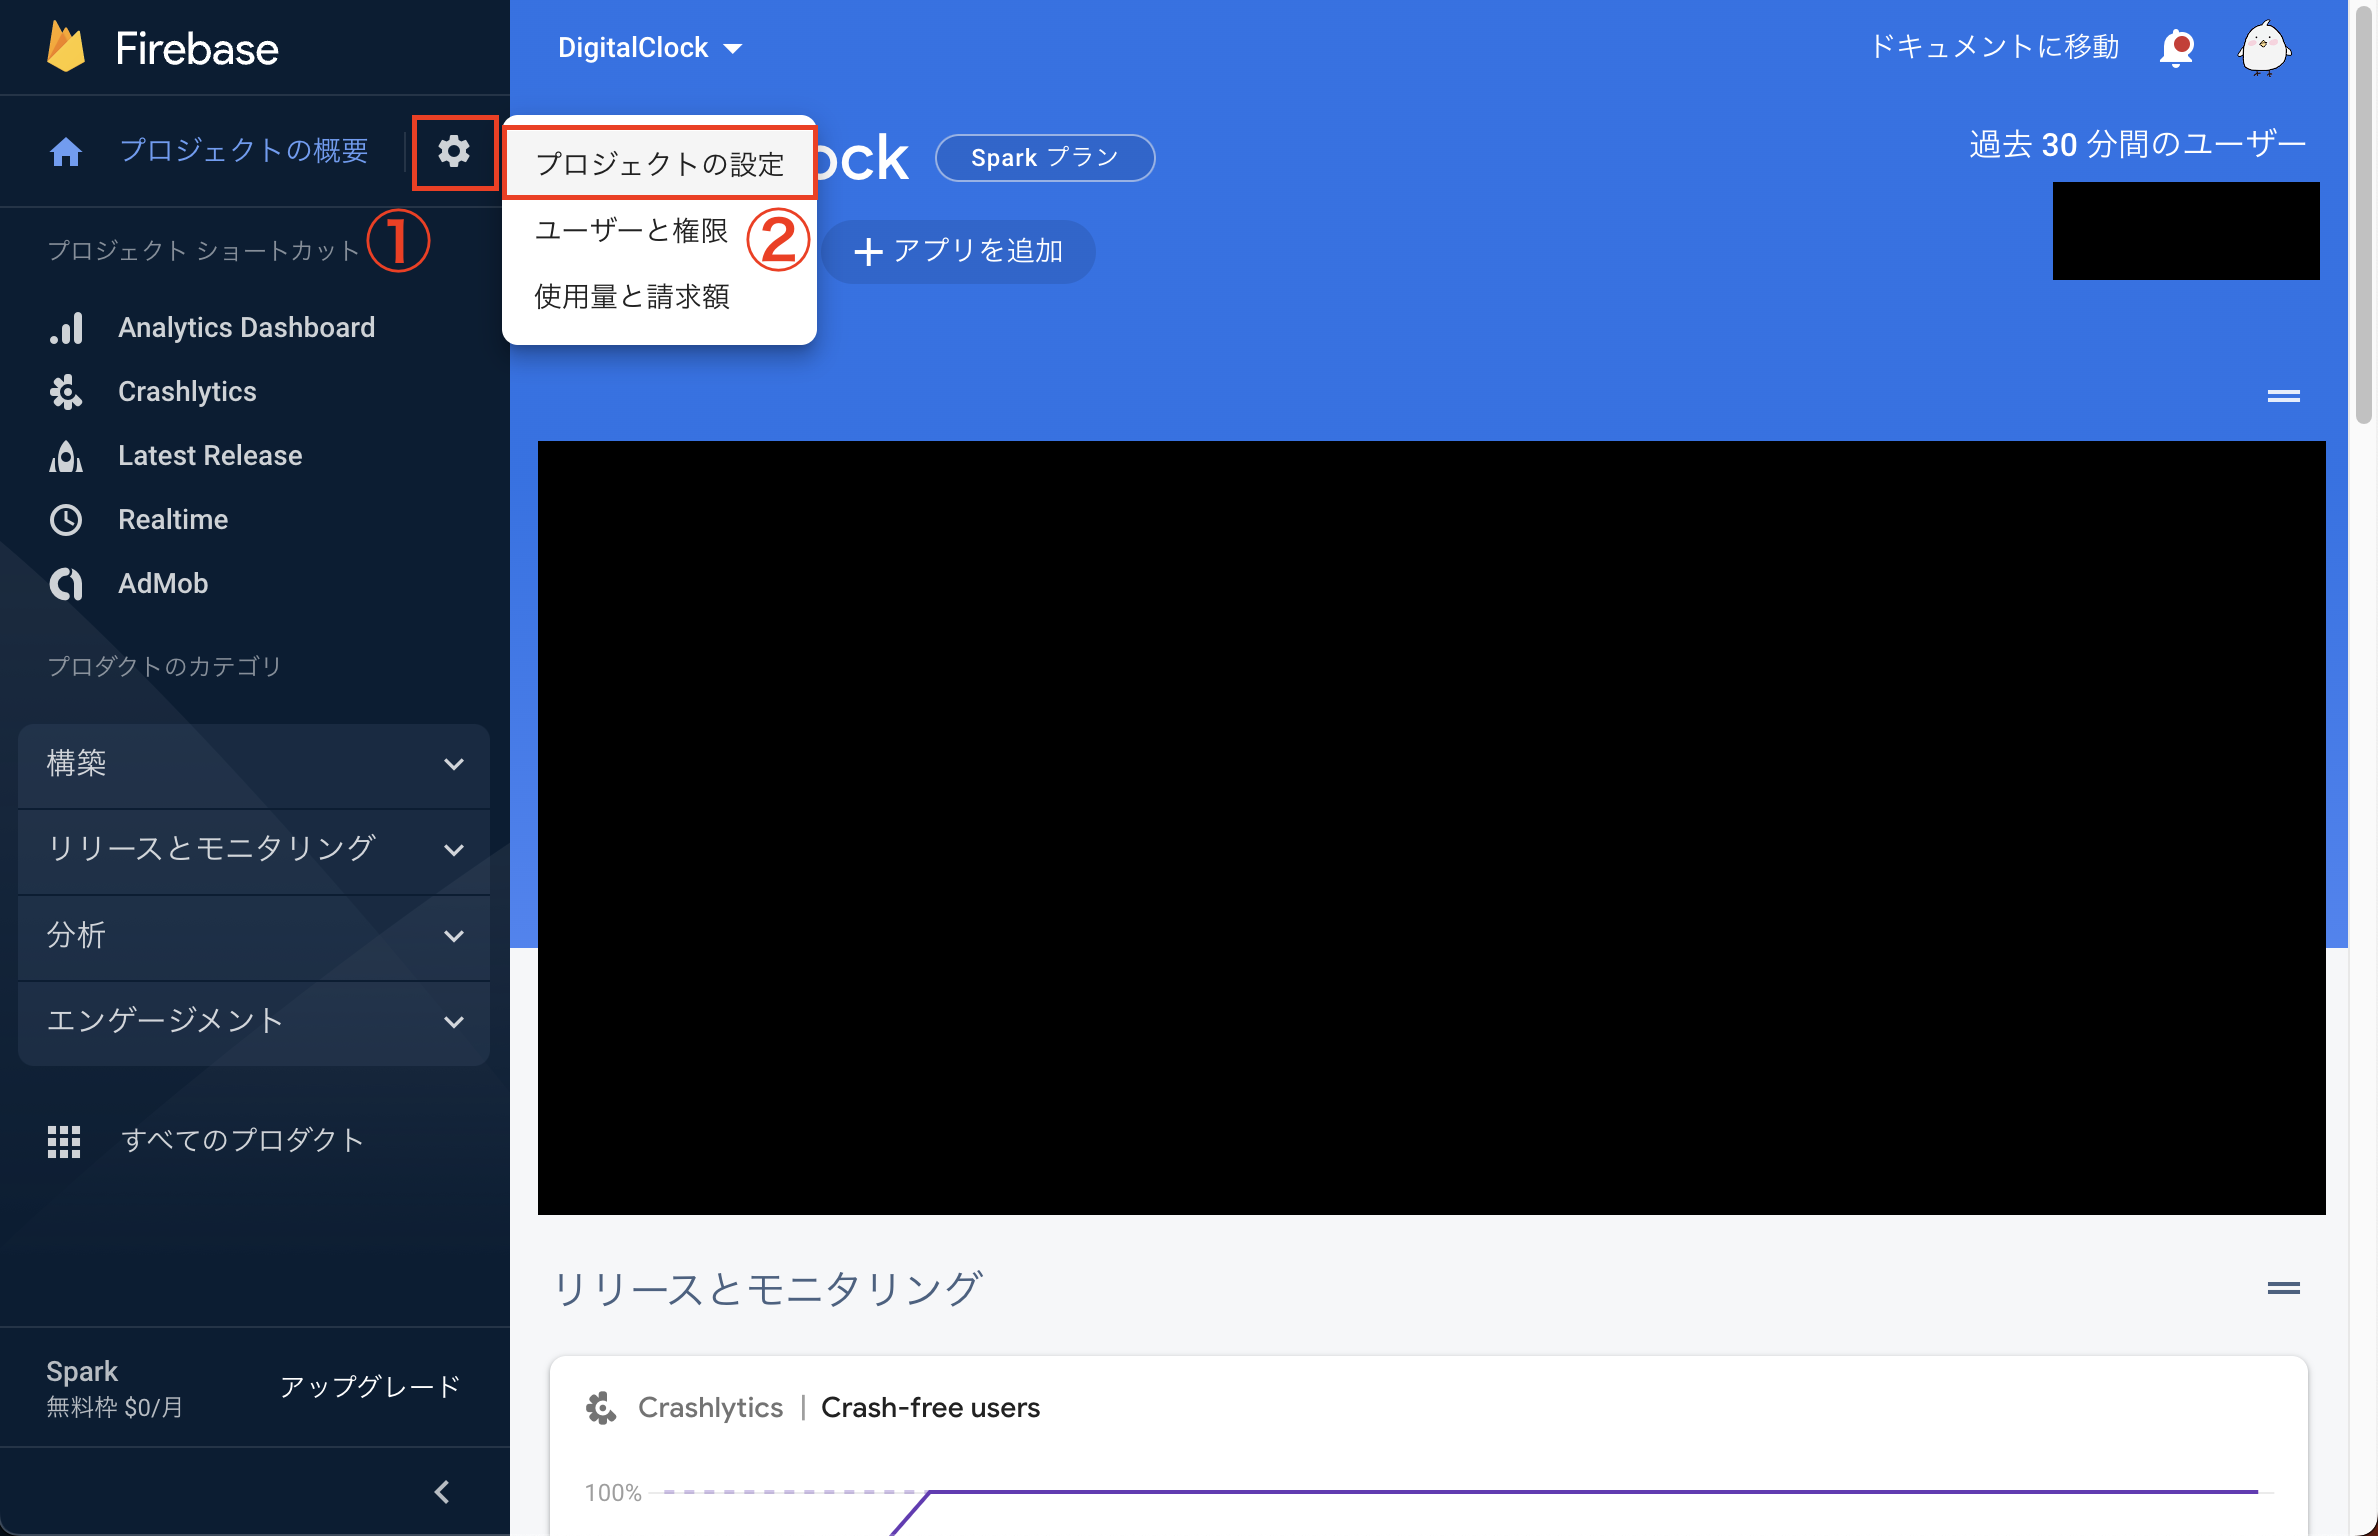
① 設定マークを選択します
② 「プロジェクトの設定」を選択します
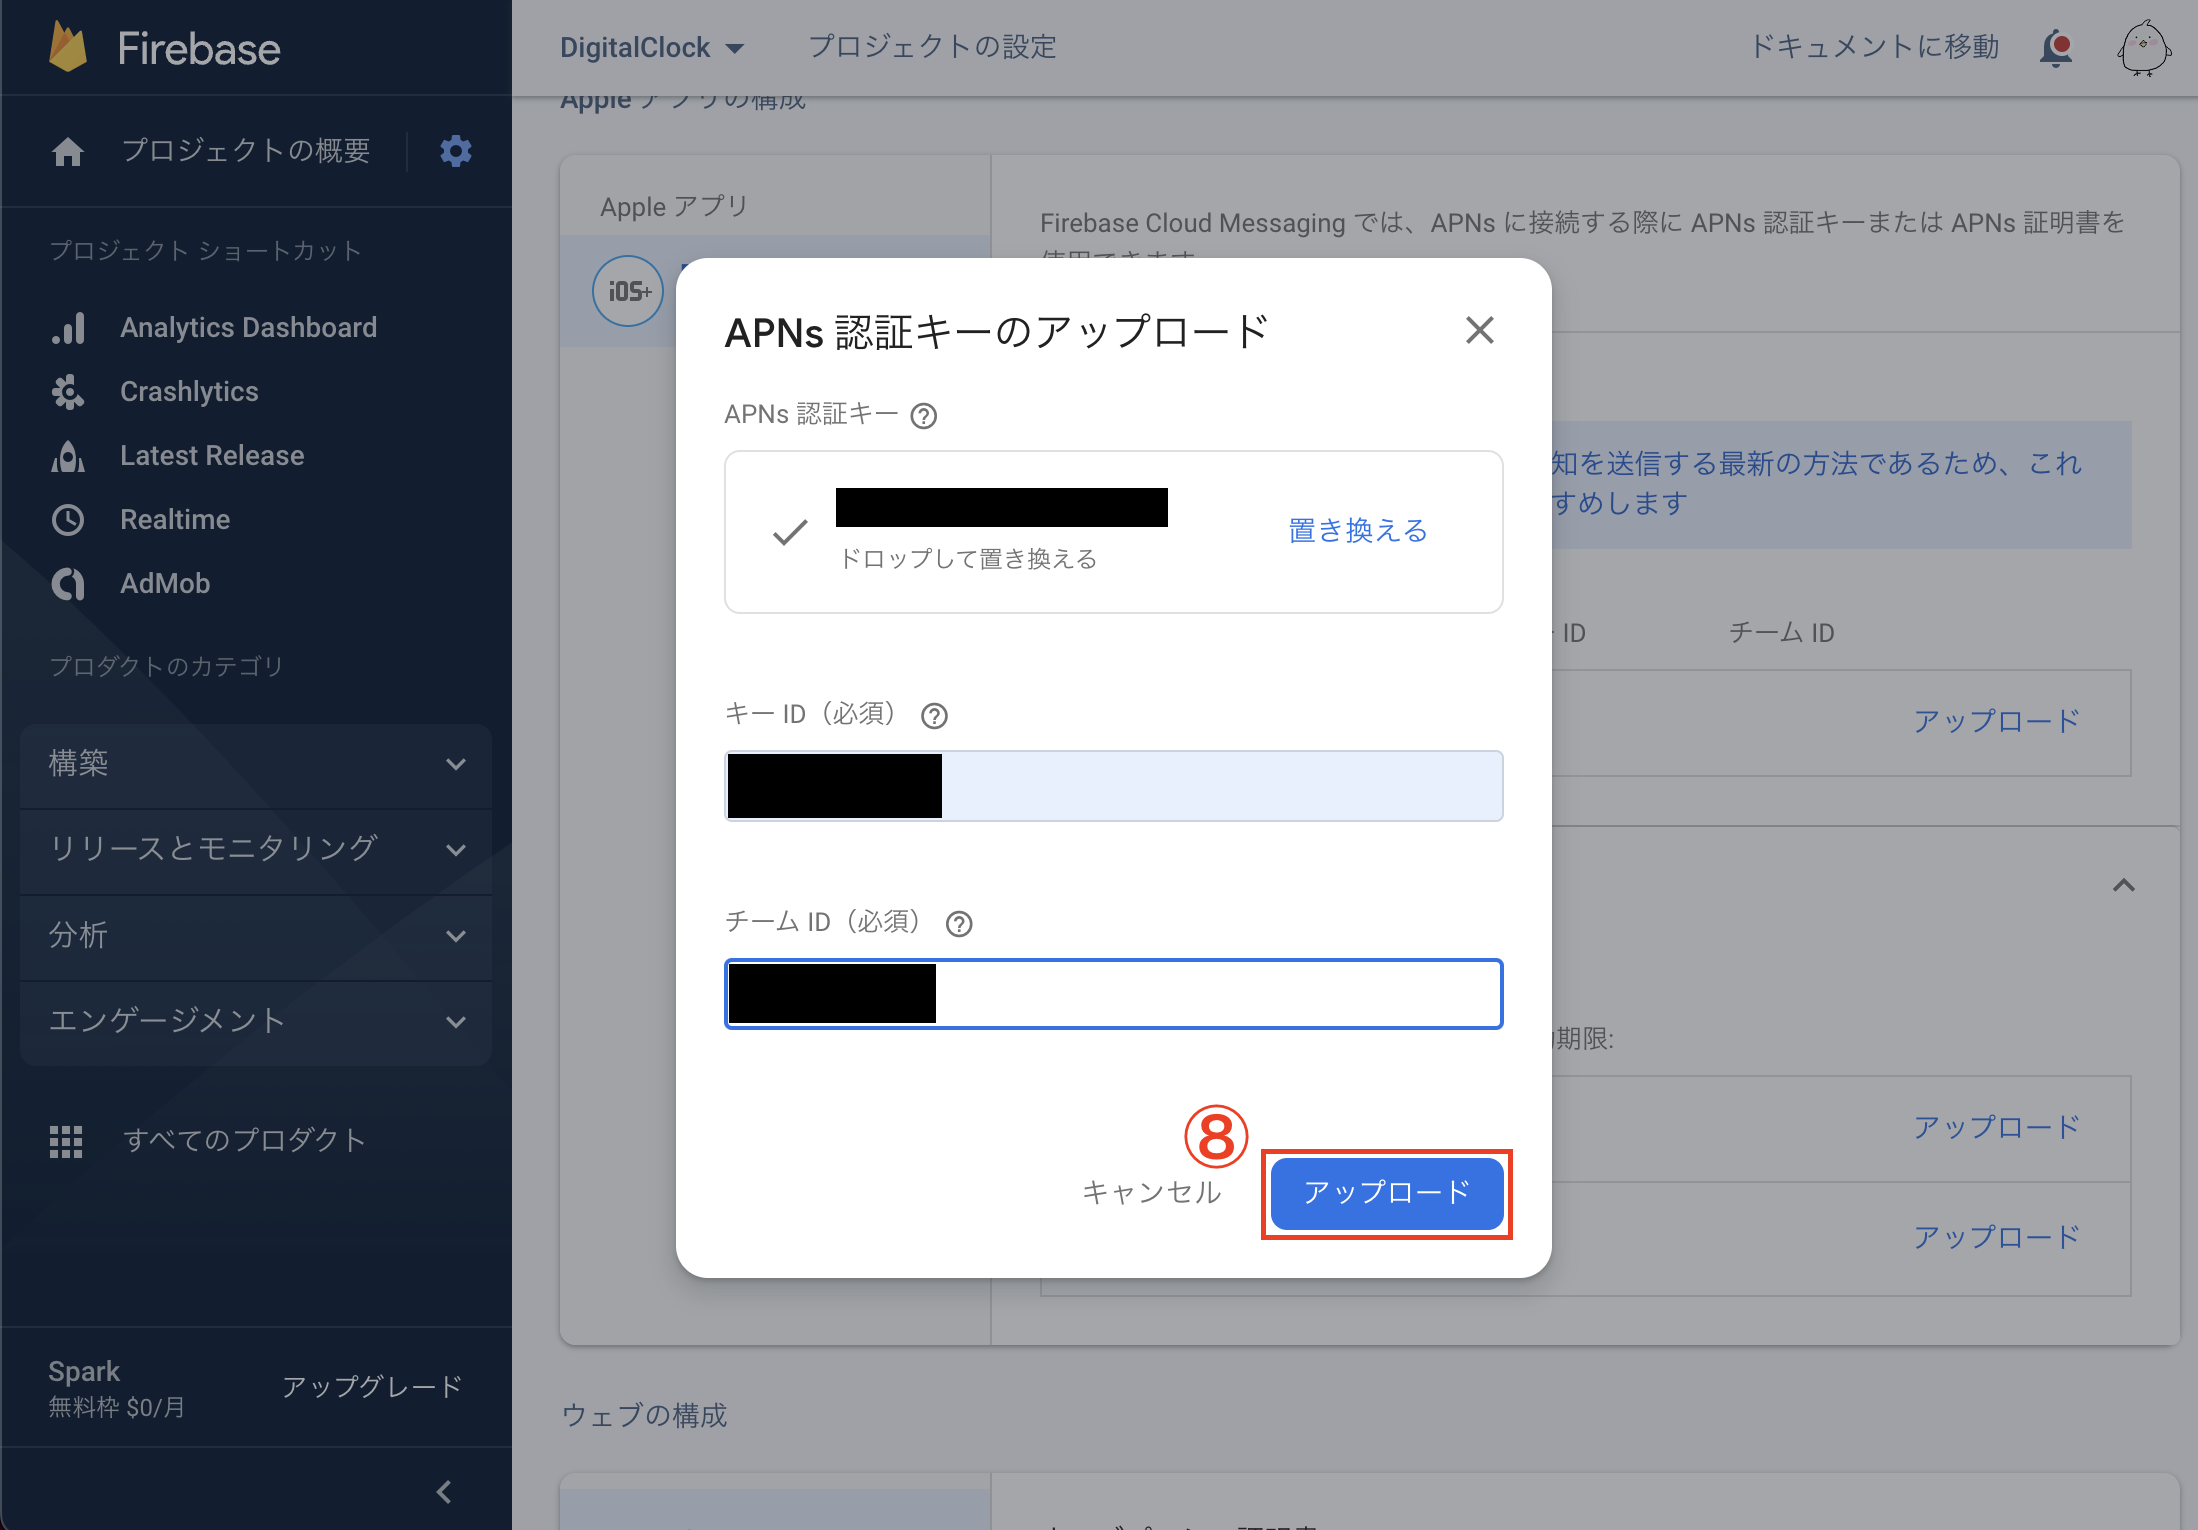
⑤ ダウンロードしたファイルをドラッグします
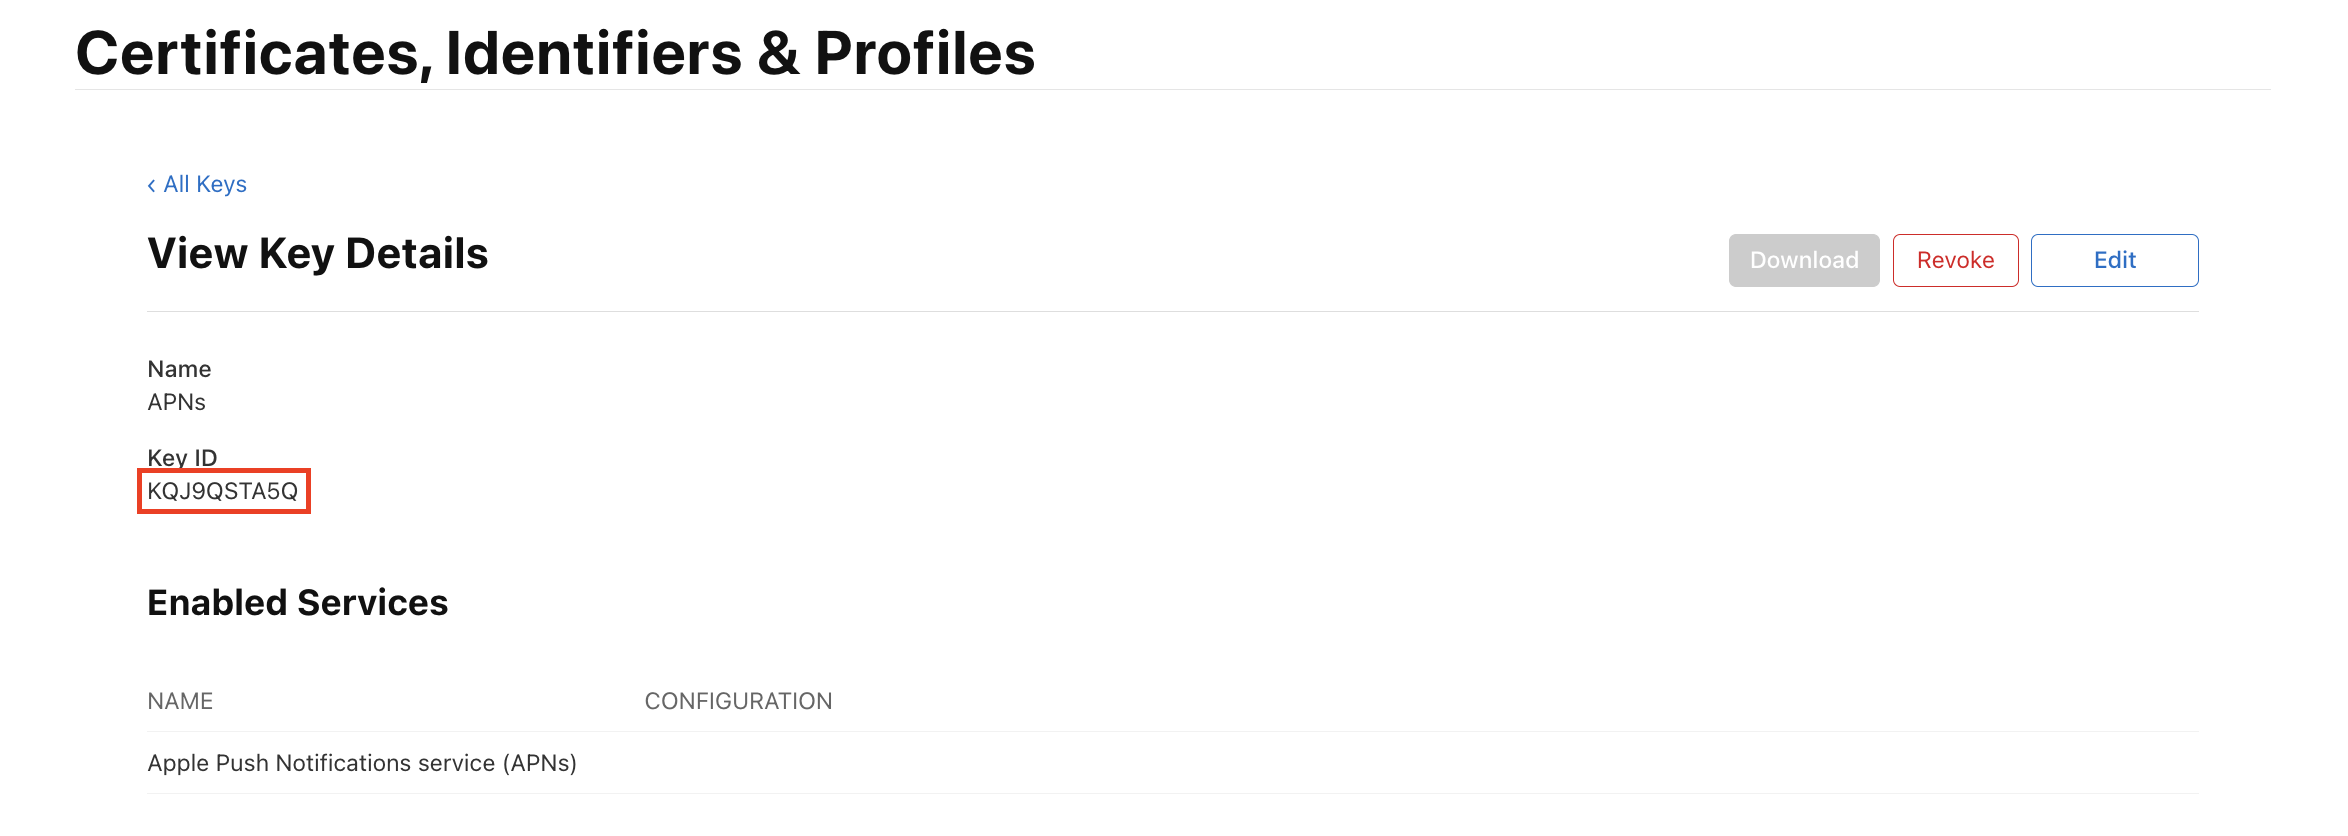
⑥ キーIDを入力します(キーIDの場所は下で解説します)
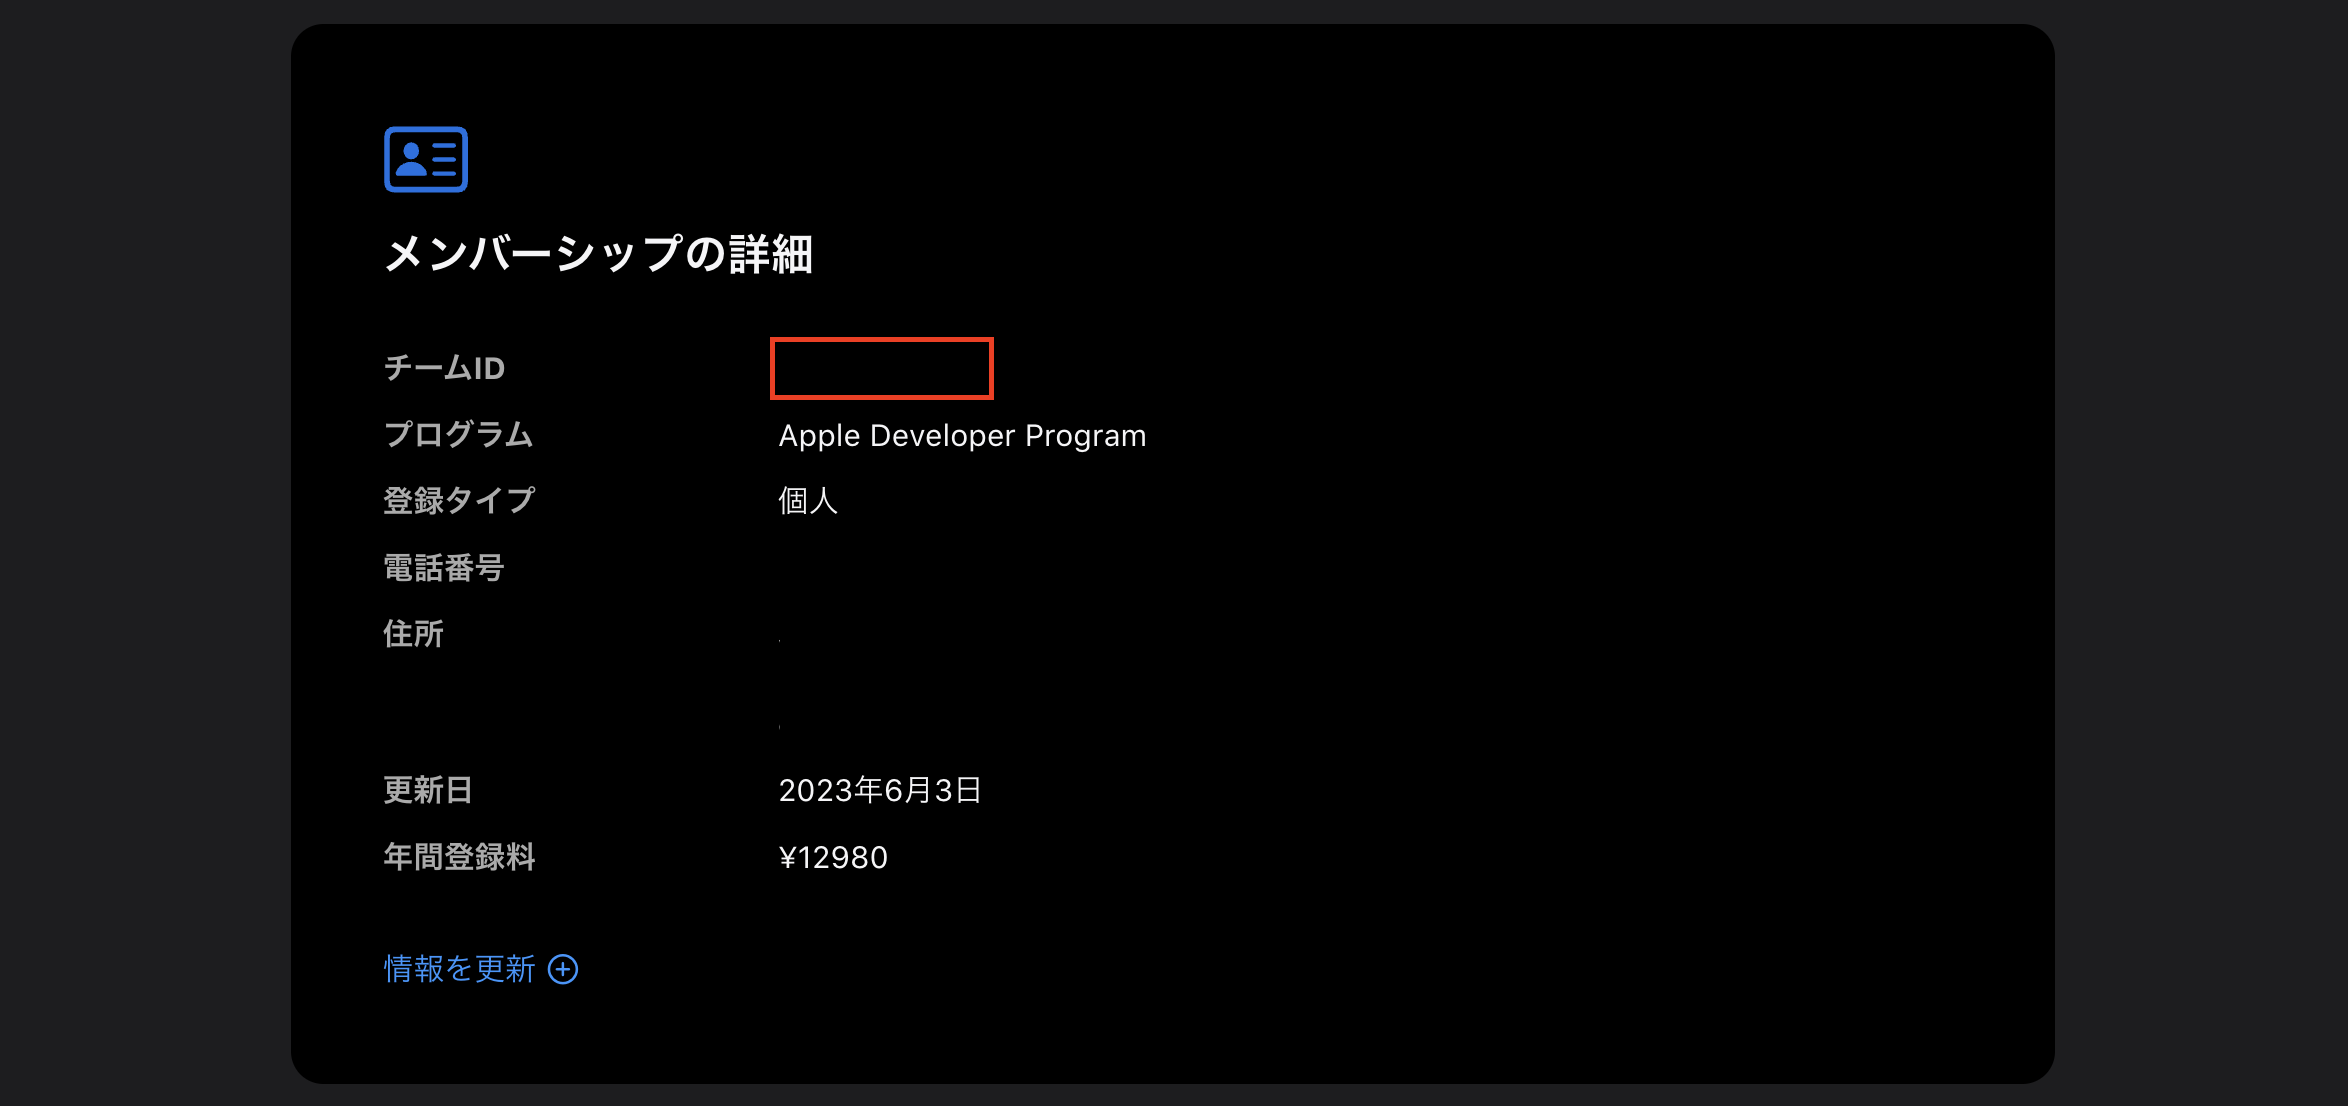
⑦ チームIDを入力します(チームIDの場所は下で解説します)

キーIDの場所
ここから先ほど作成したAPNs認証キーを選択してください
チームIDの場所
ここから「メンバーシップの詳細」を確認します
実装
import Firebase
import FirebaseCore
import FirebaseMessaging
import UserNotifications

final class AppDelegate: NSObject, UIApplicationDelegate {
    func application(
        _ application: UIApplication,
        didFinishLaunchingWithOptions _: [UIApplication.LaunchOptionsKey: Any]? = nil
    ) -> Bool {
        FirebaseApp.configure()

        Messaging.messaging().delegate = self

        UNUserNotificationCenter.current().delegate = self

        let authOptions: UNAuthorizationOptions = [.alert, .badge, .sound]
        UNUserNotificationCenter.current().requestAuthorization(options: authOptions, completionHandler: { _, _ in })

        application.registerForRemoteNotifications()

        Messaging.messaging().token { token, error in
            if let error {
                print("Error fetching FCM registration token: \(error)")
            } else if let token {
                print("FCM registration token: \(token)")
            }
        }

        return true
    }

    func application(_: UIApplication, didFailToRegisterForRemoteNotificationsWithError error: Error) {
        print("Oh no! Failed to register for remote notifications with error \(error)")
    }

    func application(_: UIApplication, didRegisterForRemoteNotificationsWithDeviceToken deviceToken: Data) {
        var readableToken = ""
        for index in 0 ..< deviceToken.count {
            readableToken += String(format: "%02.2hhx", deviceToken[index] as CVarArg)
        }
        print("Received an APNs device token: \(readableToken)")
    }
}

extension AppDelegate: MessagingDelegate {
    @objc func messaging(_: Messaging, didReceiveRegistrationToken fcmToken: String?) {
        print("Firebase token: \(String(describing: fcmToken))")
    }
}

extension AppDelegate: UNUserNotificationCenterDelegate {
    func userNotificationCenter(
        _: UNUserNotificationCenter,
        willPresent _: UNNotification,
        withCompletionHandler completionHandler: @escaping (UNNotificationPresentationOptions) -> Void
    ) {
        completionHandler([[.banner, .list, .sound]])
    }

    func userNotificationCenter(
        _: UNUserNotificationCenter,
        didReceive response: UNNotificationResponse,
        withCompletionHandler completionHandler: @escaping () -> Void
    ) {
        let userInfo = response.notification.request.content.userInfo
        NotificationCenter.default.post(
            name: Notification.Name("didReceiveRemoteNotification"),
            object: nil,
            userInfo: userInfo
        )
        completionHandler()
    }
}
import SwiftUI

@main
struct SampleApp: App {
    @UIApplicationDelegateAdaptor(AppDelegate.self) private var appDelegate
    var body: some Scene {
        WindowGroup {
            ContentView()
        }
    }
}
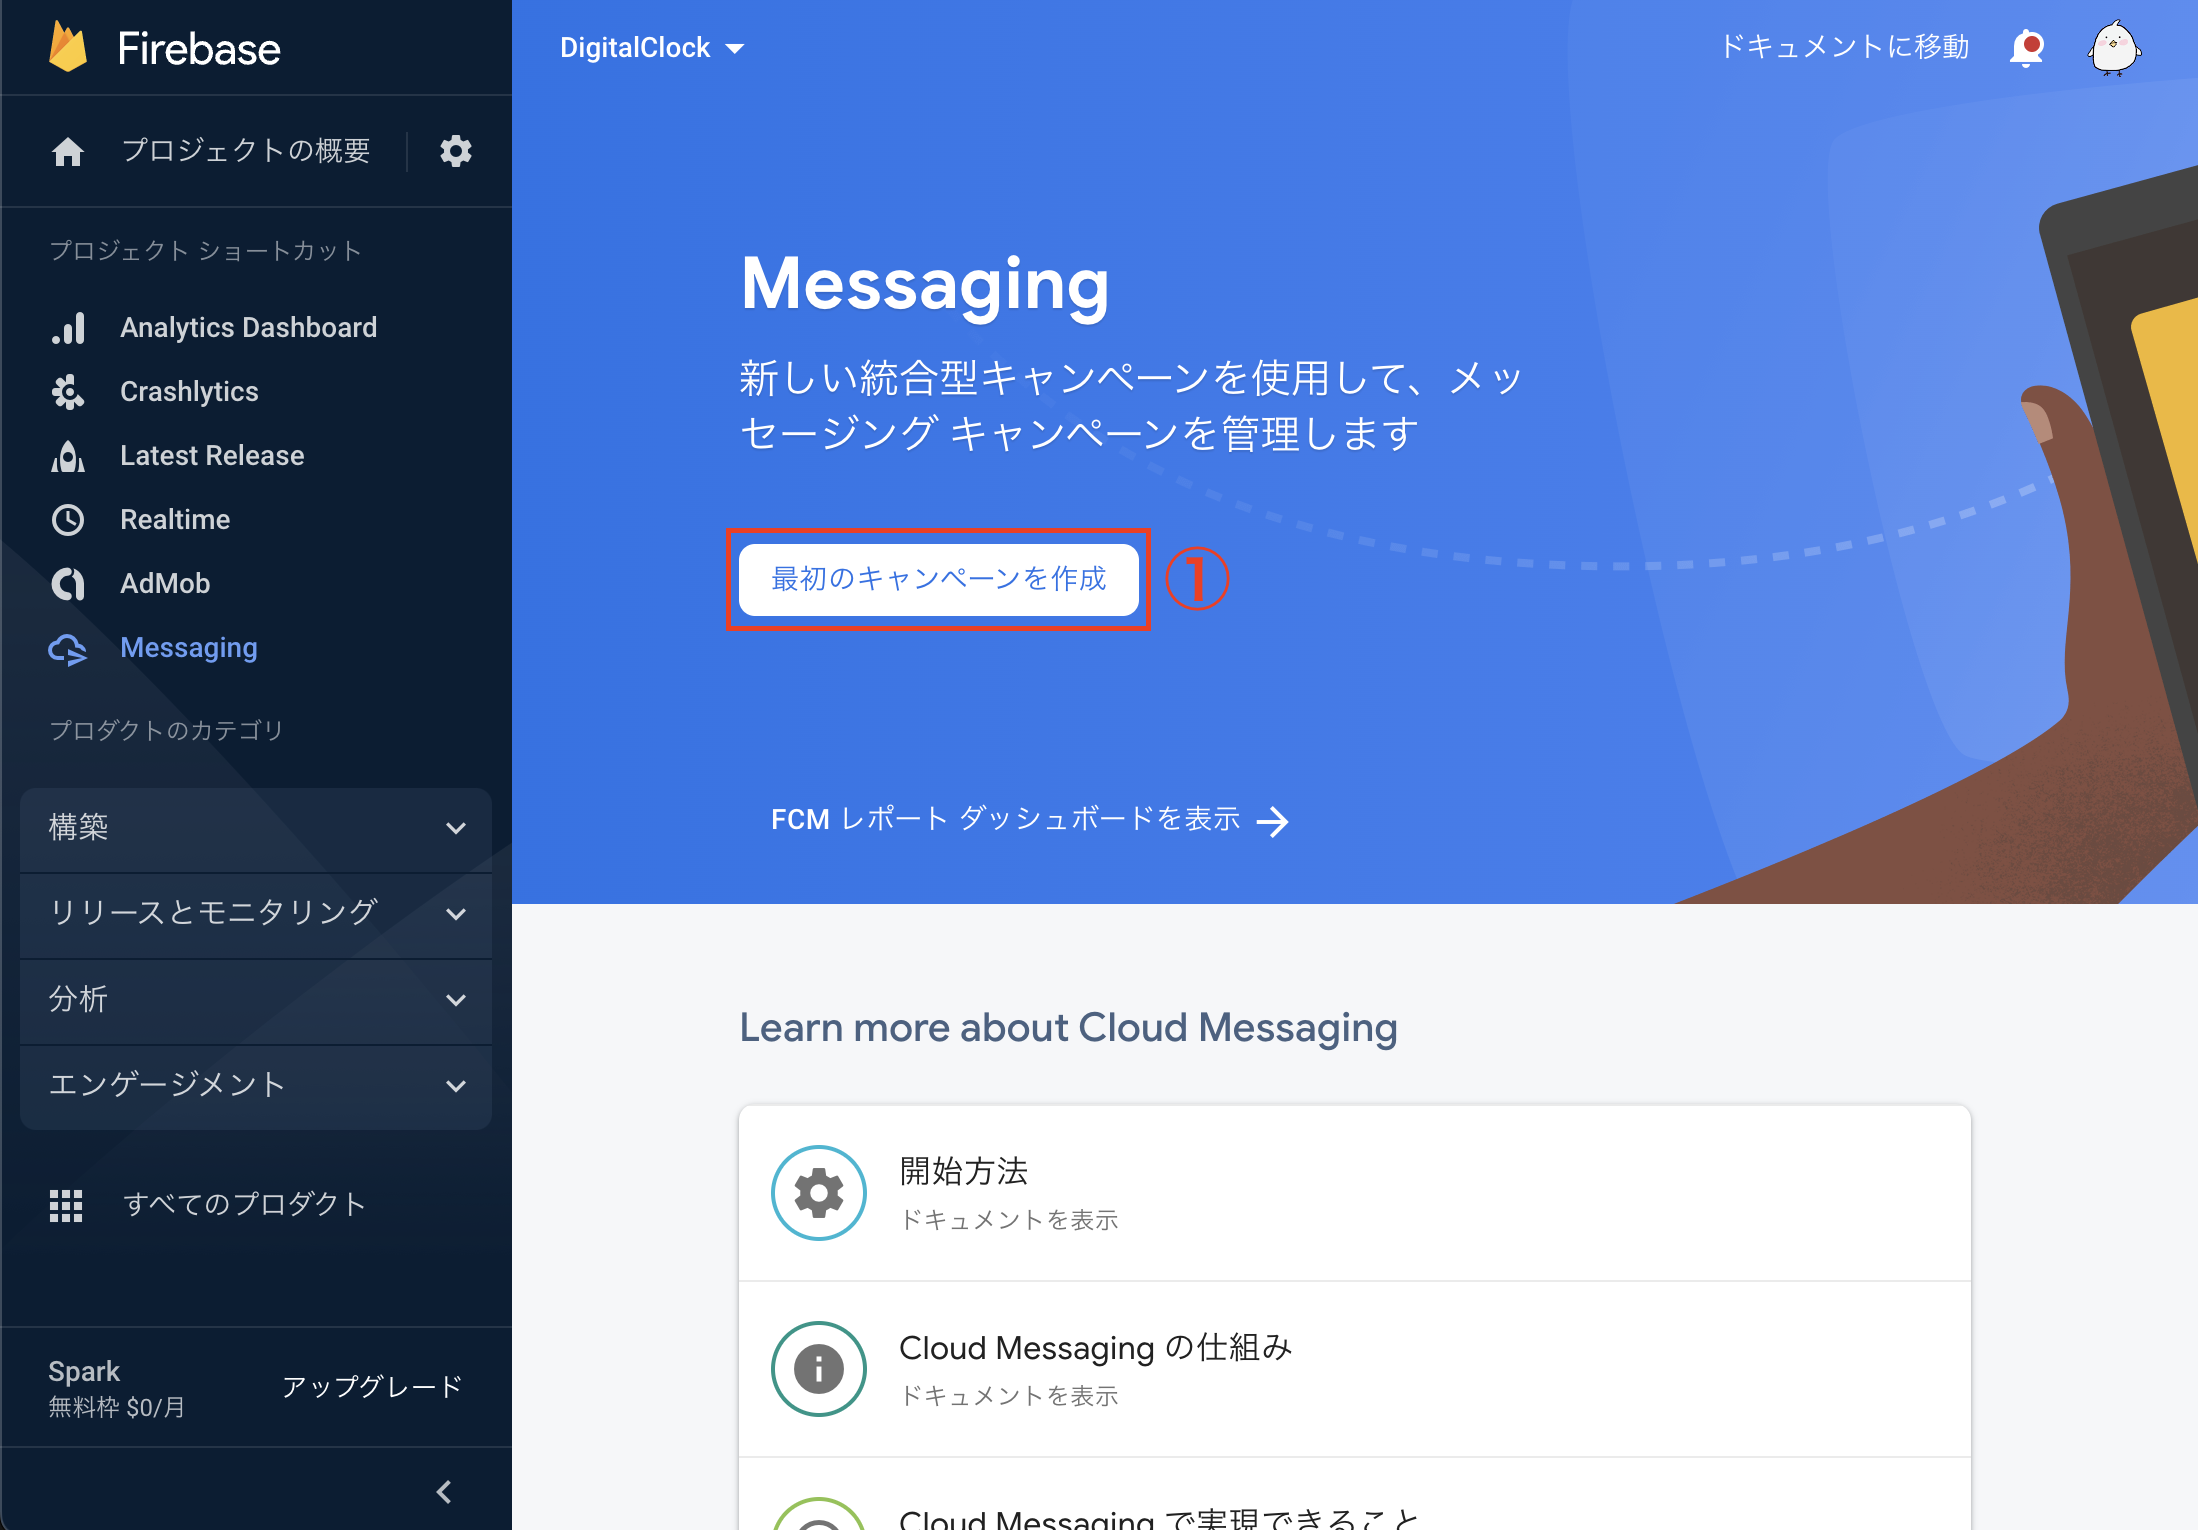
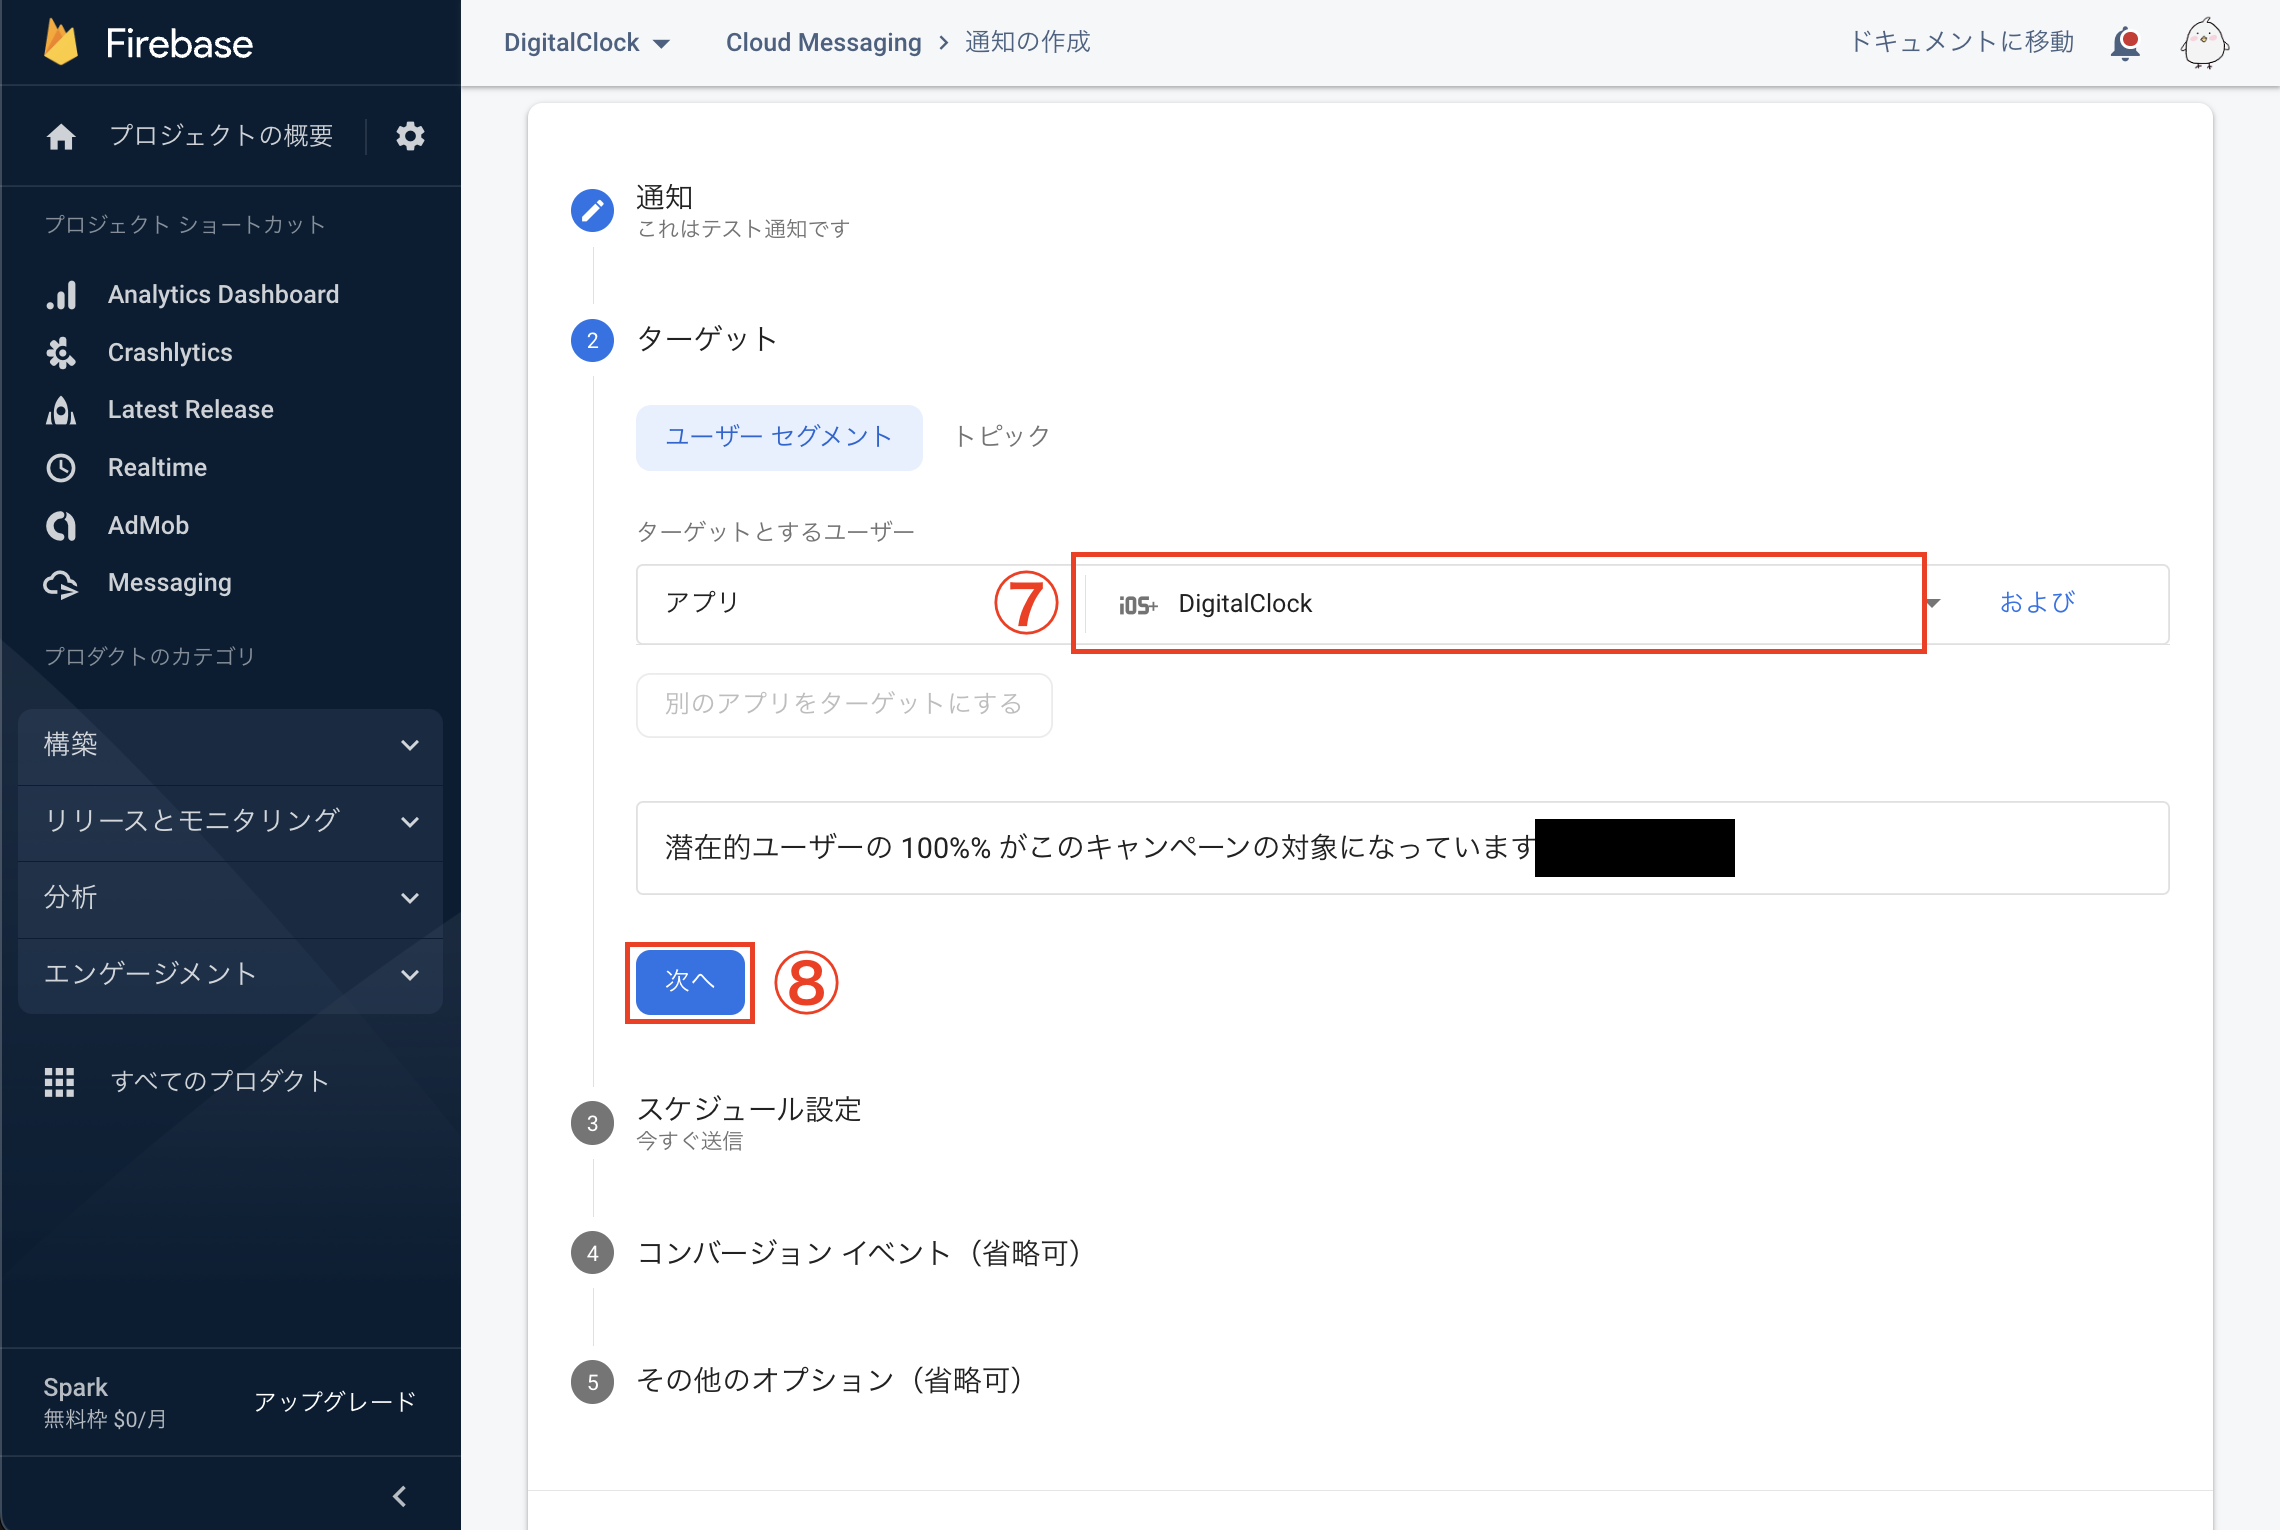
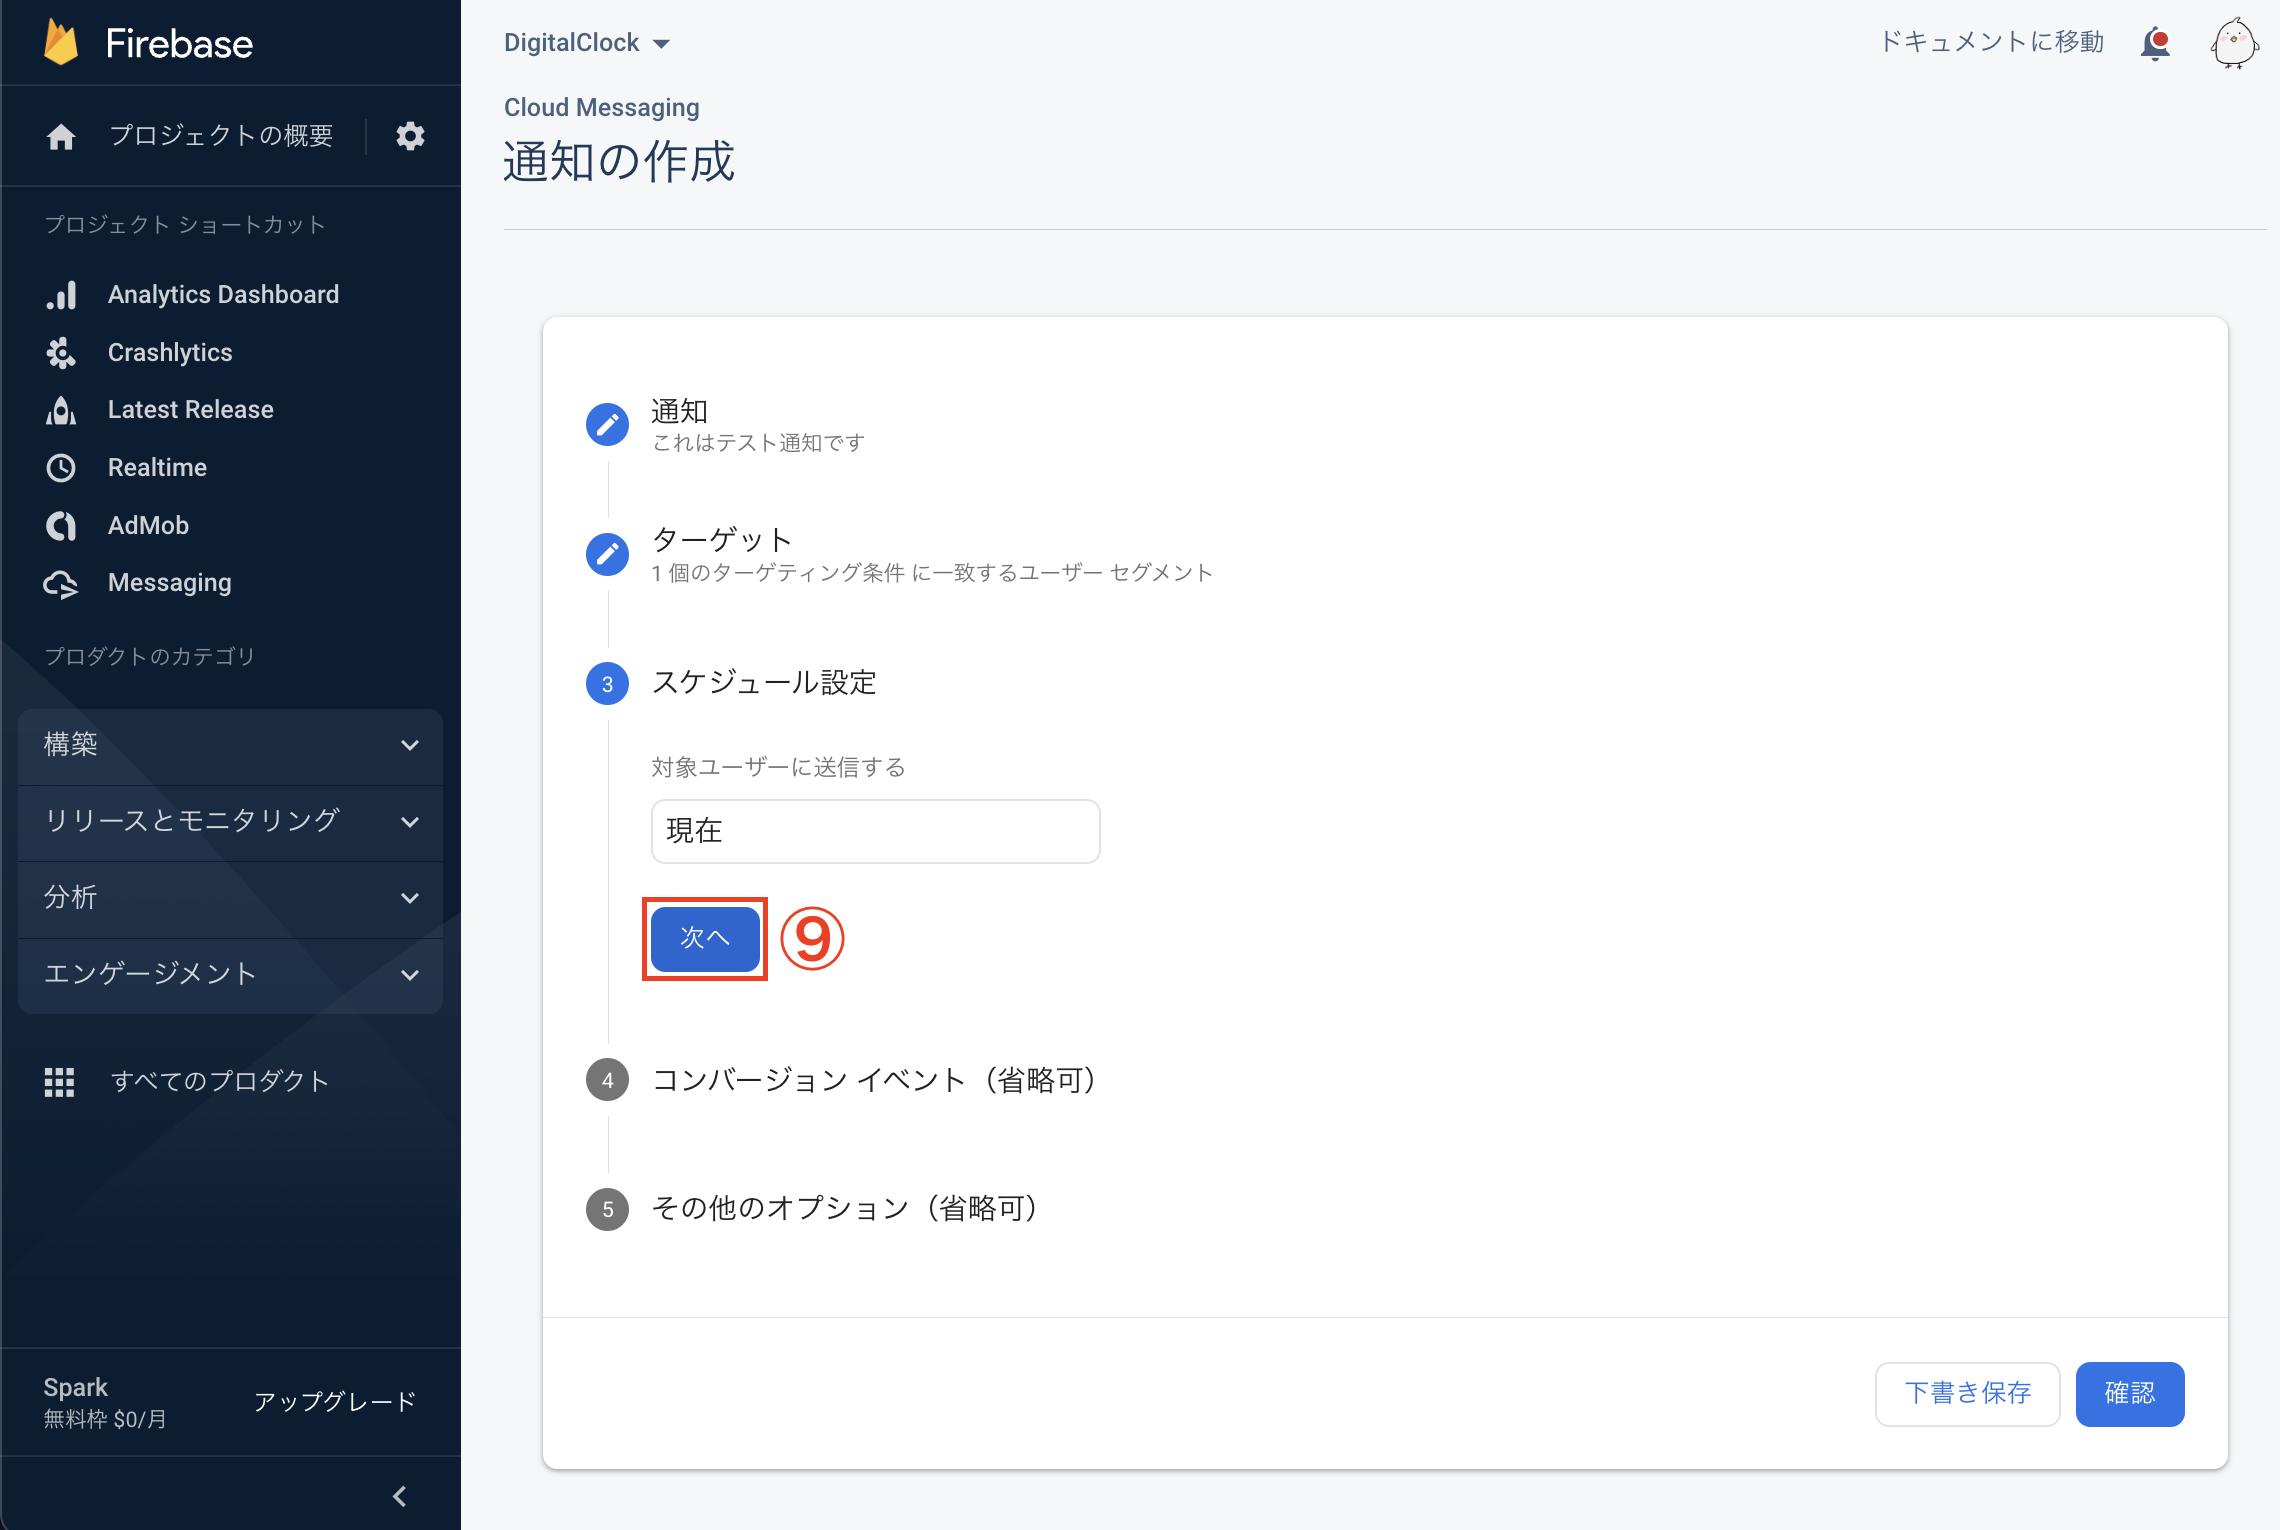
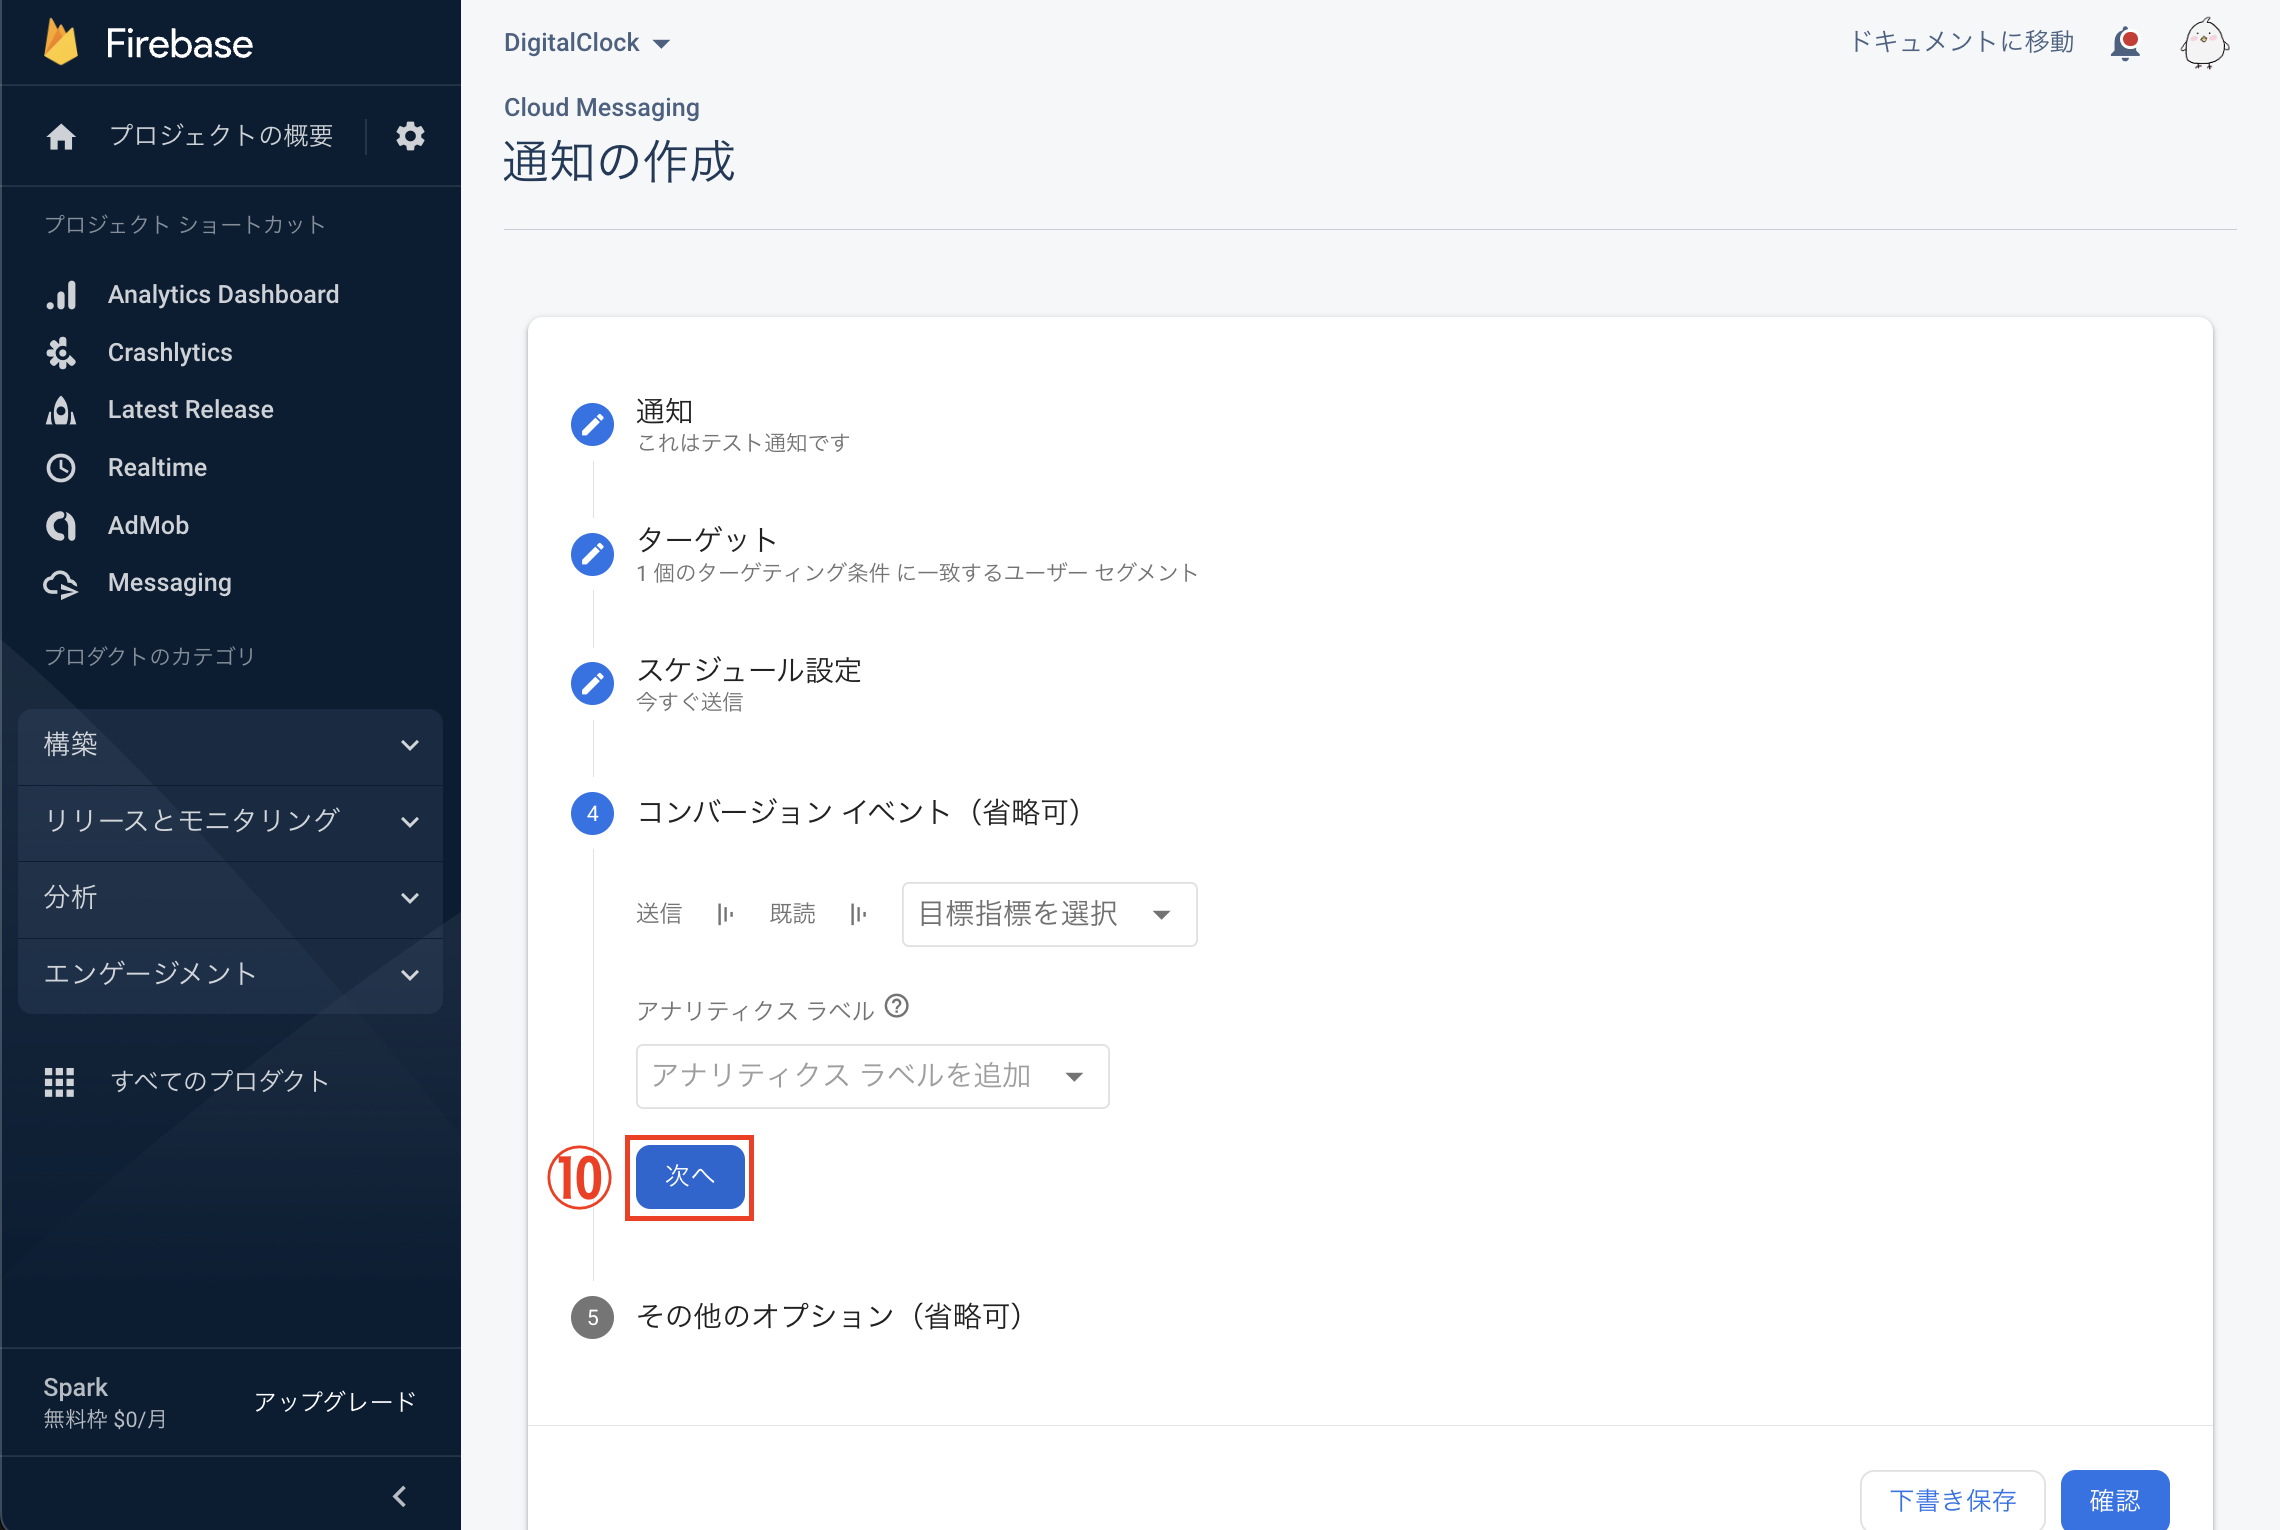
通知を送る
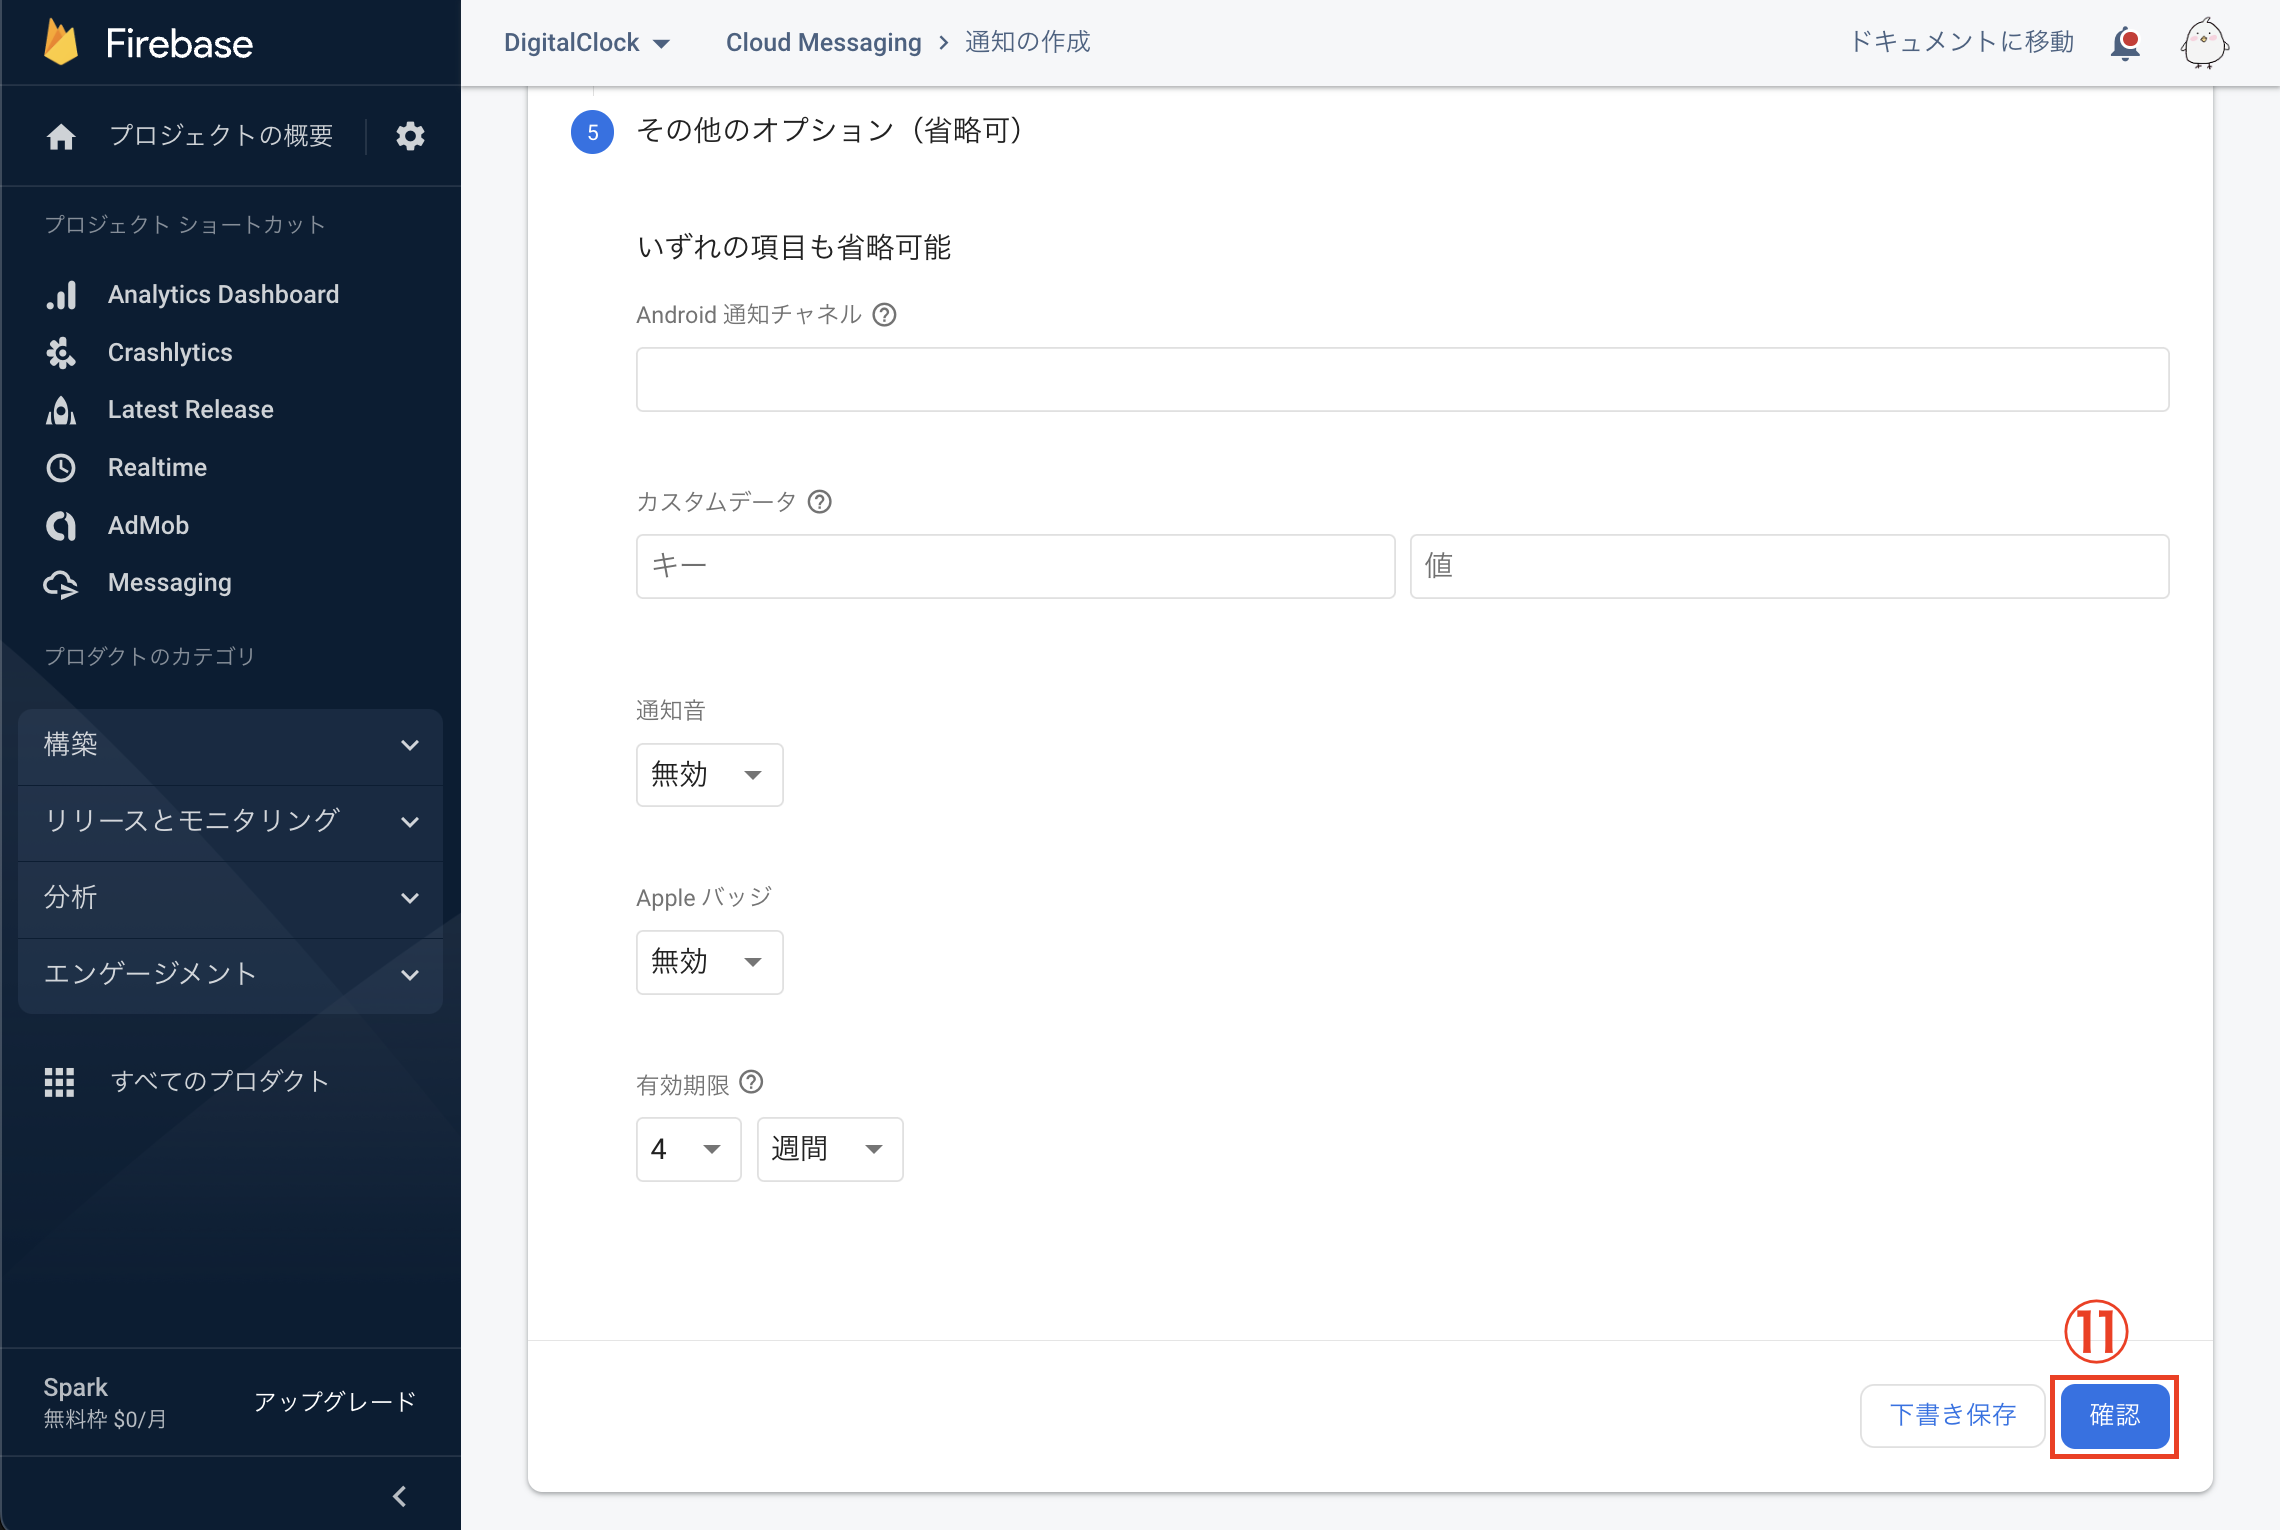
② 「Firebase Notification メッセージ」を選択します
③ 「作成」を選択します

④ 「通知のタイトル」を設定します
⑤ 「通知テキスト」を設定します
⑥ 「次へ」を選択します
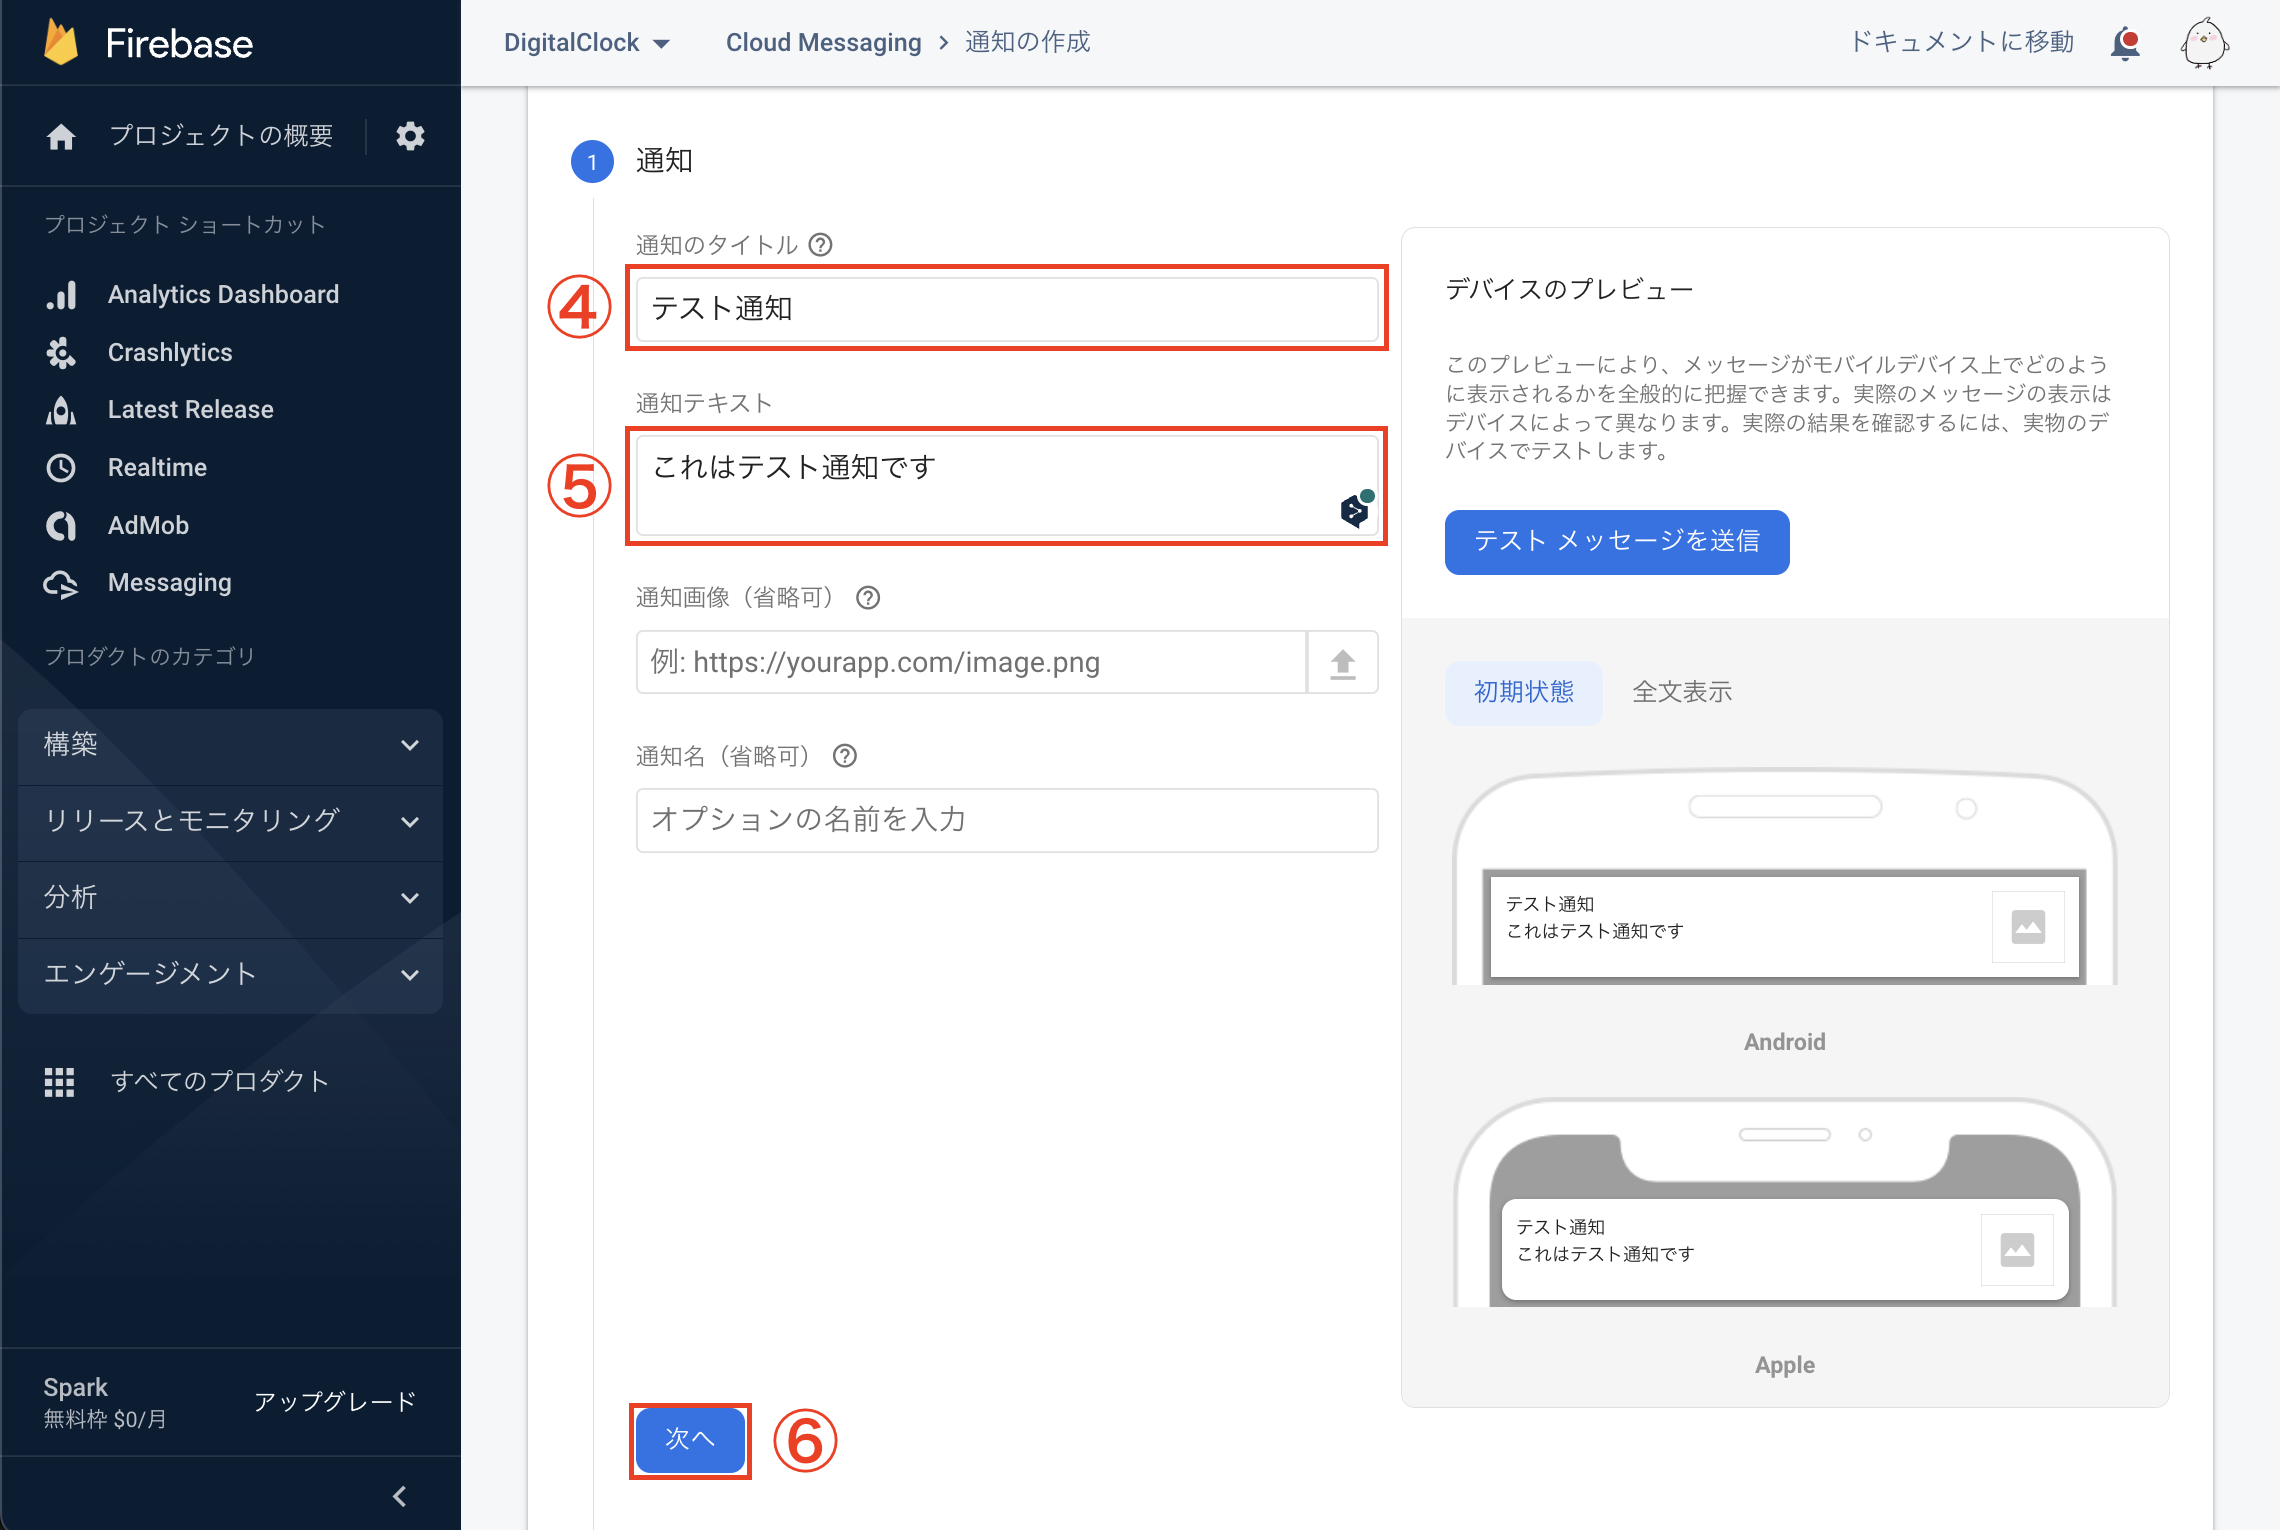
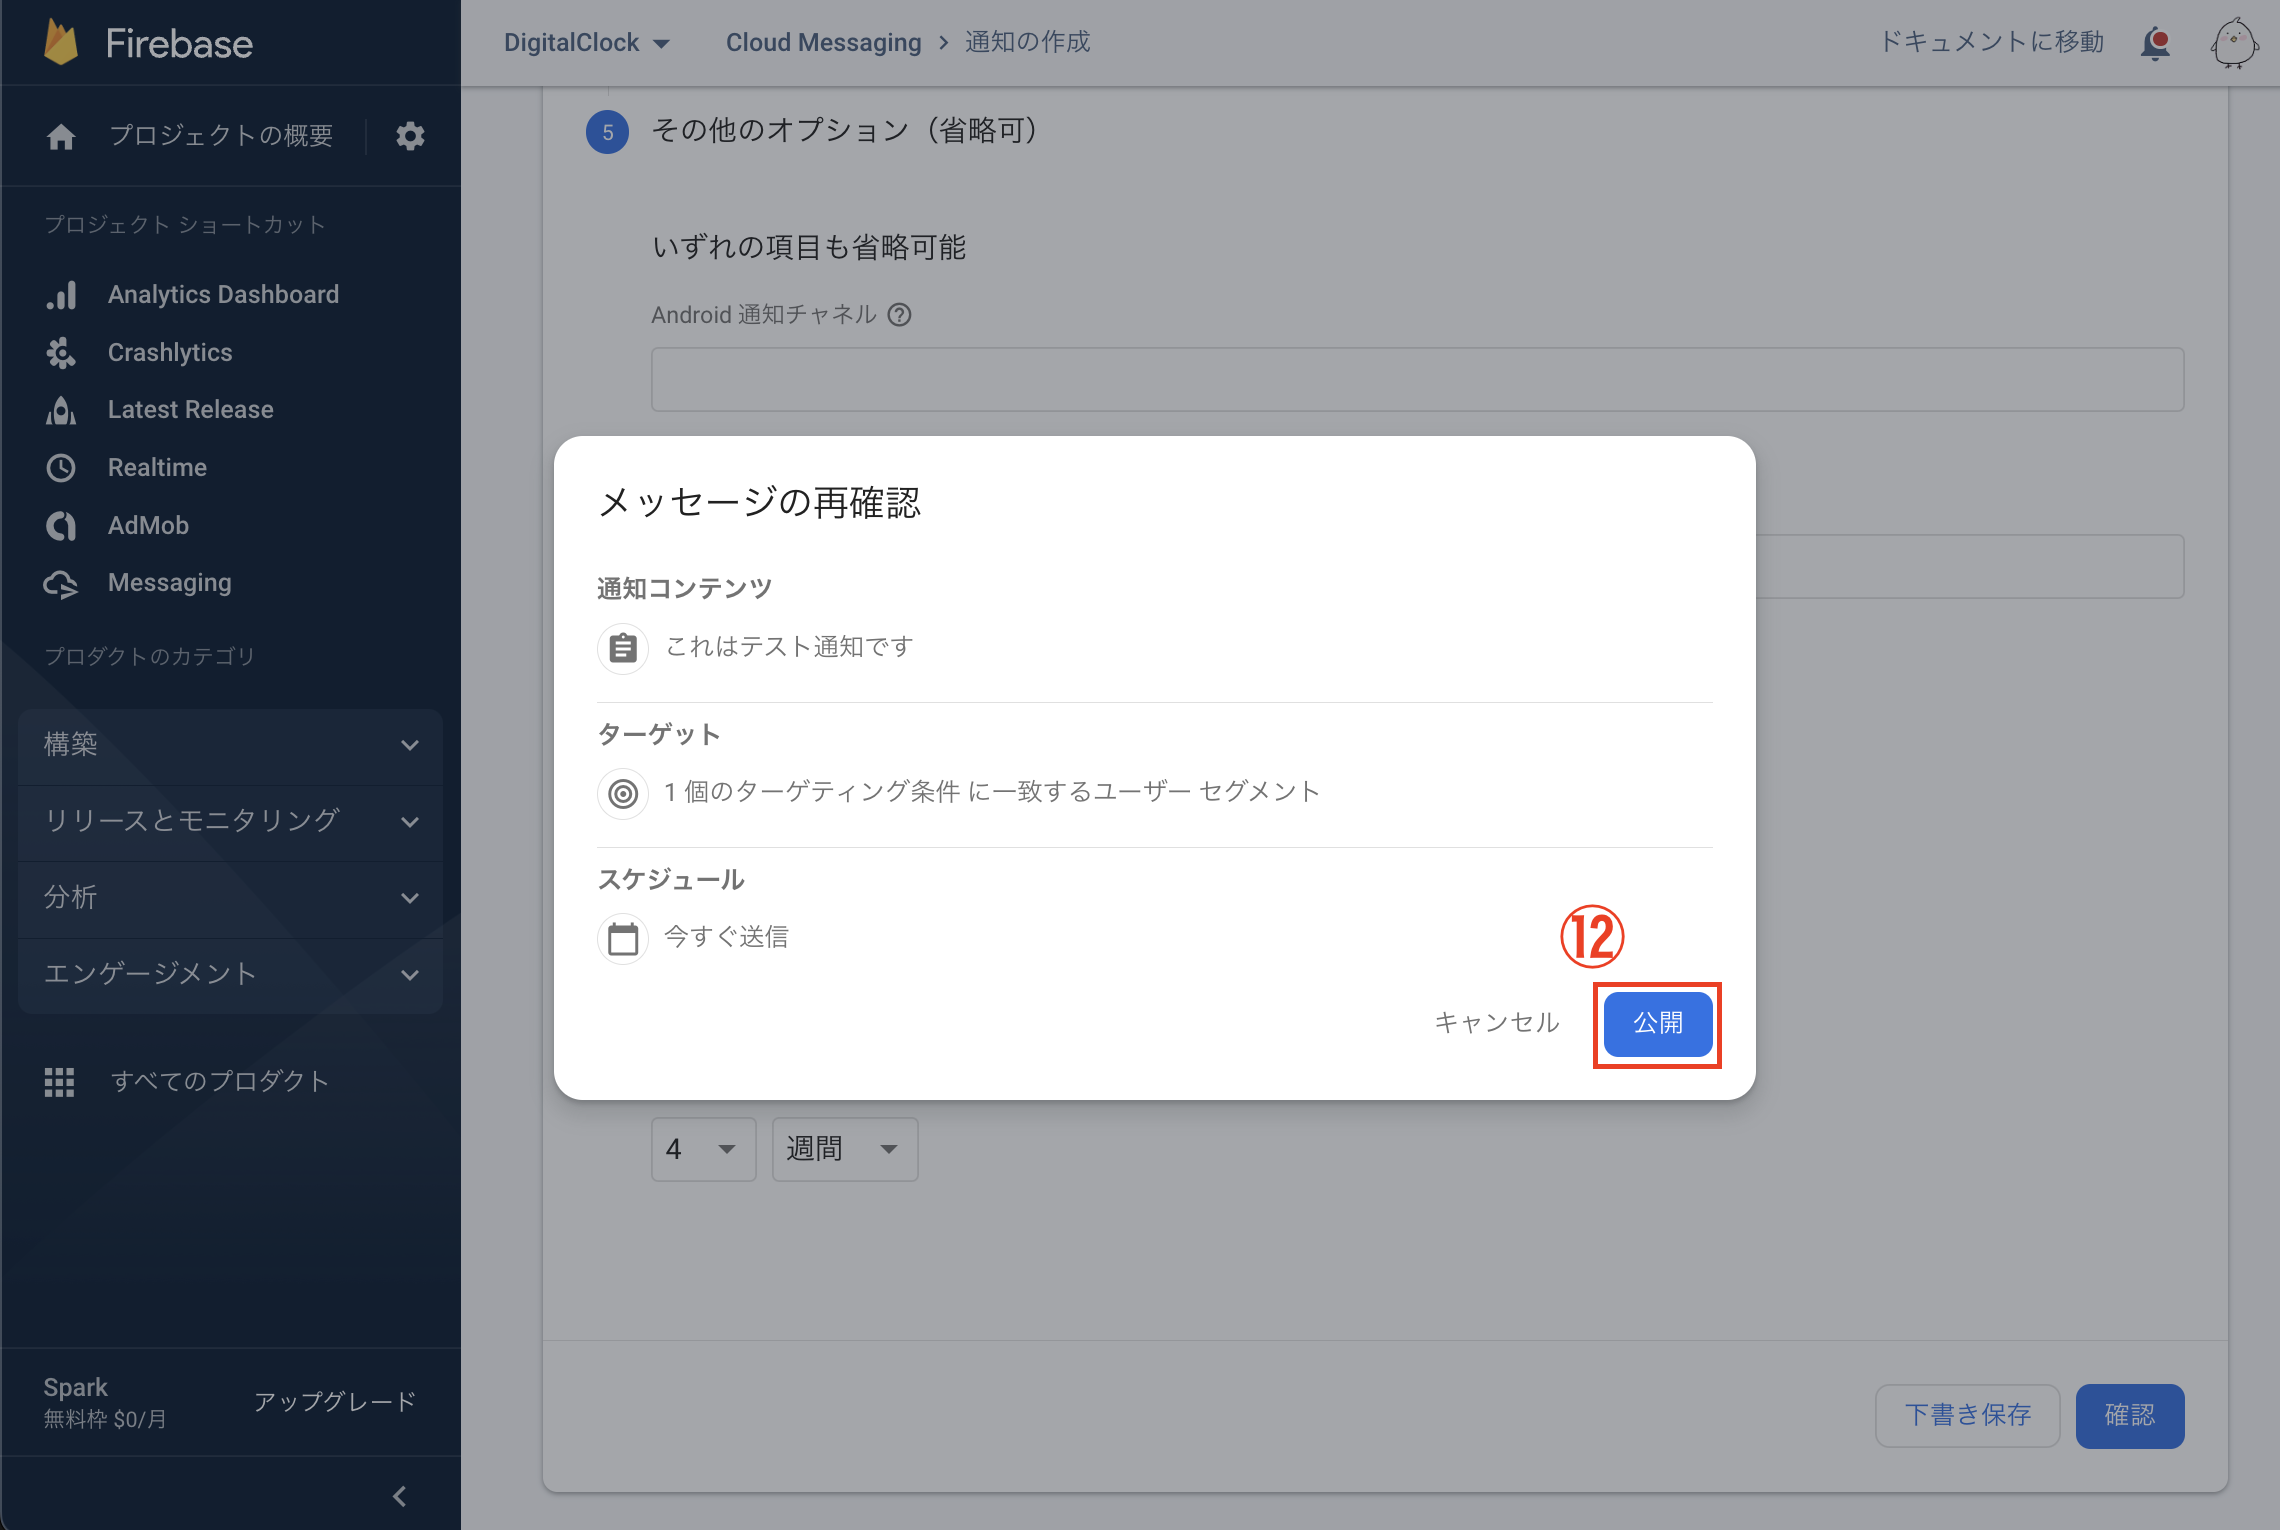
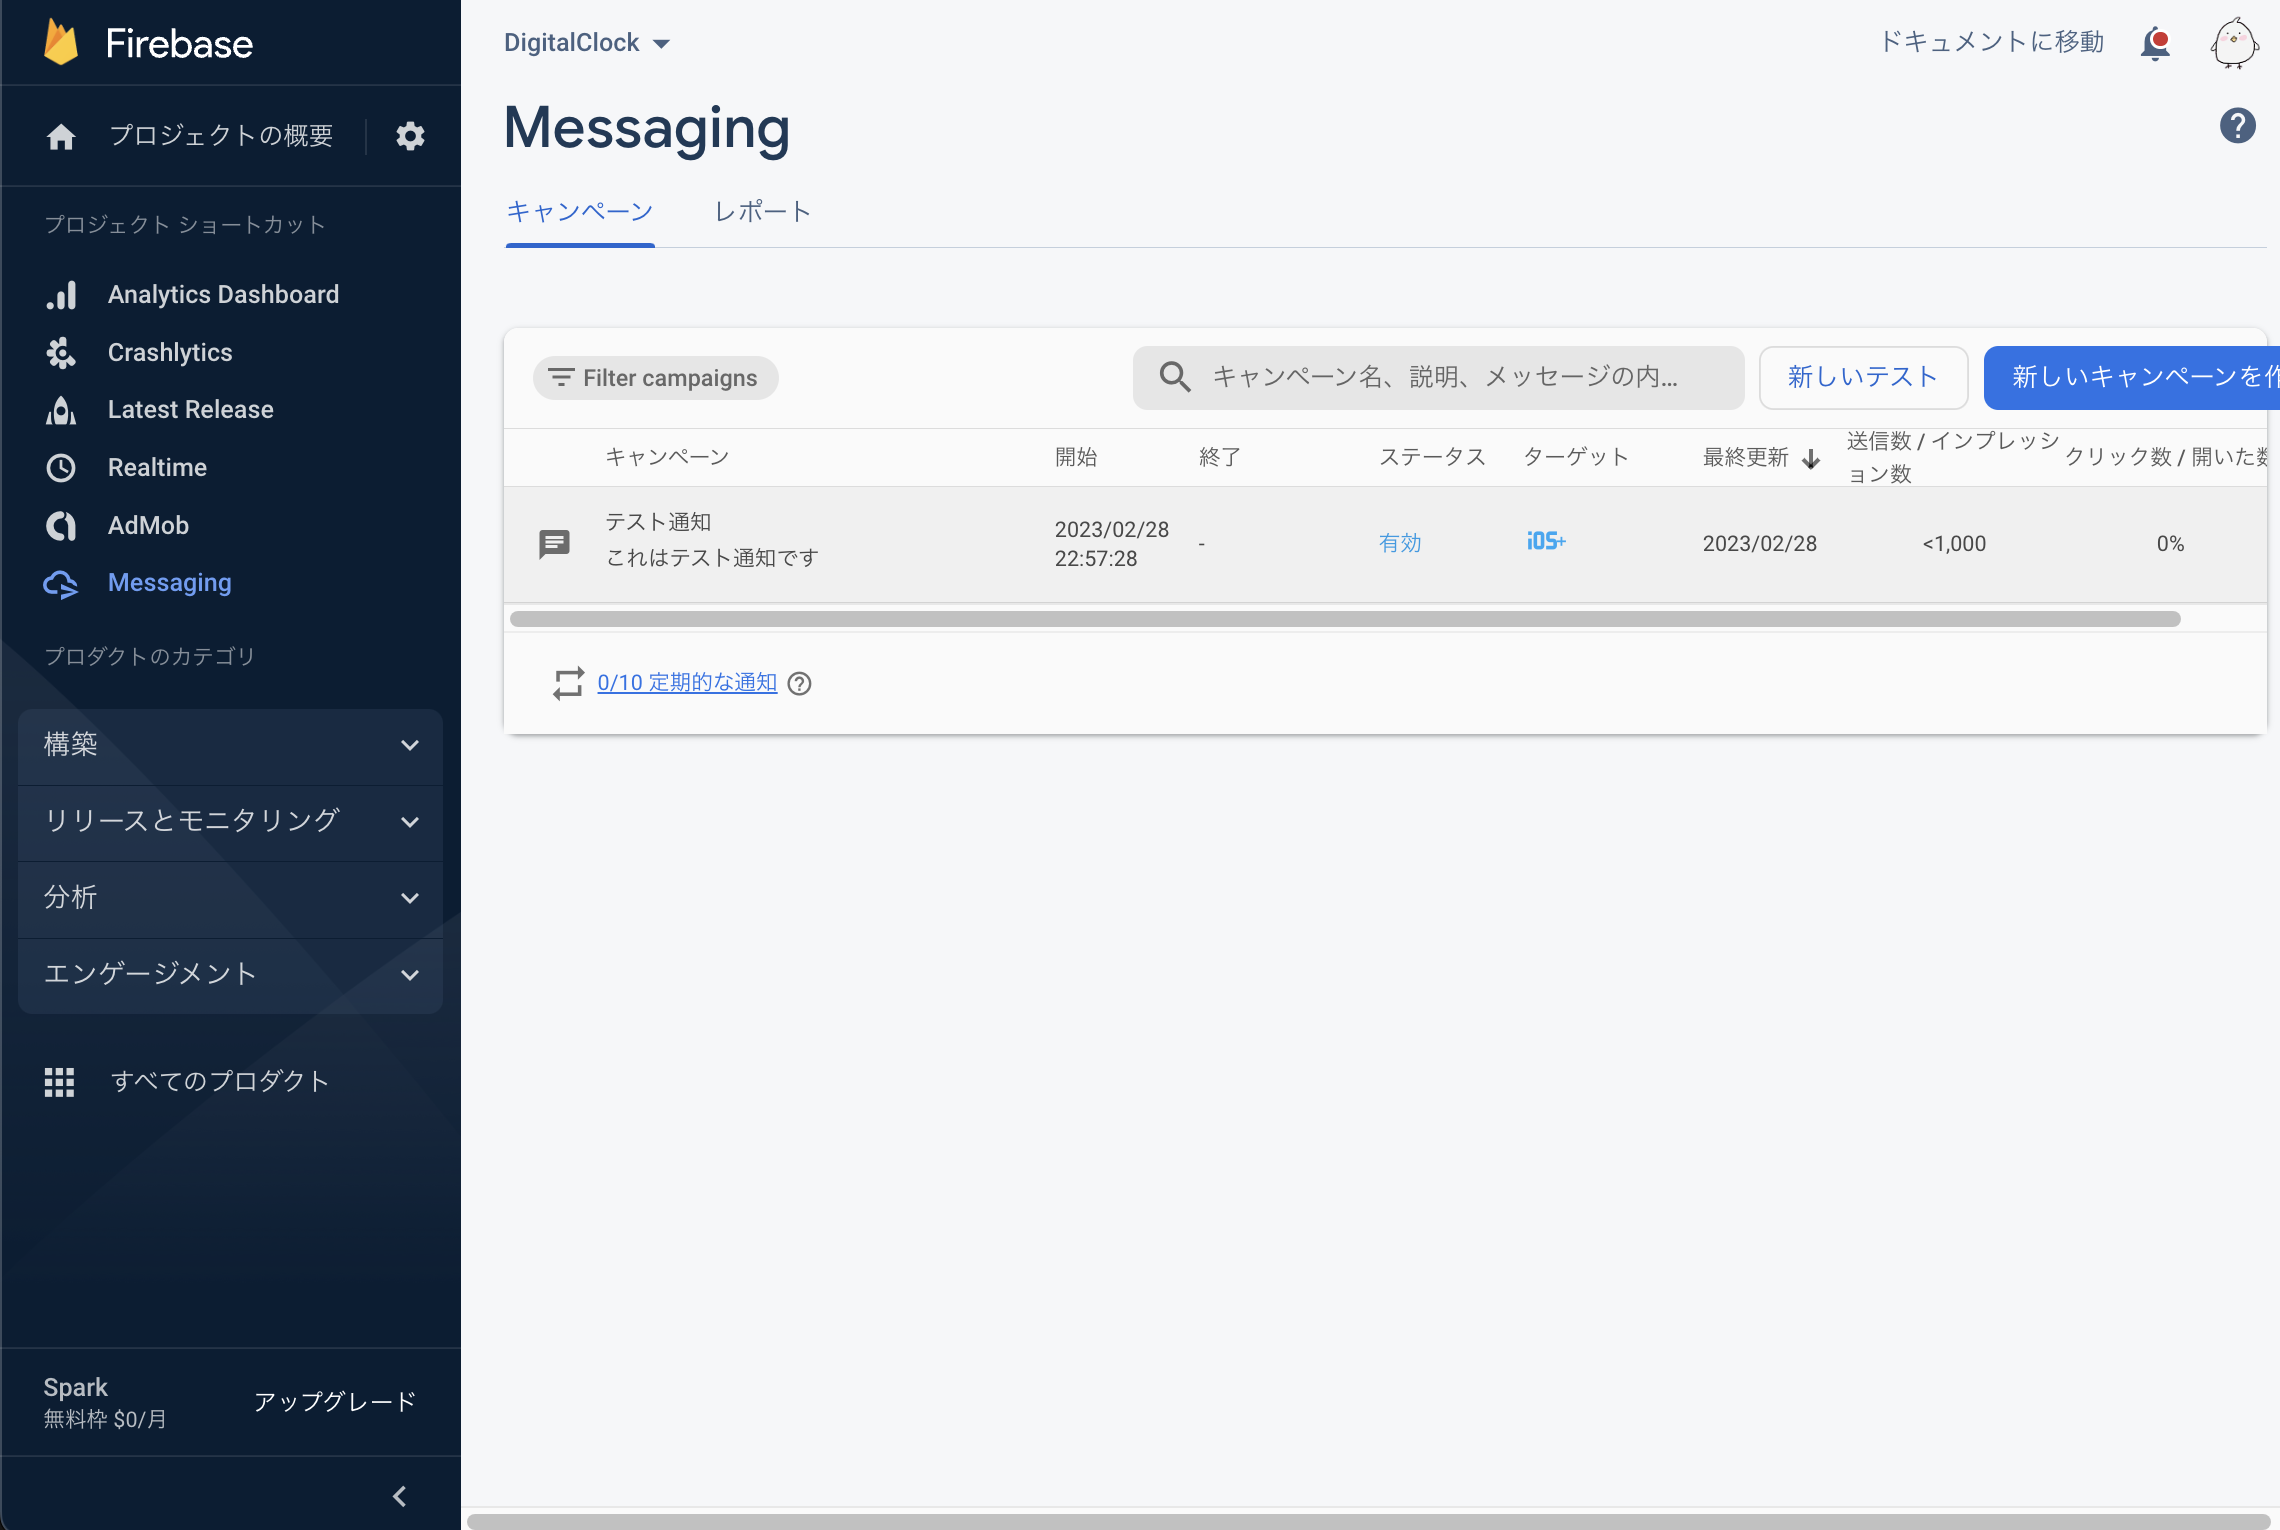
この画面になっていれば成功だと思います!
6分後に来たり、2分後に来たり結構アバウトな感じなのでちょっと待ってみましょう
アプリに通知が来たら成功です。
おわり
こんなに簡単にプッシュ通知が実装できるなんて感動です
これが無料ってFirebaseやばくないですかね?
