はじめに
SwiftUIはUIコンポーネントにスタイルが指定できるようになっています。
そんなスタイルには指定方法が2つあります。
TabViewのPageスタイルを例に挙げてみます。
以下の2つの指定方法が考えられます。
TabView {
    Text("タブ1")
    Text("タブ2")
    Text("タブ3")
}
.tabViewStyle(PageTabViewStyle())
TabView {
    Text("タブ1")
    Text("タブ2")
    Text("タブ3")
}
.tabViewStyle(.page)
これらは同じ動きをします。
比べてみると下の方が簡潔に書けていると思います。
今回は.pageのようにカスタムスタイルを指定できるようにする方法を紹介します。
サンプルアプリ
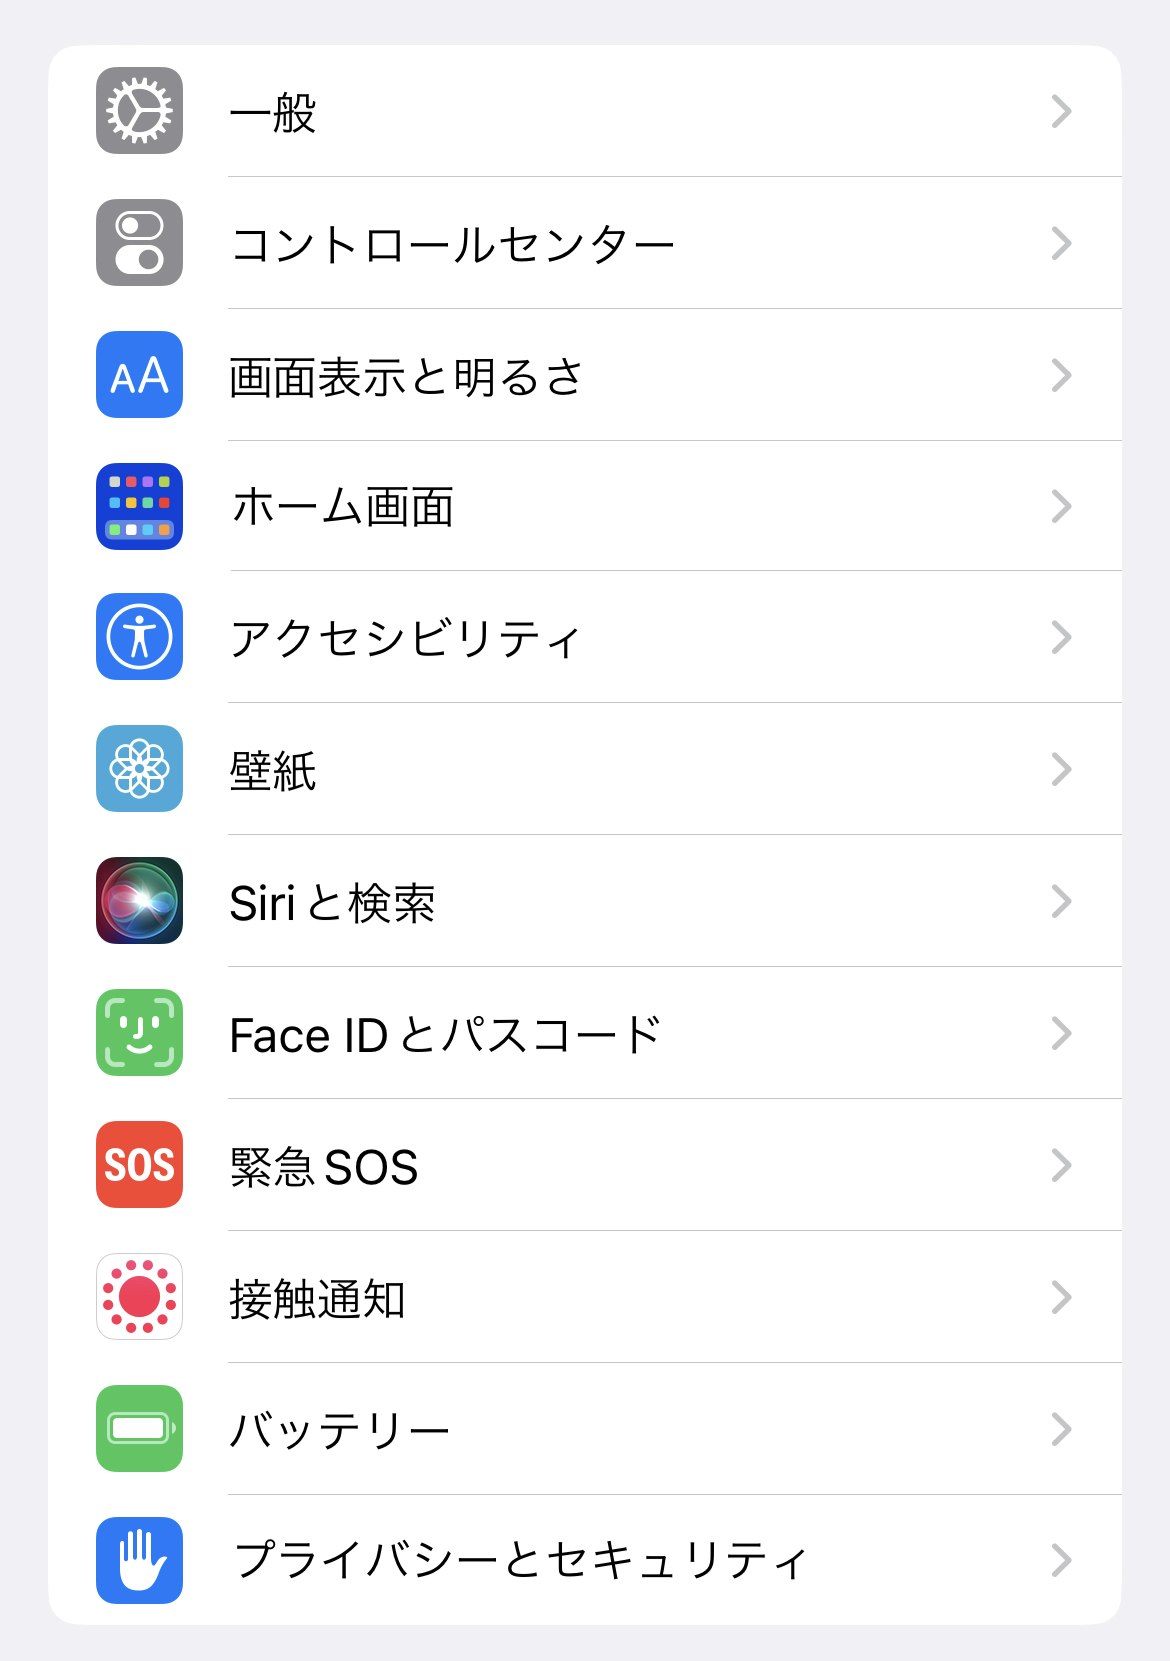
システム設定のようなリストを作成してみようと思います。
実装
引数なし
以下のようなLabelStyleを作成しました。
struct SystemLabelStyle: LabelStyle {
    func makeBody(configuration: Configuration) -> some View {
        HStack(spacing: 20) {
            configuration.icon
                .frame(width: 30, height: 30)
                .background(Color.gray)
                .foregroundColor(.white)
                .cornerRadius(5)
            configuration.title
                .foregroundColor(.primary)
        }
    }
}
引数がない場合はプロパティで指定することができます。
extension LabelStyle where Self == SystemLabelStyle {
    static var system: SystemLabelStyle {
        .init()
    }
}
以下のように使用することができます。
struct ContentView: View {
    var body: some View {
        List {
            Label {
                Text("一般")
            } icon: {
                Image(systemName: "gear")
            }
            .labelStyle(.system)

            Label {
                Text("コントロールセンター")
            } icon: {
                Image(systemName: "switch.2")
            }
            .labelStyle(.system)
        }
    }
}

引数あり
先ほどのように背景色がグレーしかない場合はプロパティーで大丈夫です。
しかし、背景色は複数あります。
背景色を指定できるようにLabelStyleを変更します。
struct SystemLabelStyle: LabelStyle {
    let color: Color
    func makeBody(configuration: Configuration) -> some View {
        HStack(spacing: 20) {
            configuration.icon
                .frame(width: 30, height: 30)
                .background(color)
                .foregroundColor(.white)
                .cornerRadius(5)
            configuration.title
                .foregroundColor(.primary)
        }
    }
}
引数がある場合はメソッドを使用します。
extension LabelStyle where Self == SystemLabelStyle {
    static func system(color: Color) -> SystemLabelStyle {
        .init(color: color)
    }
}
以下のように使用することができます。
struct ContentView: View {
    var body: some View {
        List {
            Label {
                Text("一般")
            } icon: {
                Image(systemName: "gear")
            }
            .labelStyle(.system(color: .gray))

            Label {
                Text("コントロールセンター")
            } icon: {
                Image(systemName: "switch.2")
            }
            .labelStyle(.system(color: .gray))

            Label {
                Text("画面表示と明るさ")
            } icon: {
                Image(systemName: "textformat.size")
            }
            .labelStyle(.system(color: .blue))
        }
    }
}
おわり
どちらも使用することができますが、SystemLabelStyle()で指定するのは良くない気がします。
Label {
    Text("一般")
} icon: {
    Image(systemName: "gear")
}
.labelStyle(SystemLabelStyle())
Label {
    Text("コントロールセンター")
} icon: {
    Image(systemName: "switch.2")
}
.labelStyle(.system)