Server Actions機能を使ってファイルをアップロード
今回は、Next.jsを使って画像をサーバにアップロードする実装を備忘録として記載します。
完成イメージ
今回は、下記のアプリを作成しました。
ファイルアップロード画面で①イベントのタイトル、②イベントの詳細、③画像の添付をそれぞれ入力します。

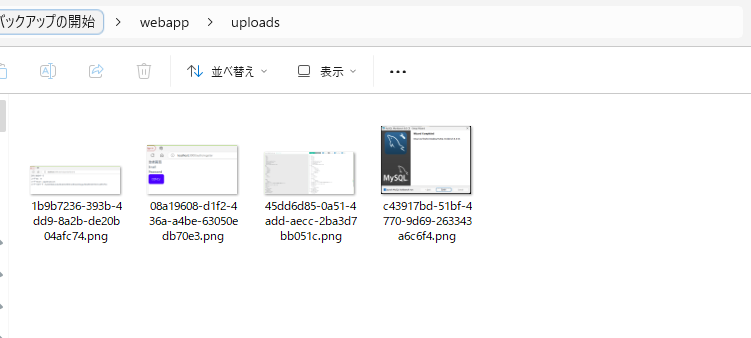
プログラムで指定したディレクトリ「upload」フォルダにファイルが配置されます。

Server Actionsとは?
最近よく聞く、「Server Actions」というのはどのようなものでしょうか?
それは、「クライアント側でデータ管理処理を持たないで、サーバー側でデータ更新を行うことができる機能」をさしています。
この機能を使って、ファイル(または画像)をアップロードしてみましょう。
プロジェクトのディレクトリ構造
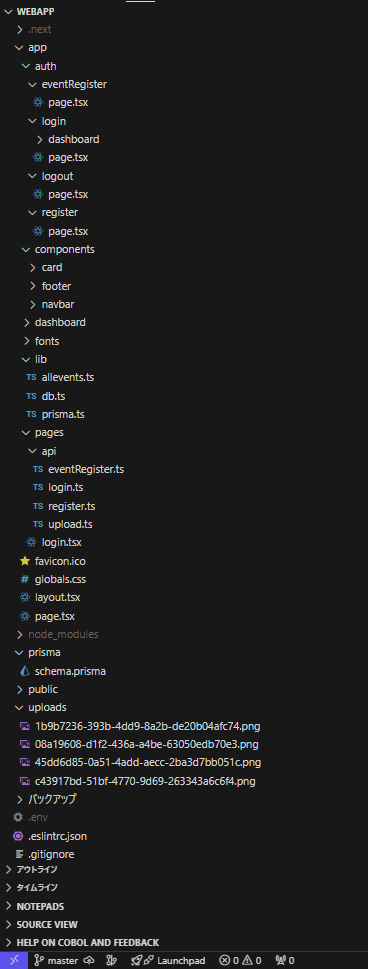
プロジェクトの構造は下記のとおりです。
下にスクロールすると、フルディレクトリのキャプチャも貼っていますので参考にしてみてください。
└── プロジェクト/
    ├── モジュール群
    └── app/
        ├── auth/
        │   └── eventRegister
        ├── login/
        │   ├── dashboard/
        │   │   └── page.tsx
        │   └── page.tsx
        ├── logout/
        │   └── page.tsx
        ├── register/
        │   └── page.tsx
        ├── components/
        │   ├── card/
        │   │   └── page.tsx
        │   ├── footer/
        │   │   └── page.tsx
        │   └── navbar/
        │       └── page.tsx
        ├── lib /
        │   ├── db.ts
        │   └── prisma.ts
        └── pages/
            └── api/
                ├── eventRegister.ts
                ├── login.ts
                ├── register.ts
                └── upload.ts
サンプルコード
イベント登録用の画面を作成します。
ファイルの冒頭にimport { UploadFile } from "@/app/pages/api/upload";がありますが、サーバサイドのこのコードを使ってアップロードします。
全体のコードはこちら↓
'use client'

import { useRouter } from "next/navigation"
import { registerEvent } from "@/app/pages/api/eventRegister";
import { UploadFile } from "@/app/pages/api/upload";


export default function EventRegister(){
    //ルーターを設定する
    const router = useRouter();

    //ダッシュボードに戻るためのボタン
    const backToMyPage = ()=>{
        router.push("/auth/login/dashboard");
    }
    //登録内容をクリアするボタン
    const clearTargetEvent = ()=>{
        const targetEventTitle =  document.getElementById("targetEventTitle") as HTMLInputElement;
        const targetEventDetail = document.getElementById("targetEventDetail") as HTMLTextAreaElement;
        const targetEventThumbnail = document.getElementById("targetEventThumbnail") as HTMLInputElement;
        //イベントタイトルをクリアする
        if(targetEventTitle) targetEventTitle.value = '';
        //イベント内容をクリアする
        if(targetEventDetail) targetEventDetail.value = '';
        ////イベントサムネイルをクリアする
        if(targetEventThumbnail) targetEventThumbnail.value = '';
        return;
    }

    return (
        <div>
            イベント登録用のページ
            <form action={UploadFile} encType="multipart/form-data">
                <div className="eventRegisterArea">
                    <div>
                        <input type="text"
                            name="eventTitle"
                            className="eventTitle input input-bordered input-secondary w-full max-wxs"
                            maxLength={10}
                            required
                            id="targetEventTitle"
                            placeholder="イベントタイトル"/>
                    </div>
                    <div>
                        <textarea
                            name="eventDetail"
                            className="eventDetail textarea textarea-info w-full"
                            maxLength={20}
                            id="targetEventDetail"
                            placeholder="イベント内容を書いてください">
                            </textarea>
                    </div>
                    <div>
                        <input type="file"
                            name="file"
                            className="eventThumbnail file-input file-input-bordered file-input-accent w-full max-w-xs"
                            id="targetEventThumbnail"
                            accept="image/jpeg,image/png"/>
                    </div>
                </div>
                <div className="btnArea">
                    <button type="submit" className="btn btn-primary">登録する</button>
                    <button className="btn btn-warning" onClick={clearTargetEvent}>クリアする</button>
                    <button className="btn btn-accent" onClick={backToMyPage}>戻る</button>
                </div>
            </form>
        </div>
    )
}
つぎに、ファイルアップロード用のコードを作成していきましょう。
今回のアプリでは、記事の最初にも書いたとおり①イベントのタイトル、②イベントの詳細、③サムネイル、をサーバに会登録します。(データベースの登録機能の実装はまだですが)。
この3つの①イベントのタイトル、②イベントの詳細、③サムネイル、を一度にサーバに送るためにFormDataオブジェクトを使用します。
export async function UploadFile(formData:FormData){
  //以降の処理は省略
}
画面からサーバに渡された3つのデータ①イベントのタイトル、②イベントの詳細、③サムネイル、がちゃんと入っているかをConsole.logスクリプトで確認しておきます。
    const file = formData.get("file") as File;
    const eventTitle = formData.get("eventTitle");
    const eventDetail = formData.get("eventDetail");
    //アップロードファイル情報を取得する
    console.log(file);
    //イベントタイトルを取得する
    console.log(eventTitle);
    //イベント内容を取得する
    console.log(eventDetail);
さいごに、ファイルパスを下記の通り取得します。
    if(file && file.size > 0){
        const data = await file.arrayBuffer();
        const buffer = Buffer.from(data);
        const filePath = resolve(
            process.cwd(),
            "./uploads",
            `${crypto.randomUUID()}.${file.name.split(".").pop()}`
        );
        await fs.writeFile(filePath,buffer);
        //ファイルパスを取得する
        console.log("ファイルパスは:" + filePath);
    }
全体のソースコードを載せておきます。
'use server'

import { promises as fs } from "node:fs"
import { resolve } from "node:path"
import { revalidatePath } from "next/cache"

export async function UploadFile(formData:FormData){
    const file = formData.get("file") as File;
    const eventTitle = formData.get("eventTitle");
    const eventDetail = formData.get("eventDetail");
    //アップロードファイル情報を取得する
    console.log(file);
    //イベントタイトルを取得する
    console.log(eventTitle);
    //イベント内容を取得する
    console.log(eventDetail);

    if(file && file.size > 0){
        const data = await file.arrayBuffer();
        const buffer = Buffer.from(data);
        const filePath = resolve(
            process.cwd(),
            "./uploads",
            `${crypto.randomUUID()}.${file.name.split(".").pop()}`
        );
        await fs.writeFile(filePath,buffer);
        //ファイルパスを取得する
        console.log("ファイルパスは:" + filePath);
    }
    revalidatePath("/file");
}
スペシャルサンクス
今回のアプリで大変お世話になった方々です!
すごい分かりやすいソースコードですので、ぜひ見ていってくださいね🌝
■Next.js ServerActionsでファイルアップロード・ダウンロード
■Nuxt3のファイルアップロードをServer API Routeで行う

