サンプル
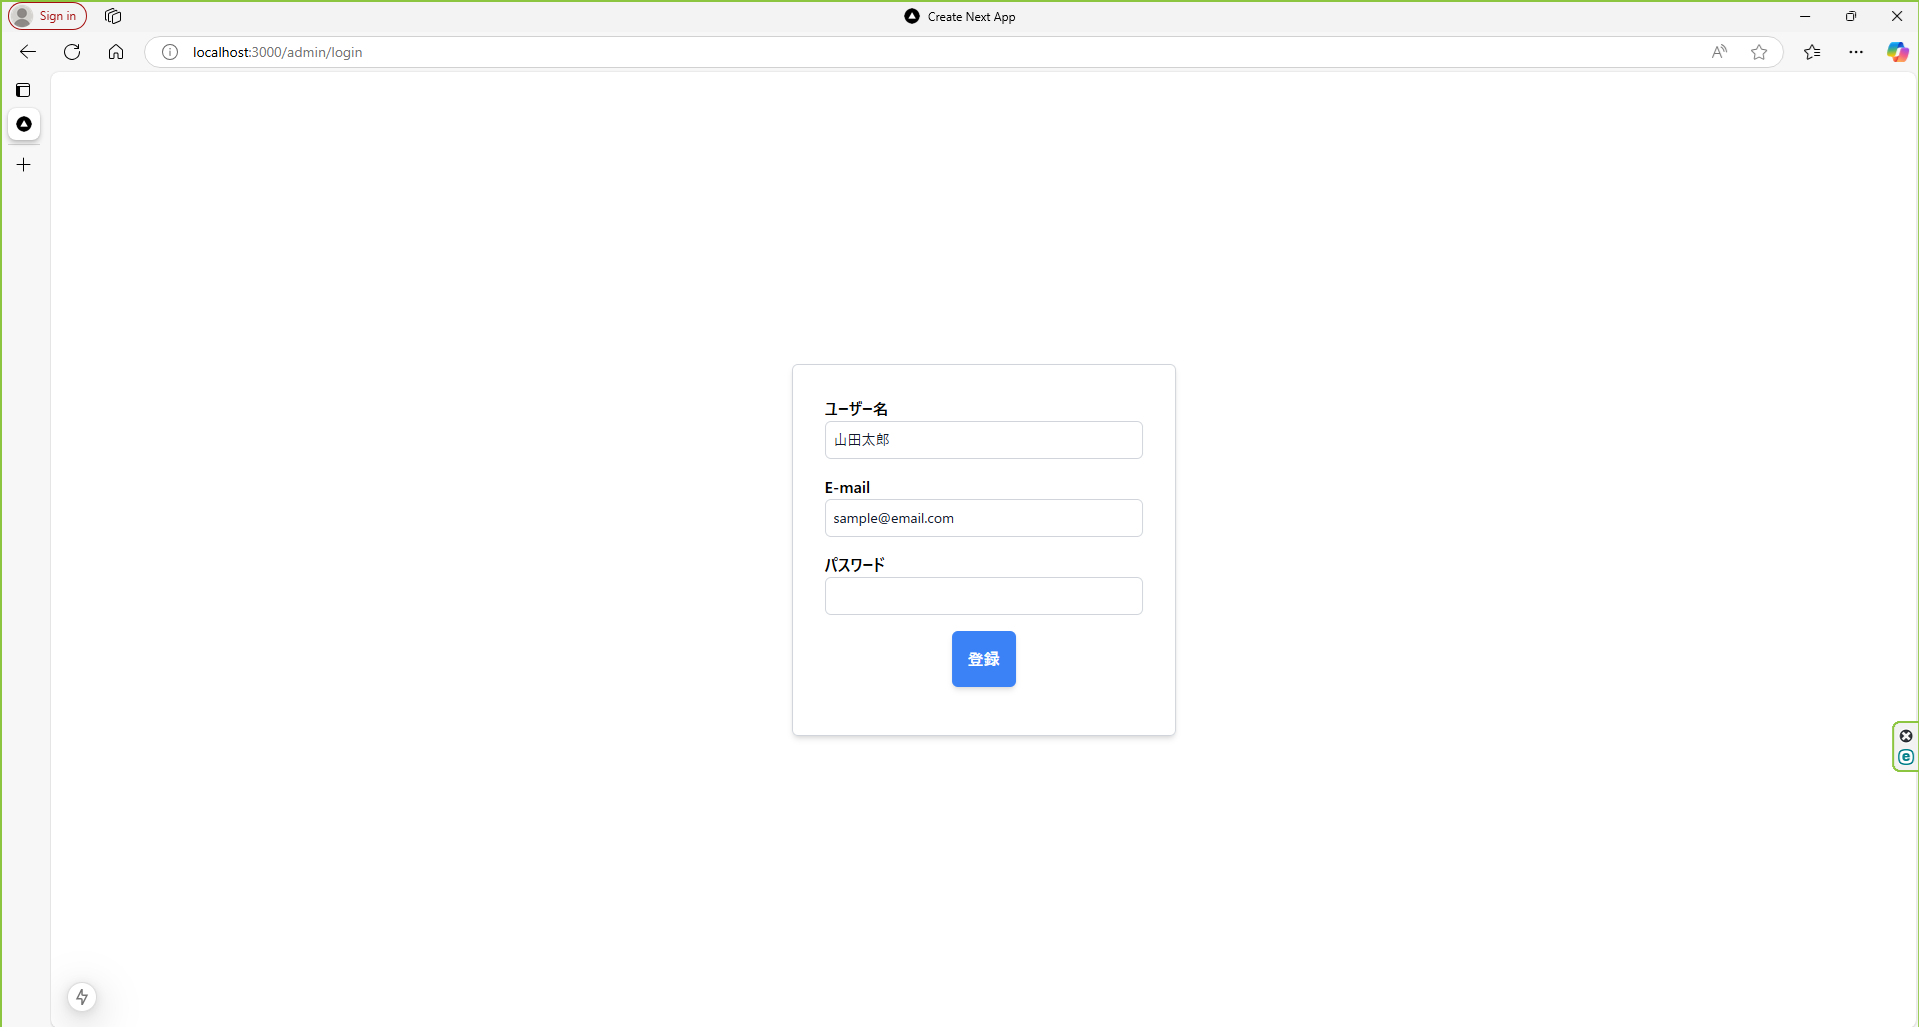
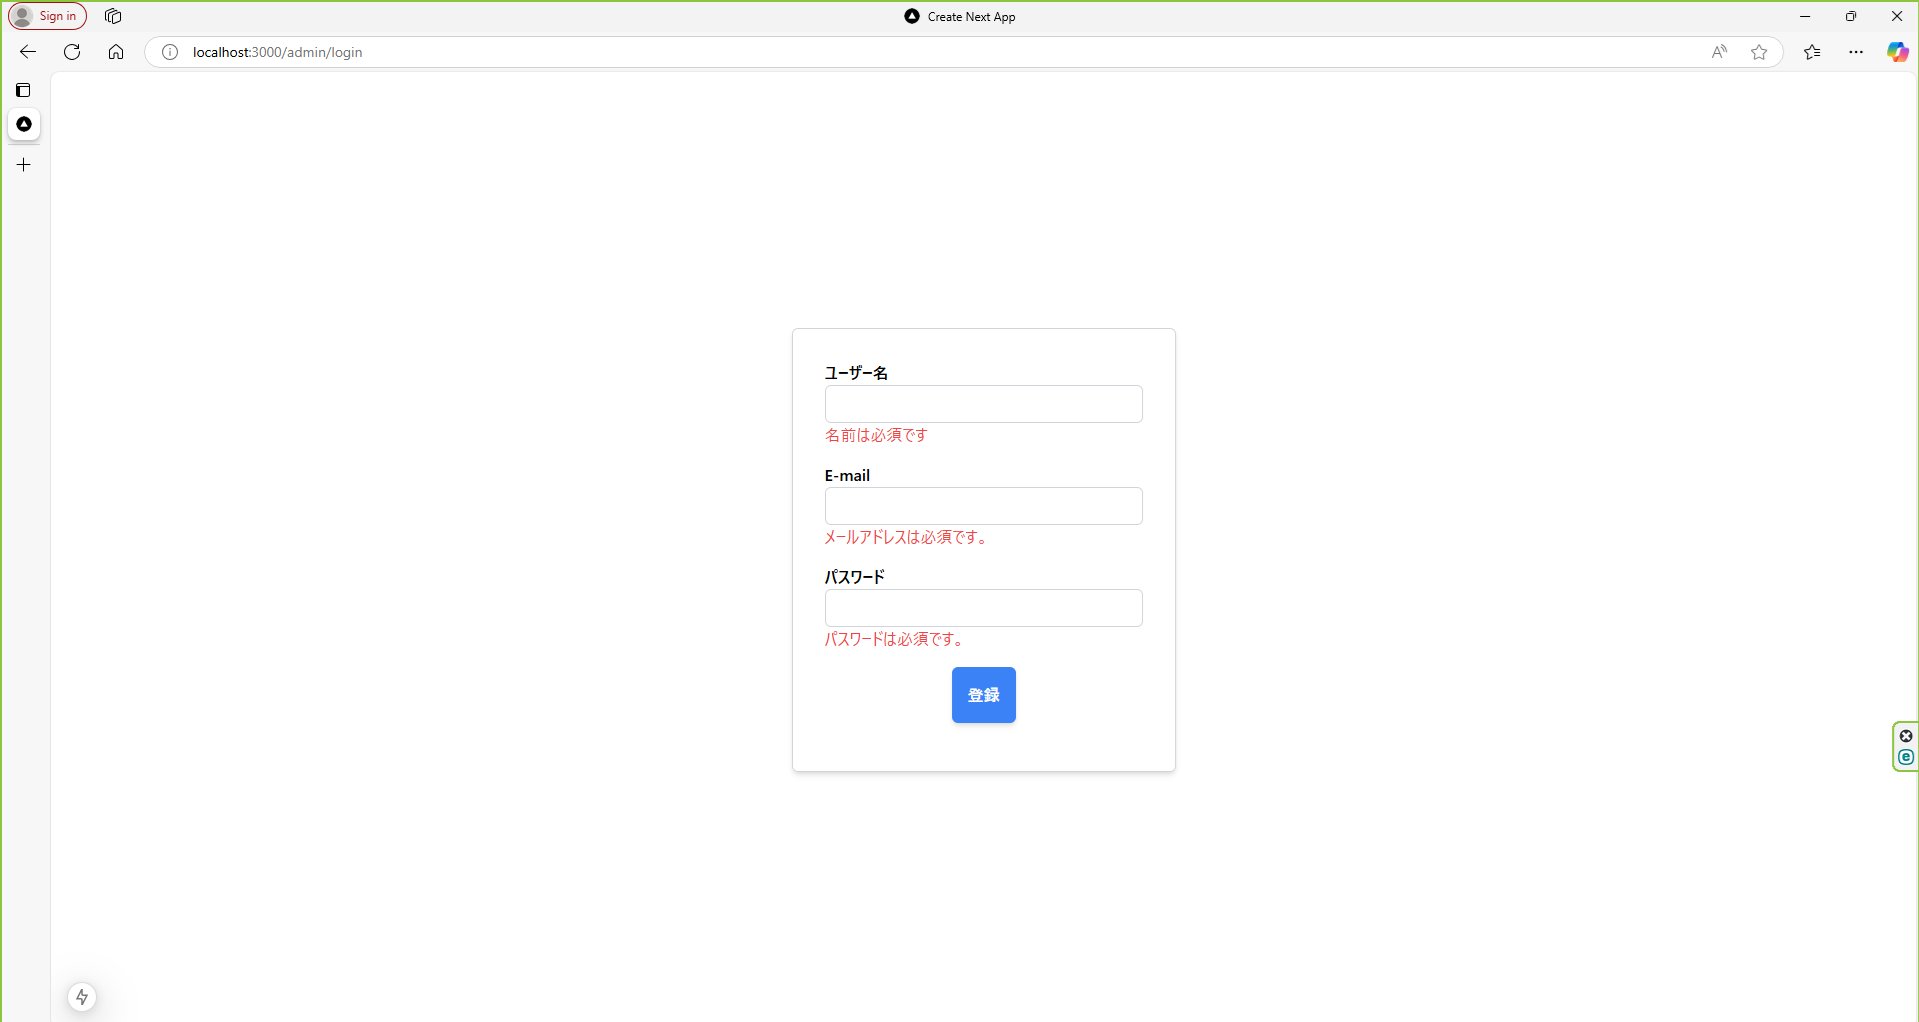
ログイン画面で①ユーザー名、②E-mail、③パスワードを空にしてみます。そのあと、登録ボタンをクリックすると...

下記の画面のようにそれぞれエラーが出るようなサンプルを作ります。

パッケージをインストールする
react-hook-formを使う場合は、パッケージ管理ツールを使ってmoduleをインストールしましょう。
npm install react-hook-form
これで準備は整いました。
サンプルコード
まずは全コードを記載します。
app/admin/login/pag.tsx
'use client' // 付けること
import { useState } from "react";
import { useForm } from "react-hook-form";
//import RegisterUser from "@/app/api/userRegister";

export default function Login() {
    // 既定値を準備する
    const defaultValues = {
        userName: '山田太郎',
        email: 'sample@email.com',
        password: ''
    }

    // フォームを初期化する
    const { register, handleSubmit, formState: { errors } } = useForm({
        defaultValues
    });

    const [userName, setUserName] = useState("");
    const [email, setEmail] = useState("");
    const [password, setPassword] = useState("");

    // フォーム送信時に実行される関数
    const onSubmit = async (data: any) => {
        //e.preventDefault();
        console.log("フォーム送信データ:", data);

        // Postリクエスト送信
        const response = await fetch('/api/userRegister', {
            method: 'POST',
            headers: {
              'Content-Type': 'application/json',
            },

            body: JSON.stringify({
              userName: data.userName,
              email: data.email,
              password: data.password,
            }),
        });

        // レスポンスを確認する
        if (response.ok) {
            const result = await response.json();
            console.log('ユーザー登録成功:', result);
        } else {
            console.log('ユーザー登録失敗');
        }
    }

    return (
        <div className="flex items-center justify-center min-h-screen rounded-md">
            <form onSubmit={handleSubmit(onSubmit)} className="shadow-md w-96 px-8 py-8 border border-gray-300 rounded-md">
                <div className="w-full">
                    <label className="font-bold">ユーザー名</label>
                    <input
                        type="text"
                        name="userName"
                        className="block rounded-md w-full text-sm border border-gray-300 text-gray-900 px-2 py-2"
                        defaultValue={userName}
                        placeholder=""
                        {...register('userName', {
                            required: '名前は必須です',
                            maxLength: {
                                value: 20,
                                message: '名前は20文字以内にしてください。'
                            }
                        })}
                        onChange={(e) => setUserName(e.target.value)}
                    />
                    <div className="text-red-500">{errors.userName?.message}</div>
                </div>
                <div className="w-full mt-4">
                    <label className="font-bold">E-mail</label>
                    <input
                        type="email"
                        {...register('email', {
                            required: 'メールアドレスは必須です。',
                            pattern: {
                                value: /([a-z\d+\-.]@[a-z\d-]+(?:\.[a-z]+)*)/i,
                                message: 'メールアドレスの形式が不正です。'
                            }
                        })}
                        name="email"
                        defaultValue={email}
                        className="block rounded-md w-full text-sm border border-gray-300 text-gray-900 px-2 py-2"
                        onChange={(e) => setEmail(e.target.value)}
                    />
                    <div className="text-red-500">{errors.email?.message}</div>
                </div>
                <div className="w-full mt-4">
                    <label className="font-bold">パスワード</label>
                    <input
                        type="password"
                        {...register('password', {
                            required: 'パスワードは必須です。'
                        })}
                        name="password"
                        defaultValue={password}
                        className="block rounded-md w-full text-sm border border-gray-300 text-gray-900 px-2 py-2"
                        onChange={(e) => setPassword(e.target.value)}
                    />
                    <div className="text-red-500">{errors.password?.message}</div>
                </div>
                <div className="flex items-center justify-center mt-4 mb-4">
                    <button type="submit" className="shadow-md bg-blue-500 text-white font-bold rounded-md px-4 py-4">
                        登録
                    </button>
                </div>
            </form>
        </div>
    );
}
解説
defaultValueで規定値を設定
プレースホルダーみたいに初期の画面に何らかの値を持たせるために、defaultValueを使って設定しています。
app/admin/login/pag.tsx
// 既定値を準備する
const defaultValues = {
    userName: '山田太郎',
    email: 'sample@email.com',
    password: ''
}
// フォームを初期化する
const { register, handleSubmit, formState: { errors } } = useForm({
    defaultValues
});
register{...}オブジェクトのバリデーションを持たせる
register{...}オブジェクトは、フォーム要素に紐づけるイベントハンドラーなどを含んだオブジェクトです。
なので、下記のように表示させたいエラーハンドリングを付けると良いです。
input type="text"の場合
app/admin/login/pag.tsx
                <div className="w-full">
                    <label className="font-bold">ユーザー名</label>
                    <input
                        type="text"
                        name="userName"
                        className="block rounded-md w-full text-sm border border-gray-300 text-gray-900 px-2 py-2"
                        defaultValue={userName}
                        placeholder=""
                        {...register('userName', {
                            required: '名前は必須です',
                            maxLength: {
                                value: 20,
                                message: '名前は20文字以内にしてください。'
                            }
                        })}
                        onChange={(e) => setUserName(e.target.value)}
                    />
                    <div className="text-red-500">{errors.userName?.message}</div>
                </div>
input type="email"の場合
app/admin/login/pag.tsx
                <div className="w-full mt-4">
                    <label className="font-bold">E-mail</label>
                    <input
                        type="email"
                        {...register('email', {
                            required: 'メールアドレスは必須です。',
                            pattern: {
                                value: /([a-z\d+\-.]@[a-z\d-]+(?:\.[a-z]+)*)/i,
                                message: 'メールアドレスの形式が不正です。'
                            }
                        })}
                        name="email"
                        defaultValue={email}
                        className="block rounded-md w-full text-sm border border-gray-300 text-gray-900 px-2 py-2"
                        onChange={(e) => setEmail(e.target.value)}
                    />
                    <div className="text-red-500">{errors.email?.message}</div>
input type="password"の場合
app/admin/login/pag.tsx
                <div className="w-full mt-4">
                    <label className="font-bold">パスワード</label>
                    <input
                        type="password"
                        {...register('password', {
                            required: 'パスワードは必須です。'
                        })}
                        name="password"
                        defaultValue={password}
                        className="block rounded-md w-full text-sm border border-gray-300 text-gray-900 px-2 py-2"
                        onChange={(e) => setPassword(e.target.value)}
                    />
                    <div className="text-red-500">{errors.password?.message}</div>
                </div>
以上です、