サンプル
ログイン画面でユーザー情報を入力して登録ボタンをクリックします。

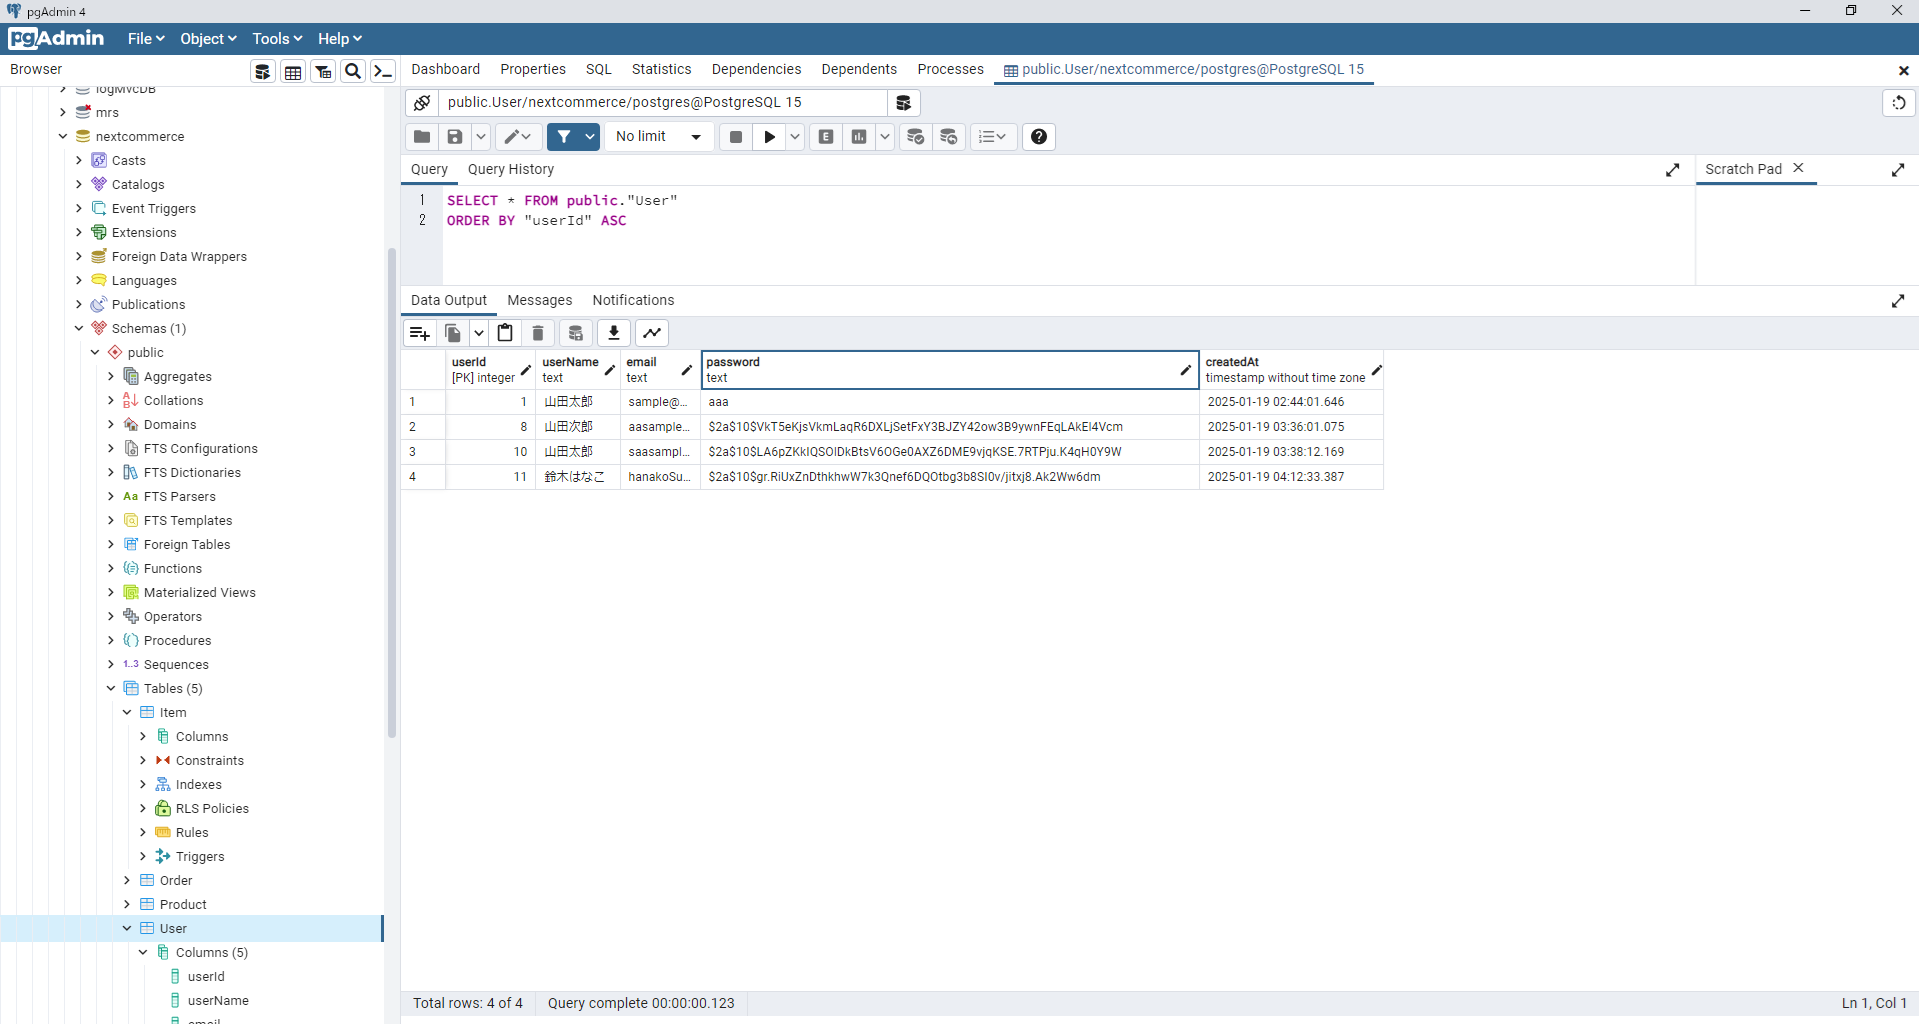
データベースに未登録のユーザー(E-mailアドレスが被っていない ※以降で解説)はこのように登録できます。
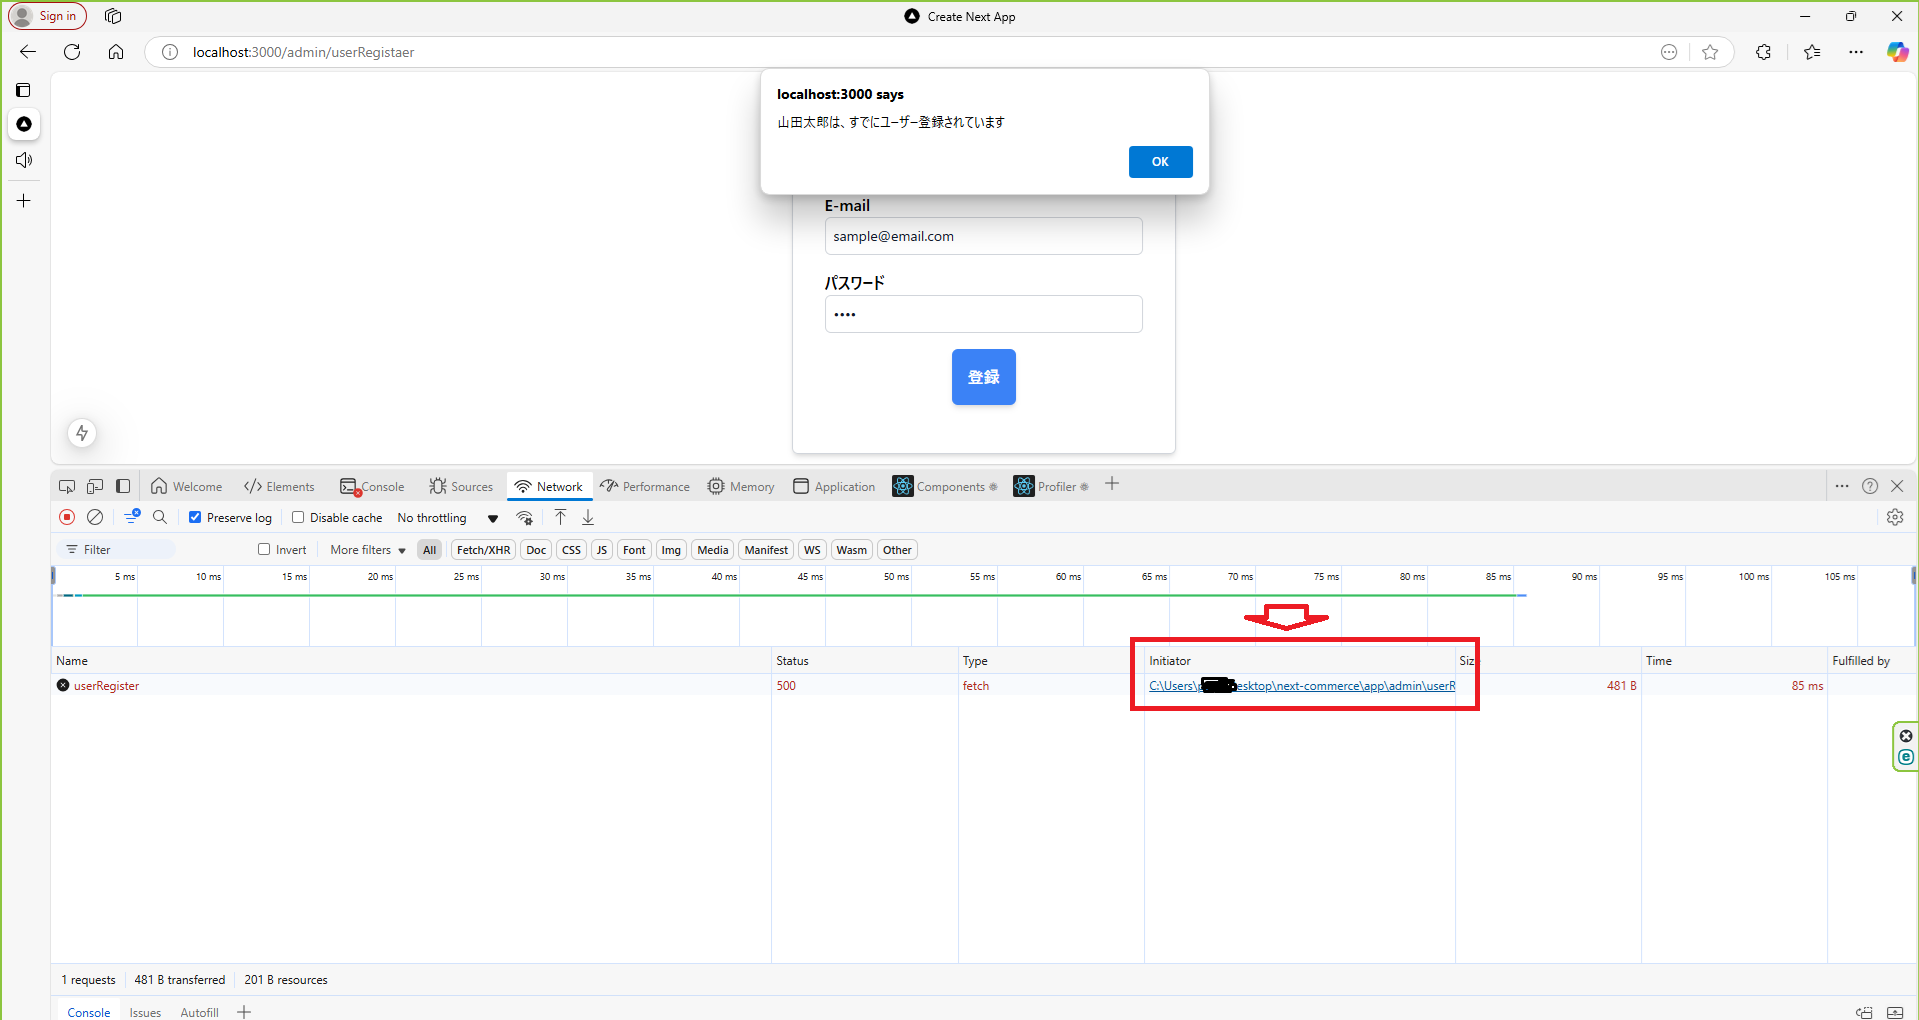
一方、同じユーザを登録しようとするとサーバ側で検知してMessageやHTTPステータス、User情報をブラウザに返すように設計しています。

このようにアラート画面でユーザ被りをメッセージ表示します。

このようなサンプルを作っていきます。
Micro Soft Edgeでのブレークポイントの設置方法
react(Next.js)でのブレークポイントの設置方法についてもここで説明しておきます。
F12または開発ツールでを開きます
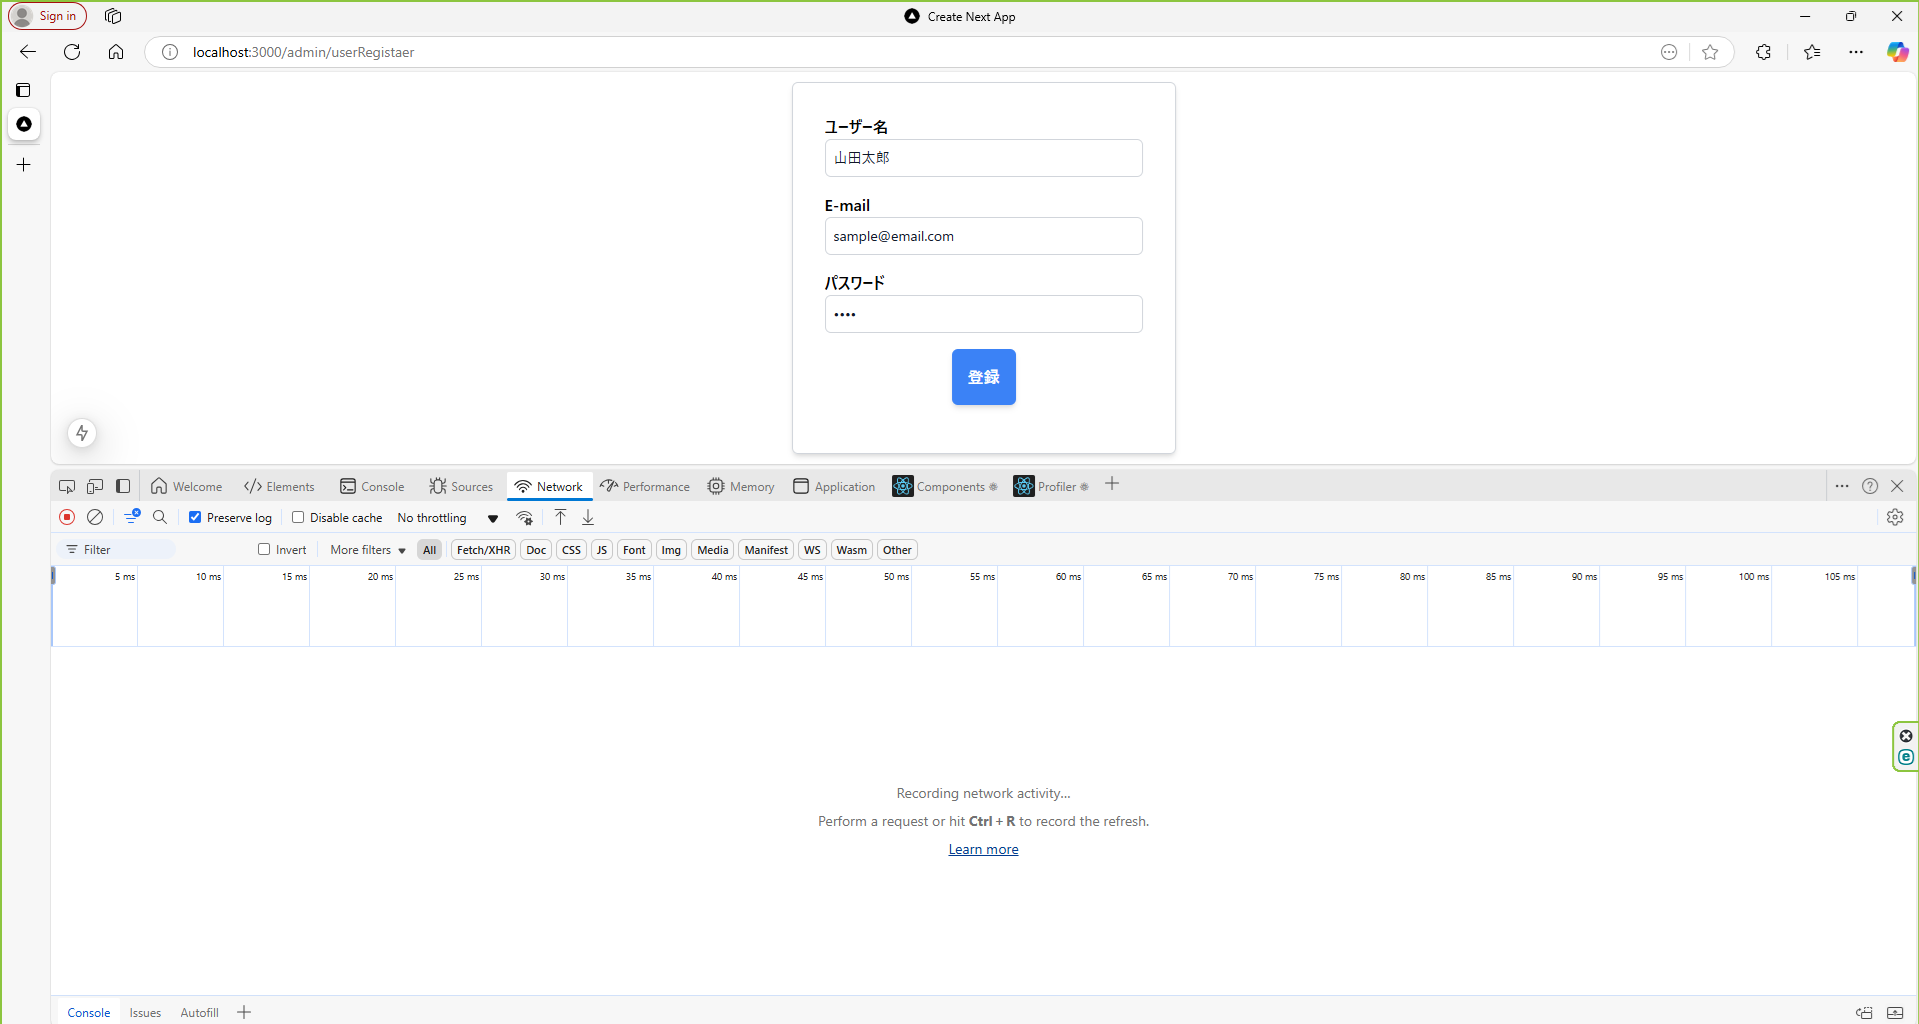
Netwokタグを開いて対象のリンクをクリックします。
すると、対象のコードが表j氏有れるのでここでブレークポイントを設置します。

今回使うNext.jsのバージョン
NextRequestとNextResponseとは
Web APIで使用されるライブラリです。
Next.jsではHTTPメソッド(GET,POST,PUT,DELETE)でサーバとの通信を行うときに使用されます。
ディレクトリ構造
Next.jsのプロジェクト構成です。
NextProject
└─ app
   ├─ admin
   │  └─ userRegister
   │     └─ page.tsx
   ├─ api
   │  └─ userRegister
   │     └─ route.ts
   ├─ components
   │  └─ headers
   │     └─ navbar
   │        └─ page.tsx
   ├─ prisma
   │  └─ schema.prisma
   ├─ next.config.ts
   ├─ package.json
   ├─ package.lock.json
   └─ tailwind.config.mjs
Next.js ver13以降Route Handlerについて
Next.js 13以降のapp/apiディレクトリでは、route.tsやroute.jsファイル内でHTTPメソッド(GET、POST、PUT、DELETEなど)を個別に定義することができます。
それぞれのメソッドに対して、対応する関数を作成することが必要です。
例えば、以下のように各HTTPメソッドに対して異なる関数を定義することができます。
また、プロジェクト作成時にApp Routerを使う場合はapi関連のフォルダやファイルはappディレクトリ直下に配置する必要があります↓。
理由は、Next.jsが特定のHTTPメソッド(GET、POST、PUT、DELETEなど)を処理するために、メソッド名を特定のものとして認識しているからです。
Next.js 13以降では、app/apiディレクトリ内でファイル内に定義する関数の名前として、**HTTPメソッド名(GET、POST、PUT、DELETE)**を指定する必要があります。
例えば、POSTメソッドを処理したい場合、その関数名は必ず export async function POST でなければなりません。
なぜHTTPメソッド名を使う必要があるか?
Next.jsは、GETやPOSTなどのHTTPメソッドに対応する関数を動的にルーティングする仕組みを提供しています。
これにより、同じroute.ts内で異なるHTTPメソッドに対する処理を分けることができます。
GETやPOSTといった名前はNext.jsがそのメソッドを特定するために使うため、関数名を自由に変更してしまうとその識別ができず、リクエストが処理されません。
結論
Next.js では、HTTPメソッド(GET, POST, PUT, DELETE)に対応する関数名を使う必要があります。
route.tsのディレクトリ
NextProject
└─ app
   ├─ admin
   │  └─ userRegister
   │     └─ page.tsx
サンプルコード
// app/api/userRegister/route.ts
import { NextRequest, NextResponse } from 'next/server';

export async function GET(req: NextRequest) {
  // GETリクエストの処理
  return NextResponse.json({ message: "GETリクエストが成功しました!" });
}

export async function POST(req: NextRequest) {
  // POSTリクエストの処理
  const { userName, email, password } = await req.json();

  if (!userName || !email || !password) {
    return NextResponse.json({ error: "全てのフィールドを入力してください。" }, { status: 400 });
  }

  // ユーザー登録処理など
  return NextResponse.json({ message: "ユーザー登録が成功しました!" }, { status: 200 });
}

export async function PUT(req: NextRequest) {
  // PUTリクエストの処理
  return NextResponse.json({ message: "PUTリクエストが成功しました!" });
}

export async function DELETE(req: NextRequest) {
  // DELETEリクエストの処理
  return NextResponse.json({ message: "DELETEリクエストが成功しました!" });
}
登録画面の実装
さて、前置きが長くなりましたがさっそく実装していきましょう。
モデルスキーマの構造
PostgreSQLとの接続するためのモデルスキーマはこちらになります。
今回はUserを登録します。
ユニークキーには、emailに対して設定しています。
なので、登録画面でE-mailが同じだとサーバ側で弾かれます。
スキーマの構成
条件の整理
User と Order (1 対多)
1 人のユーザーが複数の注文を持つ関係。
Order と Item (1 対多 または 1 対 1)
1 注文に対して、1 つまたは複数のアイテムが関連付けられる関係。
Item と Product (多対 1)
複数のアイテムが 1 つの製品に関連する関係。
// This is your Prisma schema file,
// learn more about it in the docs: https://pris.ly/d/prisma-schema

// Looking for ways to speed up your queries, or scale easily with your serverless or edge functions?
// Try Prisma Accelerate: https://pris.ly/cli/accelerate-init

generator client {
  provider = "prisma-client-js"
}

datasource db {
  provider = "postgresql"
  url      = env("DATABASE_URL")
}

model User{
  userId Int @id @default(autoincrement())
  userName String
  email String @unique
  password String
  createdAt DateTime @default(now())

  orders   Order[]  // 1人のユーザーは複数の注文を持つ
}

model Product{
  productId Int @id @default(autoincrement())
  productName String
  description String
  productImagepath String
  createdAt DateTime @default(now())
  updatedAt DateTime @default(now())

  items   Item[]   // 1つの製品は複数のアイテムに関連付けられる
}

model Item{
  itemId Int @id @default(autoincrement())
  quantity Int
  price Int
  createdAt DateTime @default(now())
  updatedAt DateTime @default(now())

  orderId   Int      // Order と 1対多 のリレーション
  order     Order    @relation(fields: [orderId], references: [orderId])
  productId Int      // Product と 多対1 のリレーション
  product   Product  @relation(fields: [productId], references: [productId])
}

model Order{
  orderId Int @id @default(autoincrement())
  total Int
  createdAt DateTime @default(now())
  updatedAt DateTime @default(now())

  userId    Int      // User と 1対多 のリレーション
  user      User     @relation(fields: [userId], references: [userId])
  items     Item[]   // 1つの注文には複数のアイテムが関連付けられる
}
bcrypyjsモジュールをインストール
パスワードハッシュ化のためのモジュールbcryptjsをインストールしましょう。
npm install bcryptjs
フロント画面の実装
登録画面を作っていきます。
WEB APIのNextResponseからの返却値をブラウザでも確認したいので、下記のように記載しています。
        const response = await fetch('/api/userRegister', {
            method: 'POST',
            headers:{
                'Content-Type': 'application/json',
                cache: 'no-store',
            },
            body:JSON.stringify({
                userName: data.userName,
                email: data.email,
                password: data.password,
            })
        });

        //レスポンスデータをJSON取得する
        const responseJson = await response.json();
        console.log(responseJson);

        // レスポンスを確認する
        if (response.ok) {
            const result = await response.json();
            alert("ユーザー登録成功");
            console.log('ユーザー登録成功:', result);
        }

        if(response.status === 500){
            alert(responseJson.user.userName + 'は、' + responseJson.message);
        }
全体のコードはこちら↓
'use client' // 付けること
import React, { useState } from "react";
import { useForm } from "react-hook-form";
//import axios from "axios";

export default function Login() {
    // 既定値を準備する
    const defaultValues = {
        userName: '山田太郎',
        email: 'sample@email.com',
        password: ''
    }

    // フォームを初期化する
    const { register,handleSubmit ,formState: { errors } } = useForm({ //handleSubmit
        defaultValues
    });

    const [userName, setUserName] = useState("");
    const [email, setEmail] = useState("");
    const [password, setPassword] = useState("");

    // フォーム送信時に実行される関数
    const onSubmit = async (data:any) => {//onSubmit data: any

        //console.log("フォーム送信データ:", data);
        const targetData :any = JSON.stringify({
            "userName": data.userName,
            "email": data.email,
            "password": data.password,
          });
        // Postリクエスト送信

        const response = await fetch('/api/userRegister', {
            method: 'POST',
            headers:{
                'Content-Type': 'application/json',
                cache: 'no-store',
            },
            body:JSON.stringify({
                userName: data.userName,
                email: data.email,
                password: data.password,
            })
        });
        //レスポンスデータをJSON取得する
        const responseJson = await response.json();
        console.log(responseJson);

        // レスポンスを確認する
        if (response.ok) {
            const result = await response.json();
            alert("ユーザー登録成功");
            console.log('ユーザー登録成功:', result);
        }

        if(response.status === 500){
            alert(responseJson.user.userName + 'は、' + responseJson.message);
        }
    }

    return (
        <div className="flex items-center justify-center min-h-screen rounded-md">
            <form onSubmit={handleSubmit(onSubmit)} className="shadow-md w-96 px-8 py-8 border border-gray-300 rounded-md">
                <div className="w-full">
                    <label className="font-bold">ユーザー名</label>
                    <input
                        type="text"
                        name="userName"
                        className="block rounded-md w-full text-sm border border-gray-300 text-gray-900 px-2 py-2"
                        defaultValue={userName}
                        placeholder=""
                        {...register('userName', {
                            required: '名前は必須です',
                            maxLength: {
                                value: 20,
                                message: '名前は20文字以内にしてください。'
                            }
                        })}
                        onChange={(e) => setUserName(e.target.value)}
                    />
                    <div className="text-red-500">{errors.userName?.message}</div>
                </div>
                <div className="w-full mt-4">
                    <label className="font-bold">E-mail</label>
                    <input
                        type="email"
                        {...register('email', {
                            required: 'メールアドレスは必須です。',
                            pattern: {
                                value: /([a-z\d+\-.]@[a-z\d-]+(?:\.[a-z]+)*)/i,
                                message: 'メールアドレスの形式が不正です。'
                            }
                        })}
                        name="email"
                        defaultValue={email}
                        className="block rounded-md w-full text-sm border border-gray-300 text-gray-900 px-2 py-2"
                        onChange={(e) => setEmail(e.target.value)}
                    />
                    <div className="text-red-500">{errors.email?.message}</div>
                </div>
                <div className="w-full mt-4">
                    <label className="font-bold">パスワード</label>
                    <input
                        type="password"
                        {...register('password', {
                            required: 'パスワードは必須です。'
                        })}
                        name="password"
                        defaultValue={password}
                        className="block rounded-md w-full text-sm border border-gray-300 text-gray-900 px-2 py-2"
                        onChange={(e) => setPassword(e.target.value)}
                    />
                    <div className="text-red-500">{errors.password?.message}</div>
                </div>
                <div className="flex items-center justify-center mt-4 mb-4">
                    <button type="submit" className="shadow-md bg-blue-500 text-white font-bold rounded-md px-4 py-4">
                        登録
                    </button>
                </div>
            </form>
        </div>
    );
}
サーバ側の実装
NextRequestとNextReponseを使って画面からのデータを取得・返却するように設計しています。
// app/api/userRegister/route.ts

import { NextRequest, NextResponse } from 'next/server';
import { PrismaClient } from '@prisma/client';
import bcrypt from 'bcryptjs'

const prisma = new PrismaClient();

export async function POST(req: NextRequest) {
  try {
    let { userName, email, password } = await req.json();
    console.log("パスワード(ハッシュ化前):", password);
    const hashedPassword:any = await bcrypt.hash(password,10);
    console.log("ハッシュ化後のパスワード:", hashedPassword);
    // パラメータが不足している場合はエラーレスポンス
    if (!userName || !email || !password) {
      return NextResponse.json({ error: "全てのフィールドを入力してください。" }, { status: 400 });
    }

    //登録済みのユーザか確認
    const existUser = await prisma.user.findUnique({
      where:{
        email:email
      }
    });

    if(existUser){
      console.log("登録済みユーザー:" + existUser);
      return NextResponse.json({message:"すでにユーザー登録されています",user:existUser,status:500},{status:500});
    }

    // ユーザーをデータベースに挿入
    const newUser = await prisma.user.create({
      data: {
        userName,
        email,
        password:hashedPassword, // 実際のアプリケーションではパスワードをハッシュ化することを忘れないでください
      },
    });

    // 成功レスポンスを返す
    return NextResponse.json({ message: "ユーザー登録が成功しました!", user: newUser }, { status: 200 });
  } catch (error) {
    console.error("エラー:", error);
    if (error instanceof Error) {
      console.error("エラー詳細:", error.message);
    }
    return NextResponse.json({ error: "ユーザー登録中にエラーが発生しました。" }, { status: 500 });
  }
}
以上です。
参考にしたサイト