SwiftでPixabay Developer APIを使って大喜利アプリを作ってみたいと思います。
初心者にもわかりやすく、デザインパターン、コードの可読性もしっかり守っているので、APIの入門記事としてはぴったりかなと。
完成形はこちら!

では始めていきます。ぜひ最後までご覧ください。
UIの設計
このように配置していきます。
ViewController,ShareViewControllerを作り、IBOutlet接続します。
import UIKit

class ViewController: UIViewController {

    @IBOutlet weak var odaiImageView: UIImageView!
    @IBOutlet weak var commentTextView: UITextView!
    @IBOutlet weak var searchTextField: UITextField!

    override func viewDidLoad() {
        super.viewDidLoad()
        // Do any additional setup after loading the view.
    }

    @IBAction func nextOdai(_ sender: Any) {

    }

    @IBAction func searchPressed(_ sender: Any) {

    }

    @IBAction func next(_ sender: Any) {

    }
}
import UIKit

class ShareViewController: UIViewController {

    @IBOutlet weak var resultImageView: UIImageView!

    @IBOutlet weak var commentLabel: UILabel!

    override func viewDidLoad() {
        super.viewDidLoad()
    }

    @IBAction func share(_ sender: Any) {

    }

    @IBAction func dismiss(_ sender: Any) {

    }
}
全体設計
APIの取得
まず、APIの取得からやっていきたいと思います。
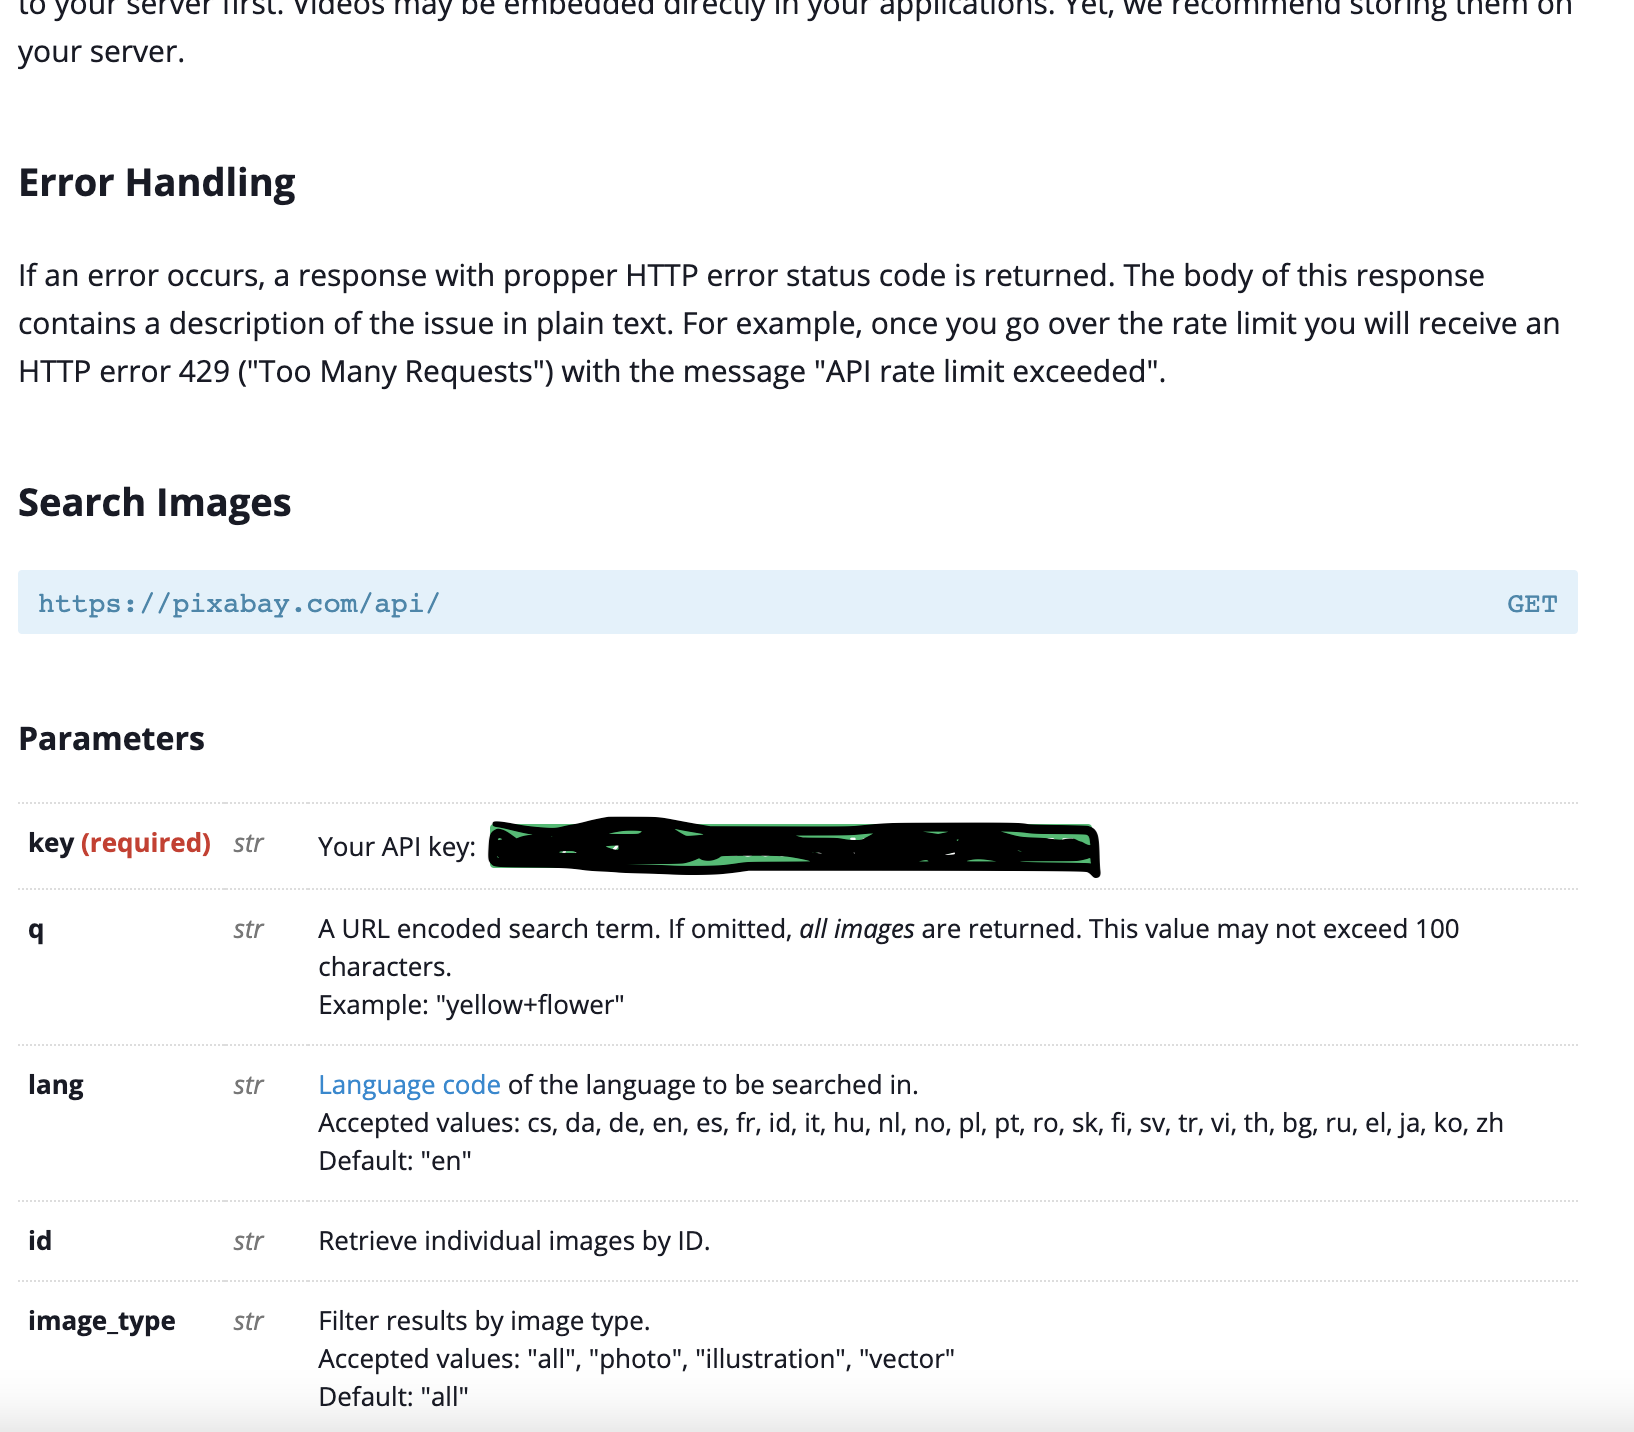
Pixabay Developer APIを使います。
操作は以下。
ログインをする、またアカウントがない場合は新規アカウント登録を行う。
それができたら、ここでAPIKeyを取得する。
そしてこのようにAPIを叩くと、JSONデータを変換してくれます。
これらのデータをうまく使い今回はアプリを作成していきます。
OdaiManager
今回のAPIにおいてのロジックを管理するOdaiManagerを書いていきます。
import Foundation

struct OdaiManager {
    func getImages(with keyword:String,completion:@escaping ([Hits]?) -> ()){
        //APIKey 22576227-26b7f5cefaed90131ae202127
        let urlString = "https://pixabay.com/api/?key=22576227-26b7f5cefaed90131ae202127&q=\(keyword)"

        //①URL型に変換
        if let url = URL(string: urlString) {

            //②URLSessionを作る
            let session = URLSession(configuration: .default)
            //③SessionTaskを与える
            let task = session.dataTask(with: url) { data, response, error in
                if error != nil {
                    print(error!)

                    completion(nil)
                }

                if let safeData = data {
                    // print(response)
                    let decoder = JSONDecoder()
                    do {
                        let decodedData = try decoder.decode(OdaiModel.self, from: safeData)

                        completion(decodedData.hits)

                        //print(decodedData.hits[0].webformaturl)

                    } catch  {
                        print(String(describing: error))
                    }
                }
            }
            //④Taskを始める
            task.resume()
        }
    }
}
OdaiModel
レスポンスしたデータをデコードするためのOdaiModelを作成していきます。
import Foundation

struct OdaiModel:Codable{
    let hits:[Hits]
}

struct Hits:Codable {
    let webformatURL:String
}
ViewController
次に取得したデータをViewに反映させるためにViewControllerを作っていきます。
その前に画像のキャッシュのために便利なSDWebImageというライブラリを使いたいと思います。
SDWebImageの詳しい説明、導入の仕方などはこれらの記事を見るとわかると思います。
import UIKit
import SDWebImage
import Photos

class ViewController: UIViewController {

    @IBOutlet weak var odaiImageView: UIImageView!
    @IBOutlet weak var commentTextView: UITextView!
    @IBOutlet weak var searchTextField: UITextField!

    var odaiManager = OdaiManager()

    var hits: [Hits] = []
    private var imageString = ""

    private var count = 0

    override func viewDidLoad() {
        super.viewDidLoad()
        // Do any additional setup after loading the view.
        commentTextView.layer.cornerRadius = 20.0

        //アルバムの許可をとる
        AuthCheck().cameraCheck()

        odaiManager.getImages(with: "funny") { (hits) in
            guard let data = hits else{
                return
            }
            self.hits = data

            self.imageString = hits![self.count].webformatURL

            DispatchQueue.main.async {
                self.odaiImageView.sd_setImage(with: URL(string:self.imageString), completed: nil)
            }

        }
    }

    //検索キーワードの値をもとに画像を引っ張ってくる
    //pixabay.com
    @IBAction func nextOdai(_ sender: Any) {
        //次の画像を表示させるためにカウントを1増やす
        count += 1
        // getImages(keyword:)

        setUp()
    }

    @IBAction func searchPressed(_ sender: Any) {
        self.count = 0

        setUp()
    }

    func setUp(){
        if searchTextField.text == "" {
            odaiManager.getImages(with: "funny") { (hits) in
                guard let data = hits else{
                    return
                }
                self.hits = data

                self.imageString = hits![self.count].webformatURL

                DispatchQueue.main.async {
                    self.odaiImageView.sd_setImage(with: URL(string:self.imageString), completed: nil)
                }
            }
        }else{
            if let text = searchTextField.text {
                odaiManager.getImages(with: text) { (hits) in
                    guard let data = hits else{
                        return
                    }
                    self.hits = data

                    self.imageString = hits![self.count].webformatURL

                    DispatchQueue.main.async {
                        self.odaiImageView.sd_setImage(with: URL(string:self.imageString), completed: nil)
                    }
                }
            }
        }
    }

    @IBAction func next(_ sender: Any) {
        performSegue(withIdentifier: "toShare", sender: nil)
    }

    override func prepare(for segue: UIStoryboardSegue, sender: Any?) {
        let shareVC = segue.destination as? ShareViewController

        if let comment = commentTextView.text,let image = odaiImageView.image {
            shareVC?.commentString = comment
            shareVC?.resultImage = image
        }
    }
}
ここでアルバムの許可画面を作るためのモデルを作っていきたいと思います。
import Foundation
import Photos

class AuthCheck {
    func cameraCheck(){
        // ユーザーに許可を促す.
        PHPhotoLibrary.requestAuthorization { (status) -> Void in

            switch(status){
            case .authorized:
                print("Authorized")

            case .denied:
                print("Denied")

            case .notDetermined:
                print("NotDetermined")

            case .restricted:
                print("Restricted")
            case .limited:
                print("limited")
            @unknown default:
                return
            }
        }
    }
}
また、Info.plistの設定で

このような設定も各自行ってください。
ShareViewController
import UIKit

class ShareViewController: UIViewController {

    var resultImage = UIImage()
    var commentString = String()

    var screenShotImage = UIImage()

    @IBOutlet weak var resultImageView: UIImageView!

    @IBOutlet weak var commentLabel: UILabel!

    override func viewDidLoad() {
        super.viewDidLoad()

        // Do any additional setup after loading the view.
        resultImageView.image = resultImage
        commentLabel.text = commentString
        commentLabel.adjustsFontSizeToFitWidth = true
    }

    @IBAction func share(_ sender: Any) {
        //スクリーンショットを撮る
        takeScreenShot()

        let items = [screenShotImage] as [Any]

        //アクティビティービューに乗っけて、シェアする
        let activityVC = UIActivityViewController(activityItems: items, applicationActivities: nil)

        present(activityVC, animated: true, completion: nil)
    }

    func takeScreenShot(){
        let width = CGFloat(UIScreen.main.bounds.size.width)
        let height = CGFloat(UIScreen.main.bounds.size.height/1.3)

        let size = CGSize(width: width, height: height)

        UIGraphicsBeginImageContextWithOptions(size, false, 0.0)
        //viewに書き出す
        self.view.drawHierarchy(in: view.bounds, afterScreenUpdates: true)
        screenShotImage = UIGraphicsGetImageFromCurrentImageContext()!
        UIGraphicsEndImageContext()
    }

    @IBAction func dismiss(_ sender: Any) {
        dismiss(animated: true, completion: nil)
    }
}
最後に
コードはこちらに載せてあります。
指摘点がありましたら、コメントでもよろしくお願いします。


