discordgoでdiscordbotを作っているので、開発環境・クイックスタート・デプロイ・機能集の説明をしたいと思います。
- 9/10 開発環境に関する記事作成
- 9/15 クイックスタートを作成
- 9/16 herokuでの立ち上げ方
- 9/16 GuildName & GetMessageの機能を追加!
開発環境
筆者はMacユーザーですのでWindowsは書きませんでした。
エディイター Goland
環境準備がPath設定ぐらいなのですごく楽です!
Goland Official Web Page
discordgo インストール
go get github.com/bwmarrin/discordgo
Github: https://github.com/bwmarrin/discordgo
ドキュメント: https://pkg.go.dev/github.com/bwmarrin/discordgo?tab=doc
Modules の機能
Modules は、依存モジュール管理ツールです。
Go言語 1.11 から標準で使えるようになりました。
以下のような機能を持っています。
- 依存モジュールの自動検知
- 依存モジュールのバージョン固定、バージョンアップ検知
依存モジュールの情報は go.mod と go.sum という名前のファイルに記載されます。
これらのファイルを git などでバージョン管理することによって、依存モジュールとそのバージョンを明確にすることができます。
参考サイト: https://blog.mmmcorp.co.jp/blog/2019/10/10/go-mod/
Botアカウントの作成と登録
Discord Developer PortalでBotアカウントを作成し、Discordサーバーに登録しましょう。
アクセストークンも必要なので取得してください。
詳細な手順はこちらの記事にて紹介しています。
Discord Botアカウント初期設定ガイド for Developer - Qiita
GitHubアカウントを作成とリポジトリ作成
Github のアカウントを作ってソースコードなどの管理をします。
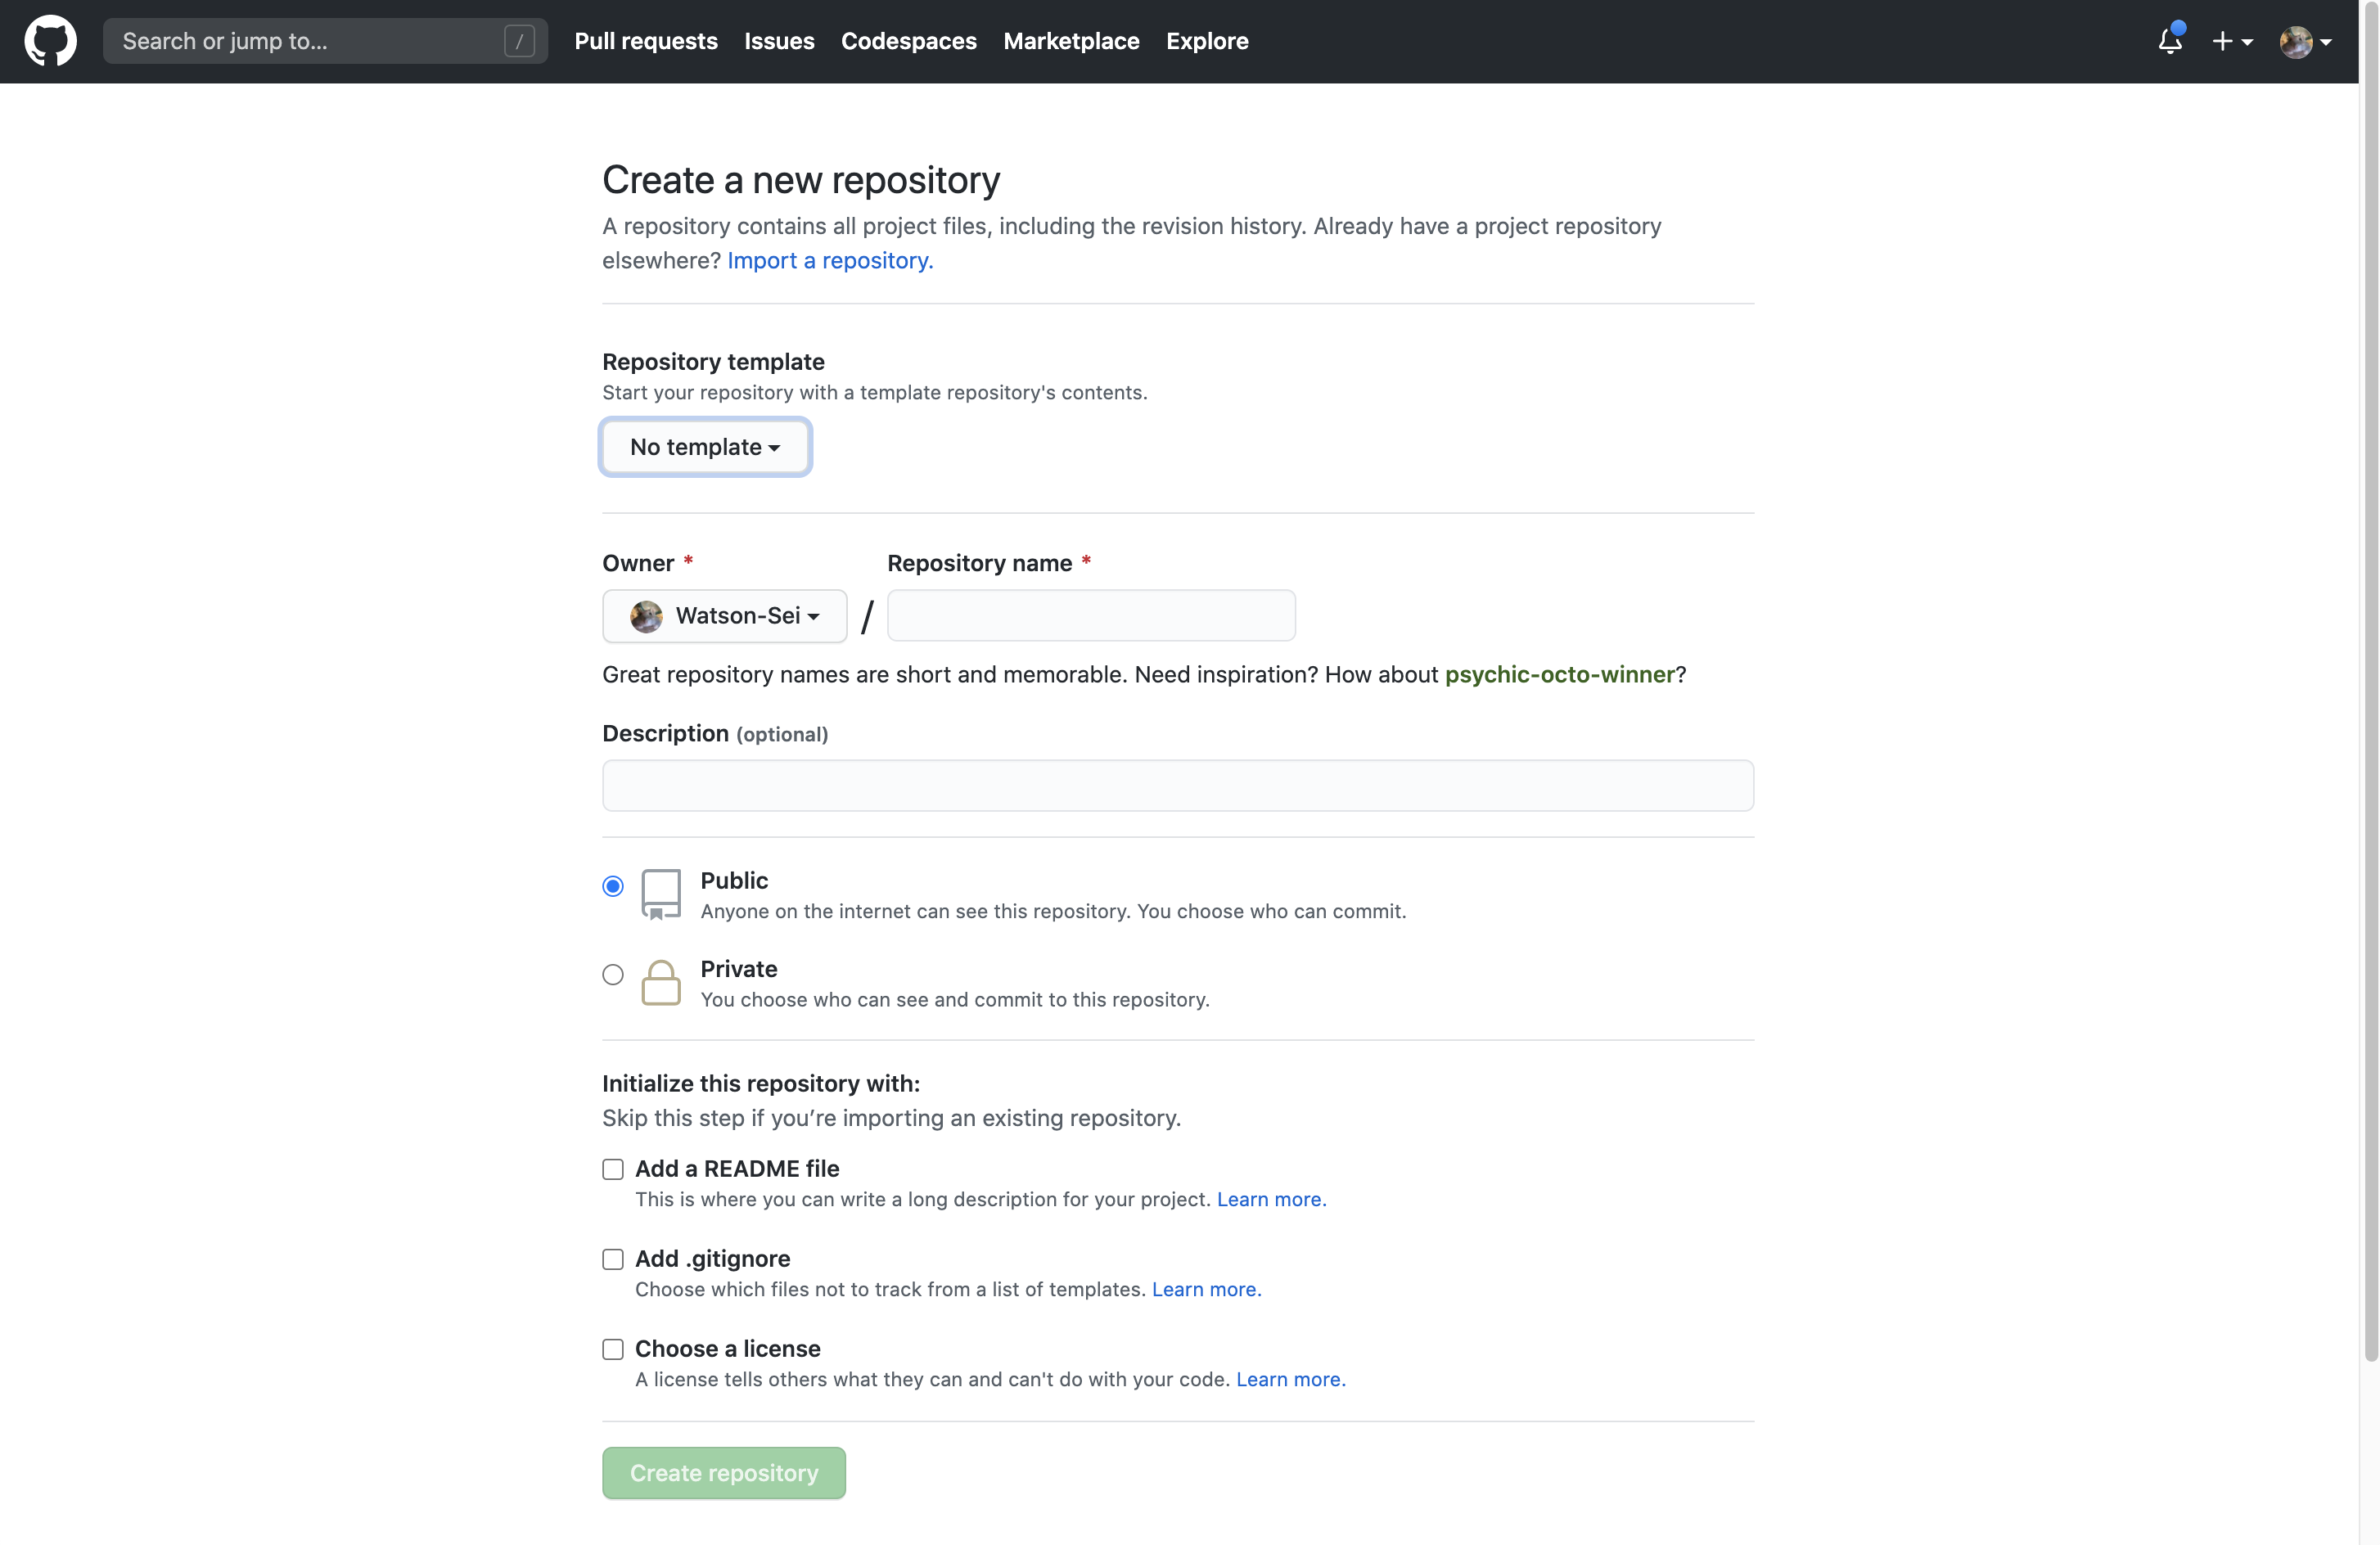
アカウントが作成できたら 「New repository」 があるので新しいリポジトリを作りましょう。

下のような画面が表示されたらリポジトリの設定をしましょう。
- リポジトリ名 : demoapp-< username > など
- 公開設定 : 間違ってトークンなどをPushしても大丈夫なようにプライベートをおすすめします!
- READMEの生成 : 今回は必要ありません
- gitignoreの生成 : チェックしてください、するとテンプレート選択が出ますので、「Go」と検索してGoを選んでください
- Licenseの生成: 今回は必要ありません
Repository Clone
先ほど作成したリポジトリをローカルにクローンして開発できるようにしましょう!
以下のコマンドを実行するとディレクトリが作成されます。
git clone <repository-url>
クイックスタート(ローカルバージョン)
1. 環境変数ファイルを作成
touchコマンドでenvファイルを作ります。
touch .env
環境変数に先ほど作成したDiscord BotのTokenを設定します。
作っていない方は開発環境の説明に戻ってください。
DISCORD_TOKEN=<Token>
2. Main.goを作成して動かす
touchコマンドでmain.goを作成します。
touch main.go
main.goを書いていきます。
機能内容
- カスタムステータスを設定して「demoapp!」と表示させることもできます。
- ユーザーが「ServerName」とチャットをするとサーバー名を変えてくれます
- ユーザーが「!Hello」とチャットをすると「Hello」と返事を返してくれます
環境変数を取得するために以下のライブラリをダウンロードする必要があります。
go get github.com/joho/godotenv
package main

import (
	"fmt"
	"log"
	"os"
	"os/signal"
	"syscall"

    "github.com/joho/godotenv"
	"github.com/bwmarrin/discordgo"
)

func main() {
	/*local only code */
	err := godotenv.Load(fmt.Sprintf("./%s.env", os.Getenv("GO_ENV")))
	if err != nil {
		// .env読めなかった場合の処理
		log.Fatal(err)
	}

	Token := os.Getenv("DISCORD_TOKEN")
	log.Println("Token: ",Token)
	if Token == "" {
		return
	}

	// Create a new Discord session using the provided bot token.
	dg, err := discordgo.New("Bot " + Token)
	if err != nil {
		fmt.Println("error creating Discord session,", err)
		return
	}

	// Register ready as a callback for the ready events.
	dg.AddHandler(ready)

	// Register the messageCreate func as a callback for MessageCreate events.
	dg.AddHandler(messageCreate)

	// In this example, we only care about receiving message events.
	dg.Identify.Intents = discordgo.MakeIntent(discordgo.IntentsGuilds | discordgo.IntentsGuildMessages)

	// Open a websocket connection to Discord and begin listening.
	err = dg.Open()
	if err != nil {
		fmt.Println("error opening connection,", err)
		return
	}

	// Wait here until CTRL-C or other term signal is received.
	fmt.Println("Bot is now running.  Press CTRL-C to exit.")
	sc := make(chan os.Signal, 1)
	signal.Notify(sc, syscall.SIGINT, syscall.SIGTERM, os.Interrupt, os.Kill)
	<-sc

	// Cleanly close down the Discord session.
	dg.Close()
}

// This function will be called (due to AddHandler above) when the bot receives
// the "ready" event from Discord.
func ready(s *discordgo.Session, event *discordgo.Ready)  {
	// Set the playing status.
	log.Println("BotName: ",event.User.ID)
	log.Println("BotID: ",event.User.Username)
	s.UpdateStatus(0, "demoapp!")
}


// This function will be called (due to AddHandler above) every time a new
// message is created on any channel that the authenticated bot has access to.
func messageCreate(s *discordgo.Session, m *discordgo.MessageCreate) {

	// Ignore all messages created by the bot itself
	// This isn't required in this specific example but it's a good practice.
    // ボットからのメッセージの場合は返さないように判定します。
	if m.Author.ID == s.State.User.ID {
		return
	}

    // Server名を取得して返します。
	if m.Content == "ServerName" {
		g, err := s.Guild(m.GuildID)
		if err != nil {
			log.Fatal(err)
		}
		log.Println(g.Name)
		s.ChannelMessageSend(m.ChannelID, g.Name)
	}

    // !Helloというチャットがきたら 「Hello」 と返します
	if m.Content == "!Hello" {
		s.ChannelMessageSend(m.ChannelID, "Hello")
	}
}
書き終わりましたら、以下のコマンドを実行してボットを起動しましょう!
go run main.go
Herokuデプロイ
Procfileを作成
Heroku アプリでは、「Procfile」と呼ばれる設定ファイルを 1 つだけ使用してアプリの実行に必要なプロセスタイプを指定します
$echo 'worker: bin/demoapp-< username>' > Procfile
go.modに依存関係を追加
依存関係をgo.modに書き込みます!
実行後に cat go.modを実行してみて追加されているか確認してみるのもいいかもしれません。
go build
gitignoreの修正
リポジトリ生成時に自動で生成されたgitignoreファイルは書き足す必要があります。
# Created by https://www.toptal.com/developers/gitignore/api/go
# Edit at https://www.toptal.com/developers/gitignore?templates=go

### Go ###
# Binaries for programs and plugins
*.exe
*.exe~
*.dll
*.so
*.dylib

# Test binary, built with `go test -c`
*.test

# Output of the go coverage tool, specifically when used with LiteIDE
*.out

# Dependency directories (remove the comment below to include it)
# vendor/

### Go Patch ###
/vendor/
/Godeps/

# End of https://www.toptal.com/developers/gitignore/api/go

# Golandを使用している場合は.ideaファイルは対象外にしましょう。
.idea <-- 追加
# Tokenキーなどは公開するのは良くないので対象外にしましょう。
.env <-- 追加
Push
Pushの準備ができたのでプッシュしましょう。
git add -A .

git commit -m "first commit"

git push
これでリポジトリにファイルが増えて更新されたと思われます。
herokuにデプロイ
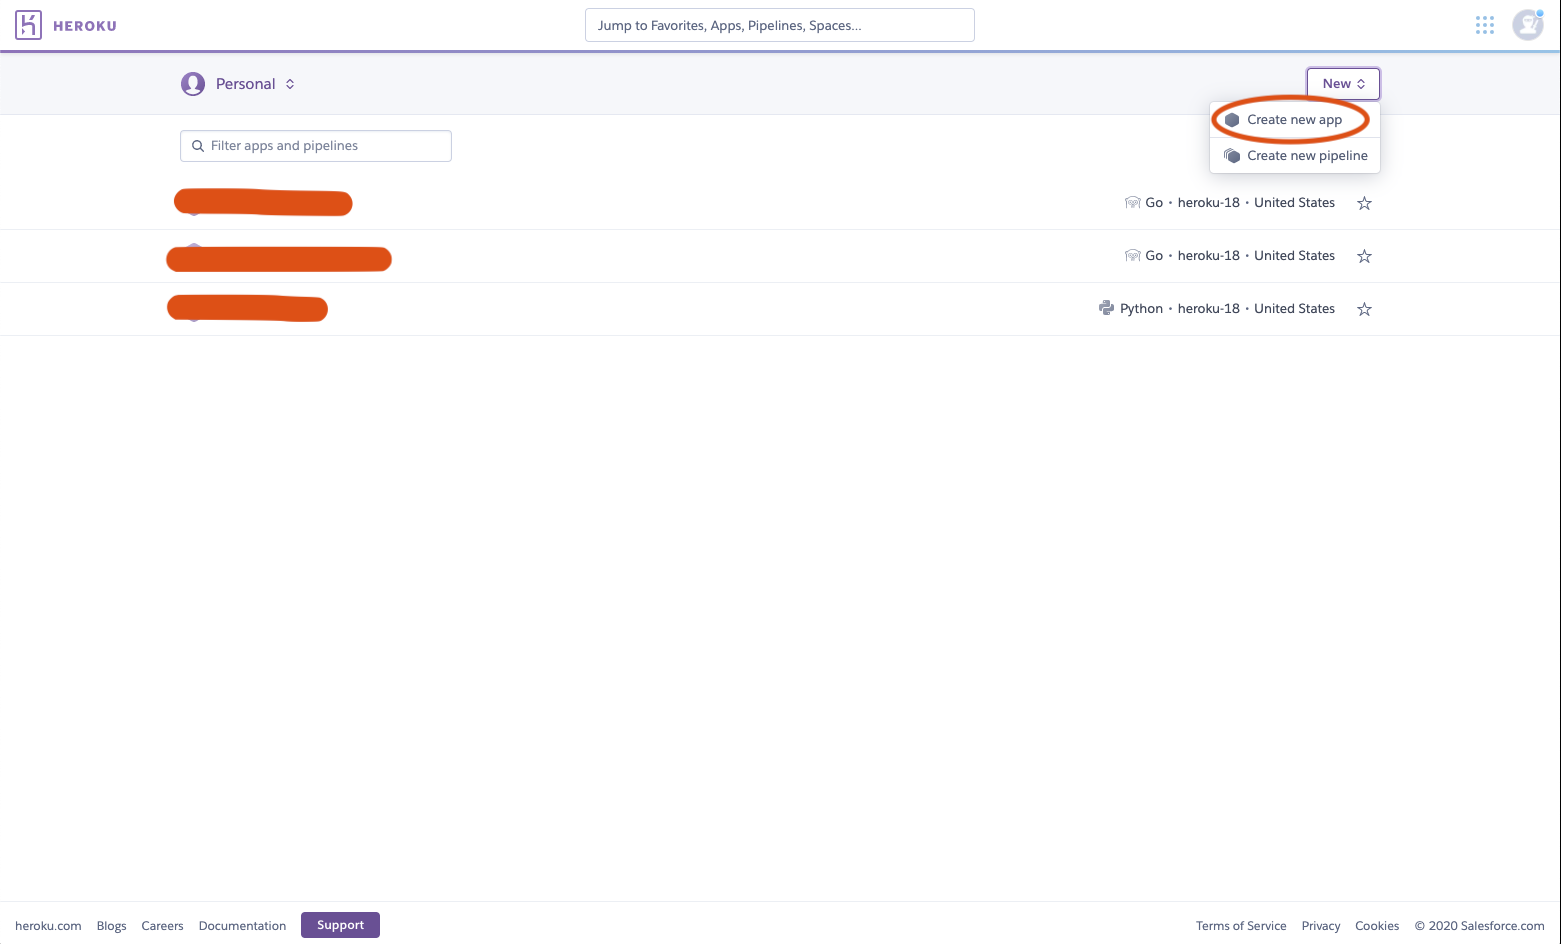
アプリを作成
- 「Create New App」でアプリを作成します。
- 「app-name」はご自由で構いません。
- 「Choose a region」はアメリカで
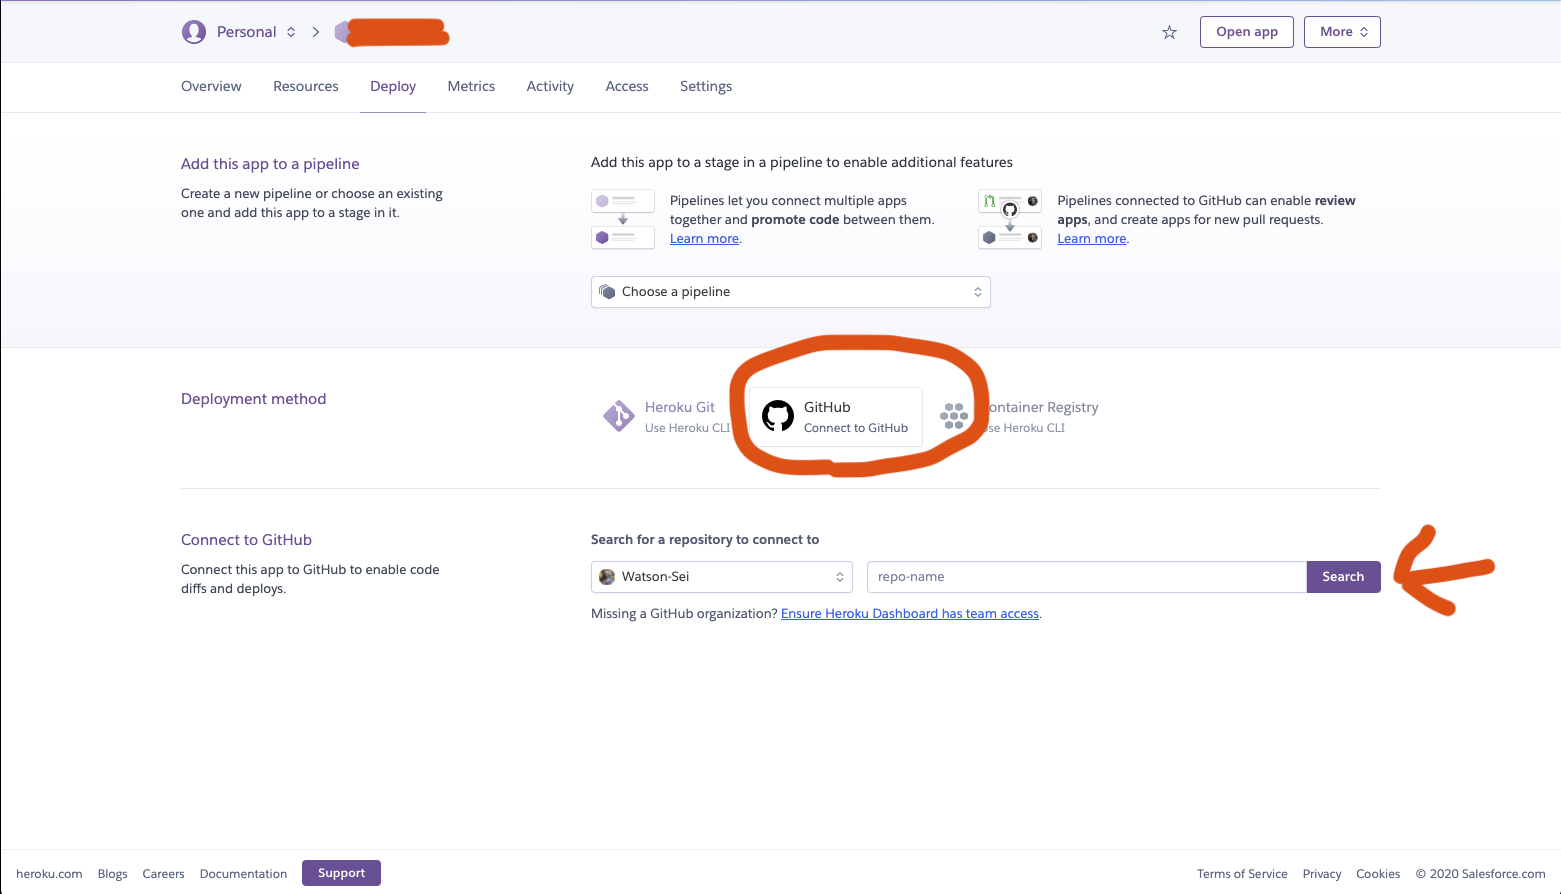
Githubリポジトリをherokuにconnect
- 「Deployment method」はGitHubを選択してください
- 「Connect to GitHub」デプロイするリポジトリをconnectしましょう!
herokuの設定
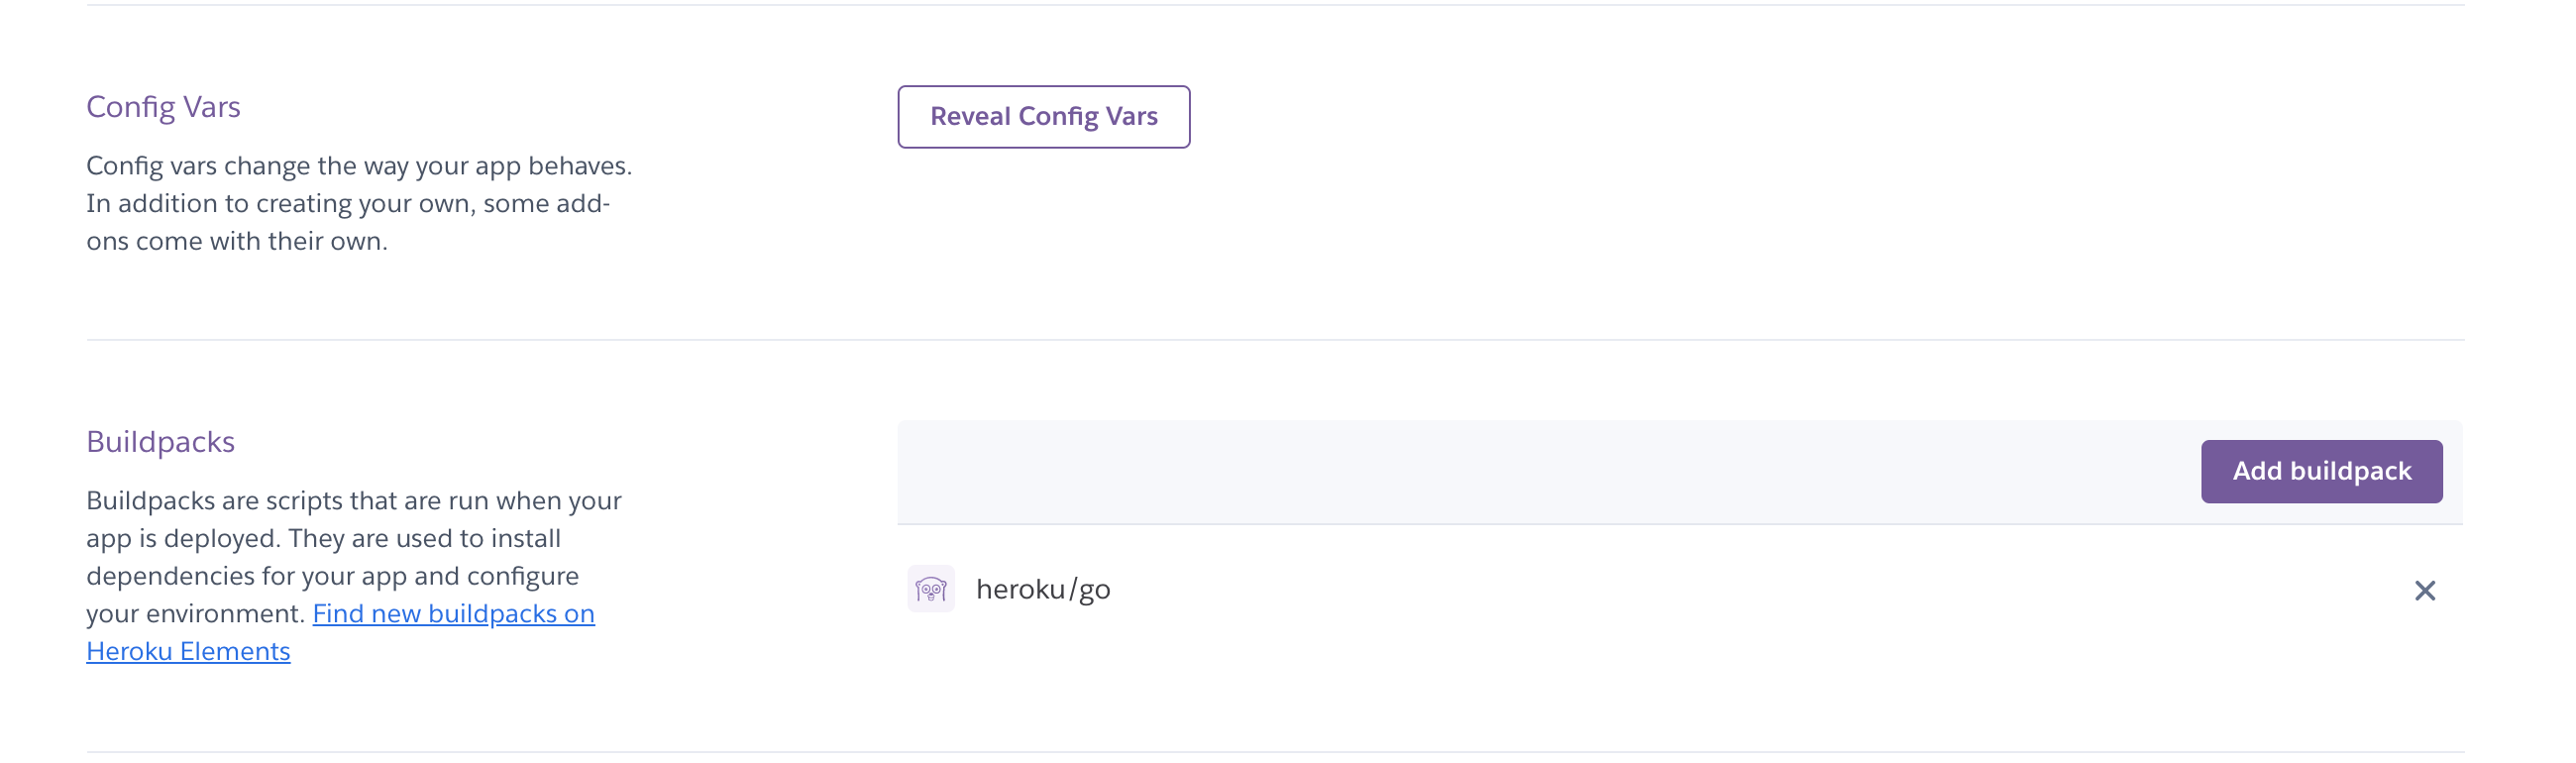
Settingsの画面に移動します。
-
「Config Vars」の「Reveal Config Vars」をクリックして入力欄が表示されます。Keyにはクイックスタートで設定した「DISCORD_TOKEN」を設定します。ValueにはTokenを設定します。
-
「Buildpacks」では、Goと検索して「heroku/go」を追加しましょう!
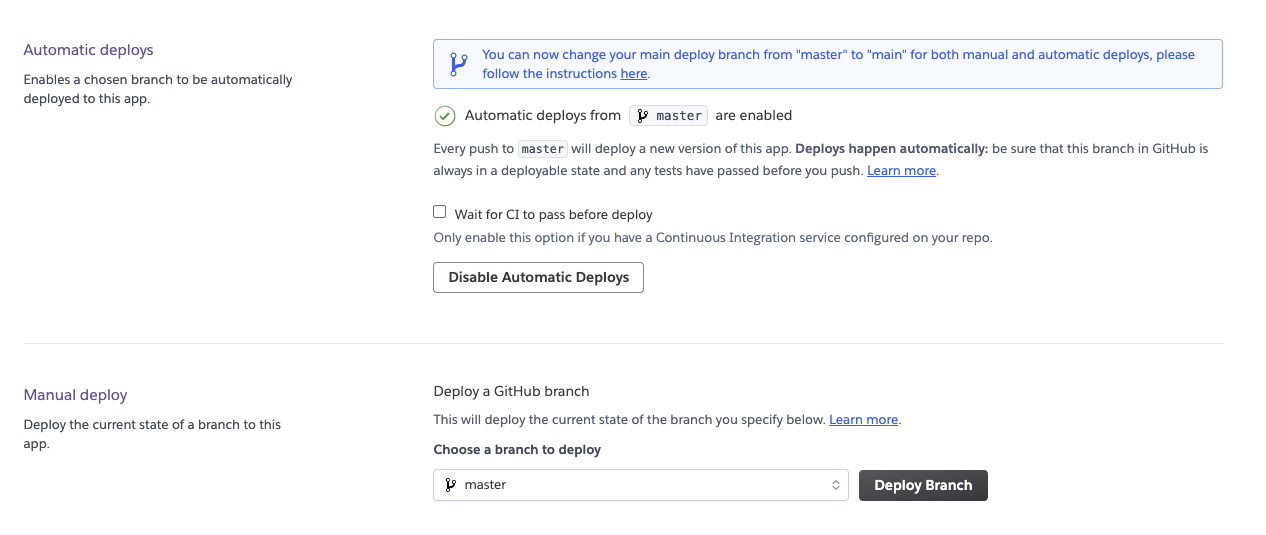
デプロイ
- 「Automatic deploys」は「Enable Automatic Deploys」と書かれているボタンを押しましょう!
- 「Manual deploy」の「Deploy Branch」を押すとデプロイと実行が行われます。
デプロイが成功したらDiscordbotは制限がかからない限りオンライン状態でいられます!
機能集
例えばサーバーの名前GuildNameの取得などのコードの書き方を説明します。
メッセージを取得
特にチャンネル指定で受け取るメッセージではなく全体からのメッセージに対応します。
さらにボット同士の無限やりとりが起きないようにボットからの受け取りには反応しないようにします。
func messageCreate(s *discordgo.Sesstion, m *discordgo.MessageCreate) {
    if m.Author.ID == s.State.User.ID {
        return
    }

    if m.Content == "Hello!" {
        s.ChannelMessageSend(m.ChannelID, "Hello")
    }
}
GuildName
GuildのGuildNameを取得します。
func messageCreate(s *discordgo.Sesstion, m *discordgo.MessageCreate) {
    if m.Content == "ServerName" {
        g, err := s.Guild(m.GuildID)
        if err != nil {
            log.Fatal(err)
        }
        s.ChannnelMessageSend(m.ChannelID, g.Name)
    }
}
最後
書いている人はGo歴一ヶ月半なので正しい立ち上げ方がありましたらコメントなどで教えてください!
heroku以外の立ち上げ方や機能ごとの書き方など学び次第追加したいと思います。