開発環境
・GoogleColaboratory
まずYOLOv5って?
YOLOv5を用いればPython上で物体検出を行うことが出来ます。
下準備として以下のコマンドを実行します。
!git clone https://github.com/ultralytics/yolov5
%cd yolov5
!pip install -r requirements.txt
この状態で例えば以下の画像(sample.png)の物体検出をしたいなら

!python detect.py --source /content/sample.jpg(←ここは画像のパスを入力)
と実行すると
Downloading https://ultralytics.com/assets/Arial.ttf to /root/.config/Ultralytics/Arial.ttf...
detect: weights=yolov5s.pt, source=/content/sample.jpg, imgsz=[640, 640], conf_thres=0.25, iou_thres=0.45, max_det=1000, device=, view_img=False, save_txt=False, save_conf=False, save_crop=False, nosave=False, classes=None, agnostic_nms=False, augment=False, visualize=False, update=False, project=runs/detect, name=exp, exist_ok=False, line_thickness=3, hide_labels=False, hide_conf=False, half=False
YOLOv5 🚀 2021-10-1 torch 1.9.0+cu111 CUDA:0 (Tesla K80, 11441.1875MB)

Fusing layers...
Model Summary: 224 layers, 7266973 parameters, 0 gradients
image 1/1 /content/sample.jpg: 448x640 10 cars, 1 motorcycle, 6 trucks, 5 traffic lights, Done. (0.031s)
Speed: 0.5ms pre-process, 31.1ms inference, 31.3ms NMS per image at shape (1, 3, 640, 640)
Results saved to runs/detect/exp61
このような実行結果が出ます。実行結果の1番下にあるようにruns/detect/exp61にあるファイルを開くと
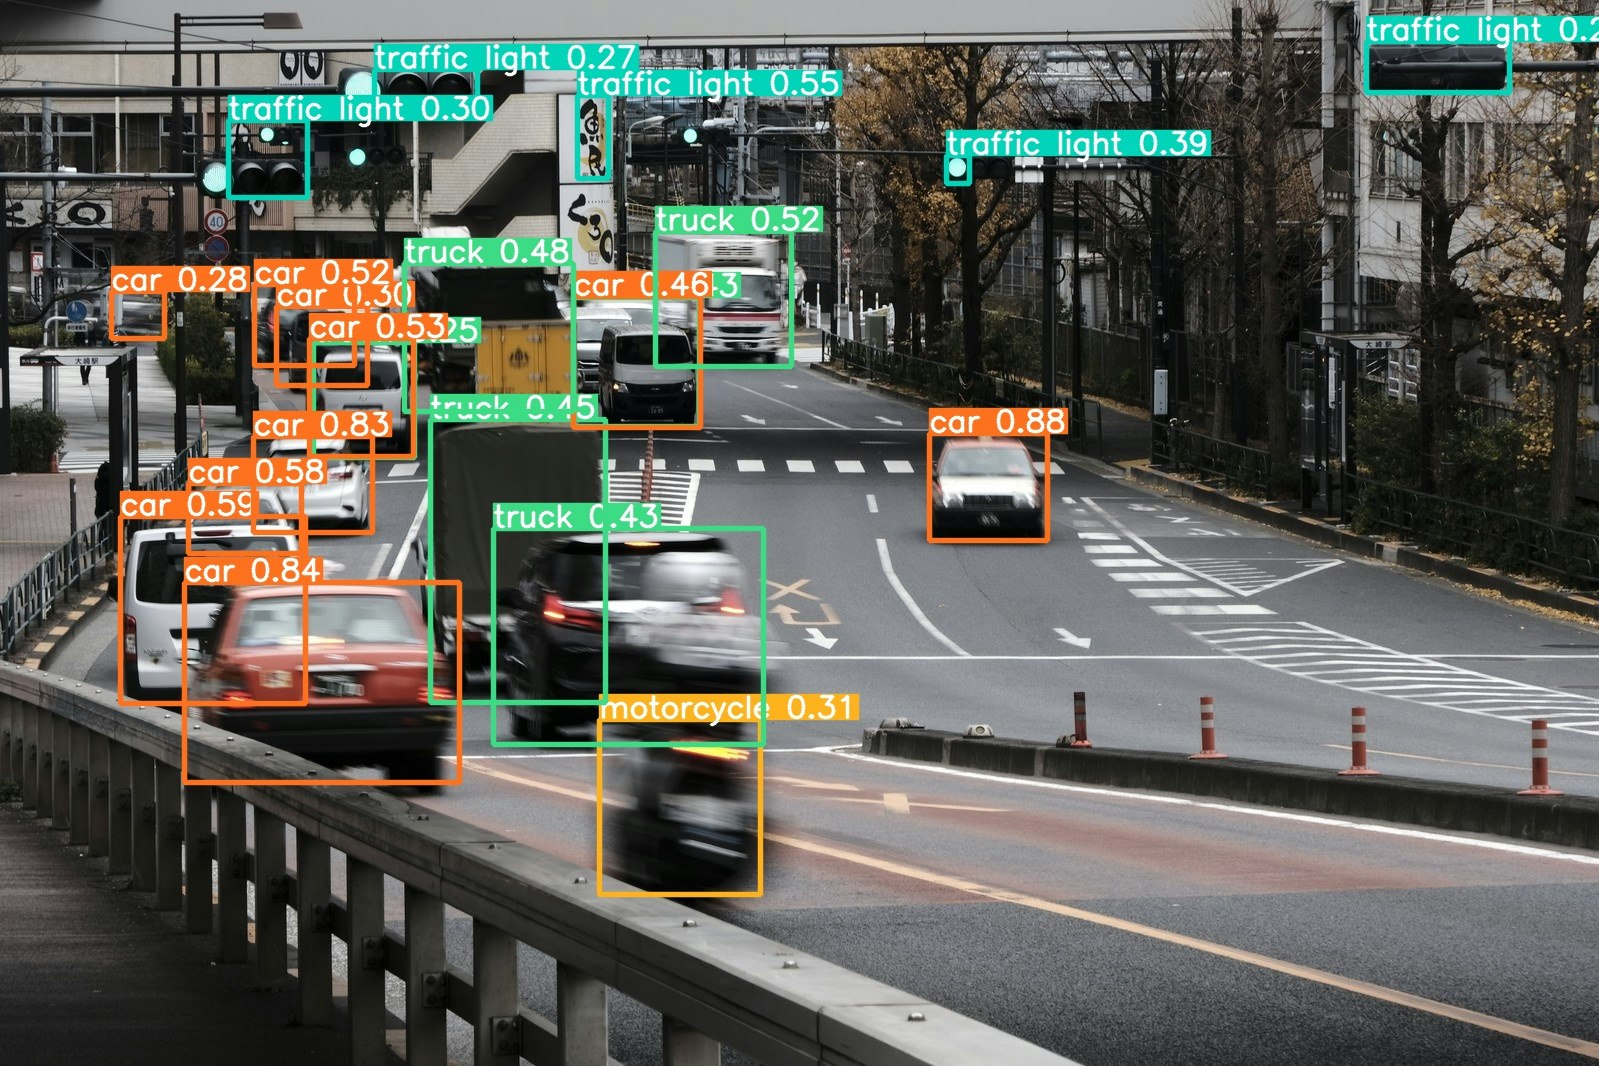
このようにcar(車)、traffic light(信号機)などの物体を検出していることが分かります。
ここからが本題
ここで「検出した画像をくり抜いて保存したいなぁ」、「信号機だけ検出したいなぁ」と思った人はいませんか?
この記事ではその方法をお教えします。(前置き長くてすみません!でも説明しないと何のこっちゃ分からないので)
くり抜いて保存する方法
「検出した画像をくり抜いて保存する方法」はとても簡単です。先ほどの実行コマンドに「--save-crop」を追加するだけです!
!python detect.py --source /content/sample.jpg --save-crop
すると
detect: weights=yolov5s.pt, source=/content/sample.jpg, imgsz=[640, 640], conf_thres=0.25, iou_thres=0.45, max_det=1000, device=, view_img=False, save_txt=False, save_conf=False, save_crop=True, nosave=False, classes=None, agnostic_nms=False, augment=False, visualize=False, update=False, project=runs/detect, name=exp, exist_ok=False, line_thickness=3, hide_labels=False, hide_conf=False, half=False, dnn=False
YOLOv5 🚀 2021-10-17 torch 1.9.0+cu111 CPU

Fusing layers...
Model Summary: 213 layers, 7225885 parameters, 0 gradients
image 1/1 /content/sample.jpg: 448x640 10 cars, 1 motorcycle, 4 trucks, 3 traffic lights, Done. (0.298s)
Speed: 2.7ms pre-process, 297.8ms inference, 1.5ms NMS per image at shape (1, 3, 640, 640)
Results saved to runs/detect/exp4
このような実行結果が出ます。実行結果の1番下にあるようにruns/detect/exp4にあるファイルを見ると

「crops」の中にcarやtraffic lightなどのフォルダがあります。この中のファイルを開くと


このようにくり抜かれた画像が保存されています!
特定の物体のみを検出する方法
「特定の物体のみを検出する方法」は少し複雑です。実行コマンドに「--class (番号)」を追加します。例えば「traffic light」のみを検出したい場合は「--class 9」を追加します。
(この番号については後ほど解説します。)
!python detect.py --source /content/sample.jpg --class 9
以下のような実行結果が出ます。
detect: weights=yolov5s.pt, source=/content/sample.jpg, imgsz=[640, 640], conf_thres=0.25, iou_thres=0.45, max_det=1000, device=, view_img=False, save_txt=False, save_conf=False, save_crop=False, nosave=False, classes=[9], agnostic_nms=False, augment=False, visualize=False, update=False, project=runs/detect, name=exp, exist_ok=False, line_thickness=3, hide_labels=False, hide_conf=False, half=False, dnn=False
YOLOv5 🚀 2021-10-17 torch 1.9.0+cu111 CPU

Fusing layers...
Model Summary: 213 layers, 7225885 parameters, 0 gradients
image 1/1 /content/sample.jpg: 448x640 3 traffic lights, Done. (0.309s)
Speed: 2.6ms pre-process, 308.8ms inference, 5.8ms NMS per image at shape (1, 3, 640, 640)
Results saved to runs/detect/exp5
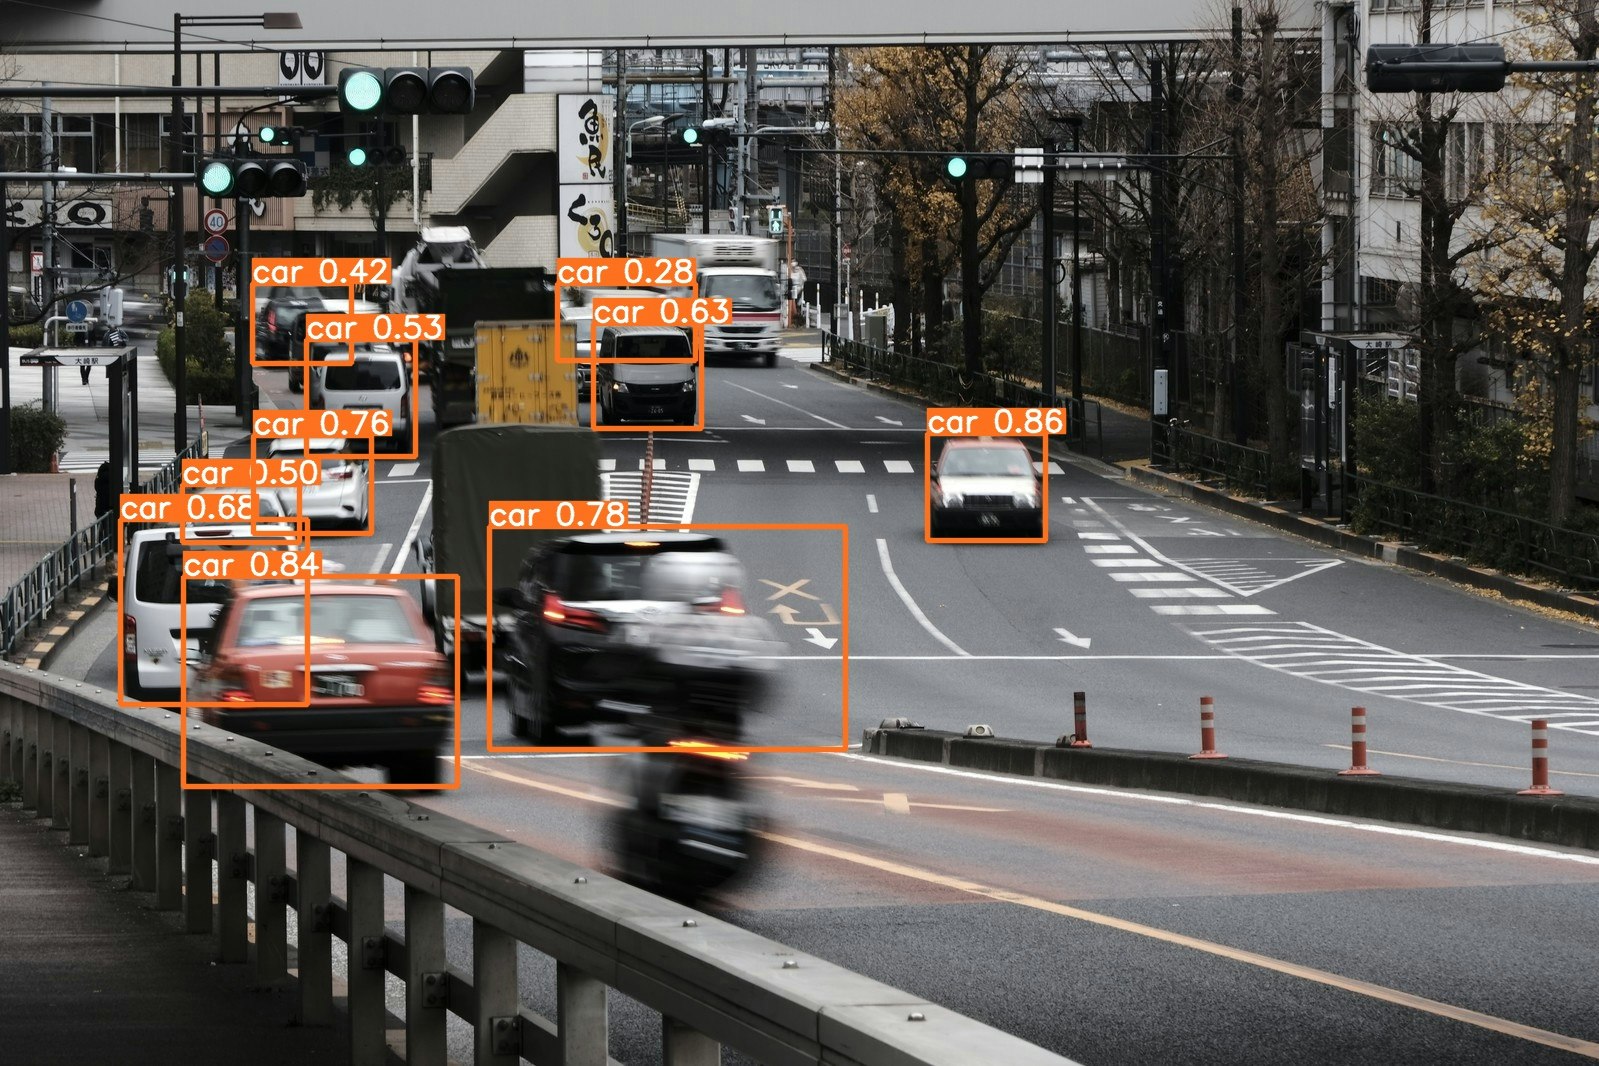
実行結果の1番下にあるようにruns/detect/exp4にあるファイルを見ると

traffic light「のみ」検出していることが分かります。
番号はどこで分かる?
先ほど「traffic light」のみを検出したい時、「--class 9」としました。この「9」は以下の場所にある「coco.yaml」を見れば分かります。

このファイルをクリックすると、以下の画面が表示されます。
# YOLOv5 🚀 by Ultralytics, GPL-3.0 license
# COCO 2017 dataset http://cocodataset.org
# Example usage: python train.py --data coco.yaml
# parent
# ├── yolov5
# └── datasets
#     └── coco  ← downloads here


# Train/val/test sets as 1) dir: path/to/imgs, 2) file: path/to/imgs.txt, or 3) list: [path/to/imgs1, path/to/imgs2, ..]
path: ../datasets/coco  # dataset root dir
train: train2017.txt  # train images (relative to 'path') 118287 images
val: val2017.txt  # train images (relative to 'path') 5000 images
test: test-dev2017.txt  # 20288 of 40670 images, submit to https://competitions.codalab.org/competitions/20794

# Classes
nc: 80  # number of classes
names: ['person', 'bicycle', 'car', 'motorcycle', 'airplane', 'bus', 'train', 'truck', 'boat', 'traffic light',
        'fire hydrant', 'stop sign', 'parking meter', 'bench', 'bird', 'cat', 'dog', 'horse', 'sheep', 'cow',
        'elephant', 'bear', 'zebra', 'giraffe', 'backpack', 'umbrella', 'handbag', 'tie', 'suitcase', 'frisbee',
        'skis', 'snowboard', 'sports ball', 'kite', 'baseball bat', 'baseball glove', 'skateboard', 'surfboard',
        'tennis racket', 'bottle', 'wine glass', 'cup', 'fork', 'knife', 'spoon', 'bowl', 'banana', 'apple',
        'sandwich', 'orange', 'broccoli', 'carrot', 'hot dog', 'pizza', 'donut', 'cake', 'chair', 'couch',
        'potted plant', 'bed', 'dining table', 'toilet', 'tv', 'laptop', 'mouse', 'remote', 'keyboard', 'cell phone',
        'microwave', 'oven', 'toaster', 'sink', 'refrigerator', 'book', 'clock', 'vase', 'scissors', 'teddy bear',
        'hair drier', 'toothbrush']  # class names

(以下省略)
「Classes」の「name」に注目してください。「person」、「bycycle」...と続いています。番号はこの順番で決まります。「person」は0番目、「bycycle」は1番目です。このように数えていくと「traffic light」が9番目になります。これが「--class 9」を追加した理由です。
なので、もし「car」のみを検出したいなら、数えると2番目なので
!python detect.py --source /content/sample.jpg --class 2
を実行します。すると「car」のみを検出します。
特定の物体のみ検出し、写真をくり抜く方法
以上2つの合わせ技「特定の物体のみ検出し、写真をくり抜く方法」は先ほど追加したコマンドを繋げるだけです。
例えば「car」のみを検出し、それをくり抜いて保存したいなら
!python detect.py --source /content/sample.jpg --save-crop --class 2
を実行します。するとフォルダには車のみのくり抜かれた画像が保存されます。


終わりに
ほかにも、YOLOv5には色々なコマンドがあるので、ぜひ調べてみてください。