目次
- Column, Row, Box
- サンプルコード
- まとめ
1.Column, Row, Box
Column‥アイテムを画面上の垂直方向に配置するために使用する。
Row‥アイテムを画面上の水平方向に配置するために使用する。
Box‥アイテムをアイテムの上に配置するために使用する。
2.サンプルコード
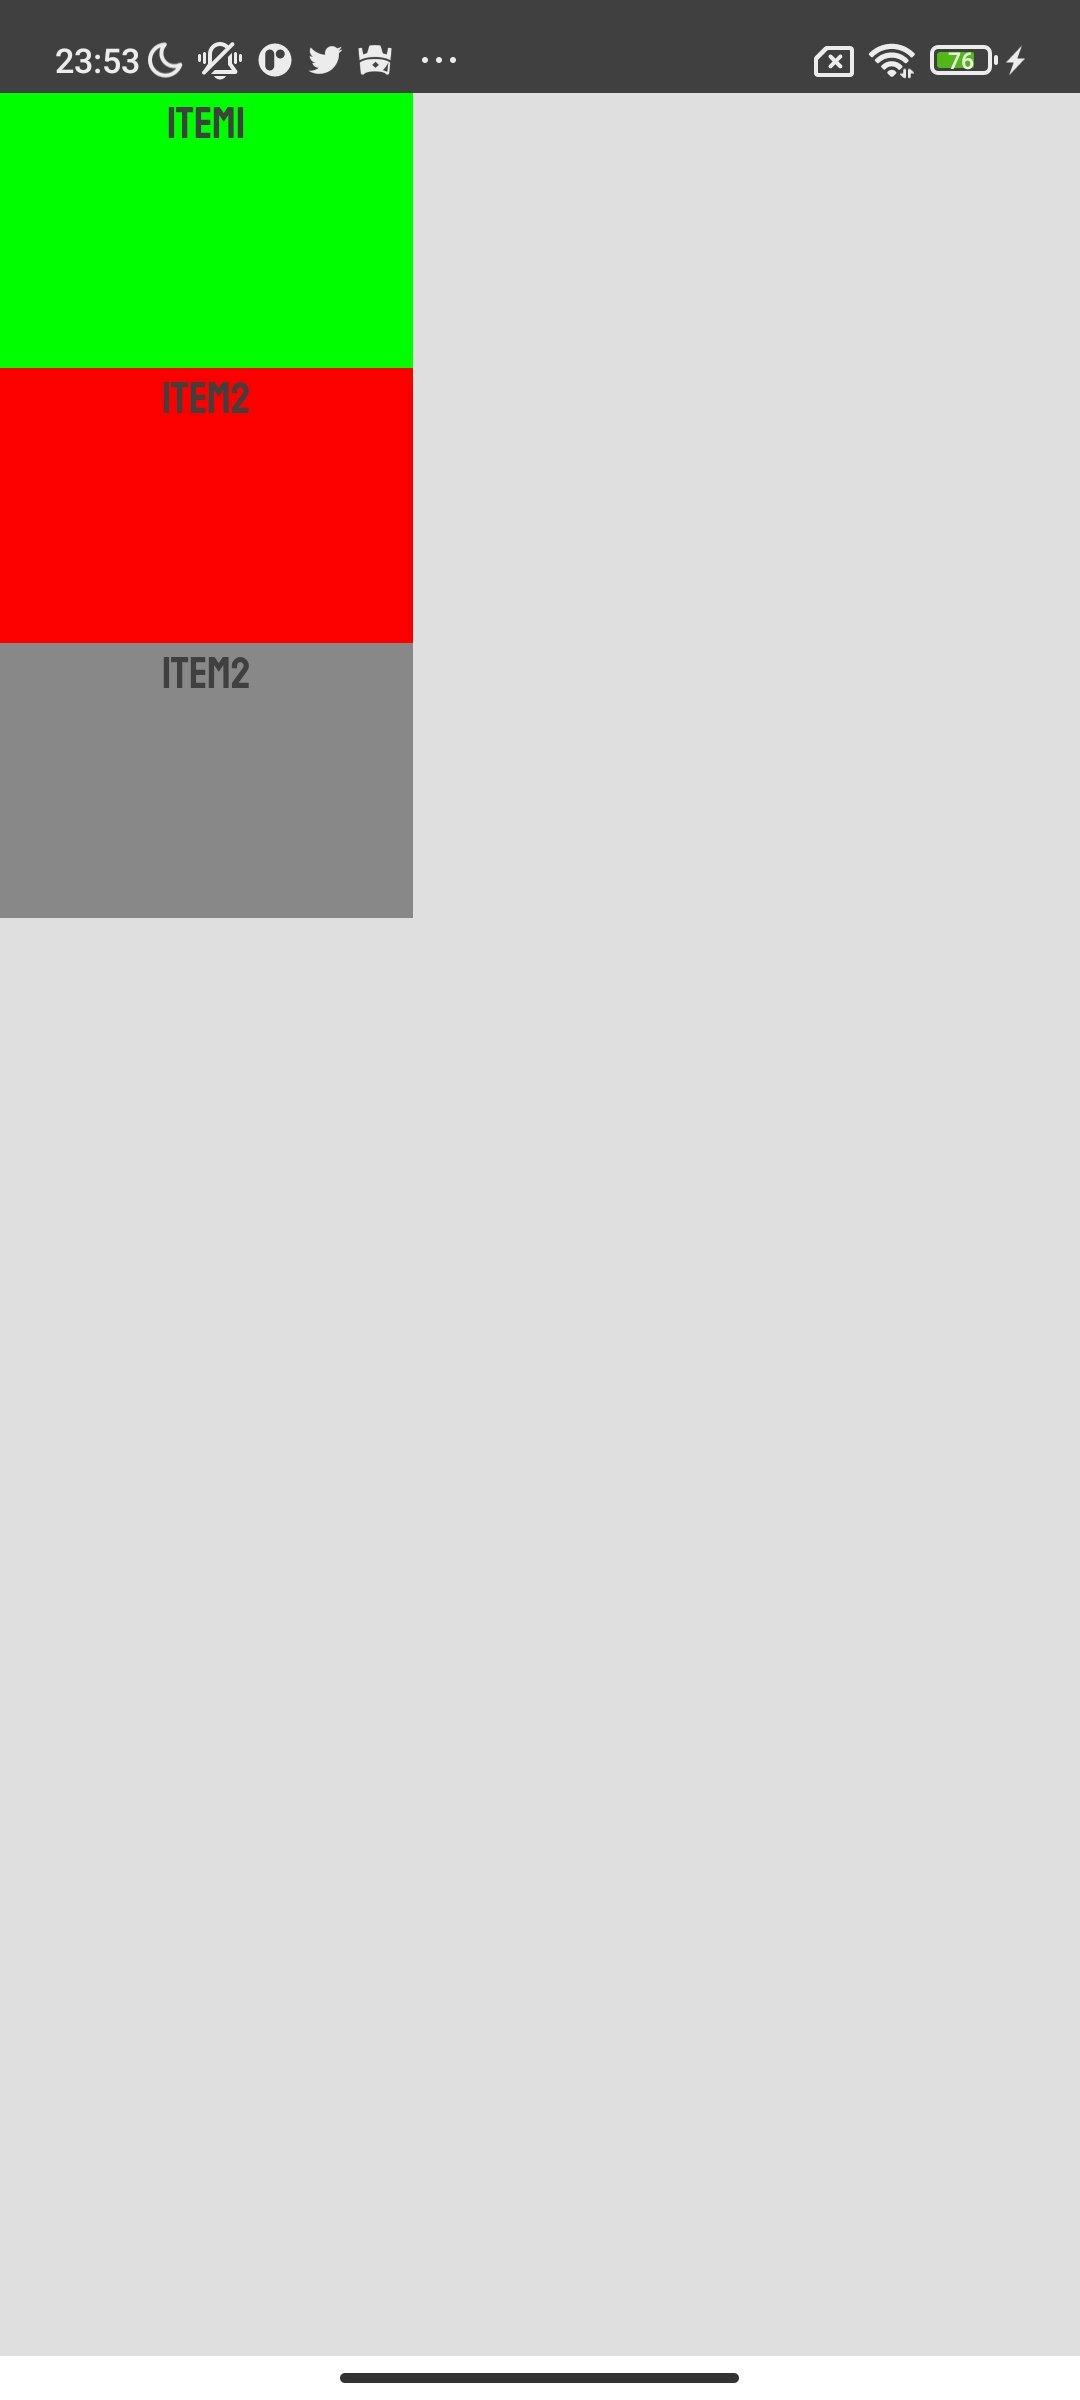
Column
@Composable
fun UnderstandColumn() {
    Column(
            modifier = Modifier
                .fillMaxSize()
        ) {

            Surface(
                modifier = Modifier
                    .width(150.dp)
                    .height(100.dp),
                color = Color.Green
            ) {
                Text(text = "Item1", color = TextBlack, textAlign = TextAlign.Center)
            }

            Surface(
                modifier = Modifier
                    .width(150.dp)
                    .height(100.dp),
                color = Color.Red
            ) {
                Text(text = "Item2", color = TextBlack, textAlign = TextAlign.Center)
            }

            Surface(
                modifier = Modifier
                    .width(150.dp)
                    .height(100.dp),
                color = Color.Gray
            ) {
                Text(text = "Item2", color = TextBlack, textAlign = TextAlign.Center)
            }
      }
}
このサンプルコードは、以下のようになります。
ここで、UIの要素を任意の場所に動かすために以下の引数を考えます。
verticalArrangementは、テキストで示しているような配置をとることができます。
horizontalAlignmentは、テキストで示しているような配置をとることができます。
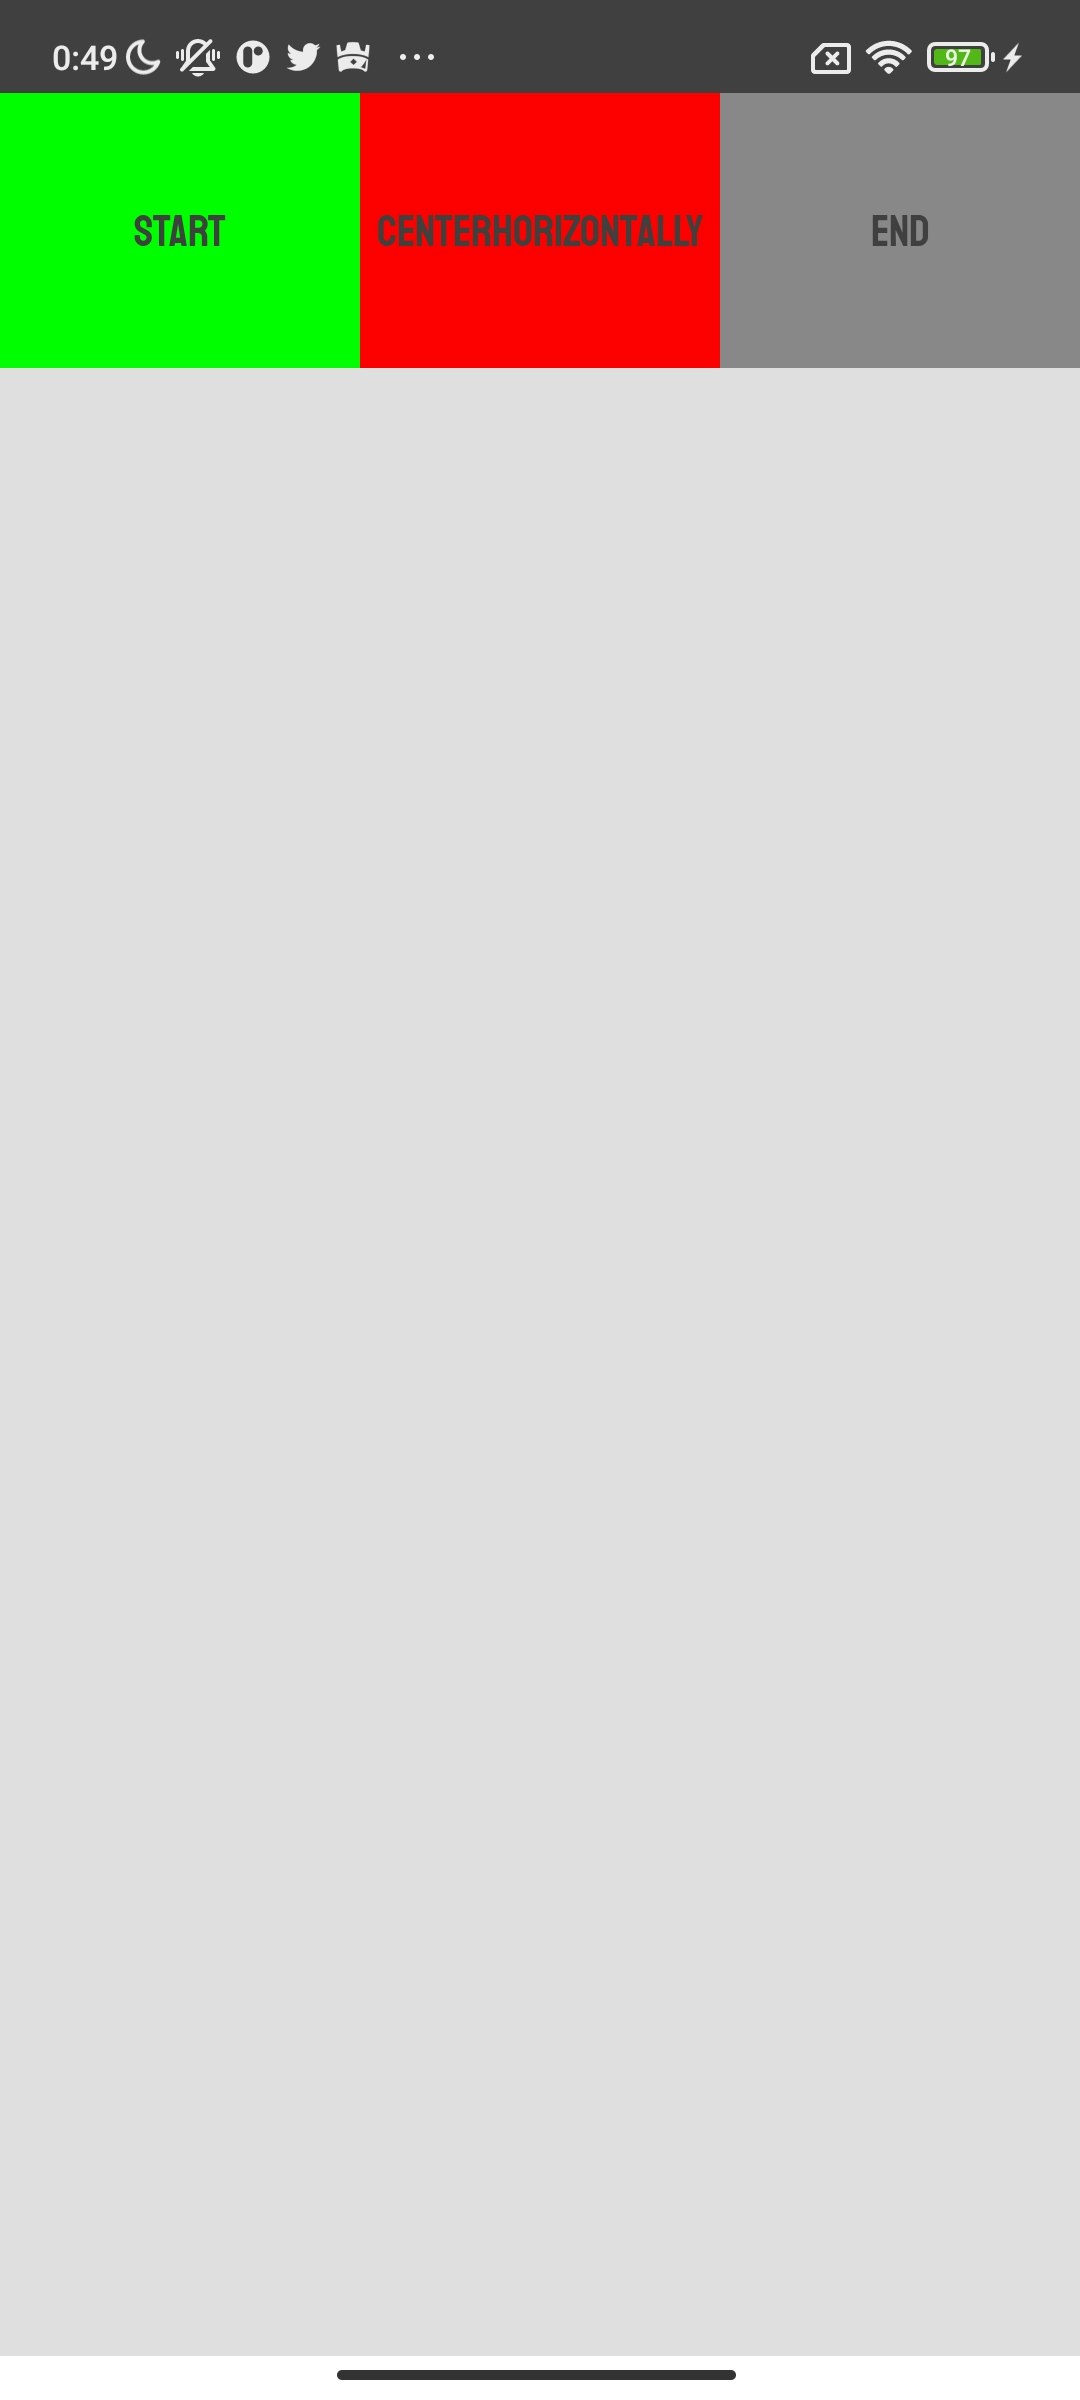
Row
    Row(
            modifier = Modifier
                .fillMaxSize(),
            verticalAlignment = Alignment.Top
        ) {

            Surface(
                modifier = Modifier
                    .weight(1f)
                    .height(100.dp),
                color = Color.Green
            ) {

                Column(
                    horizontalAlignment = Alignment.CenterHorizontally,
                    verticalArrangement = Arrangement.Center
                ) {
                    Text(text = "Item1", color = TextBlack)
                }
            }

            Surface(
                modifier = Modifier
                    .weight(1f)
                    .height(100.dp),
                color = Color.Red
            ) {

                Column(
                    horizontalAlignment = Alignment.CenterHorizontally,
                    verticalArrangement = Arrangement.Center
                ) {
                    Text(text = "item2", color = TextBlack)
                }
            }

            Surface(
                modifier = Modifier
                    .weight(1f)
                    .height(100.dp),
                color = Color.Gray
            ) {

                Column(
                    horizontalAlignment = Alignment.CenterHorizontally,
                    verticalArrangement = Arrangement.Center
                ) {
                    Text(text = "item3", color = TextBlack)
                }
            }
        }
このサンプルコードは、以下のようになります。

Columnと同様に、任意の場所に要素を配置したいときはに次の2つの引数に値を与えることで配置することができますが、Columnのときと混同しないように注意が必要です。
horizontalArrangementは、テキストで示しているような配置をとることができます。

verticalAlignmentは、テキストで示しているような配置をとることができます。
Box
Image上に、チェックマークを以下のコードに示す。
        Box(
            modifier = Modifier.fillMaxSize(),
            contentAlignment = Alignment.Center
        ) {
            Image(
                painter = painterResource(id = R.drawable.ic_launcher_foreground),
                contentDescription = null,
                contentScale = ContentScale.Crop,
                modifier = Modifier
                    .size(60.dp)
                    .clip(CircleShape)
                    .background(BackgroundBlack)
            )
            Icon(
                painter = painterResource(id = R.drawable.ic_check),
                contentDescription = null,
                tint = ButtonBackgroundRed,
                modifier = Modifier.offset(2.dp,15.dp),
            )
        }

アイテムをアイテムの上に配置するためにBoxを使用し、Image上にIconを上記のように表示することができた。
3.まとめ
Jetpack Composeで、UIを構成するための基礎をまとめました。Animation, Scaffold, Modifier(修飾詞)などを別の記事で紹介したいと思います。