はじめに
前回の記事で evision と Image モジュールを連携させました
今回はそれを利用して、 evision で顔を検出して Image でモザイク加工します
いつものように Livebook を使います
実装したノートブックはコチラ
実行環境
- Elixir: 1.14.2 OTP 24
- Livebook: 0.8.1
以下のリポジトリーの Docker コンテナ上で起動しています
Docker が使える環境であれば簡単に実行できます
https://docs.docker.com/engine/install/
Docker Desktop を無償利用できない場合は Rancher Desktop を使ってください
セットアップ
必要なモジュールをインストールします
Mix.install([
  {:image, "~> 0.24"},
  {:evision, "~> 0.1"},
  {:req, "~> 0.3"},
  {:kino, "~> 0.8"}
])
Req は画像やモデルファイルを Web からダウンロードするのに使っています
画像の読込
毎度の如くレナさんの画像をダウンロードしてきます
まず最初は Image.from_binary で読み込み、 Vix.Vips.Image の形にしておきます
lenna_img =
  "https://upload.wikimedia.org/wikipedia/en/7/7d/Lenna_%28test_image%29.png"
  |> Req.get!()
  |> then(& &1.body)
  |> Image.from_binary()
  |> elem(1)
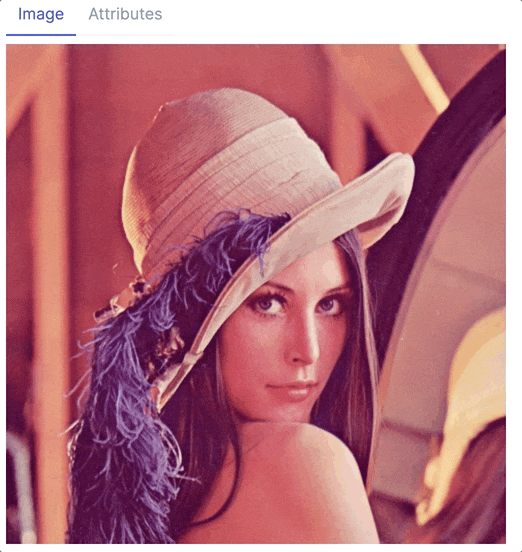
Vix.Vips.Image の場合、画像自体と属性情報のタブが表示されます
顔検出モデルの準備
evision (OpenCV) で使うカスケード分類器のモデルを用意します
詳しくは以前の記事を参照してください
face_model_path = "face_model.xml"

"https://github.com/opencv/opencv/raw/master/data/haarcascades/haarcascade_frontalface_default.xml"
|> Req.get!(connect_options: [timeout: 300_000], output: face_model_path)

face_model = Evision.CascadeClassifier.cascadeClassifier(face_model_path)
顔を検出する
顔検出は evision で行うので、画像を Evision.Mat に変換してからカスケード分類器にかけます
face_rect =
  {left, top, width, height} =
  lenna_img
  |> Image.to_evision()
  |> elem(1)
  |> then(&Evision.CascadeClassifier.detectMultiScale(face_model, &1))
  |> List.first()
今回は顔が一つなのでリストの先頭を取り出し、顔の左上XY座標、幅、高さを取得します
実行結果は以下の値になります
{217, 201, 173, 173}
顔にモザイクをかける
Image モジュールの crop 関数で簡単に画像を切り取れます
face_img = Image.crop!(lenna_img, left, top, width, height)

また、 pixelate 関数で簡単にモザイク処理できます(evision でもモザイクは可能ですが、少し手間が多いです)
pixelated_face_img = Image.pixelate!(face_img)

モザイク加工した顔画像を compose 関数で元の位置に貼り付ければ完成です
pixelated_lenna_img = Image.compose!(lenna_img, pixelated_face_img, x: left, y: top)

モザイク処理を全てパイプで繋ぐと以下のようになります
lenna_img
|> Image.crop!(left, top, width, height)
|> Image.pixelate!()
|> then(&Image.compose!(lenna_img, &1, x: left, y: top))
ね、簡単でしょ?
まとめ
OpenCV と libvips のいいとこ取りができるので、かなり書きやすいです