はじめに
Elixir の Image モジュールで画像に写っているものを識別します
内部的には機械学習モデルによる推論が実行されていますが、Image モジュールではシンプルに使えるようになっています
実装したノートブックはこちら
セットアップ
必要なモジュールをインストールします
Mix.install(
  [
    {:image, "~> 0.52"},
    {:bumblebee, "~> 0.5"},
    {:exla, "~> 0.7"},
    {:kino, "~> 0.13"}
  ],
  config: [
    nx: [
      default_backend: EXLA.Backend,
      default_defn_options: [compiler: EXLA]
    ]
  ]
)
Nx と Bumblebee、 EXLA の全てがインストールされていないと Image.Classification モジュールが読み込めません
Bumblebee をインストールした時点で Nx は付随されるため、省略可能です
画像の準備
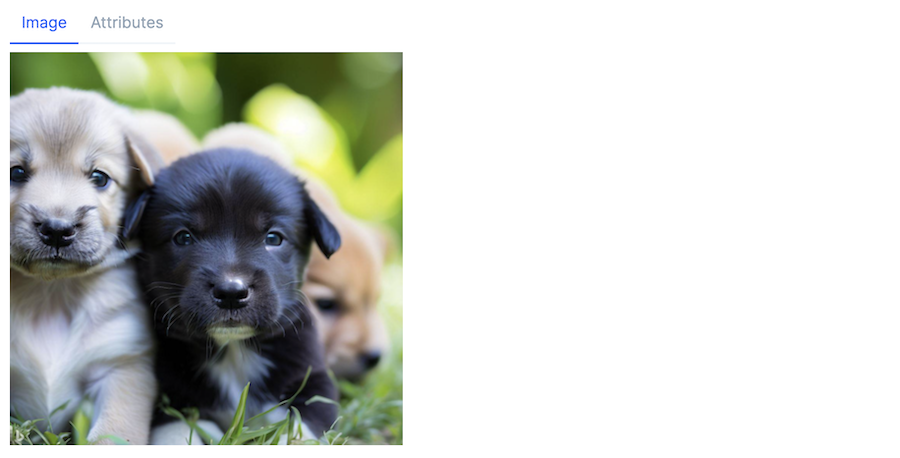
任意の画像を読み込みます
puppies_img = Image.open!("/home/livebook/vix/puppies.png")
画像の識別
ラベル名だけの取得
Image.Classification.labels で識別結果のラベル名だけが配列として返ってきます
Image.Classification.labels(puppies_img)
実行結果
["golden retriever"]
デフォルトでは確信度 0.5 以上のラベルを返します
第2引数で min_score: 0.3 のように閾値を指定できます
ラベル名と確信度の取得
Image.Classification.classify でラベルと確信度の組み合わせを配列で取得できます
Image.Classification.classify(puppies_img)
実行結果
%{
  predictions: [
    %{label: "golden retriever", score: 0.545122504234314},
    %{label: "Labrador retriever", score: 0.07027861475944519},
    %{label: "Tibetan mastiff", score: 0.06626683473587036},
    %{label: "flat-coated retriever", score: 0.03985850512981415},
    %{label: "Border collie", score: 0.027414413169026375}
  ]
}
Kino.DataTable と組み合わせれば、表形式で出力可能です
puppies_img
|> Image.Classification.classify()
|> Map.get(:predictions)
|> Kino.DataTable.new()
実行結果

任意モデルでの画像識別
Image.Classification.classifier を使うことで、任意の画像識別モデルを使用できます
まずはデフォルトの画像識別モデル(この記事内でこれまで使っていたものと同じモデル)を使ってみます
デフォルトの画像識別モデルは HuggingFace 上に公開されている "microsoft/resnet-50" というモデルです
デフォルトなのでオプションを指定しません
{_, classifier} = Image.Classification.classifier()
実行結果
{Nx.Serving,
 [
   serving: %Nx.Serving{
     module: Nx.Serving.Default,
     arg: #Function<1.94186835/1 in Bumblebee.Vision.ImageClassification.image_classification/3>,
     client_preprocessing: #Function<2.94186835/1 in Bumblebee.Vision.ImageClassification.image_classification/3>,
     client_postprocessing: #Function<3.94186835/2 in Bumblebee.Vision.ImageClassification.image_classification/3>,
     streaming: nil,
     batch_size: 10,
     distributed_postprocessing: &Function.identity/1,
     process_options: [],
     defn_options: [compiler: EXLA]
   },
   name: Image.Classification.Server,
   batch_timeout: 100
 ]}
以下のようにして画像識別モデルを Nx.Serving の形式で取得できます
serving = Keyword.get(classifier, :serving)
実行結果
%Nx.Serving{
  module: Nx.Serving.Default,
  arg: #Function<1.94186835/1 in Bumblebee.Vision.ImageClassification.image_classification/3>,
  client_preprocessing: #Function<2.94186835/1 in Bumblebee.Vision.ImageClassification.image_classification/3>,
  client_postprocessing: #Function<3.94186835/2 in Bumblebee.Vision.ImageClassification.image_classification/3>,
  streaming: nil,
  batch_size: 10,
  distributed_postprocessing: &Function.identity/1,
  process_options: [],
  defn_options: [compiler: EXLA]
}
取得した serving を使って、以下のように画像識別が実行できます
serving
|> Nx.Serving.run(Image.to_nx!(puppies_img))
|> Map.get(:predictions)
|> Kino.DataTable.new()
これまでと同じモデルなので結果も同じになります
Image.Classification.classifier にオプションを指定することで、違うモデルが使用できます
{_, classifier} = Image.Classification.classifier(
  model: {:hf, "google/vit-base-patch16-224"},
  featurizer:  {:hf, "google/vit-base-patch16-224"}
)

serving = Keyword.get(classifier, :serving)

serving
|> Nx.Serving.run(Image.to_nx!(puppies_img))
|> Map.get(:predictions)
|> Kino.DataTable.new()
実行結果

まとめ
Bumblebee でも簡単に画像識別を実行できますが、 Image モジュールでは更に簡単に、機械学習モデルを意識せずに画像識別を実行できます
単純な分類をしたいだけの場合、 Image.Classification.labels を使えば実装は超シンプルです