はじめに
前回の記事で Cloudflare R2 を紹介しました
その特徴の一つに、 Amazon S3 との互換性があります
AWS CLI や Cyberduck などは、上記の記事で S3 と同じように操作できることを確認しました
本記事では、以前書いた「Livebook で AWS S3 のデータを分析したり画像処理したり」の記事とほぼ同じコードで Cloudflare R2 を操作します
実装はいつもの通り Livebook で行います
実装したノートブックはこちら
S3 と設定の項目が違うだけで、操作自体は全く同じコードす
事前作業
以下の記事を参考に、 R2 のバケット、 R2 用のアクセスキーID、シークレットアクセスキーを用意してください
また、バケットには適当なファイルを10個以上アップロードしておきましょう
セットアップ
S3 を操作するときと同じく、 ex_aws と ex_aws_s3 をインストールします
また、ファイル一覧などを表形式にするため Explorer 、画像ファイルを画像処理するために Evision などもインストールします
Mix.install([
  {:ex_aws, "~> 2.5"},
  {:ex_aws_s3, "~> 2.4"},
  {:poison, "~> 5.0"},
  {:hackney, "~> 1.20"},
  {:sweet_xml, "~> 0.7"},
  {:explorer, "~> 0.7"},
  {:evision, "~> 0.1.33"},
  {:req, "~> 0.3"},
  {:kino, "~> 0.12"}
])
エイリアスやマクロの準備をしておきます
alias ExAws.S3
alias Explorer.DataFrame
alias Explorer.Series
require Explorer.DataFrame
認証情報の入力
認証情報入力用の UI を作ります
Livebook の Secrets を使っても OK です
access_key_id_input = Kino.Input.password("ACCESS_KEY_ID")
secret_access_key_input = Kino.Input.password("SECRET_ACCESS_KEY")
endpoint_host_input = Kino.Input.text("ENDPOINT_HOST")

[
  access_key_id_input,
  secret_access_key_input,
  endpoint_host_input
]
|> Kino.Layout.grid(columns: 3)
表示された入力エリアに R2 用のアクセスキーID、シークレットアクセスキー、エンドポイントのホスト名(エンドポイント URL の http:// を除いたもの)を入力します

以下のコードで接続用の認証情報を設定します
auth_config = [
  access_key_id: Kino.Input.read(access_key_id_input),
  secret_access_key: Kino.Input.read(secret_access_key_input),
  host: Kino.Input.read(endpoint_host_input)
]

Kino.nothing()
Amazon S3 の場合、 region を指定していましたが、その代わりに host を指定することで、 Cloudflare R2 のエンドポイントに接続できます
ここから先は S3 と全く同じコードです
バケット一覧の取得
S3 のときと同様、 S3.list_buckets() でバケットの一覧が取得できます
S3.list_buckets()
|> ExAws.request(auth_config)
実行結果
{:ok,
 %{
   body: %{
     owner: %{
       id: "xxx",
       display_name: "xxx"
     },
     buckets: [
       %{name: "rwakabay", creation_date: "2024-02-07T00:24:44.741Z"},
       %{name: "rwakabay-2", creation_date: "2024-02-08T00:15:34.055Z"}
     ]
   },
   headers: [
     {"Date", "Fri, 09 Feb 2024 05:37:46 GMT"},
     {"Content-Type", "application/xml"},
     {"Content-Length", "453"},
     {"Connection", "keep-alive"},
     {"cf-truncated", "false"},
     {"Server", "cloudflare"},
     {"CF-RAY", "xxx-KIX"}
   ],
   status_code: 200
 }}
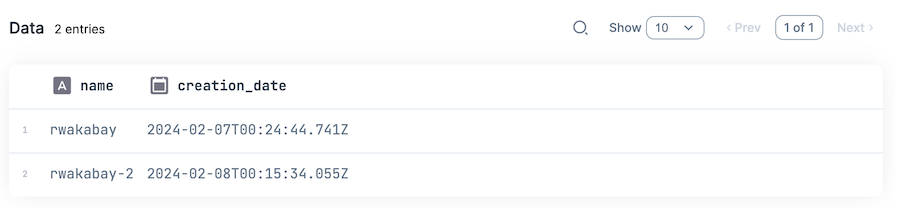
以下のようにしてバケット一覧を表形式で表示できます
S3.list_buckets()
|> ExAws.request!(auth_config)
|> then(& &1.body.buckets)
|> DataFrame.new()
|> DataFrame.select(["name", "creation_date"])
|> Kino.DataTable.new()
ファイル一覧の取得
バケット名を入力します
bucket_name_input = Kino.Input.text("BUCKET_ANME")

S3.list_objects_v2 でファイル一覧が取得できます
max_keys で一度に取得するファイル数(1 ページ分のファイル数)を指定しています
{contents, next_continuation_token} =
  bucket_name_input
  |> Kino.Input.read()
  |> S3.list_objects_v2(max_keys: 10)
  |> ExAws.request!(auth_config)
  |> then(&{&1.body.contents, &1.body.next_continuation_token})
実行結果
{[
   %{
     owner: nil,
     size: "0",
     key: "others/",
     last_modified: "2024-02-09T05:42:53.694Z",
     storage_class: "STANDARD",
     e_tag: "\"d41d8cd98f00b204e9800998ecf8427e\""
   },
   ...
   ],
 "xxx"}
取得した next_continuation_token を使って、次のページを取得することができます
bucket_name_input
|> Kino.Input.read()
|> S3.list_objects_v2(max_keys: 10, continuation_token: next_continuation_token)
|> ExAws.request!(auth_config)
|> then(&{&1.body.contents, &1.body.next_continuation_token})
実行結果
{[
   %{
     owner: nil,
     size: "249972",
     key: "ryo/ryo-000.png",
     last_modified: "2024-02-09T05:43:33.060Z",
     storage_class: "STANDARD",
     e_tag: "\"d10f45f7c326ecbd54b34db3b2055b5e\""
   },
   ...
   ],
 "xxx"}
全ファイルの一覧を取得するモジュールは以下のようになります
defmodule S3LS do
  def get_contents(continuation_token, bucket_name, auth_config) do
    bucket_name
    |> S3.list_objects_v2(max_keys: 10, continuation_token: continuation_token)
    |> ExAws.request!(auth_config)
    |> then(&{&1.body.contents, &1.body.next_continuation_token})
  end

  def get_contents_cyclic(continuation_token, bucket_name, auth_config) do
    {contents, next_token} = get_contents(continuation_token, bucket_name, auth_config)

    case next_token do
      # 空であれば次ページを取得しない
      "" ->
        contents

      # 空以外の場合は次ページを取得する
      _ ->
        contents ++ get_contents_cyclic(next_token, bucket_name, auth_config)
    end
  end

  def get_all_contents(bucket_name, auth_config) do
    get_contents_cyclic(nil, bucket_name, auth_config)
  end
end
ファイルアップロード
アップロードする画像ファイルを Web からダウンロードしておきます
lenna_path = "lenna.png"

"https://upload.wikimedia.org/wikipedia/en/7/7d/Lenna_%28test_image%29.png"
|> Req.get!(into: File.stream!(lenna_path))
ローカルファイルのアップロード
S3.Upload.stream_file と S3.upload でファイルをアップロードできます
lenna_path
|> S3.Upload.stream_file()
|> S3.upload(Kino.Input.read(bucket_name_input), "lenna.png")
|> ExAws.request!(auth_config)
インメモリのアップロード
画像ファイルを evision で読み込んでおきます
mat = Evision.imread(lenna_path)
S3.put_object でインメモリのバイナリデータをアップロードできます
bucket_name_input
|> Kino.Input.read()
|> S3.put_object("lenna_2.png", Evision.imencode(".png", mat))
|> ExAws.request!(auth_config)
ファイルダウンロード
ローカルファイルへのダウンロード
S3.download_file で R2 上のファイルをダウンロードできます
bucket_name_input
|> Kino.Input.read()
|> S3.download_file("lenna.png", "lenna_downloaded.png")
|> ExAws.request!(auth_config)
インメモリへのダウンロード
S3.get_object でバイナリデータとしてダウンロードできます
bucket_name_input
|> Kino.Input.read()
|> S3.get_object("lenna.png")
|> ExAws.request!(auth_config)
|> then(&Evision.imdecode(&1.body, Evision.Constant.cv_IMREAD_COLOR()))
まとめ
ex_aws に対して、 region の代わりに host を指定するだけで、 S3 と全く同じコードで操作できました
S3 から R2 に移行しても、設定だけ変えれば同じコードで使える、と言うことですね