はじめに
今まで散々 Livebook を使ってきましたが、いよいよ内側に入っていきたいと思います
つまり、 Livebook のセルを改造し、まだ実装されていない処理を動かしてみます
とはいえ、そんなに大それた話ではなく、カスタム方法は普通に公式ドキュメントに記載されています
なので、単純にドキュメントに従ってカスタマイズしていきます
せっかくなので、 Three.js を使った3Dレンダリングを実装してみましょう
実装したノートブックはこちら
副題は Kino のモジュール名を見たときからいつかやろうと思っていました
Kino と組み合わせて使える Hermes なんてモジュールがあったらステキだな
セットアップ
何はともあれ Kino をインストールします
Kino は Livebook 上でリッチな UI/UX を実現してくれる最高のモジュールです
Mix.install([
  {:kino, "~> 0.8"}
])
Kino.JS
まずはシンプルな例です
HTML のレンダリング
公式ドキュメントの例を動かしてみましょう
defmodule KinoDocs.HTML do
  use Kino.JS

  def new(html) do
    Kino.JS.new(__MODULE__, html)
  end

  asset "main.js" do
    """
    export function init(ctx, html) {
      ctx.importCSS("https://fonts.googleapis.com/css?family=Sofia")
      ctx.importCSS("main.css")

      ctx.root.innerHTML = html;
    }
    """
  end

  asset "main.css" do
    """
    body {
      font-family: "Sofia", sans-serif;
    }
    """
  end
end
カスタマイズの仕方は簡単で、 asset "main.js" do ... end に JavaScript で処理を記述するだけです
ctx.root が実行時の出力結果になる HTML 要素なので、その中に好きな HTML を入れれば何でも作れます
スタイルは外部のスタイルシートを ctx.importCSS でインポートしても良いし、 asset "main.css" do ... end で自分で定義した CSS をインポートすることもできます
上記の KinoDocs.HTML モジュールは new 関数で受け取った HTML 文をレンダリングし、特殊なフォントを適用しています
実行してみましょう
KinoDocs.HTML.new("""
<div>
  Hello
  <ul>
    <li>World</li>
    <li>Elixir</li>
    <li>Livebook</li>
    <li>Kino</li>
  </ul>
</div>
""")
結果は以下のようになります
HTML で書いたリストがちゃんと描画され、フォントは何だかオシャレになっています
リスト表示
自分でモジュールを実装してみます
defmodule KinoCustom.List do
  use Kino.JS

  def new(element) do
    element
    |> generate_html()
    |> then(&Kino.JS.new(__MODULE__, "<div>#{&1}</div>"))
  end

  defp generate_html(element) when is_list(element) do
    if Keyword.keyword?(element) do
      element
      |> Enum.into(%{})
      |> generate_html()
    else
      element
      |> Enum.map(&"#{generate_html(&1)}")
      |> then(& "<ul>#{&1}</ul>")
    end
  end

  defp generate_html(element) when is_tuple(element) do
    element
    |> Tuple.to_list()
    |> generate_html()
  end

  defp generate_html(element) when is_map(element)  do
    element
    |> Enum.map(fn {key, value} ->
      cond do
        is_binary(value) or is_atom(value) or is_number(value) ->
          "#{value}"
        true ->
          generate_html(value)
      end
      |> then(&"#{key}: #{&1}")
      |> generate_html()
    end)
  end

  defp generate_html(element)
    when is_binary(element) or is_atom(element) or is_number(element) do
    "<li>#{element}</li>"
  end

  asset "main.js" do
    """
    export function init(ctx, html) {
      ctx.importCSS("main.css")
      ctx.root.innerHTML = html;
    }
    """
  end

  asset "main.css" do
    """
    li {
      color: rgb(79, 53, 96);
      width: fit-content;
    }

    li::marker {
      content: "- ";
    }
    """
  end
end
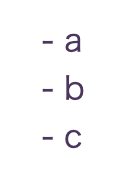
配列やマップを HTML のリスト要素として表示します
new 関数で generate_html を呼び、再帰的に HTML 文を生成するようにしてみました
KinoCustom.List.new(["a", "b", "c"])
KinoCustom.List.new(
  [
    "a",
    %{"b" => ["b1", "b2"]},
    %{c: {%{c1: "A"}, "c2", [1, 2]}},
    [d1: 10, d2: [21, 22]]
  ]
)
Mermaid による作図
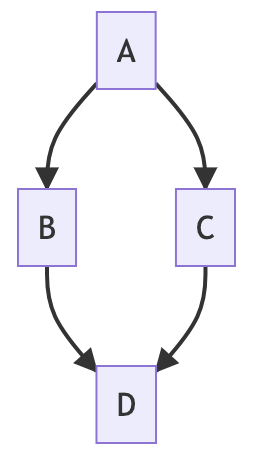
こちらも Kino 公式ドキュメントに記載されている例です
Mermaid を使って作図します
defmodule KinoDocs.Mermaid do
  use Kino.JS

  def new(graph) do
    Kino.JS.new(__MODULE__, graph)
  end

  asset "main.js" do
    """
    import "https://cdn.jsdelivr.net/npm/mermaid@9.1.3/dist/mermaid.min.js";

    mermaid.initialize({ startOnLoad: false });

    export function init(ctx, graph) {
      mermaid.render("graph1", graph, (svgSource, bindListeners) => {
        ctx.root.innerHTML = svgSource;
        bindListeners && bindListeners(ctx.root);
      });
    }
    """
  end
end
JavaScript の import を使って外部のモジュールを読み込んで利用しています
KinoDocs.Mermaid.new("""
graph TD;
  A-->B;
  A-->C;
  B-->D;
  C-->D;
""")
Three.js による3Dレンダリング
同じように Three.js を読み込んで3Dレンダリングしてみます
といっても私も Three.js には詳しくないので以下のサイトを参考にしました
defmodule KinoCustom.Three do
  use Kino.JS

  def new(color) do
    Kino.JS.new(__MODULE__, color)
  end

  asset "main.js" do
    """
    import "https://unpkg.com/three@0.142.0/build/three.min.js";

    export function init(ctx, color) {
      const canvas = document.createElement("canvas");
      ctx.root.appendChild(canvas);

      const renderer = new THREE.WebGLRenderer({canvas: canvas});
      const width = 320;
      const height = 320;
      renderer.setSize(width, height);

      const scene = new THREE.Scene();

      const camera = new THREE.PerspectiveCamera(45, width / height, 1, 1000);

      camera.position.set(0, 0, 500);

      const size = 80;
      const geometry = new THREE.BoxGeometry(size, size, size);
      const material = new THREE.MeshStandardMaterial({color: color});

      const box = new THREE.Mesh(geometry, material);
      scene.add(box);

      const light = new THREE.DirectionalLight(0xffffff);
      light.intensity = 2;
      light.position.set(1, 1, 1);
      scene.add(light);

      light.position.set(1, 1, 1);

      renderer.render(scene, camera);

      tick();

      function tick() {
        requestAnimationFrame(tick);

        box.rotation.x += 0.05;
        box.rotation.y -= 0.05;

        renderer.render(scene, camera);
      }
    }
    """
  end
end
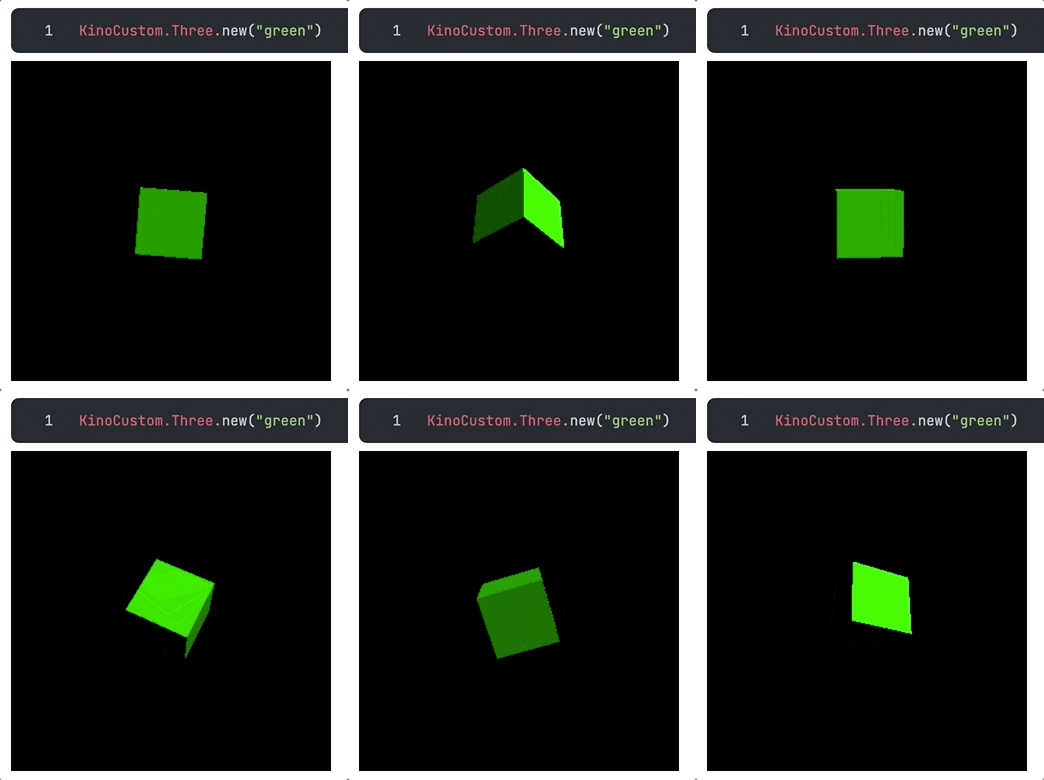
document.createElement で canvas を作り、そこにレンダリングしています
KinoCustom.Three.new("green")
Livebook 上で見事に立方体が回転しました
Kino.JS.Live
次は実行後に出力を変化させます
HTML の更新
defmodule KinoDocs.LiveHTML do
  use Kino.JS
  use Kino.JS.Live

  def new(html) do
    Kino.JS.Live.new(__MODULE__, html)
  end

  def replace(kino, html) do
    Kino.JS.Live.cast(kino, {:replace, html})
  end

  @impl true
  def init(html, ctx) do
    {:ok, assign(ctx, html: html)}
  end

  @impl true
  def handle_connect(ctx) do
    {:ok, ctx.assigns.html, ctx}
  end

  @impl true
  def handle_cast({:replace, html}, ctx) do
    broadcast_event(ctx, "replace", html)
    {:noreply, assign(ctx, html: html)}
  end

  asset "main.js" do
    """
    export function init(ctx, html) {
      ctx.root.innerHTML = html;

      ctx.handleEvent("replace", (html) => {
        ctx.root.innerHTML = html;
      });
    }
    """
  end
end
new で最初に HTML をレンダリングした後、 replace で更新できるようになっています
ctx.handleEvent で変更時( replace イベント発生時)の処理を定義しています
list = KinoDocs.LiveHTML.new("""
<h1>Hello</h1>
""")
最初の時点でこのセルの出力は以下のようになります
次のセルで以下のコードを実行します
KinoDocs.LiveHTML.replace(list, """
<h2 style="color: red">World</h2>
""")
すると、このセル自体の出力は :ok になり、前の Hello だったセルが以下のように更新されます
プログレスバー
div の幅を変更するようにして、プログレスバーのような出力を実装してみましょう
defmodule KinoCustom.Bar do
  use Kino.JS
  use Kino.JS.Live

  def new(width) do
    Kino.JS.Live.new(__MODULE__, width)
  end

  def update(kino, width) do
    Kino.JS.Live.cast(kino, {:update, width})
  end

  @impl true
  def init(html, ctx) do
    {:ok, assign(ctx, html: html)}
  end

  @impl true
  def handle_connect(ctx) do
    {:ok, ctx.assigns.html, ctx}
  end

  @impl true
  def handle_cast({:update, width}, ctx) do
    broadcast_event(ctx, "update", width)
    {:noreply, assign(ctx, width: width)}
  end

  asset "main.js" do
    """
    export function init(ctx, width) {
      const bar = document.createElement("div");
      bar.className = "bar";
      bar.style.width = width;
      bar.style.height = "40px";
      bar.style.backgroundColor = "red";

      ctx.root.appendChild(bar);

      ctx.handleEvent("update", (width) => {
        bar.style.width = width
      });
    }
    """
  end
end
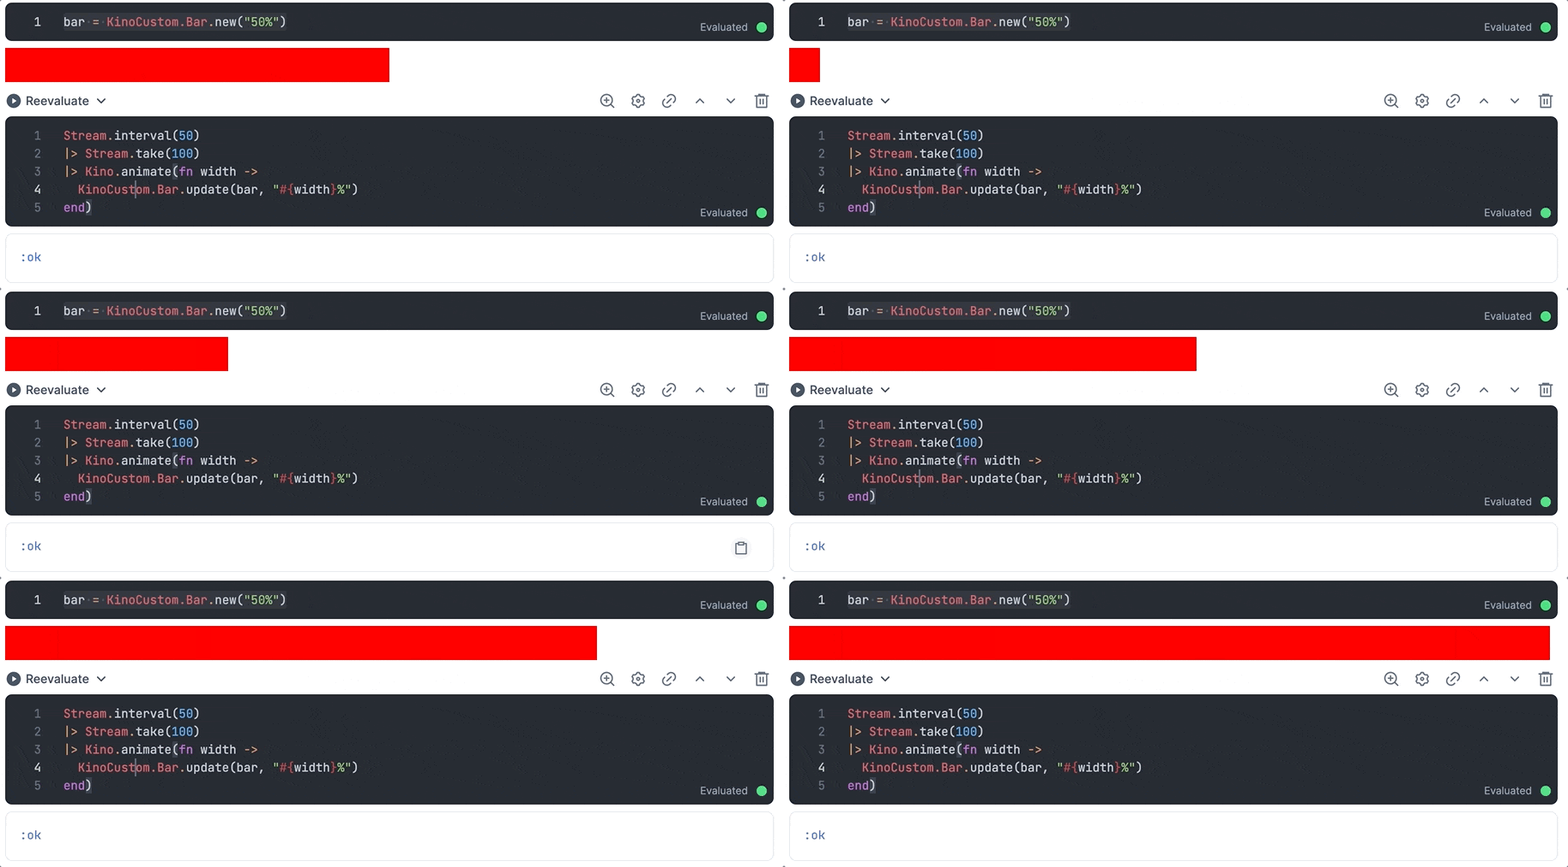
初期状態は 50% にしてみます
bar = KinoCustom.Bar.new("50%")
これをアニメーションで動かします
Stream.interval(50)
|> Stream.take(100)
|> Kino.animate(fn width ->
  KinoCustom.Bar.update(bar, "#{width}%")
end)
こんな感じで動きます
Kino.SmartCell
最後にスマートセルで、入力もカスタマイズします
プレーンテキストエリア
セルをシンプルなテキストエリアにします
出力は変わりません
defmodule Kino.SmartCell.Plain do
  use Kino.JS
  use Kino.JS.Live
  use Kino.SmartCell, name: "Plain code editor"

  @impl true
  def init(attrs, ctx) do
    source = attrs["source"] || ""
    {:ok, assign(ctx, source: source)}
  end

  @impl true
  def handle_connect(ctx) do
    {:ok, %{source: ctx.assigns.source}, ctx}
  end

  @impl true
  def handle_event("update", %{"source" => source}, ctx) do
    broadcast_event(ctx, "update", %{"source" => source})
    {:noreply, assign(ctx, source: source)}
  end

  @impl true
  def to_attrs(ctx) do
    %{"source" => ctx.assigns.source}
  end

  @impl true
  def to_source(attrs) do
    attrs["source"]
  end

  asset "main.js" do
    """
    export function init(ctx, payload) {
      ctx.importCSS("main.css");

      ctx.root.innerHTML = `
        <textarea id="source"></textarea>
      `;

      const textarea = ctx.root.querySelector("#source");
      textarea.value = payload.source;

      textarea.addEventListener("change", (event) => {
        ctx.pushEvent("update", { source: event.target.value });
      });

      ctx.handleEvent("update", ({ source }) => {
        textarea.value = source;
      });

      ctx.handleSync(() => {
        // Synchronously invokes change listeners
        document.activeElement &&
          document.activeElement.dispatchEvent(new Event("change"));
      });
    }
    """
  end

  asset "main.css" do
    """
    #source {
      box-sizing: border-box;
      width: 100%;
      min-height: 100px;
    }
    """
  end
end
use Kino.SmartCell, name: でスマートセル追加時のドロップダウンに表示される名称を指定しています
addEventListener によって入力値の変化を捉えています
スマートセルを Livebook から使えるように登録します
Kino.SmartCell.register(Kino.SmartCell.Plain)
登録後、 +Smart を開くと、選択肢が追加されています
Plane code editor をクリックすると、以下のようなセルが表示されます
このセルに以下のように入力して実行します
target = "World"

"Hello, #{target}"
すると、以下のような結果が出力されます
"Hello, World"
カラーパレット
名前や16進数表示で色を指定すると、その色の div を出力する、カラーパレットを作ってみます
まず、出力の方を実装します
defmodule KinoCustom.Color do
  use Kino.JS
  use Kino.JS.Live

  def new(color) do
    Kino.JS.Live.new(__MODULE__, color)
  end

  @impl true
  def init(html, ctx) do
    {:ok, assign(ctx, html: html)}
  end

  @impl true
  def handle_connect(ctx) do
    {:ok, ctx.assigns.html, ctx}
  end

  @impl true
  def handle_cast({:update, color}, ctx) do
    broadcast_event(ctx, "update", color)
    {:noreply, assign(ctx, color: color)}
  end

  asset "main.js" do
    """
    export function init(ctx, color) {
      const bar = document.createElement("div");
      bar.style.width = "100%";
      bar.style.height = "40px";
      bar.style.backgroundColor = color;

      ctx.root.appendChild(bar);
    }
    """
  end
end
出力の動きを確認してみます
KinoCustom.Color.new("red")
結果は以下のように真っ赤になります
スマートセルを実装します
defmodule KinoCustom.Palette do
  use Kino.JS
  use Kino.JS.Live
  use Kino.SmartCell, name: "Palette"

  @impl true
  def init(attrs, ctx) do
    color = attrs["color"] || "white"
    {:ok, assign(ctx, color: color)}
  end

  @impl true
  def handle_connect(ctx) do
    {:ok, %{color: ctx.assigns.color}, ctx}
  end

  @impl true
  def handle_event("update", %{"color" => color}, ctx) do
    broadcast_event(ctx, "update", %{"color" => color})
    {:noreply, assign(ctx, color: color)}
  end

  @impl true
  def to_attrs(ctx) do
    %{"color" => ctx.assigns.color}
  end

  @impl true
  def to_source(attrs) do
    quote do
      KinoCustom.Color.new(unquote(attrs["color"]))
    end
    |> Kino.SmartCell.quoted_to_string()
  end

  asset "main.js" do
    """
    export function init(ctx, payload) {
      ctx.importCSS("main.css");

      const input = document.createElement("input");
      input.type = "text"
      input.value = payload.color;

      const output = document.createElement("output");
      output.style.color = payload.color;

      const rgbContainer = document.createElement("div");

      const rLabel = document.createElement("span");
      rLabel.innerText = "R: ";
      rgbContainer.appendChild(rLabel);
      const rValue = document.createElement("span");
      rValue.className = "color-value";
      rValue.innerText = "255";
      rgbContainer.appendChild(rValue);

      const gLabel = document.createElement("span");
      gLabel.innerText = "G: ";
      rgbContainer.appendChild(gLabel);
      const gValue = document.createElement("span");
      gValue.className = "color-value";
      gValue.innerText = "255";
      rgbContainer.appendChild(gValue);

      const bLabel = document.createElement("span");
      bLabel.innerText = "B: ";
      rgbContainer.appendChild(bLabel);
      const bValue = document.createElement("span");
      bValue.className = "color-value";
      bValue.innerText = "255";
      rgbContainer.appendChild(bValue);

      ctx.root.appendChild(input);
      ctx.root.appendChild(output);
      ctx.root.appendChild(rgbContainer);

      input.addEventListener("change", (event) => {
        ctx.pushEvent("update", { color: event.target.value });
      });

      ctx.handleEvent("update", ({ color }) => {
        input.value = color;
        output.style.color = color;

        const rgb =
          window
            .getComputedStyle(output)
            .color
            .replace("rgb(", "")
            .replace(")", "")
            .split(",")
            .map(ch => ch.trim());

        rValue.innerText = rgb[0];
        gValue.innerText = rgb[1];
        bValue.innerText = rgb[2];

        console.log(rgb);
      });

      ctx.handleSync(() => {
        document.activeElement &&
          document.activeElement.dispatchEvent(new Event("change"));
      });
    }
    """
  end

  asset "main.css" do
    """
    .color-value {
      margin-right: 16px;
    }
    """
  end
end
肝心なのは以下の箇所です
  @impl true
  def to_source(attrs) do
    quote do
      KinoCustom.Color.new(unquote(attrs["color"]))
    end
    |> Kino.SmartCell.quoted_to_string()
  end
to_source に出力内容を記載しますが、これを以下のようにするとエラーが発生します
  ## 悪い例
  @impl true
  def to_source(attrs) do
    KinoCustom.Color.new(attrs["color"])
  end
詳しくは以下を参照してください
スマートセルに追加します
Kino.SmartCell.register(KinoCustom.Palette)
スマートセルを追加します
初期値は白です
white を blue に変えて実行すると、以下のようになります
まとめ
思った以上に Livebook で何でもできそうです


