この記事は、RancherでMySQLのレプリケーション構成スタックを作る(前編)の続編となります。
目的
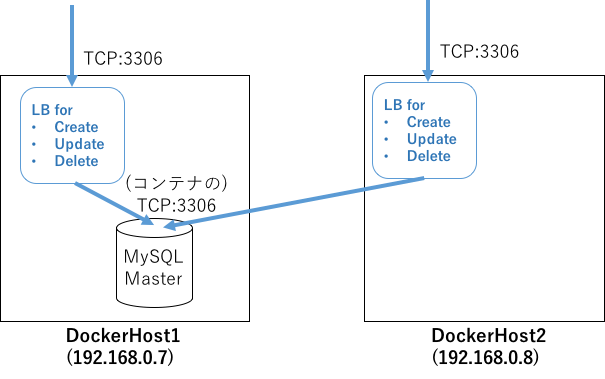
前回の記事でMySQLのMaster-Slave構成に置けるMaster部分の作成が完了しました。
今回の記事ではレプリケーション先となるSlave構成の作成を行います。
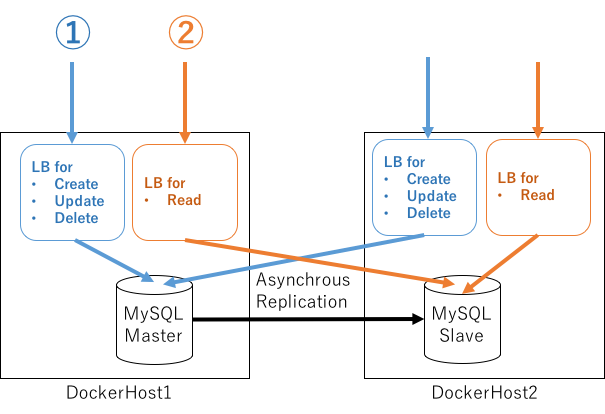
全体の構成
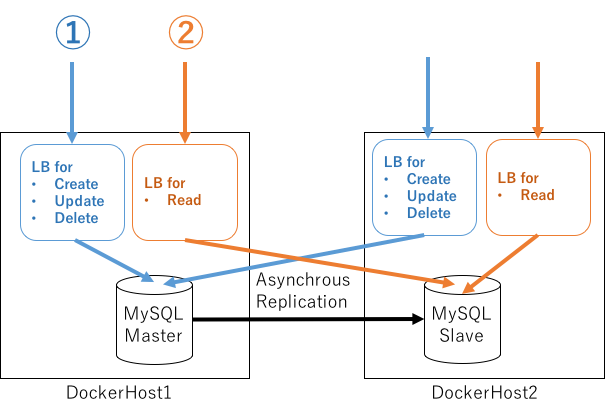
最終的に目指す構成は以下のようになります。
全体の流れ
今回は MySQL Slaveサービスの作成を進めます。
- MySQL Slaveサービスを作成
- MySQL Slaveのサイドキックコンテナを作成
- MySQL Slaveへのアクセス用のLBを作成
今回は MySQL Slaveの作成までで、カタログ化は後編にします。
個別手順
MySQL Slaveサービスの作成
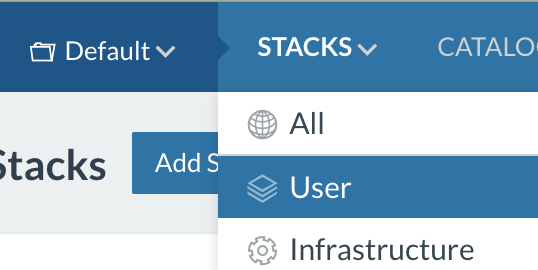
Stacks -> Userを選択します。
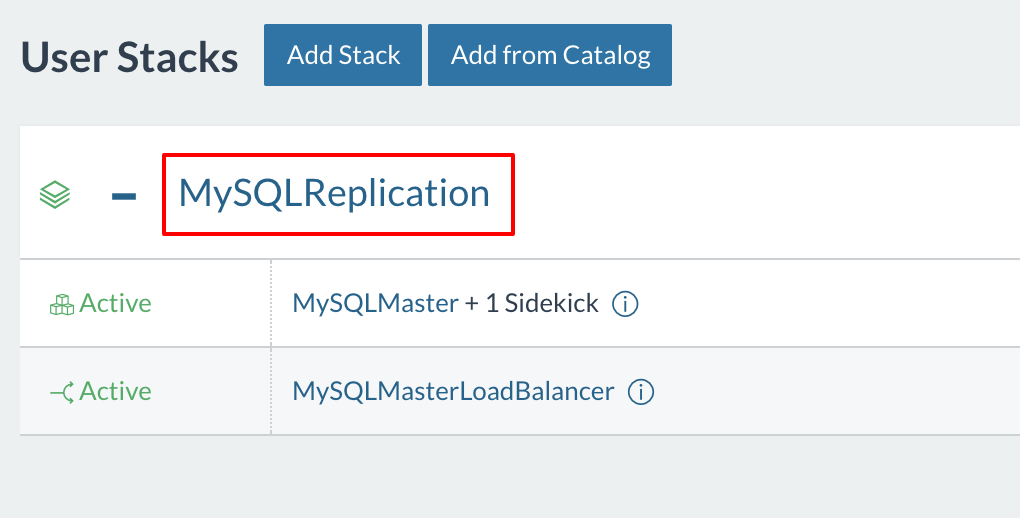
MySQL Replicationを選択します。
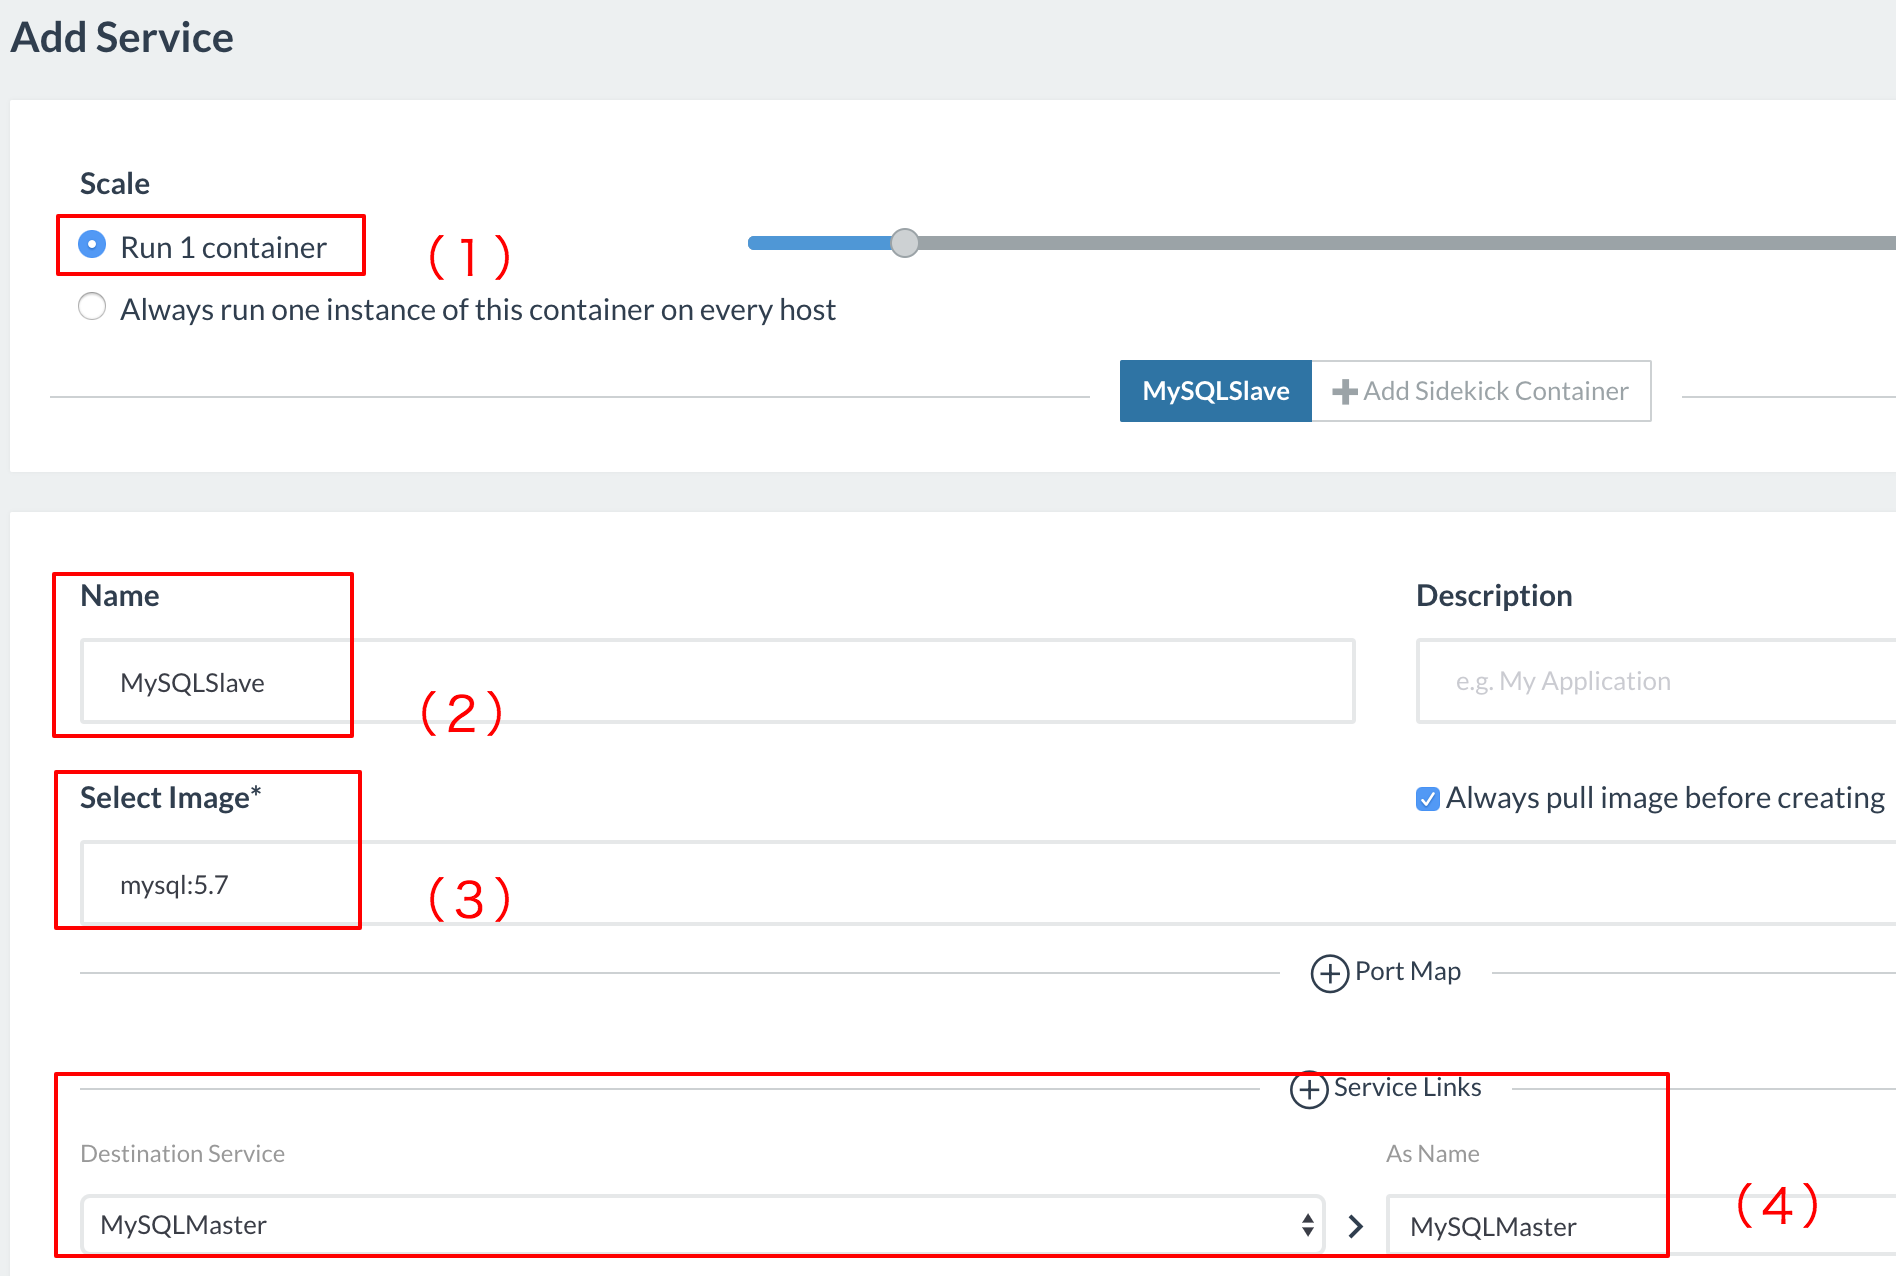
Add Serviceボタンを選択します。
(1)コンテナは1つのみとします
(2)名前にMySQLSLaveを指定します
(3)イメージにはMasterと同じくmysql:5.7を利用します
(4)MySQL Masterコンテナとの接続のため、Service Linkを作成します
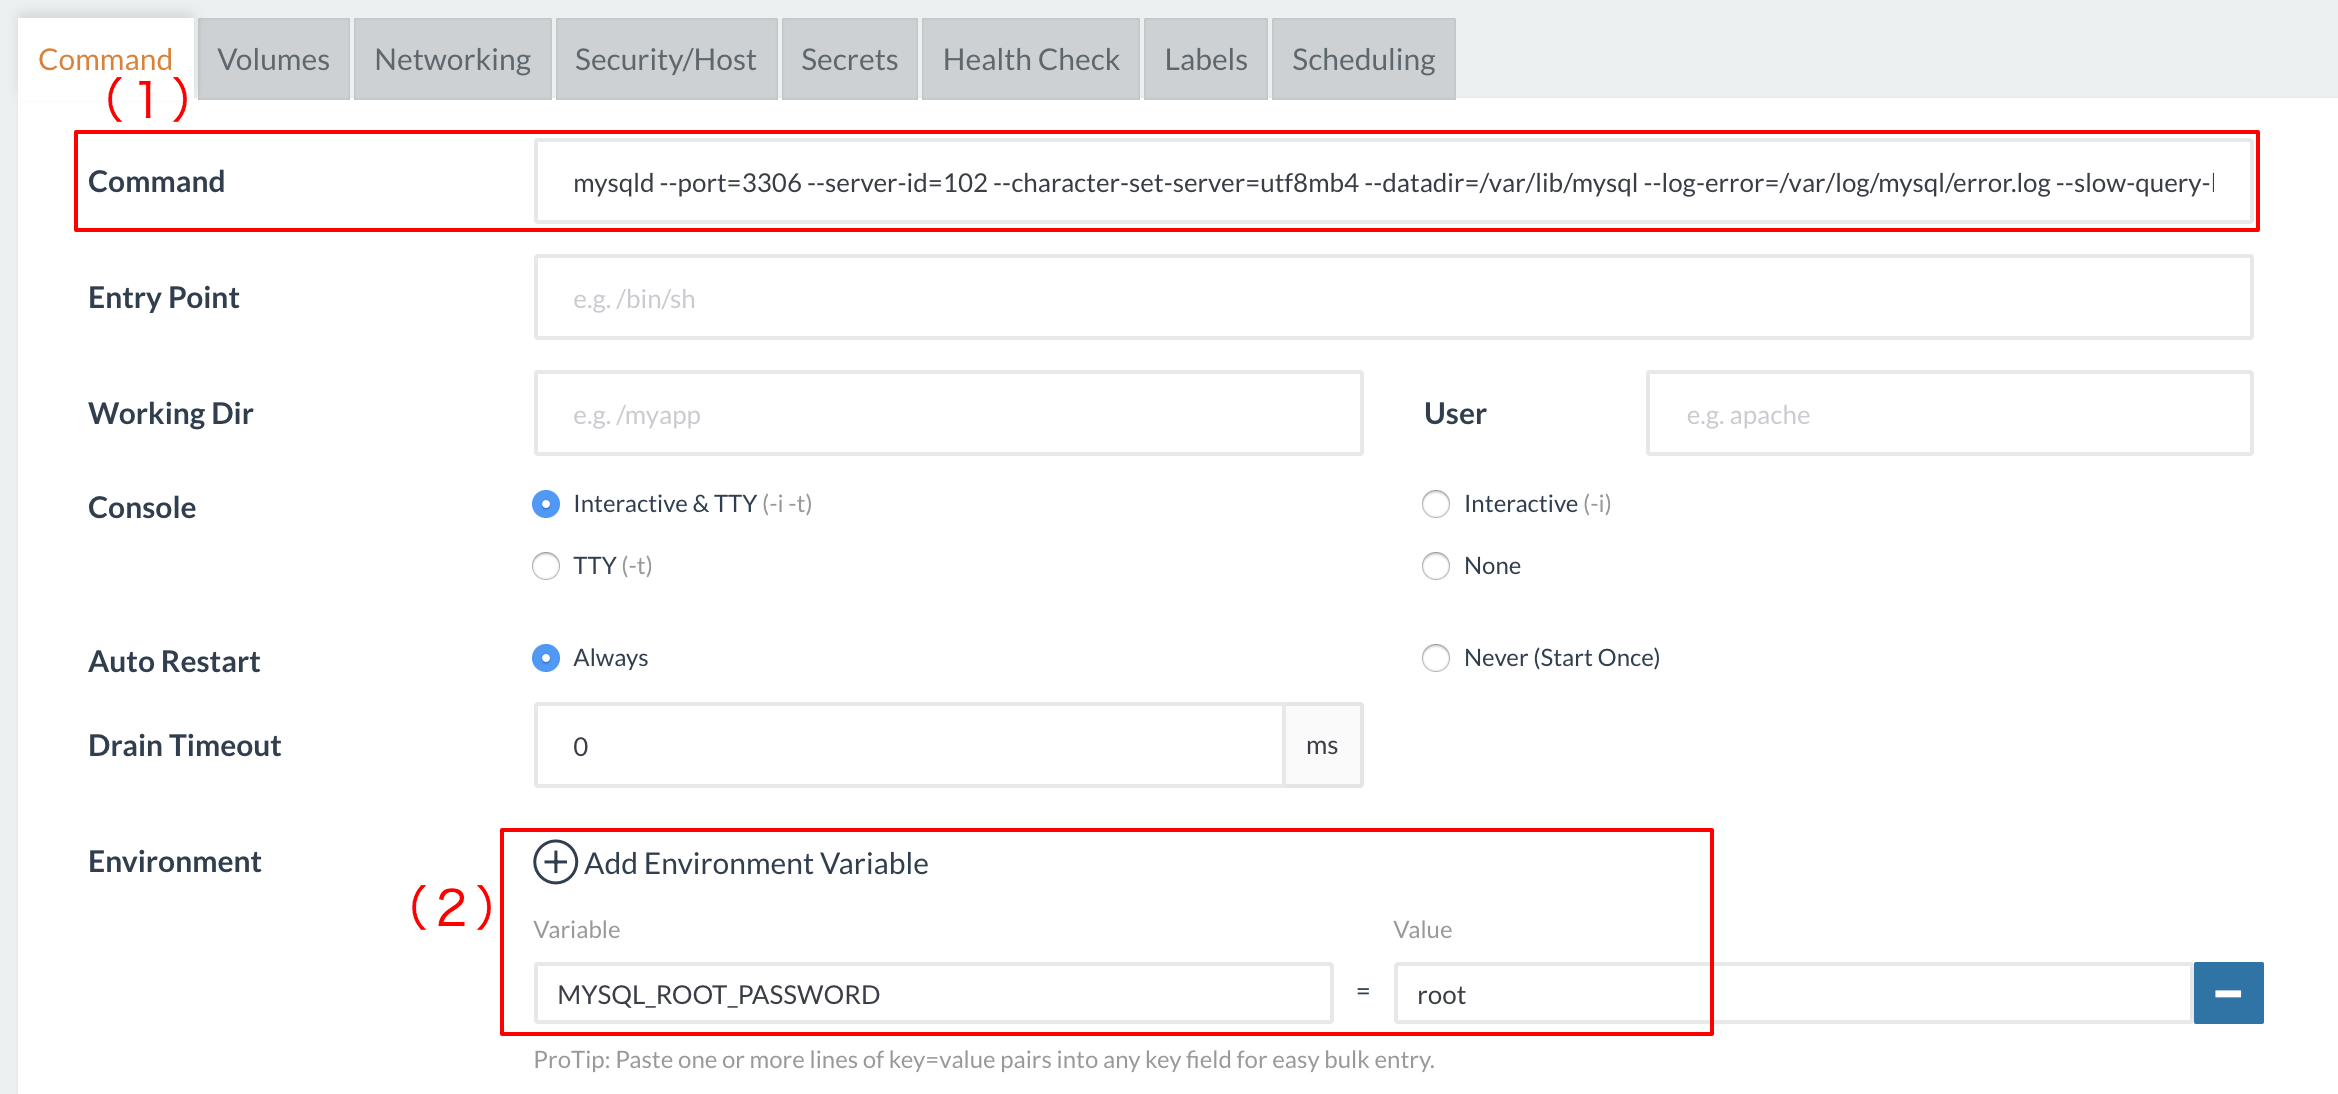
同じ画面でコンテナ起動時のコマンドおよび、環境変数を設定します。
(1)コンテナの起動時プロセス(コマンド?)としてmysqldを指定します
(2)環境変数にMySQL_ROOT_PASSWORDを指定します
mysqldのオプションとしては基本的にMySQLMasterのものと同じですが、
server-idのみ違う値(ここでは102)を指定します。
mysqld --port=3306 --server-id=102 --character-set-server=utf8mb4 --datadir=/var/lib/mysql --log-error=/var/log/mysql/error.log --slow-query-log --slow-query-log-file=/var/log/mysql/slow_query_log.log --long-query-time=5 --log-bin --max-connections=4096 --gtid-mode=on --enforce-gtid-consistency=on
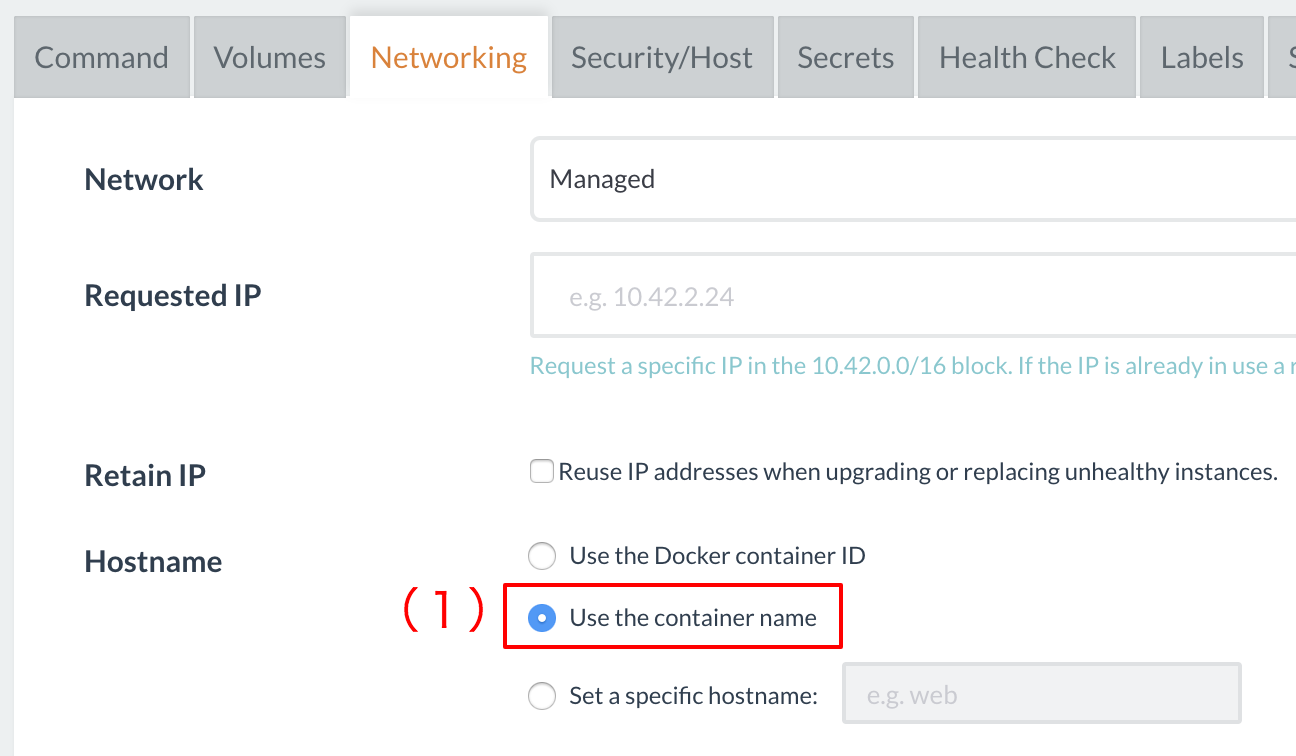
しなくてもいいですが、Networking設定を入れておきます。
(1)コンテナのホスト名としてUse the container nameを利用します。
最後にScheduling設定を行います。
今回は、MySQLReplicationスタックのMySQLMasterサービスと同じ
ホスト上に載らないように以下の設定を行います。
(1)Automatically pick~~ で自動でサービスを起動させるホストを指定します。
(2)〜(4)同じホストでなるべく起動しないよう設定
MySQL Slaveのサイドキックコンテナを作成
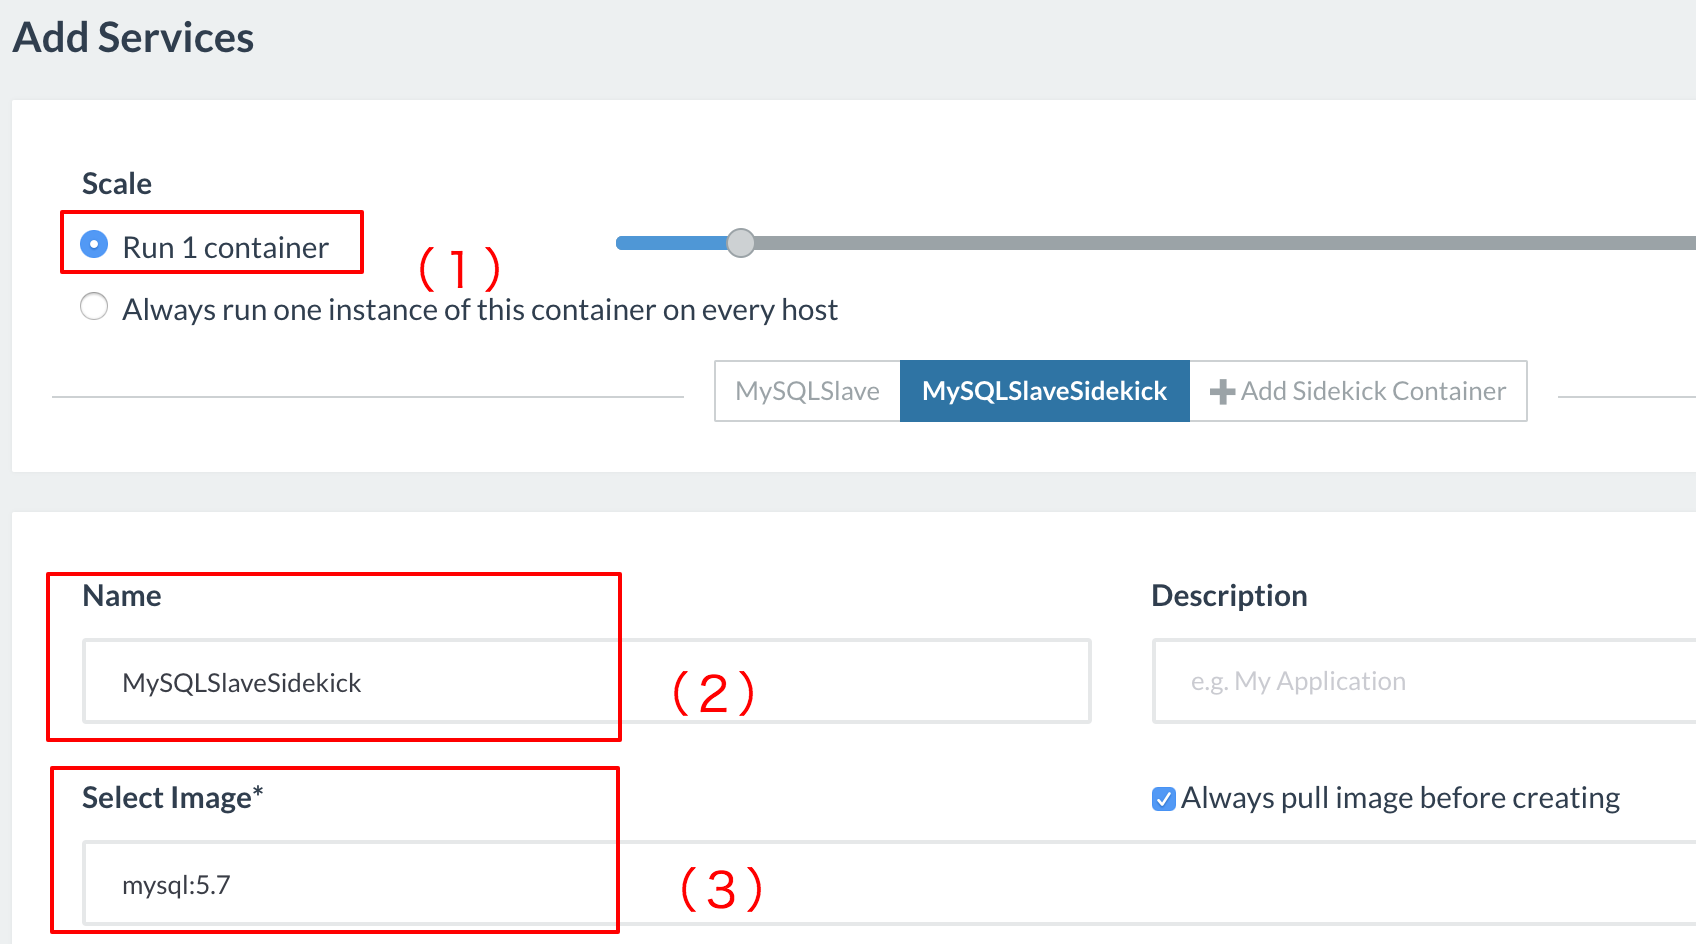
Add Sidekick Containerボタンを選択
(1)メインのコンテナ(MySQLSlave)とセットで動けば良いのでRun 1 containerを指定します
(2)サイドキックコンテナの名前としてMySQLSlaveSidekickを設定します
(3) イメージには mysql:5.7を指定します
次にMySQLSlaveSidekickの起動コマンドを指定します。
以下のようなコマンドをワンライナー化します。
(内部的には、MySQLMasterの起動待ちとMySQLSlaveコンテナをMySQLのSlaveとしての設定すると
いったことを行なっています。)
while :;
    do sleep 10;
    if [ `mysqladmin -h MySQLMaster -u root -proot | grep alive | wc -l` -eq 1 ]; then
        echo "master alive";
        if [ `mysqladmin -h MySQLSlave -u root -proot | grep alive | wc -l` -eq 1 ]; then
            echo "slavealive";
            mysql -u root -proot -h MySQLSlave -e "CHANGE MASTER TO MASTER_HOST='MySQLMaster', MASTER_USER='repl', MASTER_PASSWORD='repl', MASTER_AUTO_POSITION=1; START SLAVE;";
            sleep 10;
            mysql -u root -proot -h 10.42.2.11 -e "show slave status\G";
            break;
        fi
    fi
done
これをワンライナー化します。
/bin/bash -c "while :; do sleep 10; if [ `mysqladmin -h MySQLMaster -u root -proot | grep alive | wc -l` -eq 1 ]; then echo \"master alive\"; if [ `mysqladmin -h MySQLSlave -u root -proot | grep alive | wc -l` -eq 1 ]; then echo \"slave also alive\"; mysql -u root -proot -h MySQLSlave -e \"CHANGE MASTER TO MASTER_HOST='MySQLMaster', MASTER_USER='repl', MASTER_PASSWORD='repl', MASTER_AUTO_POSITION=1; START SLAVE;\"; sleep 10; mysql -u root -proot -h MySQLSlave -e \"show slave status\\G\";break; fi fi done"
(1)先ほど記載の起動コマンドを指定します
(2)一回動けばよいので、Auto RestartはNeverを指定します
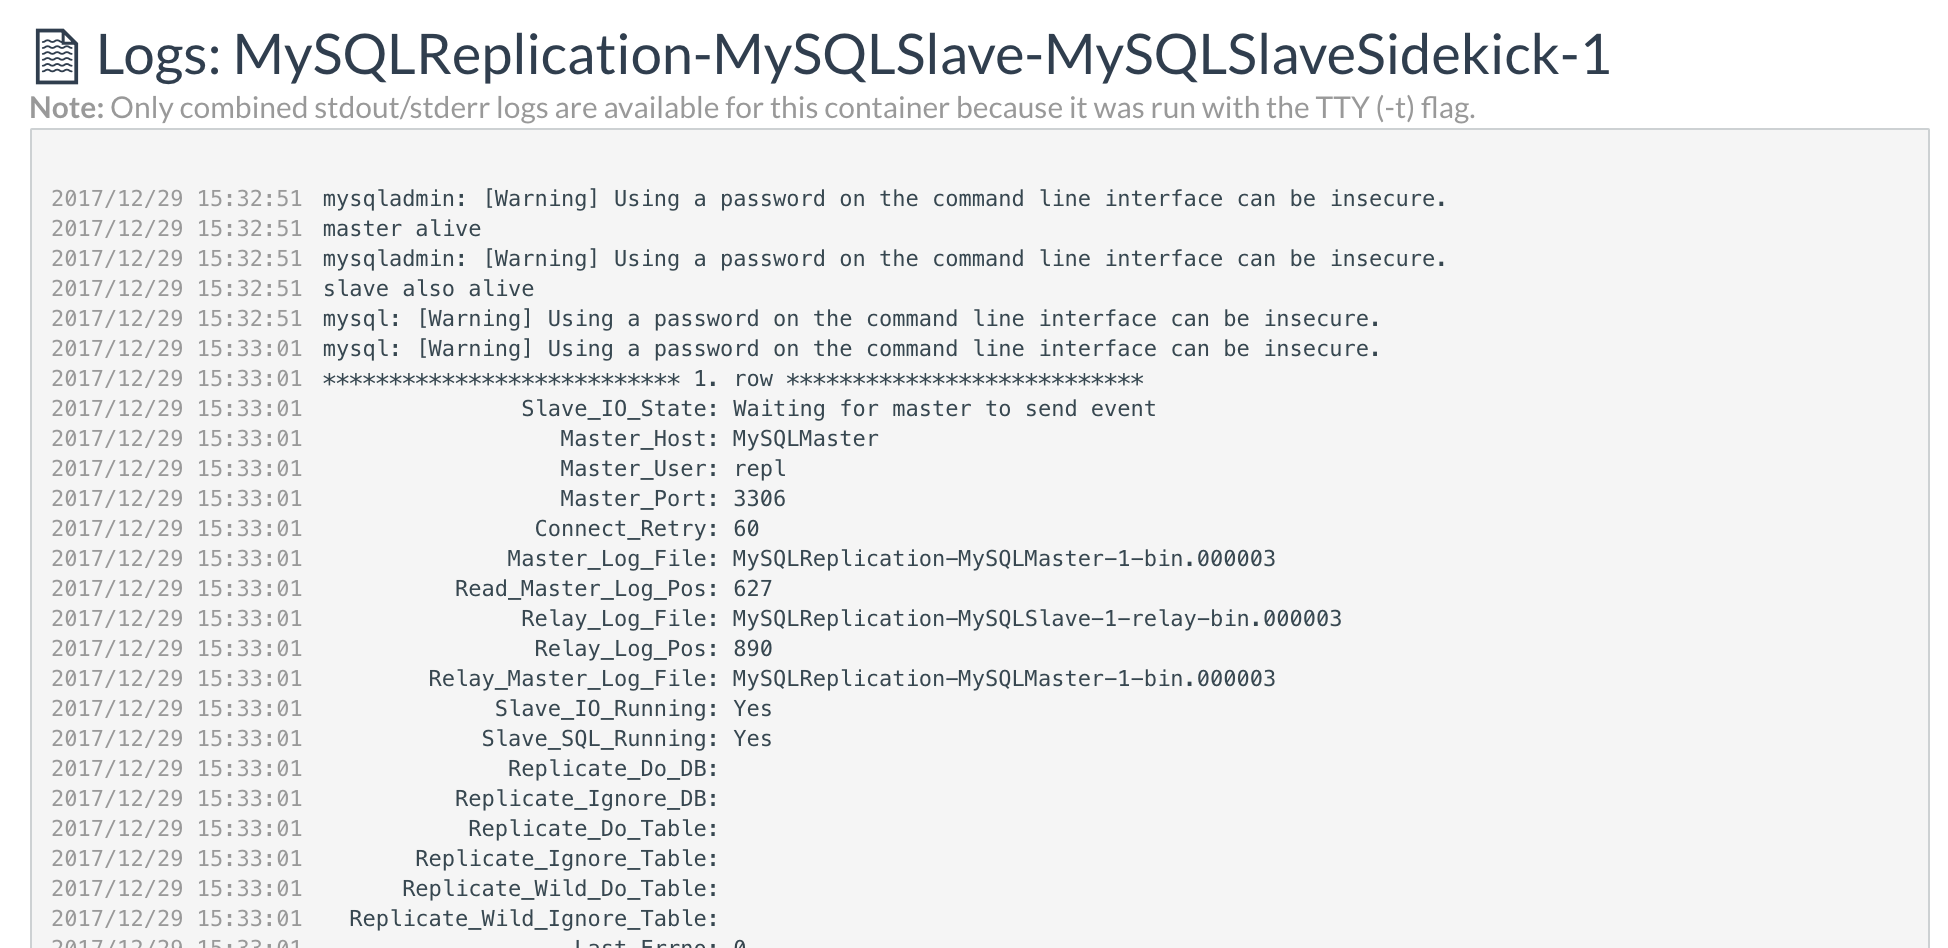
あとは起動をサイドキックコンテナの起動を待ちます。
show slave status \Gの結果が表示されれば正常にレプリケーション設定が完了しているはずです。
アクセス用のLBの作成
MySQL SlaveにアクセスするためのLBを作成します。
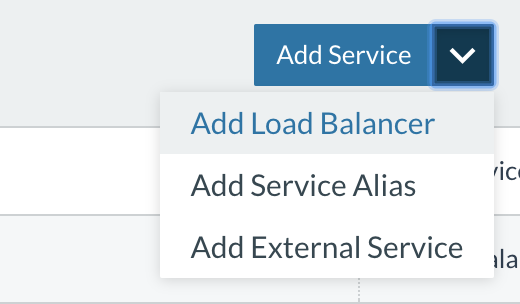
MySQLReplication stackの画面で Add Serviceのドロップダウンメニューを選択し、
Add Load Balancerを選択します。
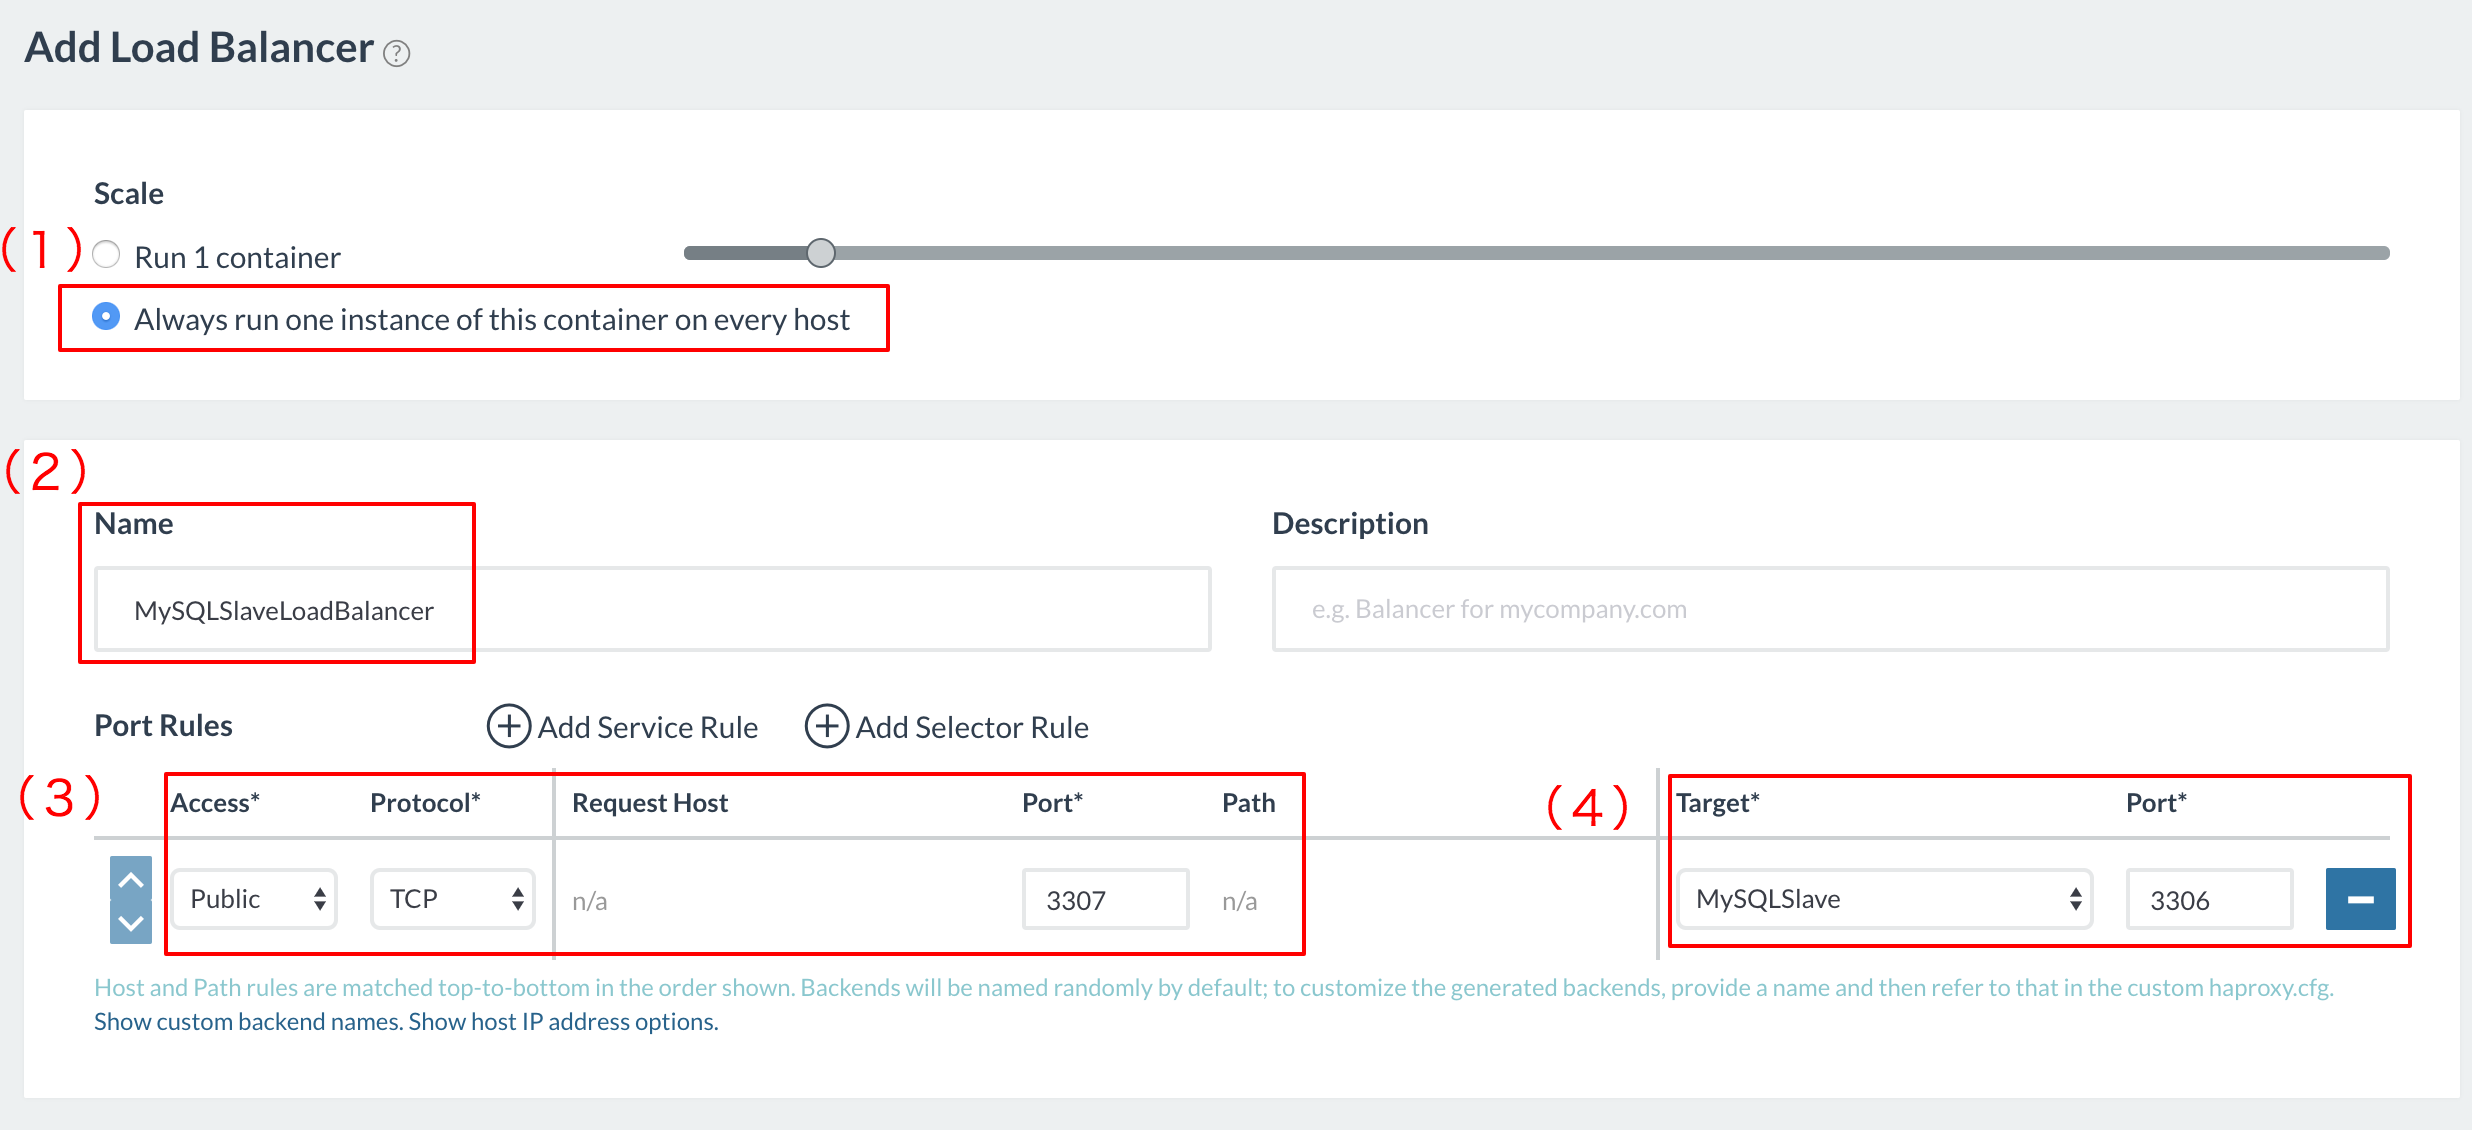
LBの作成を行います。
(1)全てのホストからMySQLのSlaveコンテナにアクセスできるようAlways run one~を選択します
(2)LBの名前はMySQLSlaveLoadBalancerとします
(3)外部からのアクセスのため Publicを選択し、TCPの3307番で待ち受けます
(4)トラフィックを転送する先のコンテナにMySQLSlave、ポートとして3306番を指定します
上記設定が完了後にCreateボタンをクリックしてLBを作成します。
動作確認の為、Rancherのホストにアクセスしてshow slave statusを投げてみます。
$ mysql -u root -p -h 192.168.0.8 -P 3307
Enter password:
Welcome to the MySQL monitor.  Commands end with ; or \g.
Your MySQL connection id is 11
Server version: 5.7.20-log MySQL Community Server (GPL)

Copyright (c) 2000, 2017, Oracle and/or its affiliates. All rights reserved.

Oracle is a registered trademark of Oracle Corporation and/or its
affiliates. Other names may be trademarks of their respective
owners.

Type 'help;' or '\h' for help. Type '\c' to clear the current input statement.

mysql> show slave status \G;
*************************** 1. row ***************************
               Slave_IO_State: Waiting for master to send event
                  Master_Host: MySQLMaster
                  Master_User: repl
                  Master_Port: 3306
~~~~~~~~~~(中略)~~~~~~~~~

$ mysql -u root -p -h 192.168.0.7 -P 3307
Enter password:
Welcome to the MySQL monitor.  Commands end with ; or \g.
Your MySQL connection id is 12
Server version: 5.7.20-log MySQL Community Server (GPL)

Copyright (c) 2000, 2017, Oracle and/or its affiliates. All rights reserved.

Oracle is a registered trademark of Oracle Corporation and/or its
affiliates. Other names may be trademarks of their respective
owners.

Type 'help;' or '\h' for help. Type '\c' to clear the current input statement.

mysql> show slave status\G;
*************************** 1. row ***************************
               Slave_IO_State: Waiting for master to send event
                  Master_Host: MySQLMaster
                  Master_User: repl
                  Master_Port: 3306
ここまでで、MySQLのSlaveコンテナとコンテナにアクセスするためのLBコンテナを確保できました。
まとめ
ここまでの作業で以下の環境を実現できました。
次回は、これらのカタログ化について説明します。
