この話のオチ
Policyを使う。この記事は、下記URLを補足するために書かれました。
Setting Headers using Custom Connector Template Policies
https://www.serverlessnotes.com/docs/setting-headers-using-custom-connector-template-policies
背景
Power Automateのカスタムコネクタで、Web APIを使用するものを作成するとき、Authorizationヘッダーを自由にいじることが出来ません。
具体的には、Authorizationという名前のパラメーターを作ろうとするとエラーが出ます。
試しにSwagger Editorから追加してみると...

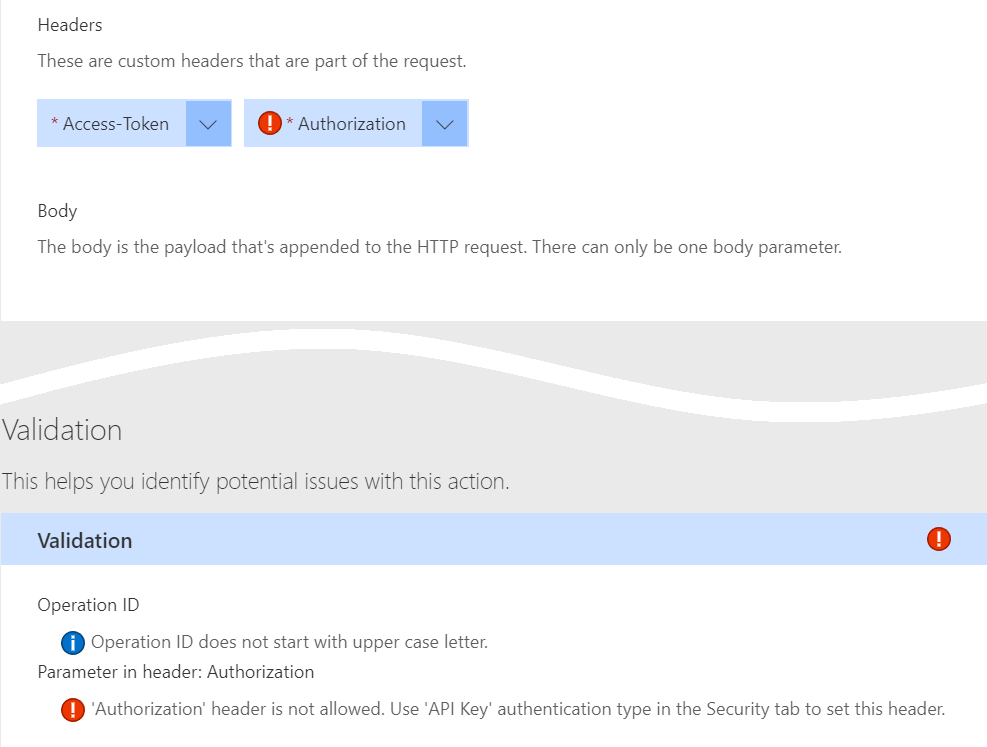
エラーが出ましたね。
「Error 'Authorization' header is not allowed. Use 'API Key' authentication type in the Security tab to set this header.」と怒られました。
しかしAuthentication TypeでAPI Keyモードを選ぶと、トークンをハードコードすることになってしまい、それは都合が悪いわけです。
なのでAPI Keyではなく、わざわざNo Authenticationモードにしているのですが...というデッドロック状態に。
これを打開します。
ポリシーを指定する
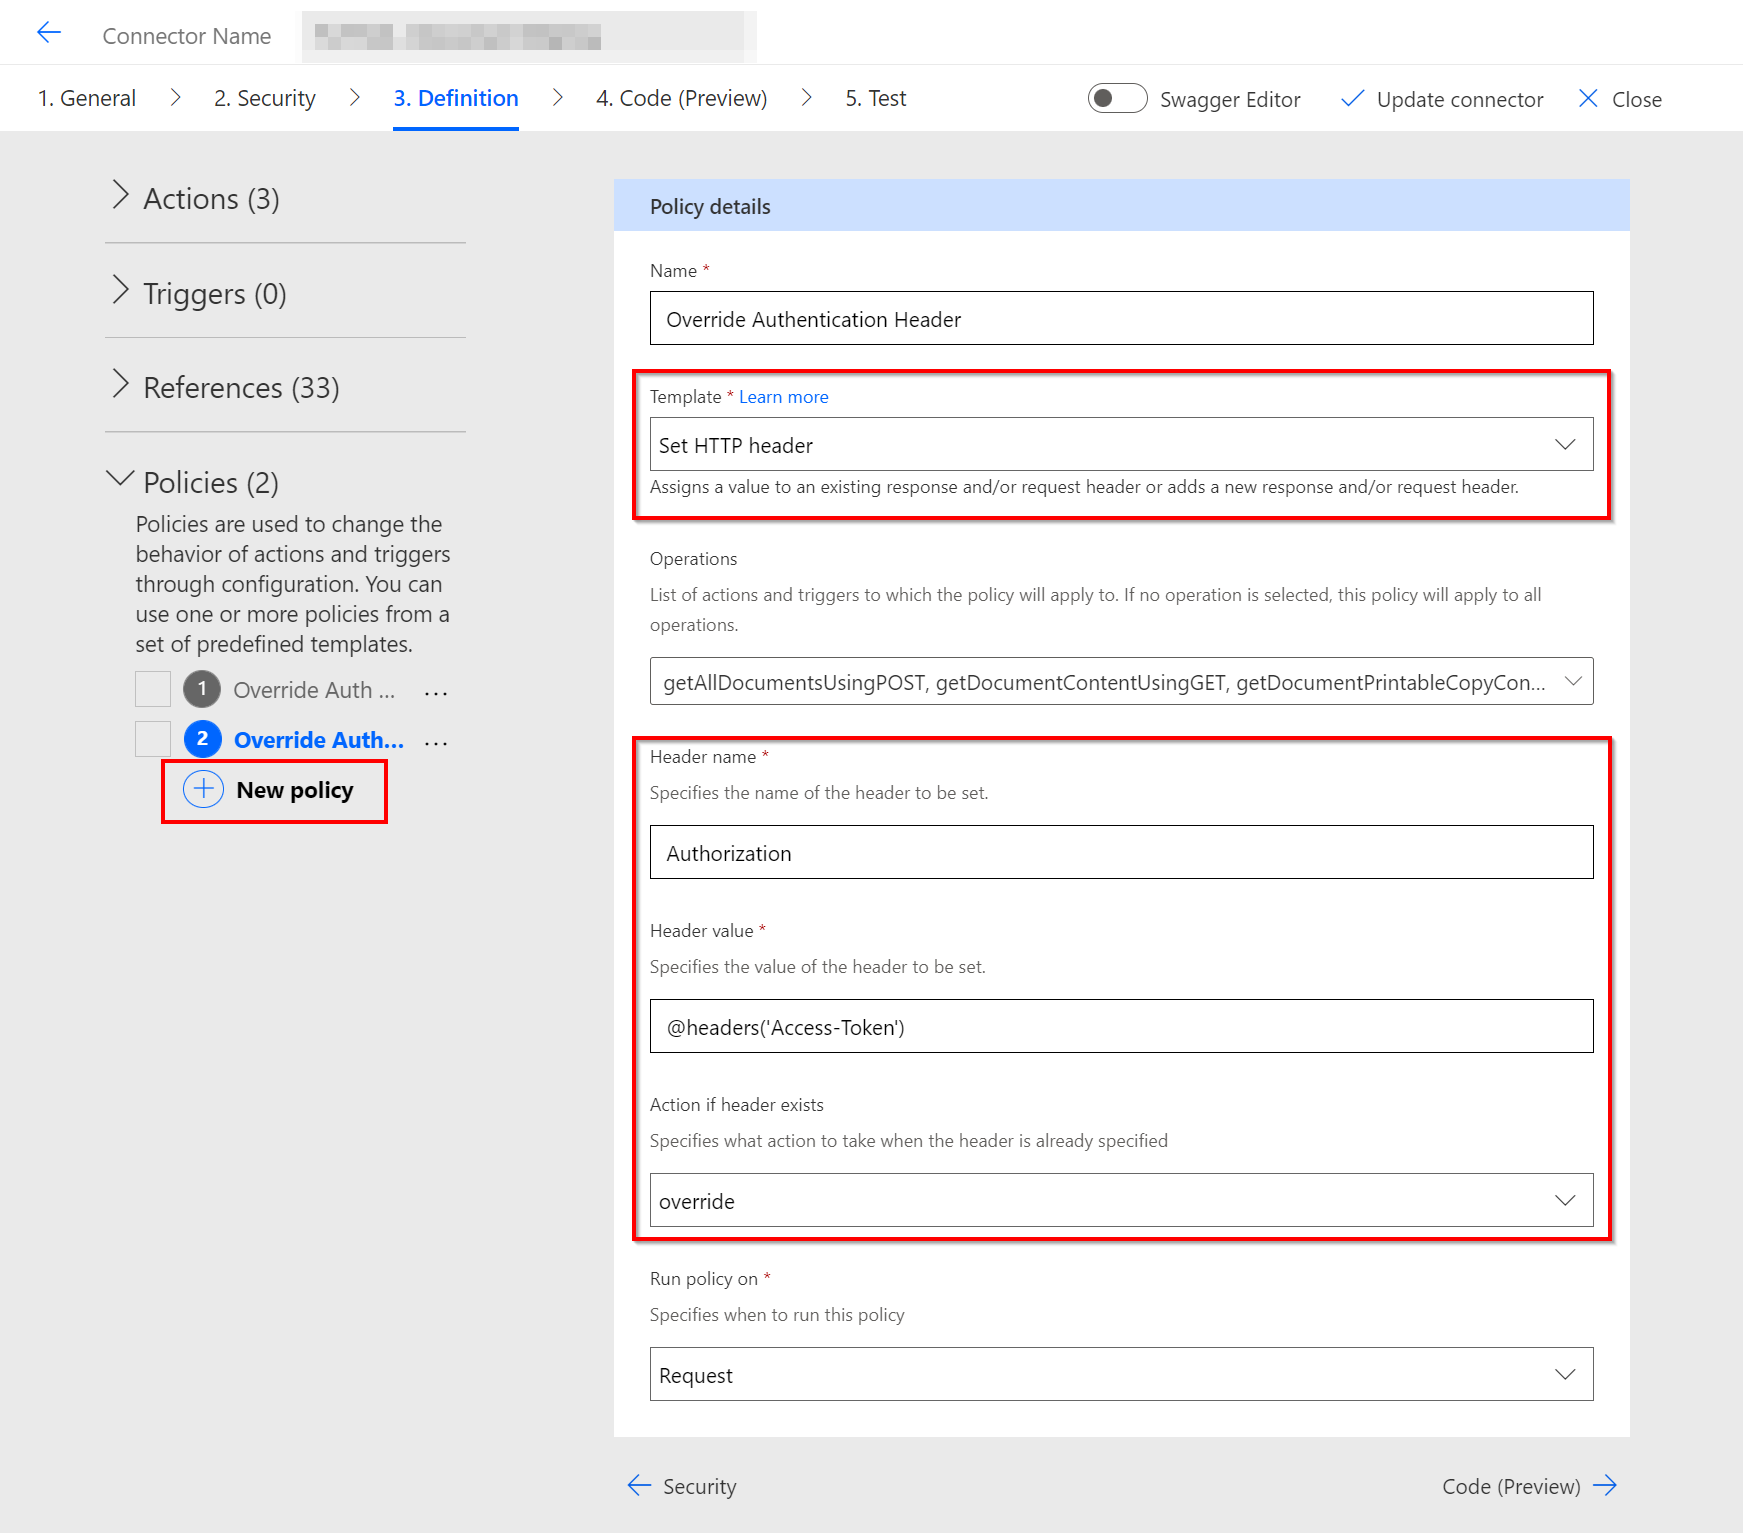
ポリシーのテンプレートに、「Set HTTP header」があるのでそれをそのまま使用します。
Header nameはAuthorizationに指定。
Header valueは@headers('Access-Token')としておきます。このAccess-Tokenは未定義の変数として、実行時に中身を要求されるようになります。これに渡せばよいわけですね。
Actions if header existsは、既に同名のヘッダーが存在する時の挙動ですが、ここではOverrideを選択しました。
実際に組み込んでみる
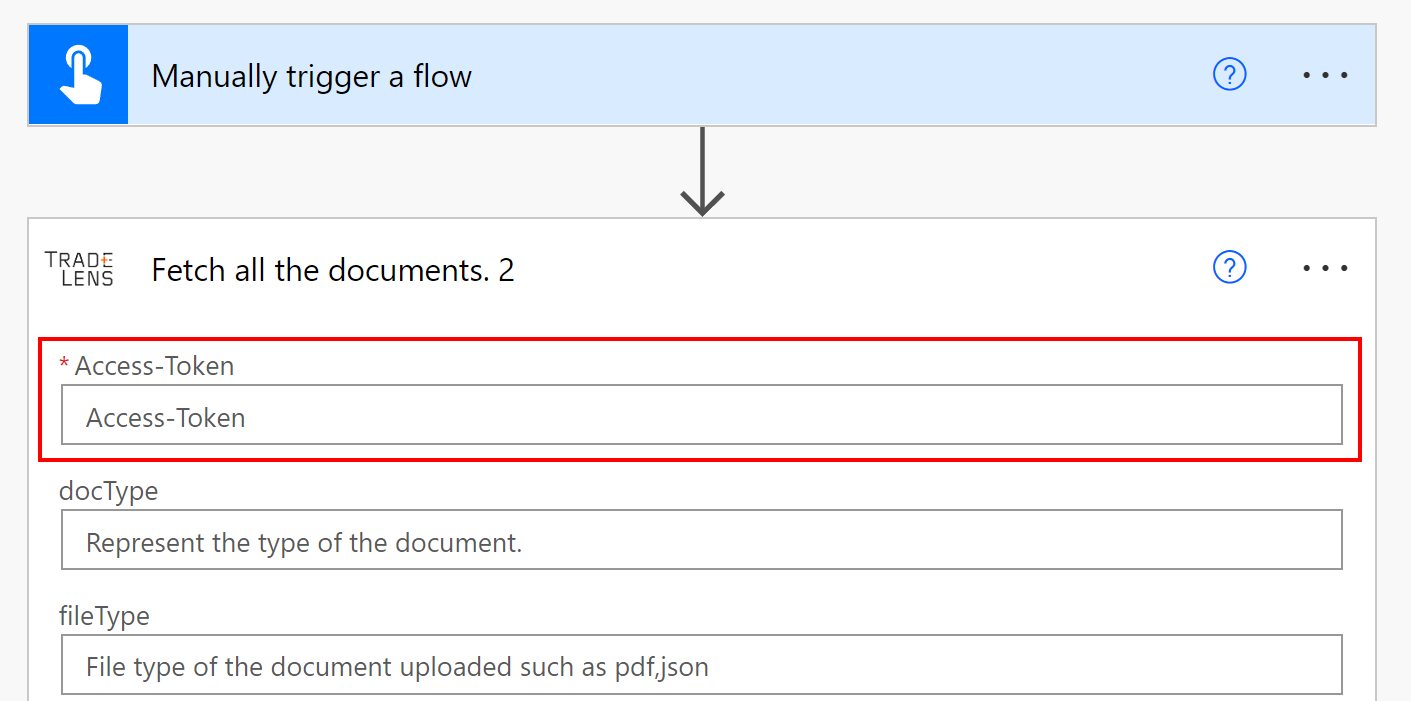
Access-Tokenというフィールドが追加され、任意の変数を渡すことが出来るようになりました。
これでBearerトークンも渡したい放題!
追記
2022-05-23 / 公開した後にTwitterで検索してみたら普通に知見として世の中にあったみたい。まぁいいか...。