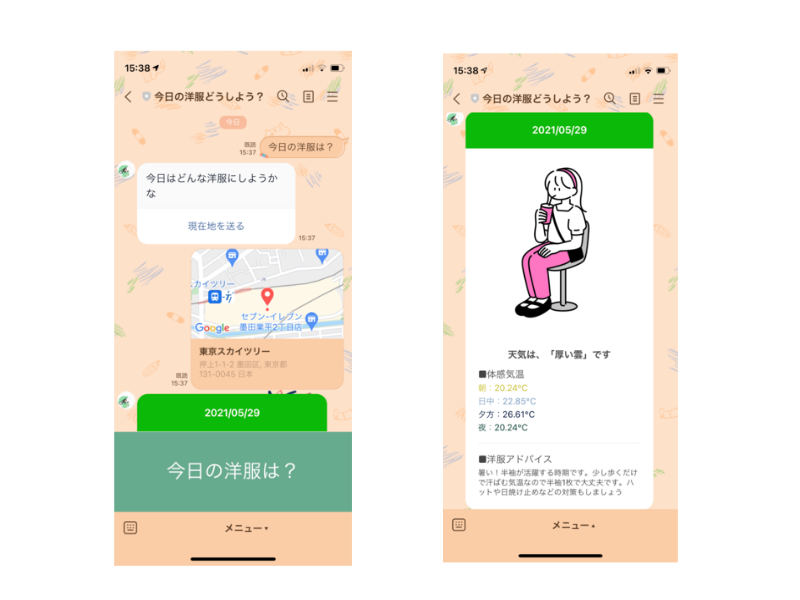
先日、Node.jsとTypeScriptで天気予報アプリを作成しました。
完成形としては以下の通りです。
この記事内では、Glitchでデプロイをしています。
まぁ無料なわけで色々問題があります。
・プロジェクトは、利用されていないときは5分でスリープ状態になる
・4000件/1hのリクエスト制限がある(Error: 429 too many requests)
ということで、AWSのLambdaを使ってデプロイしました。
動作を確認するために所々デバッグして進めていきたいですが、
その度S3にアップロードしてそれをLambdaにもアップロードする必要があります。
こんなのめんどくさいですよね・・

ということで、ローカルでデバッグやテストを可能にしてくれる、かつコマンドのみでデプロイしてくれるSAMを使ってみましょう。
作成後記
LINE MessagingAPIではHTTPSサーバーが必要になります。しかし、SAMではHTTPサーバーしか作れないのでデバッグは不可能でした。それでもコマンドのみでデプロイできるのは便利でした。
アーキテクチャ
アーキテクチャの説明の前にまずは、サーバーレスアーキテクチャに関して説明します。
サーバーレスアーキテクチャとは
AWSにおけるサーバーレスとは、**「インスタンスベースの仮想サーバー(EC2など)を使わずにアプリケーションを開発するアーキテクチャ」**を指します。
一般にシステムの運用には、プログラムを動かすためのサーバーが必要です。
そしてそのサーバーは、常に稼働していなければなりません。
しかし開発者がやりたいことは、「サーバーの管理」なのでしょうか?
エンドユーザーに価値を届けることこそが使命なわけです。
ということで、こういうめんどくさい作業から解放してくれるのがサーバーレスアーキテクチャなわけです。
サーバーレスアーキテクチャでよく使われるサービスは以下の通りです。
特に、丸で囲っている3つがよく使われます。

それではアーキテクチャに関してみていきましょう。

今回は、Lambda, API Gateway, S3の3つをSAMでデプロイを行い、環境変数をSSM(AWS Systems Manager)で管理していきます。
追記
AWSのEC2を使ってデプロイした記事もあります。
サーバーレスよりもEC2に興味があるぞという方はこちらの記事もどうぞ。
どのようなアプリか
皆さんは、今日の気温を聞いて、**「快適に過ごすために今日のファッションをこうしよう」**ってパッと思いつきますか?
私は、最高気温、最低気温を聞いてもそれがどのくらい暑いのか、寒いのかがピンと来ず、洋服のチョイスを外したことがしばしばあります。

こんな思いを2度としないために今回このアプリを作りました。
GitHub
完成形のコードは以下となります。
では実際に作成していきましょう!
sam initを実行する
ゼロから書いていってもいいのですが、初めての方はまずはsam initを使いましょう。
以下のように選択していってください。
$ sam init
Which template source would you like to use?
        1 - AWS Quick Start Templates
        2 - Custom Template Location
Choice: 1

What package type would you like to use?
        1 - Zip (artifact is a zip uploaded to S3)
        2 - Image (artifact is an image uploaded to an ECR image repository)
Package type: 1

Which runtime would you like to use?
        1 - nodejs14.x
        2 - python3.8
        3 - ruby2.7
        4 - go1.x
        5 - java11
        6 - dotnetcore3.1
        7 - nodejs12.x
        8 - nodejs10.x
        9 - python3.7
        10 - python3.6
        11 - python2.7
        12 - ruby2.5
        13 - java8.al2
        14 - java8
        15 - dotnetcore2.1
Runtime: 7

Project name [sam-app]: WeatherFashion

AWS quick start application templates:
        1 - Hello World Example
        2 - Step Functions Sample App (Stock Trader)
        3 - Quick Start: From Scratch
        4 - Quick Start: Scheduled Events
        5 - Quick Start: S3
        6 - Quick Start: SNS
        7 - Quick Start: SQS
        8 - Quick Start: App Backend using TypeScript
        9 - Quick Start: Web Backend
Template selection: 1
ここまでできれば作成されます。
このような構成になっていればOKです。
.WeatherFashion
├── events/
│   ├── event.json
├── hello-world/
│   ├── tests
│   │        └── integration
│   │        │        └── test-api-gateway.js
│   │        └── unit
│   │        │        └── test-handler.js
│   ├── .npmignore
│   ├── app.js
│   ├── package.json
├── .gitignore
├── README.md
├── template.yaml
必要ないファイルなどがあるのでそれを削除していきましょう。
.WeatherFashion
├── hello-world/
│   ├── app.js
├── .gitignore
├── README.md
├── template.yaml
また、ディレクトリ名やファイル名を変えましょう。
.WeatherFashion
├── api/
│   ├── index.js
├── .gitignore
├── README.md
├── template.yaml
次は、template.yamlを修正して、SAMの実行をしてみたいところですが、一旦後回しにします。

先にTypeScriptなどのパッケージを入れ、ディレクトリ構造を明確にした後の方が理解しやすいので。。
ということでパッケージを入れていきましょう。
package.jsonの作成
以下のコマンドを入力してください。
これで、package.jsonの作成が完了します。
$ npm init -y
必要なパッケージのインストール
dependencies
dependenciesはすべてのステージで使用するパッケージです。
今回使用するパッケージは以下の4つです。
・@line/bot-sdk
・aws-sdk
・axios
以下のコマンドを入力してください。
これで全てのパッケージがインストールされます。
$ npm install @line/bot-sdk aws-sdk axios --save
ちなみに、Lambdaでは元よりaws-sdkが使えるようなのでなくても問題ないです。
インストールしなければその分容量が軽くなるので、レスポンスは早くなります。
devDependencies
devDependenciesはコーディングステージのみで使用するパッケージです。
今回使用するパッケージは以下の5つです。
・typescript
・@types/node
・ts-node
・rimraf
・npm-run-all
以下のコマンドを入力してください。
これで全てのパッケージがインストールされます。
$ npm install -D typescript @types/node ts-node rimraf npm-run-all
package.jsonにコマンドの設定を行う
npm run buildでコンパイルを行います。
{
  "scripts": {
    "clean": "rimraf dist",
    "tsc": "tsc",
    "build": "npm-run-all clean tsc"
  },
}
tsconfig.jsonの作成
以下のコマンドを実行しTypeScriptの初期設定を行います。
$ npx tsc --init
それでは、作成されたtsconfig.jsonの上書きをしていきます。
{
  "compilerOptions": {
    "target": "ES2018",
    "module": "commonjs",
    "sourceMap": true,
    "outDir": "./api/dist",
    "strict": true,
    "moduleResolution": "node",
    "esModuleInterop": true,
    "skipLibCheck": true,
    "forceConsistentCasingInFileNames": true
  },
  "include": ["api/src/*"]
}
簡単にまとめると、
api/srcディレクトリ以下を対象として、それらをapi/distディレクトリにES2018の書き方でビルドされるという設定です。
tsconfig.jsonに関して詳しく知りたい方は以下のサイトをどうぞ。
また、この辺りで必要ないディレクトリはGithubにpushしたくないので、.gitignoreも作成しておきましょう。
node_modules
package-lock.json
.aws-sam
samconfig.toml
dist
最終的にはこのようなディレクトリ構成にしましょう。
.WeatherFashion
├── api/
│   ├── dist(コンパイル後)
│   │        └── node_modules(コピーする)
│   │        └── package.json(コピーする)
│   ├── src(コンパイル前)
│   │        └── index.ts
├── node_modules(コピー元)
├── .gitignore
├── package.json(コピー元)
├── package-lock.json
├── README.md
├── template.yaml
├── tsconfig.json
やるべきことは以下の2つです。
①distディレクトリを作成する
②distディレクトリに、node_modules, package.jsonをコピーする
次に、template.yamlを書いていきましょう。
SAM Templateを記載する
ファイル内にコメントを残しています。
これで大まかには理解できるかと思います。
詳しくは公式サイトを見てください。
# AWS CloudFormationテンプレートのバージョン
AWSTemplateFormatVersion: '2010-09-09'
# CloudFormationではなくSAMを使うと明記する
Transform: AWS::Serverless-2016-10-31
# CloudFormationのスタックの説明文(重要ではないので適当でOK)
Description: >
  WeatherFashion

Globals:
  # Lambda関数のタイムアウト値(3秒に設定)
  Function:
    Timeout: 3

Resources:
  # API Gateway
  WeatherFashionAPI:
    # Typeを指定する(今回はAPI Gateway)
    Type: AWS::Serverless::Api
    Properties:
      # ステージ名(APIのURLの最後にこのステージ名が付与されます)
      StageName: v1
      # CORSの設定
      Cors:
        AllowMethods: "'POST, GET, OPTIONS'"
        AllowHeaders: "'Content-Type,X-Amz-Date,Authorization,X-Api-Key,X-Amz-Security-Token'"
        AllowOrigin: "'*'"
        MaxAge: "'600'"

  # Lambda
  WeatherFashionFunction:
    # Typeを指定する(今回はLambda)
    Type: AWS::Serverless::Function
    Properties:
      # 関数が格納されているディレクトリ(今回はコンパイル後なので、distディレクトリを使用する)
      CodeUri: api/dist
      # ファイル名と関数名(今回はファイル名がindex.js、関数名がexports.handlerなので、index.handlerとなります)
      Handler: index.handler
      # どの言語とどのバージョンを使用するか
      Runtime: nodejs12.x
      # ポリシーを付与する(今回はLambdaの権限とSSMの読み取り権限を付与)
      Policies:
        - arn:aws:iam::aws:policy/service-role/AWSLambdaBasicExecutionRole
        - arn:aws:iam::aws:policy/AmazonSSMReadOnlyAccess
      # この関数をトリガーするイベントを指定します
      Events:
        # API Gateway
        WeatherFashionAPI:
          Type: Api
          Properties:
            # どのAPIを使用するか(!Refは値の参照に使用します)
            RestApiId: !Ref WeatherFashionAPI
            # URL
            Path: /
            # POSTメソッド
            Method: post

Outputs:
  WeatherFashionAPI:
    Description: 'API Gateway'
    # URLを作成(!Subは${}で値を指定することができます)
    Value: !Sub 'https://${WeatherFashionAPI}.execute-api.${AWS::Region}.amazonaws.com/v1'
  WeatherFashionFunction:
    Description: 'Lambda'
    # ロールの値を返す
    Value: !GetAtt WeatherFashionFunction.Arn
  WeatherFashionFunctionIamRole:
    Description: 'IAM Role'
    # ロールの値を返す
    Value: !GetAtt WeatherFashionFunctionRole.Arn
LINE Developersにアカウントを作成する
LINE Developersにアクセスして、「ログイン」ボタンをクリックしてください。
その後諸々入力してもらったら以下のように作成できるかと思います。
注意事項としては、今回Messaging APIとなるので、チャネルの種類を間違えた方は修正してください。
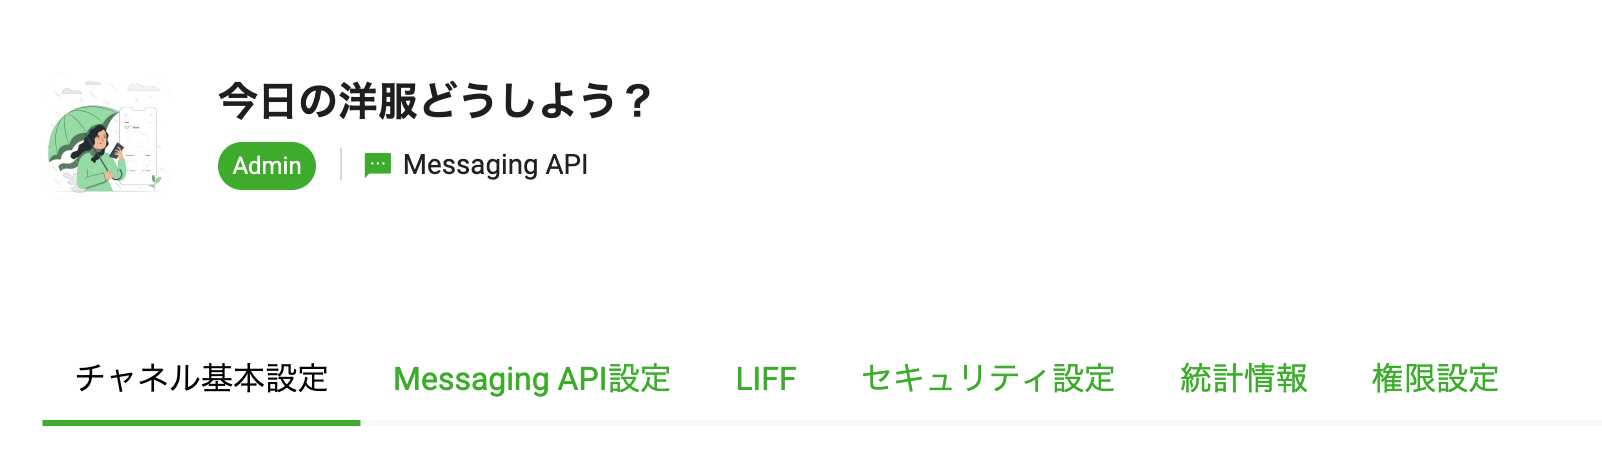
チャネルシークレットとチャネルアクセストークンが必要になるのでこの2つを発行します。


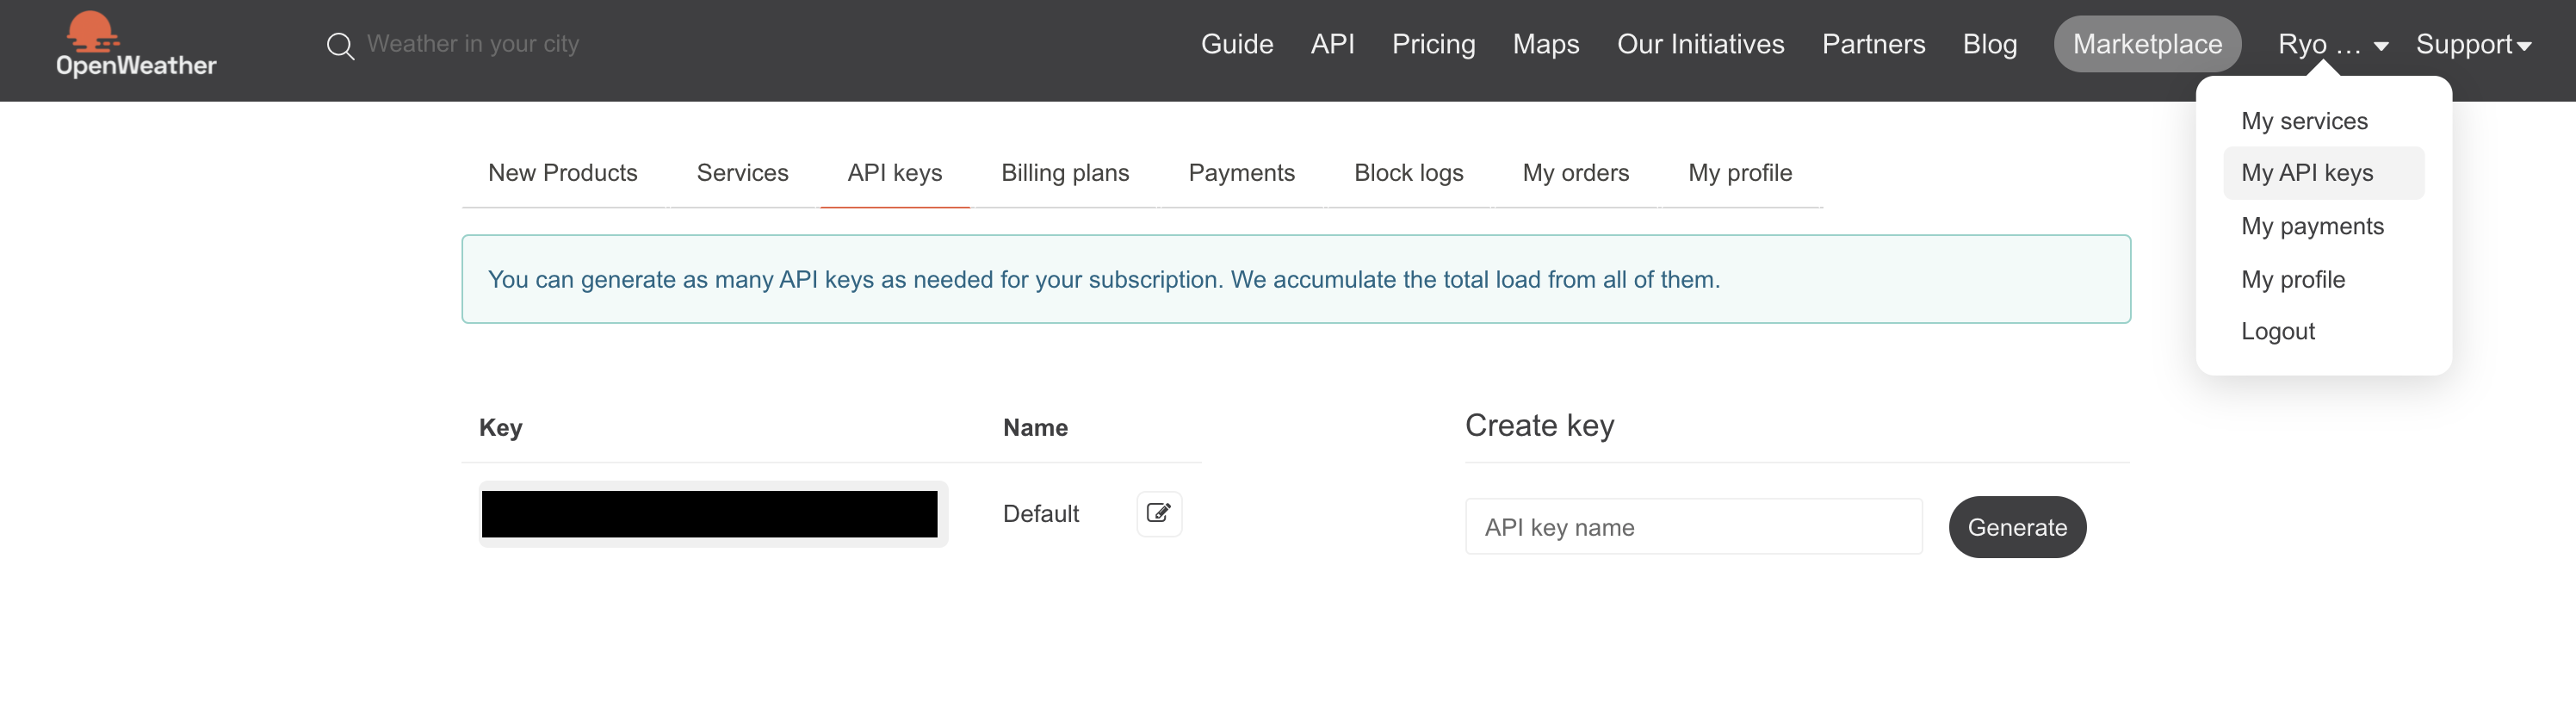
OpenWeatherのAPIを取得する
以下にアクセスしてください。
アカウントを作成し、APIキーを発行してください。
これで必要な環境変数は取得できました。
それでは、これをSSMを使ってLambda内で使えるようにしていきましょう。
SSMパラメータストアで環境変数を設定
なぜSSMパラメータストアを使うのか?
SAMのLambda設定にも、環境変数の項目はあります。
しかし、2点問題点があります。
①Lambdaの環境変数の変更をしたいとき、Lambdaのバージョンも新規発行をしなければならない
②Lambdaのバージョンとエイリアスを紐付けて管理をするとき、もし環境変数にリリース先環境別の値をセットしていると、リリース時に手動で環境変数の変更をしなければならないケースが発生する
簡単にまとめると、**「リアルタイムで反映できないし、人為的なミスのリスクもあるよ」**ということです。
SSMパラメータストアで値を管理すると以下の3点のメリットがあります。
①Lambdaの環境変数の管理が不要
②Lambdaも含めた値関連情報を一元管理できる
③Lambda外部からリアルタイムに環境変数を変更制御できる
ということで、SSMパラメータストアを使用しましょう。
みんな大好きクラスメソッドの記事にやり方が書いてあります。
こちらの記事が完璧なのでこちらを見てやってみてください。
私は以下のように命名して作成しました。

SSMパラメータが取得できているかconsole.logで検証
// import
import aws from 'aws-sdk';

// SSM
const ssm = new aws.SSM();

exports.handler = async (event: any, context: any) => {
  const LINE_WEATHER_FASHION_CHANNEL_ACCESS_TOKEN = {
    Name: 'LINE_WEATHER_FASHION_CHANNEL_ACCESS_TOKEN',
    WithDecryption: false,
  };

  const CHANNEL_ACCESS_TOKEN: any = await ssm
    .getParameter(LINE_WEATHER_FASHION_CHANNEL_ACCESS_TOKEN)
    .promise();

  const channelAccessToken: string = CHANNEL_ACCESS_TOKEN.Parameter.Value;

  console.log('channelAccessToken: ' + channelAccessToken);
};
これをコンパイルしてデプロイしていきましょう。
// コンパイル
$ npm run build

// ビルド
$ sam build

// デプロイ
$ sam deploy --guided
Configuring SAM deploy
======================

        Looking for samconfig.toml :  Not found

        Setting default arguments for 'sam deploy'
        =========================================
        // CloudFormation スタック名の指定
        Stack Name [sam-app]: WeatherFashion

        // リージョンの指定
        AWS Region [us-east-1]: ap-northeast-1

        // デプロイ前にCloudformationの変更セットを確認するか
        #Shows you resources changes to be deployed and require a 'Y' to initiate deploy
        Confirm changes before deploy [y/N]: y

        // SAM CLI に IAM ロールの作成を許可するか(CAPABILITY_IAM)
        #SAM needs permission to be able to create roles to connect to the resources in your template
        Allow SAM CLI IAM role creation [Y/n]: y

        // API イベントタイプの関数に認証が含まれていない場合、警告される
        HelloWorldFunction may not have authorization defined, Is this okay? [y/N]: y

        // この設定を samconfig.toml として保存するか
        Save arguments to samconfig.toml [Y/n]: y
これでデプロイが完了します。
では、API GatewayのURLを確認しましょう。

Webhook URLの登録
先ほどAPI Gatewayで作成したhttpsのURLをコピーしてください。
これをLINE DevelopersのWebhookに設定します。

それではSSMパラメータが正しく取得できているか確認しましょう。
CloudWatchで確認しましょう!

取得できていますね!
ここからの流れはこのような感じです。
①「今日の洋服は?」というメッセージを受け取る
②「今日の洋服は?」を受け取ったら、位置情報メッセージを送る
③「今日の洋服は?」以外を受け取ったら、「そのメッセージには対応していません」と送る
④「位置情報メッセージ」を受け取る
⑤「位置情報メッセージ」を受け取ったら、緯度と経度を使って天気予報を取得する
⑥「位置情報メッセージ」を受け取ったら、天気予報メッセージを送る
では作っていきましょう!
またこれら全てのコードをapi/src/index.tsに書くとコードが肥大化し可読性が落ちます。
なのでCommonディレクトリに関数に切り分けて作成していきます。
またここからはLINEBotのオリジナルの型が頻出します。
1つずつ説明するのはあまりに時間がかかるので、知らない型が出てきたらその度に以下のサイトで検索するようにしてください。
①「今日の洋服は?」というメッセージを受け取る
// パッケージのインストール
import { ClientConfig, Client, WebhookEvent } from '@line/bot-sdk';
import aws from 'aws-sdk';

// SSMパラメータストア
const ssm = new aws.SSM();
const LINE_WEATHER_FASHION_CHANNEL_ACCESS_TOKEN = {
  Name: 'LINE_WEATHER_FASHION_CHANNEL_ACCESS_TOKEN',
  WithDecryption: false,
};
const LINE_WEATHER_FASHION_CHANNEL_SECRET = {
  Name: 'LINE_WEATHER_FASHION_CHANNEL_SECRET',
  WithDecryption: false,
};
const LINE_WEATHER_FASHION_WEATHER_API = {
  Name: 'LINE_WEATHER_FASHION_WEATHER_API',
  WithDecryption: false,
};

exports.handler = async (event: any, context: any) => {
  // SSMパラメータストアで値を取得する
  const CHANNEL_ACCESS_TOKEN: any = await ssm
    .getParameter(LINE_WEATHER_FASHION_CHANNEL_ACCESS_TOKEN)
    .promise();
  const CHANNEL_SECRET: any = await ssm.getParameter(LINE_WEATHER_FASHION_CHANNEL_SECRET).promise();
  const WEATHER_API: any = await ssm.getParameter(LINE_WEATHER_FASHION_WEATHER_API).promise();

  const channelAccessToken: string = CHANNEL_ACCESS_TOKEN.Parameter.Value;
  const channelSecret: string = CHANNEL_SECRET.Parameter.Value;
  const weatherApi: string = WEATHER_API.Parameter.Value;

  // SSMパラメータストアを使ってclientを作成
  const clientConfig: ClientConfig = {
    channelAccessToken: channelAccessToken,
    channelSecret: channelSecret,
  };
  const client: Client = new Client(clientConfig);

  // post
  const body: any = JSON.parse(event.body);
  const response: WebhookEvent = body.events[0];

  // action
  try {
    await actionButtonOrErrorMessage(response, client);
  } catch (err) {
    console.log(err);
  }
};

// ボタンメッセージもしくはエラーメッセージを送る関数
const actionButtonOrErrorMessage = async (event: WebhookEvent, client: Client) => {
  try {
    if (event.type !== 'message' || event.message.type !== 'text') {
      return;
    }

    const { replyToken } = event;
    const { text } = event.message;

    if (text === '今日の洋服は?') {
      // ボタンメッセージを送る
    } else {
      // エラーメッセージを送る
    }
  } catch (err) {
    console.log(err);
  }
};
②「今日の洋服は?」を受け取ったら、位置情報メッセージを送る
// パッケージを読み込む
import { TemplateMessage } from '@line/bot-sdk';

export const buttonMessageTemplate = (): Promise<TemplateMessage> => {
  return new Promise((resolve, reject) => {
    const params: TemplateMessage = {
      type: 'template',
      altText: 'This is a buttons template',
      template: {
        type: 'buttons',
        text: '今日はどんな洋服にしようかな',
        actions: [
          {
            type: 'uri',
            label: '現在地を送る',
            uri: 'https://line.me/R/nv/location/',
          },
        ],
      },
    };
    resolve(params);
  });
};
// パッケージのインストール
import { ClientConfig, Client, WebhookEvent } from '@line/bot-sdk';
import aws from 'aws-sdk';

// モジュールを読み込む
import { buttonMessageTemplate } from './Common/ButtonMessage/ButtonMessageTemplate';

// SSMパラメータストア
const ssm = new aws.SSM();
const LINE_WEATHER_FASHION_CHANNEL_ACCESS_TOKEN = {
  Name: 'LINE_WEATHER_FASHION_CHANNEL_ACCESS_TOKEN',
  WithDecryption: false,
};
const LINE_WEATHER_FASHION_CHANNEL_SECRET = {
  Name: 'LINE_WEATHER_FASHION_CHANNEL_SECRET',
  WithDecryption: false,
};
const LINE_WEATHER_FASHION_WEATHER_API = {
  Name: 'LINE_WEATHER_FASHION_WEATHER_API',
  WithDecryption: false,
};

exports.handler = async (event: any, context: any) => {
  // SSMパラメータストアで値を取得する
  const CHANNEL_ACCESS_TOKEN: any = await ssm
    .getParameter(LINE_WEATHER_FASHION_CHANNEL_ACCESS_TOKEN)
    .promise();
  const CHANNEL_SECRET: any = await ssm.getParameter(LINE_WEATHER_FASHION_CHANNEL_SECRET).promise();
  const WEATHER_API: any = await ssm.getParameter(LINE_WEATHER_FASHION_WEATHER_API).promise();

  const channelAccessToken: string = CHANNEL_ACCESS_TOKEN.Parameter.Value;
  const channelSecret: string = CHANNEL_SECRET.Parameter.Value;
  const weatherApi: string = WEATHER_API.Parameter.Value;

  // SSMパラメータストアを使ってclientを作成
  const clientConfig: ClientConfig = {
    channelAccessToken: channelAccessToken,
    channelSecret: channelSecret,
  };
  const client: Client = new Client(clientConfig);

  // post
  const body: any = JSON.parse(event.body);
  const response: WebhookEvent = body.events[0];

  // action
  try {
    await actionButtonOrErrorMessage(response, client);
  } catch (err) {
    console.log(err);
  }
};

// ボタンメッセージもしくはエラーメッセージを送る関数
const actionButtonOrErrorMessage = async (event: WebhookEvent, client: Client) => {
  try {
    if (event.type !== 'message' || event.message.type !== 'text') {
      return;
    }

    const { replyToken } = event;
    const { text } = event.message;

    if (text === '今日の洋服は?') {
      const buttonMessage = await buttonMessageTemplate();
      await client.replyMessage(replyToken, buttonMessage);
    } else {
      // エラーメッセージを送る
    }
  } catch (err) {
    console.log(err);
  }
};
ボタンメッセージのJSON作成に関しては公式サイトを参考にしましょう。
③「今日の洋服は?」以外を受け取ったら、「そのメッセージには対応していません」と送る
// パッケージを読み込む
import { TextMessage } from '@line/bot-sdk';

export const errorMessageTemplate = (): Promise<TextMessage> => {
  return new Promise((resolve, reject) => {
    const params: TextMessage = {
      type: 'text',
      text: 'ごめんなさい、このメッセージは対応していません。',
    };
    resolve(params);
  });
};
// パッケージのインストール
import { ClientConfig, Client, WebhookEvent } from '@line/bot-sdk';
import aws from 'aws-sdk';

// モジュールを読み込む
import { buttonMessageTemplate } from './Common/ButtonMessage/ButtonMessageTemplate';
import { errorMessageTemplate } from './Common/ButtonMessage/ErrorMessageTemplate';

// SSMパラメータストア
const ssm = new aws.SSM();
const LINE_WEATHER_FASHION_CHANNEL_ACCESS_TOKEN = {
  Name: 'LINE_WEATHER_FASHION_CHANNEL_ACCESS_TOKEN',
  WithDecryption: false,
};
const LINE_WEATHER_FASHION_CHANNEL_SECRET = {
  Name: 'LINE_WEATHER_FASHION_CHANNEL_SECRET',
  WithDecryption: false,
};
const LINE_WEATHER_FASHION_WEATHER_API = {
  Name: 'LINE_WEATHER_FASHION_WEATHER_API',
  WithDecryption: false,
};

exports.handler = async (event: any, context: any) => {
  // SSMパラメータストアで値を取得する
  const CHANNEL_ACCESS_TOKEN: any = await ssm
    .getParameter(LINE_WEATHER_FASHION_CHANNEL_ACCESS_TOKEN)
    .promise();
  const CHANNEL_SECRET: any = await ssm.getParameter(LINE_WEATHER_FASHION_CHANNEL_SECRET).promise();
  const WEATHER_API: any = await ssm.getParameter(LINE_WEATHER_FASHION_WEATHER_API).promise();

  const channelAccessToken: string = CHANNEL_ACCESS_TOKEN.Parameter.Value;
  const channelSecret: string = CHANNEL_SECRET.Parameter.Value;
  const weatherApi: string = WEATHER_API.Parameter.Value;

  // SSMパラメータストアを使ってclientを作成
  const clientConfig: ClientConfig = {
    channelAccessToken: channelAccessToken,
    channelSecret: channelSecret,
  };
  const client: Client = new Client(clientConfig);

  // post
  const body: any = JSON.parse(event.body);
  const response: WebhookEvent = body.events[0];

  // action
  try {
    await actionButtonOrErrorMessage(response, client);
  } catch (err) {
    console.log(err);
  }
};

// ボタンメッセージもしくはエラーメッセージを送る関数
const actionButtonOrErrorMessage = async (event: WebhookEvent, client: Client) => {
  try {
    if (event.type !== 'message' || event.message.type !== 'text') {
      return;
    }

    const { replyToken } = event;
    const { text } = event.message;

    if (text === '今日の洋服は?') {
      const buttonMessage = await buttonMessageTemplate();
      await client.replyMessage(replyToken, buttonMessage);
    } else {
      const errorMessage = await errorMessageTemplate();
      await client.replyMessage(replyToken, errorMessage);
    }
  } catch (err) {
    console.log(err);
  }
};
テキストメッセージのJSON作成に関しては公式サイトを参考にしましょう。
④「位置情報メッセージ」を受け取る
// パッケージのインストール
import { ClientConfig, Client, WebhookEvent } from '@line/bot-sdk';
import aws from 'aws-sdk';

// モジュールを読み込む
import { buttonMessageTemplate } from './Common/ButtonMessage/ButtonMessageTemplate';
import { errorMessageTemplate } from './Common/ButtonMessage/ErrorMessageTemplate';

// SSMパラメータストア
const ssm = new aws.SSM();
const LINE_WEATHER_FASHION_CHANNEL_ACCESS_TOKEN = {
  Name: 'LINE_WEATHER_FASHION_CHANNEL_ACCESS_TOKEN',
  WithDecryption: false,
};
const LINE_WEATHER_FASHION_CHANNEL_SECRET = {
  Name: 'LINE_WEATHER_FASHION_CHANNEL_SECRET',
  WithDecryption: false,
};
const LINE_WEATHER_FASHION_WEATHER_API = {
  Name: 'LINE_WEATHER_FASHION_WEATHER_API',
  WithDecryption: false,
};

exports.handler = async (event: any, context: any) => {
  // SSMパラメータストアで値を取得する
  const CHANNEL_ACCESS_TOKEN: any = await ssm
    .getParameter(LINE_WEATHER_FASHION_CHANNEL_ACCESS_TOKEN)
    .promise();
  const CHANNEL_SECRET: any = await ssm.getParameter(LINE_WEATHER_FASHION_CHANNEL_SECRET).promise();
  const WEATHER_API: any = await ssm.getParameter(LINE_WEATHER_FASHION_WEATHER_API).promise();

  const channelAccessToken: string = CHANNEL_ACCESS_TOKEN.Parameter.Value;
  const channelSecret: string = CHANNEL_SECRET.Parameter.Value;
  const weatherApi: string = WEATHER_API.Parameter.Value;

  // SSMパラメータストアを使ってclientを作成
  const clientConfig: ClientConfig = {
    channelAccessToken: channelAccessToken,
    channelSecret: channelSecret,
  };
  const client: Client = new Client(clientConfig);

  // post
  const body: any = JSON.parse(event.body);
  const response: WebhookEvent = body.events[0];

  // action
  try {
    await actionButtonOrErrorMessage(response, client);
    await actionFlexMessage(response, client, weatherApi);
  } catch (err) {
    console.log(err);
  }
};

// ボタンメッセージもしくはエラーメッセージを送る関数
const actionButtonOrErrorMessage = async (event: WebhookEvent, client: Client) => {
  try {
    if (event.type !== 'message' || event.message.type !== 'text') {
      return;
    }

    const { replyToken } = event;
    const { text } = event.message;

    if (text === '今日の洋服は?') {
      const buttonMessage = await buttonMessageTemplate();
      await client.replyMessage(replyToken, buttonMessage);
    } else {
      const errorMessage = await errorMessageTemplate();
      await client.replyMessage(replyToken, errorMessage);
    }
  } catch (err) {
    console.log(err);
  }
};

// 天気予報とファッションレコメンドメッセージを送る関数
const actionFlexMessage = async (event: WebhookEvent, client: Client, weatherApi: string) => {
  try {
    if (event.type !== 'message' || event.message.type !== 'location') {
      return;
    }

    // ファッションレコメンドメッセージを送る
  } catch (err) {
    console.log(err);
  }
};
⑤「位置情報メッセージ」を受け取ったら、緯度と経度を使って天気予報を取得する
Flex Messageの作成方法に関してファイル名も出しながら説明します。
【ファイル名】GetWeatherForecast.ts
天気予報を取得します。
まずはOpenWeatherで天気予報を取得するために必要な情報が3つあります。
①API
②経度
③緯度
それではこの3つを取得していきましょう。
①API
APIはSSMパラメータストアで取得しています。
②経度、③緯度
これら2つは、eventから取得できます。
ということで作っていきましょう。
// Load the package
import { WebhookEvent } from '@line/bot-sdk';
import axios, { AxiosResponse } from 'axios';

export const getWeatherForecastData = async (
  event: WebhookEvent,
  weatherApi: string
): Promise<any> => {
  return new Promise(async (resolve, reject) => {
    try {
      if (event.type !== 'message' || event.message.type !== 'location') {
        return;
      }

      // Get latitude and longitude
      const latitude: number = event.message.latitude;
      const longitude: number = event.message.longitude;

      // OpenWeatherURL
      const openWeatherURL: string = `https://api.openweathermap.org/data/2.5/onecall?lat=${latitude}&lon=${longitude}&units=metric&lang=ja&appid=${weatherApi}`;

      const weatherData: AxiosResponse<any> = await axios.get(openWeatherURL);
      resolve(weatherData);
    } catch (err) {
      reject(err);
    }
  });
};
【ファイル名】FormatWeatherForecast.ts
取得した天気予報のデータの整形を行う。
こちらでは、const weatherとconst weatherArrayの2つで型定義ファイルを作成する必要があります。
ということで作成しましょう。
export type WeatherType = {
  dt: number;
  sunrise: number;
  sunset: number;
  moonrise: number;
  moonset: number;
  moon_phase: number;
  temp: {
    day: number;
    min: number;
    max: number;
    night: number;
    eve: number;
    morn: number;
  };
  feels_like: {
    day: number;
    night: number;
    eve: number;
    morn: number;
  };
  pressure: number;
  humidity: number;
  dew_point: number;
  wind_speed: number;
  wind_deg: number;
  wind_gust: number;
  weather: [
    {
      id: number;
      main: string;
      description: string;
      icon: string;
    }
  ];
  clouds: number;
  pop: number;
  rain: number;
  uvi: number;
};

export type WeatherArrayType = {
  today: string;
  imageURL: string;
  weatherForecast: string;
  mornTemperature: number;
  dayTemperature: number;
  eveTemperature: number;
  nightTemperature: number;
  fashionAdvice: string;
};
作成した型定義を使ってファイルを完成させます。
// Load the package
import { WebhookEvent } from '@line/bot-sdk';
import { AxiosResponse } from 'axios';

// Load the module
import { getWeatherForecastData } from './GetWeatherForecast';

// types
import { WeatherType, WeatherArrayType } from './types/FormatWeatherForecast.type';

export const formatWeatherForecastData = async (
  event: WebhookEvent,
  weatherApi: string
): Promise<WeatherArrayType> => {
  return new Promise(async (resolve, reject) => {
    // Get the getWeatherForecastData
    const weathers: AxiosResponse<any> = await getWeatherForecastData(event, weatherApi);

    // Util
    const weather: WeatherType = weathers.data.daily[0];

    // Five required data
    // 1) Today's date
    const UNIXToday: number = weather.dt;
    const convertUNIXToday: Date = new Date(UNIXToday * 1000);
    const today: string = convertUNIXToday.toLocaleDateString('ja-JP');

    // 2) Weather forecast
    const weatherForecast: string = weather.weather[0].description;

    // 3) Temperature (morning, daytime, evening, night)
    const mornTemperature: number = weather.feels_like.morn;
    const dayTemperature: number = weather.feels_like.day;
    const eveTemperature: number = weather.feels_like.eve;
    const nightTemperature: number = weather.feels_like.night;

    // Bifurcate your clothing by maximum temperature
    const maximumTemperature: number = Math.max(
      mornTemperature,
      dayTemperature,
      eveTemperature,
      nightTemperature
    );

    // 4) Fashion Advice
    let fashionAdvice: string = '';

    // 5) Fashion Image
    let imageURL: string = '';

    if (maximumTemperature >= 26) {
      fashionAdvice =
        '暑い!半袖が活躍する時期です。少し歩くだけで汗ばむ気温なので半袖1枚で大丈夫です。ハットや日焼け止めなどの対策もしましょう';
      imageURL =
        'https://uploads-ssl.webflow.com/603c87adb15be3cb0b3ed9b5/60aa3c44153071e6df530eb7_71.png';
    } else if (maximumTemperature >= 21) {
      fashionAdvice =
        '半袖と長袖の分かれ目の気温です。日差しのある日は半袖を、曇りや雨で日差しがない日は長袖がおすすめです。この気温では、半袖の上にライトアウターなどを着ていつでも脱げるようにしておくといいですね!';
      imageURL =
        'https://uploads-ssl.webflow.com/603c87adb15be3cb0b3ed9b5/6056e58a5923ad81f73ac747_10.png';
    } else if (maximumTemperature >= 16) {
      fashionAdvice =
        'レイヤードスタイルが楽しめる気温です。ちょっと肌寒いかな?というくらいの過ごしやすい時期なので目一杯ファッションを楽しみましょう!日中と朝晩で気温差が激しいので羽織ものを持つことを前提としたコーディネートがおすすめです。';
      imageURL =
        'https://uploads-ssl.webflow.com/603c87adb15be3cb0b3ed9b5/6087da411a3ce013f3ddcd42_66.png';
    } else if (maximumTemperature >= 12) {
      fashionAdvice =
        'じわじわと寒さを感じる気温です。ライトアウターやニットやパーカーなどが活躍します。この時期は急に暑さをぶり返すことも多いのでこのLINEで毎日天気を確認してくださいね!';
      imageURL =
        'https://uploads-ssl.webflow.com/603c87adb15be3cb0b3ed9b5/6056e498e7d26507413fd853_4.png';
    } else if (maximumTemperature >= 7) {
      fashionAdvice =
        'そろそろ冬本番です。冬服の上にアウターを羽織ってちょうどいいくらいです。ただし室内は暖房が効いていることが多いので脱ぎ着しやすいコーディネートがおすすめです!';
      imageURL =
        'https://uploads-ssl.webflow.com/603c87adb15be3cb0b3ed9b5/6056e4de7156326ff560b1a1_6.png';
    } else {
      fashionAdvice =
        '凍えるほどの寒さです。しっかり厚着して、マフラーや手袋、ニット帽などの冬小物もうまく使って防寒対策をしましょう!';
      imageURL =
        'https://uploads-ssl.webflow.com/603c87adb15be3cb0b3ed9b5/6056ebd3ea0ff76dfc900633_48.png';
    }

    // Make an array of the above required items.
    const weatherArray: WeatherArrayType = {
      today,
      imageURL,
      weatherForecast,
      mornTemperature,
      dayTemperature,
      eveTemperature,
      nightTemperature,
      fashionAdvice,
    };

    resolve(weatherArray);
  });
};
【ファイル名】FlexMessageTemplate
整形したデータを取得して Flex Messageのテンプレートを作成する。
// Load the package
import { WebhookEvent, FlexMessage } from '@line/bot-sdk';

// Load the module
import { formatWeatherForecastData } from './FormatWeatherForecast';

export const flexMessageTemplate = async (
  event: WebhookEvent,
  weatherApi: string
): Promise<FlexMessage> => {
  return new Promise(async (resolve, reject) => {
    const data = await formatWeatherForecastData(event, weatherApi);

    resolve({
      type: 'flex',
      altText: '天気予報です',
      contents: {
        type: 'bubble',
        header: {
          type: 'box',
          layout: 'vertical',
          contents: [
            {
              type: 'text',
              text: data.today,
              color: '#FFFFFF',
              align: 'center',
              weight: 'bold',
            },
          ],
        },
        hero: {
          type: 'image',
          url: data.imageURL,
          size: 'full',
        },
        body: {
          type: 'box',
          layout: 'vertical',
          contents: [
            {
              type: 'text',
              text: `天気は、「${data.weatherForecast}」です`,
              weight: 'bold',
              align: 'center',
            },
            {
              type: 'text',
              text: '■体感気温',
              margin: 'lg',
            },
            {
              type: 'text',
              text: `朝:${data.mornTemperature}℃`,
              margin: 'sm',
              size: 'sm',
              color: '#C8BD16',
            },
            {
              type: 'text',
              text: `日中:${data.dayTemperature}℃`,
              margin: 'sm',
              size: 'sm',
              color: '#789BC0',
            },
            {
              type: 'text',
              text: `夕方:${data.eveTemperature}℃`,
              margin: 'sm',
              size: 'sm',
              color: '#091C43',
            },
            {
              type: 'text',
              text: `夜:${data.nightTemperature}℃`,
              margin: 'sm',
              size: 'sm',
              color: '#004032',
            },
            {
              type: 'separator',
              margin: 'xl',
            },
            {
              type: 'text',
              text: '■洋服アドバイス',
              margin: 'xl',
            },
            {
              type: 'text',
              text: data.fashionAdvice,
              margin: 'sm',
              wrap: true,
              size: 'xs',
            },
          ],
        },
        styles: {
          header: {
            backgroundColor: '#00B900',
          },
          hero: {
            separator: false,
          },
        },
      },
    });
  });
};
⑥「位置情報メッセージ」を受け取ったら、天気予報メッセージを送る
// パッケージのインストール
import { ClientConfig, Client, WebhookEvent } from '@line/bot-sdk';
import aws from 'aws-sdk';

// モジュールを読み込む
import { buttonMessageTemplate } from './Common/ButtonMessage/ButtonMessageTemplate';
import { errorMessageTemplate } from './Common/ButtonMessage/ErrorMessageTemplate';
import { flexMessageTemplate } from './Common/WeatherForecastMessage/FlexMessageTemplate';

// SSMパラメータストア
const ssm = new aws.SSM();
const LINE_WEATHER_FASHION_CHANNEL_ACCESS_TOKEN = {
  Name: 'LINE_WEATHER_FASHION_CHANNEL_ACCESS_TOKEN',
  WithDecryption: false,
};
const LINE_WEATHER_FASHION_CHANNEL_SECRET = {
  Name: 'LINE_WEATHER_FASHION_CHANNEL_SECRET',
  WithDecryption: false,
};
const LINE_WEATHER_FASHION_WEATHER_API = {
  Name: 'LINE_WEATHER_FASHION_WEATHER_API',
  WithDecryption: false,
};

exports.handler = async (event: any, context: any) => {
  // SSMパラメータストアで値を取得する
  const CHANNEL_ACCESS_TOKEN: any = await ssm
    .getParameter(LINE_WEATHER_FASHION_CHANNEL_ACCESS_TOKEN)
    .promise();
  const CHANNEL_SECRET: any = await ssm.getParameter(LINE_WEATHER_FASHION_CHANNEL_SECRET).promise();
  const WEATHER_API: any = await ssm.getParameter(LINE_WEATHER_FASHION_WEATHER_API).promise();

  const channelAccessToken: string = CHANNEL_ACCESS_TOKEN.Parameter.Value;
  const channelSecret: string = CHANNEL_SECRET.Parameter.Value;
  const weatherApi: string = WEATHER_API.Parameter.Value;

  // SSMパラメータストアを使ってclientを作成
  const clientConfig: ClientConfig = {
    channelAccessToken: channelAccessToken,
    channelSecret: channelSecret,
  };
  const client: Client = new Client(clientConfig);

  // post
  const body: any = JSON.parse(event.body);
  const response: WebhookEvent = body.events[0];

  // action
  try {
    await actionButtonOrErrorMessage(response, client);
    await actionFlexMessage(response, client, weatherApi);
  } catch (err) {
    console.log(err);
  }
};

// ボタンメッセージもしくはエラーメッセージを送る関数
const actionButtonOrErrorMessage = async (event: WebhookEvent, client: Client) => {
  try {
    if (event.type !== 'message' || event.message.type !== 'text') {
      return;
    }

    const { replyToken } = event;
    const { text } = event.message;

    if (text === '今日の洋服は?') {
      const buttonMessage = await buttonMessageTemplate();
      await client.replyMessage(replyToken, buttonMessage);
    } else {
      const errorMessage = await errorMessageTemplate();
      await client.replyMessage(replyToken, errorMessage);
    }
  } catch (err) {
    console.log(err);
  }
};

// 天気予報とファッションレコメンドメッセージを送る関数
const actionFlexMessage = async (event: WebhookEvent, client: Client, weatherApi: string) => {
  try {
    if (event.type !== 'message' || event.message.type !== 'location') {
      return;
    }

    const { replyToken } = event;
    const message = await flexMessageTemplate(event, weatherApi);

    await client.replyMessage(replyToken, message);
  } catch (err) {
    console.log(err);
  }
};
これで完成です!
では、デプロイしていきましょう。
デプロイ
まずは、npm run buildでコンパイルしましょう。
$ npm run build
コンパイルされた後は、ビルドしてデプロイしていきましょう。
// ビルド
$ sam build

// デプロイ
$ sam deploy --guided
最後に
以前すべて手作業で行いましたが、SAMを使うと効率的にデプロイが行えます。
SAMテンプレートの書き方を学ぶコストは発生しますが、1度作ればそれをそのまま使えるので汎用性も高いのでおすすめです。
サーバーレスアーキテクチャを勉強する方がいましたらぜひSAMも勉強してみてください!