背景
React Nativeで開発はしてきたのですが、新しくなってきたExpoはあまり触ってなかったので、チュートリアルを走ってみます。
参考
プロジェクトの作成
npxでExpoのプロジェクトを作成します。
npx create-expo-app StickerSmash && cd StickerSmash
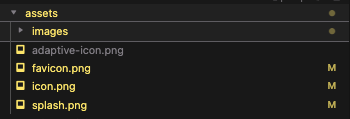
アセットをチュートリアルページからダウンロードしておきます。
ダウンロードしたファイルを、プロダクトのassetsフォルダへ上書きします。
依存関係をインストールします。
$ npx expo install react-dom react-native-web @expo/webpack-config
下記のコマンドで開発サーバーを起動します。
npx expo start
起動後にターミナルでwを押すことで、WebブラウザでWebアプリが立ち上がります。
aでAndroidアプリ、iでiOSアプリが立ち上がります。
画面の構築
StickerSmashアプリの最初の画面を作成します。
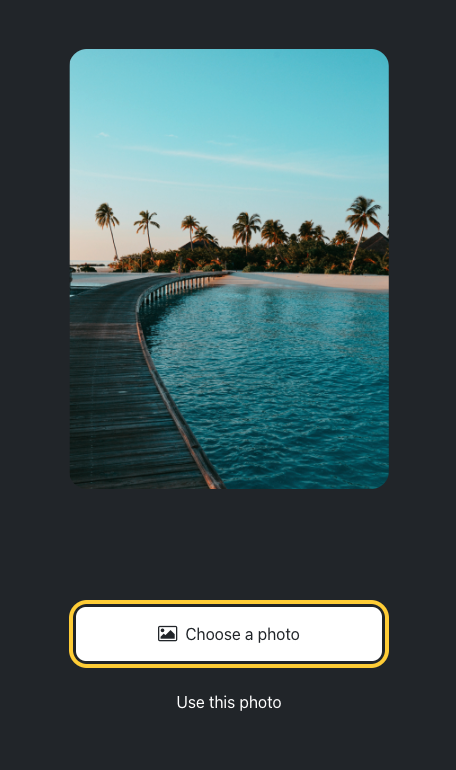
下記の画面を作成していきます。
要素を分解すると、下記のようになります。
1つずつ実装していきます。
- 画面の背景色
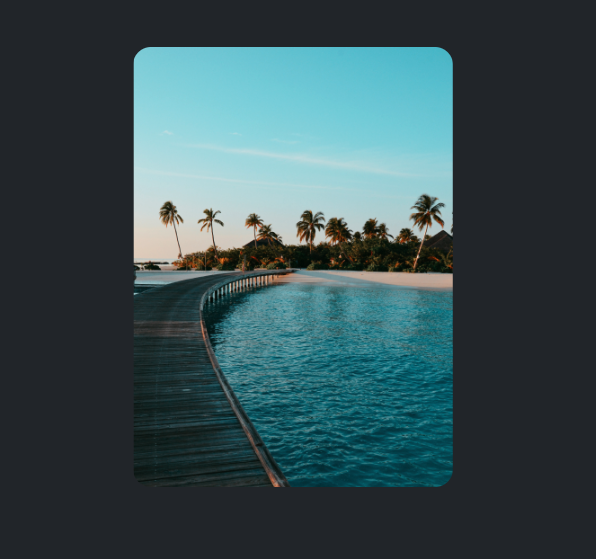
- 画面中央に画像を表示
- 画面の下半分にボタンが2つ
画面の背景色
styleプロパティは、JavaScript オブジェクトを値として受け入れる prop を受け入れます。
下記のbackgroundColorを#25292eへ変更します。
const styles = StyleSheet.create({
  container: {
    flex: 1,
+    backgroundColor: '#25292e',
    alignItems: 'center',
    justifyContent: 'center',
  },
});
文字色が読みにくくなったので、文字色を変更します。
直接styleに書き込むことも可能です。
+ <Text style={{ color: '#fff' }}>~~~</Text>
画像を表示する
React Nativeのコンポーネントを使用して表示します。
静的アセットでもURLでも表示が可能です。Webのimgと同じ。
import { StatusBar } from 'expo-status-bar';
+ import { StyleSheet, View, Image } from 'react-native';

+ const PlaceholderImage = require('./assets/images/background-image.png');

export default function App() {
  return (
    <View style={styles.container}>
+      <View style={styles.imageContainer}>
+        <Image source={PlaceholderImage} style={styles.image} />
+      </View>
      <StatusBar style="auto" />
    </View>
  );
}

const styles = StyleSheet.create({
  container: {
    flex: 1,
    backgroundColor: '#25292e',
    alignItems: 'center',
  },
+  imageContainer: {
+    flex: 1,
+    paddingTop: 58,
+  },
+  image: {
+    width: 320,
+    height: 440,
+    borderRadius: 18,
+  },
});
コンポーネントをファイル分割する
ImageViewerを別ファイルへ切り出します。
ここはReactと同じなので割愛します。
      <View style={styles.imageContainer}>
+        <ImageViewer placeholderImageSource={PlaceholderImage} />
      </View>
Pressableを使ってボタンを作る
下記のようなButton Componentファイルを作ります。
export default function Button({ label }) {
  return (
    <View style={styles.buttonContainer}>
      <Pressable style={styles.button} onPress={() => alert('You pressed a button.')}>
        <Text style={styles.buttonLabel}>{label}</Text>
      </Pressable>
    </View>
  );
}
      <View style={styles.footerContainer}>
+        <Button label="Choose a photo" />
+        <Button label="Use this photo" />
      </View>
下記のように、2つのButtonが追加されます。
Buttonコンポーネントを再利用しやすくする
ターミナルで Control+C を押して、開発サーバーを停止後、下記をターミナルで叩きます。
expo/vecwetor-iconsをインストールします。
npx expo install @expo/vector-icons
theme Propsを受け取って、デザインをthemeに合わせて変更するように修正します。
import { StyleSheet, View, Pressable, Text } from 'react-native';
+ import FontAwesome from "@expo/vector-icons/FontAwesome";

+ export default function Button({ label,  theme }) {
+  if (theme === "primary") {
    return (
+      <View
      style={[styles.buttonContainer, { borderWidth: 4, borderColor: "#ffd33d", borderRadius: 18 }]}
      >
        <Pressable
          style={[styles.button, { backgroundColor: "#fff" }]}
          onPress={() => alert('You pressed a button.')}
        >
+          <FontAwesome
+            name="picture-o"
+            size={18}
+            color="#25292e"
+            style={styles.buttonIcon}
+          />
          <Text style={[styles.buttonLabel, { color: "#25292e" }]}>{label}</Text>
        </Pressable>
    </View>
    );
  }

  return (
    <View style={styles.buttonContainer}>
        <Pressable style={styles.button} onPress={() => alert('You pressed a button.')}>
          <Text style={styles.buttonLabel}>{label}</Text>
        </Pressable>
      </View>
  );
}

const styles = StyleSheet.create({
  // Styles from previous step remain unchanged.
});
      <View style={styles.footerContainer}>
+        <Button theme="primary" label="Choose a photo" />
        <Button label="Use this photo" />
      </View>
デザインの実装が完了しました。


