Amazing Link in Japanese
G-DEP Associate Research Engineer 東京大学大学院工学系研究科 岡安優
Motivation
DLに夢を抱きつつ、よくわからないでいきなりTensorflow!! GPU!!
CUDA!!!!! and cuDNN!! COME ON! -> Install Error Parade.....

ということで、この記事ではこれからGPUでの高速計算を本格的に行っていきたい上記のような自分への戒めを込めた勉強用の記事となります。
Content
- GPU computing and CUDA
- Basic Hardware
- Get CUDA!
- Play with CUDA
- Architecture of GPU
- CUDA Programming (1)
- CUDA Programming (2)
- Elementary Programming Practice (1)
- Elementary Programming Practice (2)
- OpenACC and PGI compiler (1)
- OpenACC and PGI compiler (2)
- OpenACC and PGI compiler (3)
- Library from NVIDIA
1. GPU computing and CUDA
1.1 Introduction
So, let us start with the definition of GPU, which is short for Graphic Processing Unit. As it named, mainly it is aimed at coping with the image processing. And this unit is connected to VRAM(Video Random Access Memory) to efficiently process the images. The compositions are as simple as those of CPU, but what GPU makes so popular is that parallel computing power. If you don't have any idea what i am talking about, then please check this blog and video first!!. As you can see, it is excel in a parallel processing of huge data.
With these quality features, now we are wondering who can provide such a great product?? The answer is on this website.
By now, we have grasped a bit of GPU, right?
Then let's move on to the purpose why we are interested in this cutting-edge-technology!
1.2 What is GPU computing?
You may have already covered this fancy video, but let me put up here again!

And as you can see it is magically fast! isn't it?
In fact, it is said that originally scientists were wondering how to utilise the parallelised computing unit of GPU, and they have found the different colours on each unit of GPU. Since then they leveraged that uniqueness for parallel computing. Later on NVIDIA has developed the chip for this computation method leading the world to GPU! So what they created was CUDA which is IDE for general-purpose computing on GPU(GPGPU so called).
1.3 What is the difference between CPU and GPU?
You know? With the birth of CPU, we were sticking to the clock speed though, what GPU showed us was totally a new world. GPU is put more than hundreds of computing unit on it. Hence, as the video have shown, GPU own such a massive computational resource.
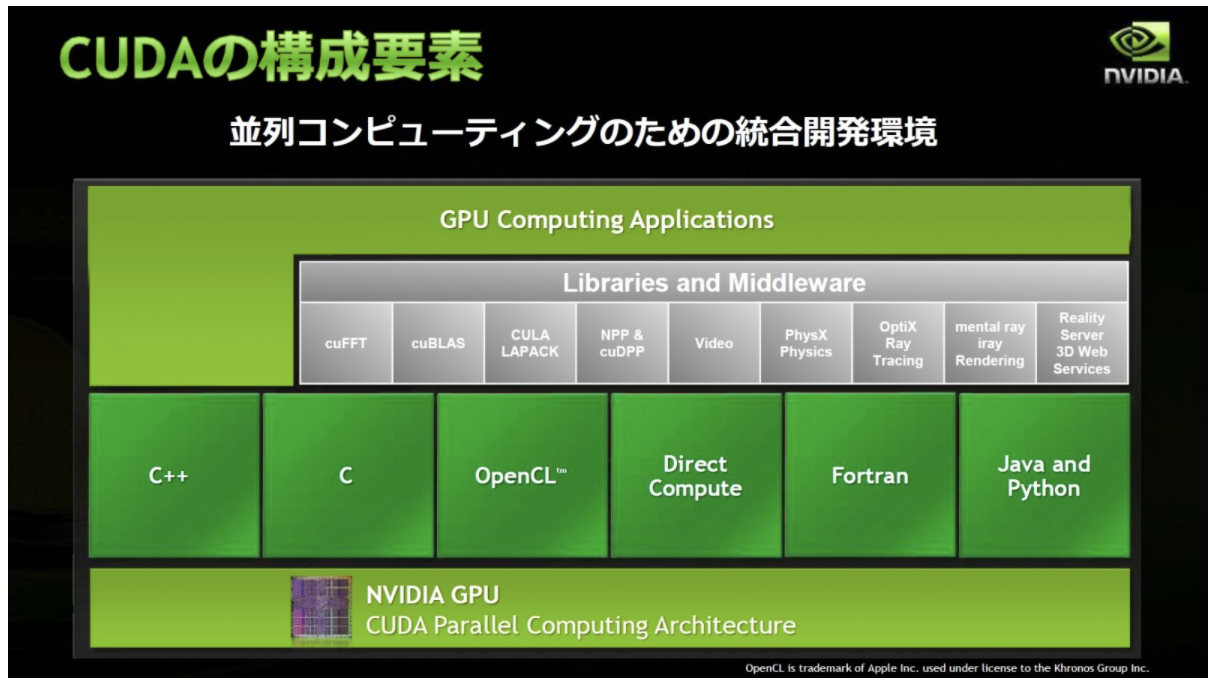
1.4 What is CUDA?
So hereby, we are kind of understanding about GPU, but in this section, I would like to focus on CUDA. It stands for Computational Unified Device Architecture.
Quoted from Official Blog of Nvidia
CUDA® is a parallel computing platform and programming model developed by NVIDIA for general computing on graphical processing units (GPUs). With CUDA, developers are able to dramatically speed up computing applications by harnessing the power of GPUs.
In GPU-accelerated applications, the sequential part of the workload runs on the CPU – which is optimized for single-threaded performance – while the compute intensive portion of the application runs on thousands of GPU cores in parallel. When using CUDA, developers program in popular languages such as C, C++, Fortran, Python and MATLAB and express parallelism through extensions in the form of a few basic keywords.
The CUDA Toolkit from NVIDIA provides everything you need to develop GPU-accelerated applications. The CUDA Toolkit includes GPU-accelerated libraries, a compiler, development tools and the CUDA runtime.
So CUDA is a parallel computing platform and programming model that makes using a GPU for general purpose computing simple and elegant. The developer still programs in the familiar C, C++, Fortran, or an ever expanding list of supported languages, and incorporates extensions of these languages in the form of a few basic keywords
2. Basic Hardware
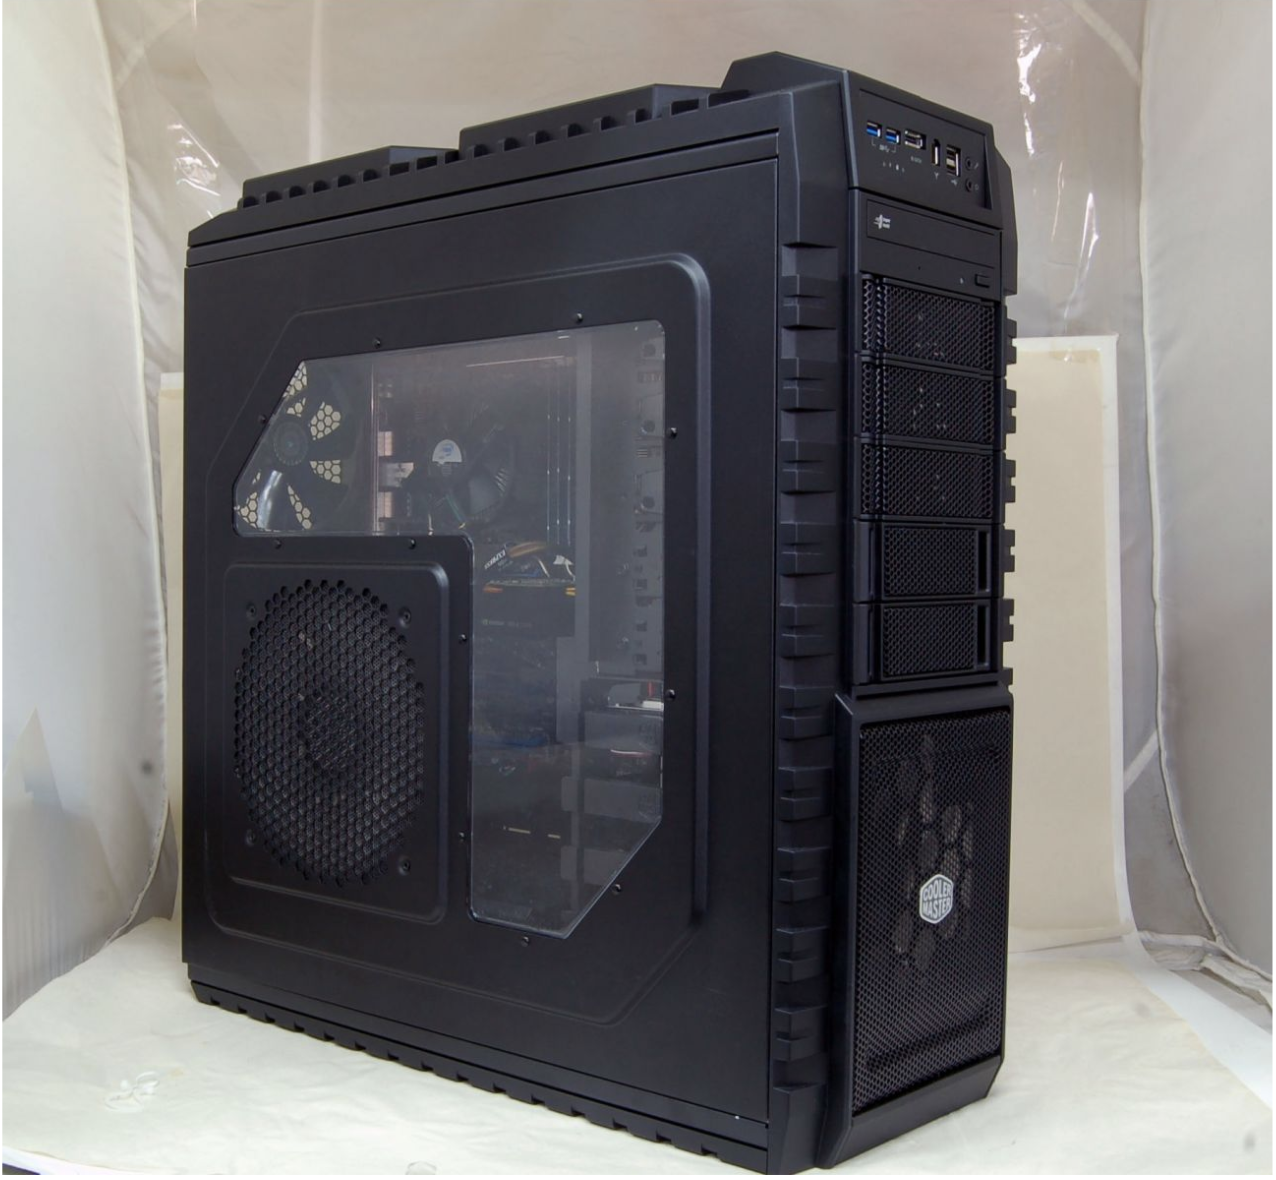
Needless to say, we are not pursuing a static academic knowledge. We need a practical knowledge. So in this section, let us move on to the hardware of GPU.
At first, the appearance.
Then the inside of this black rocky face.
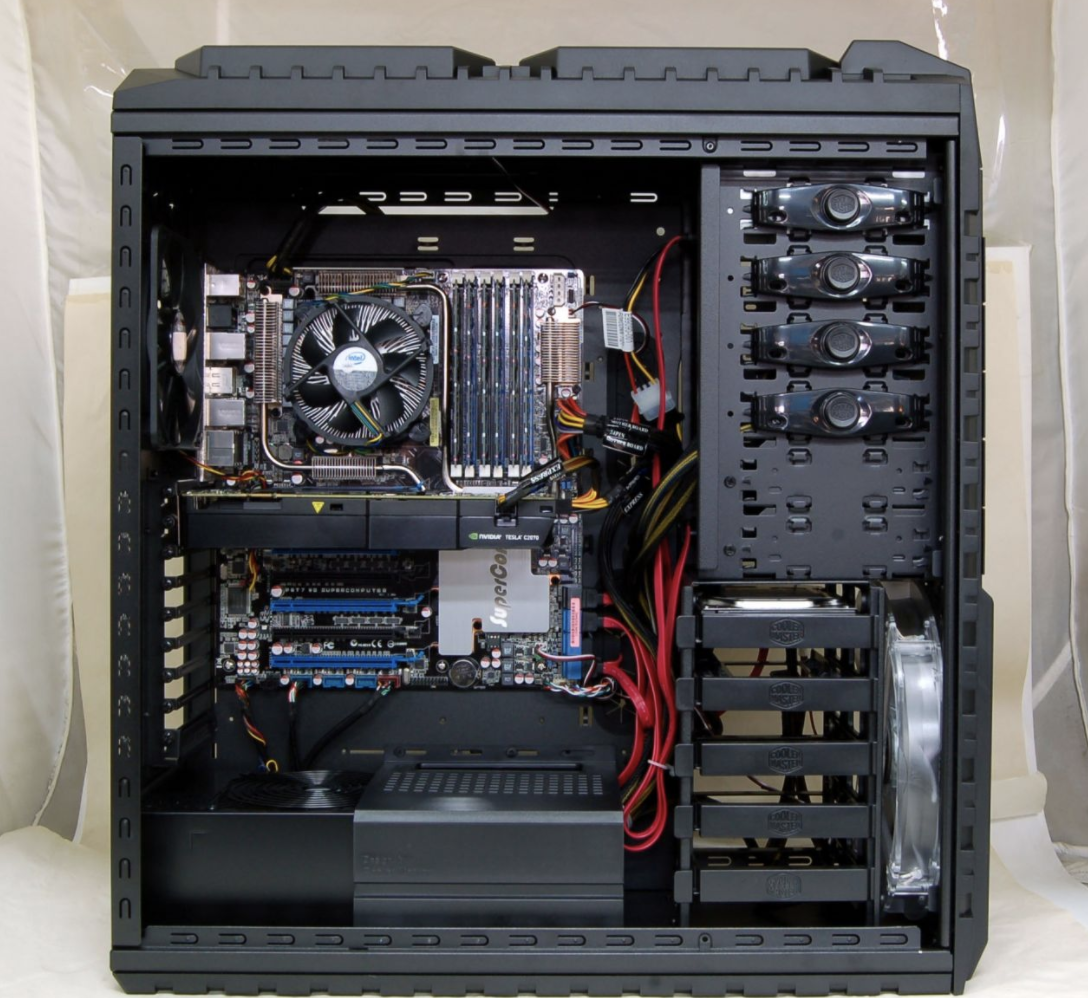
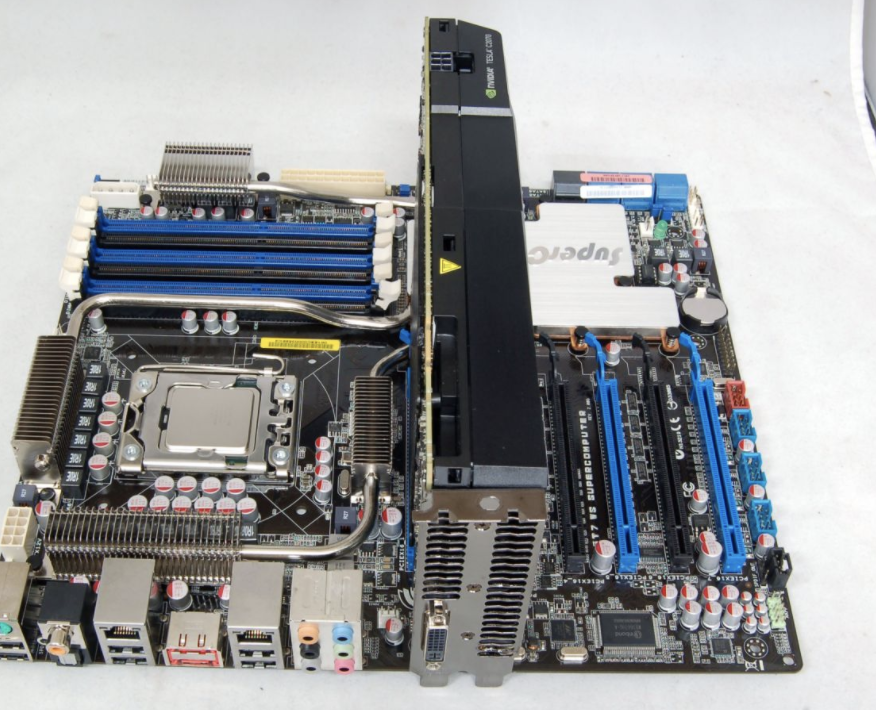
2.1 Motherboard
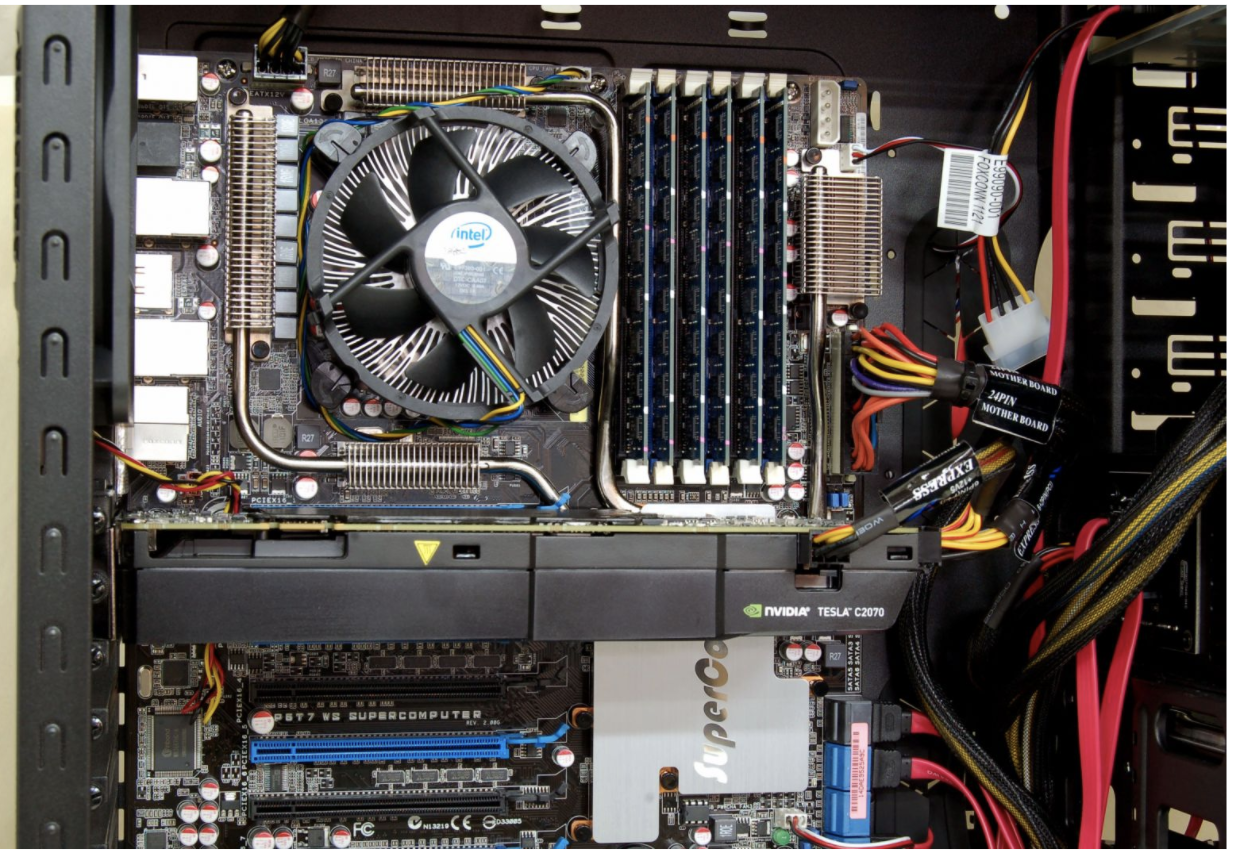

Yes, this sticking out one is GPU!
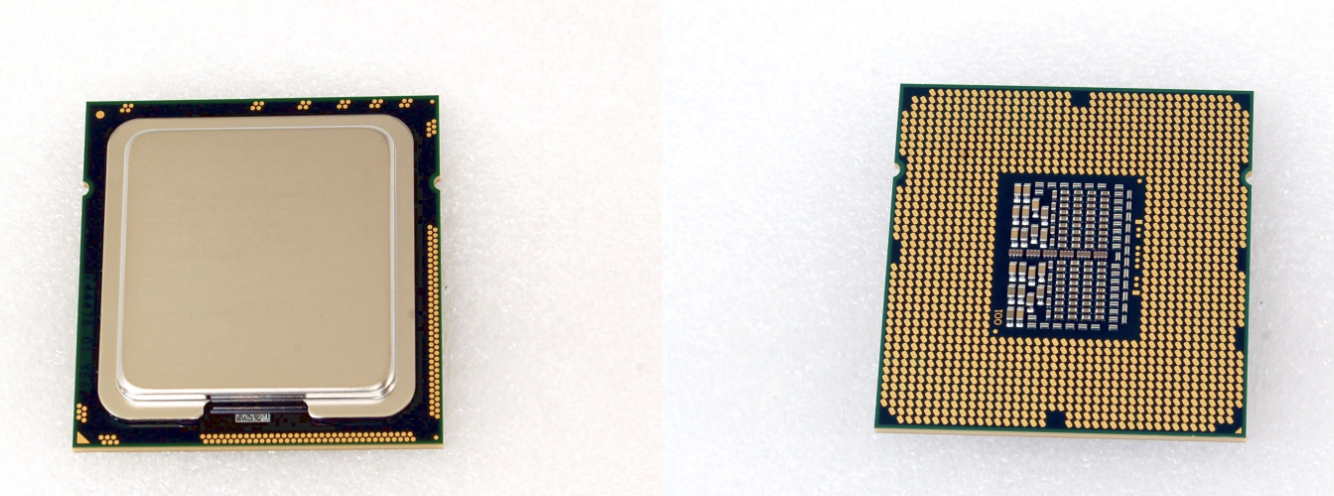
2.3 CPU
Hello our (old) friend! Still love you!
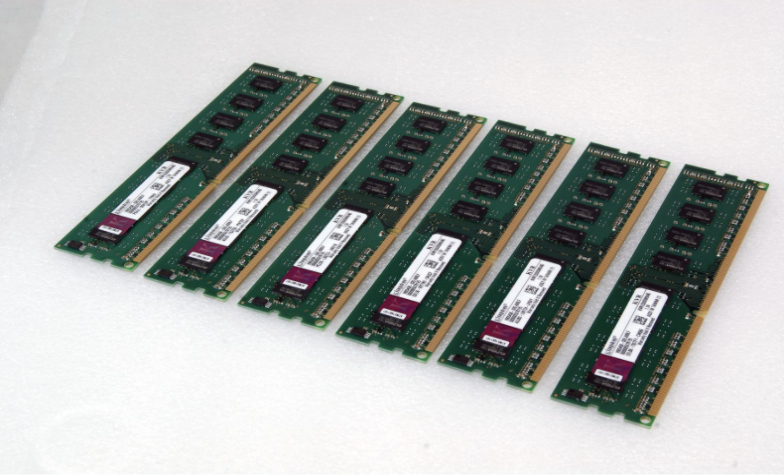
2.4 RAM
2.5 Power Suply
 Note: GPU needs relatively large electricity compared to CPU. And it depends on what type of GPU do you have, so please check the required buttery beforehand!
2.6 GPU
This is absolute beauty!!

3. Get CUDA!
Please finish installation before jumping into this section.
Useful Link for Ubuntu users: https://qiita.com/yukoba/items/3692f1cb677b2383c983
3.1 Hello World of CUDA
We have been talking enough already, so let's get our hands dirty!
Please compile this file(hello.cu) using "nvcc".
# include <stdio.h>

int main( void ) {
  printf("Hello, World!\n");
  return 0;
}
$ nvcc hello.cu # compiling the file
$ ./a.out # you can run the file
Congratulation!! You just finished making your first cuda programme.
So what the compiler nvcc so called did was a bit complicated.
It have classified the code into CPU and GPU part. And then for cpu part of code, it applies C compiler, while it compiles GPU part by itself(nvcc).
Link of this PPT: http://http.download.nvidia.com/developer/cuda/jp/CUDA_Programming_Basics_PartI_jp.pdf

Now let's try genuine cuda programming!
Save below code as hello_gpu.cu and compile it!
# include <stdio.h>

__global__ void kernel( void ) {
}

int main( void ) {
    kernel<<<1,1>>>();
    printf( "Hello, GPU World!\n" );
    return 0;
}
$ nvcc hello_gpu.cu
$ ./a.out
# output Hello World!
Since we have finished with simple helloworld programme, I believe that warm-up has finished! And let's dive into official tutorial provided by NVIDIA.
Link: https://devblogs.nvidia.com/even-easier-introduction-cuda/
I would like to skip deeper insight, because there are many good articles over the world already.
And for this tutorial from NVIDIA, they have explained how we can optimise the code.
Starting off with the simple C++ code, and they let us optimise more modify a bit of it.
sample1.cpp
# include <iostream>
# include <math.h>

// function to add the elements of two arrays
void add(int n, float *x, float *y)
{
  for (int i = 0; i < n; i++)
      y[i] = x[i] + y[i];
}

int main(void)
{
  int N = 1<<20; // 1M elements

  float *x = new float[N];
  float *y = new float[N];

  // initialize x and y arrays on the host
  for (int i = 0; i < N; i++) {
    x[i] = 1.0f;
    y[i] = 2.0f;
  }

  // Run kernel on 1M elements on the CPU
  add(N, x, y);

  // Check for errors (all values should be 3.0f)
  float maxError = 0.0f;
  for (int i = 0; i < N; i++)
    maxError = fmax(maxError, fabs(y[i]-3.0f));
  std::cout << "Max error: " << maxError << std::endl;

  // Free memory
  delete [] x;
  delete [] y;

  return 0;
}
$ nvcc sample1.cpp
$ ./a.out
$ nvprof ./a.out # we can profile the performance
# output should be like below
==10215== NVPROF is profiling process 10215, command: ./saxpy
Max error: 0
==10215== Profiling application: ./saxpy
==10215== Profiling result:
Time(%)      Time     Calls       Avg       Min       Max  Name
100.00%  426.56ms         1  426.56ms  426.56ms  426.56ms  add(int, float*, float*)

==10215== API calls:
Time(%)      Time     Calls       Avg       Min       Max  Name
 54.28%  426.56ms         1  426.56ms  426.56ms  426.56ms  cudaDeviceSynchronize
 45.33%  356.25ms         2  178.13ms  647.30us  355.60ms  cudaMallocManaged
  0.20%  1.5692ms         1  1.5692ms  1.5692ms  1.5692ms  cudaLaunch
  0.14%  1.1081ms         2  554.05us  504.10us  604.00us  cudaFree
  0.02%  172.60us        83  2.0790us     100ns  73.699us  cuDeviceGetAttribute
  0.02%  163.80us         1  163.80us  163.80us  163.80us  cuDeviceTotalMem
  0.00%  23.400us         1  23.400us  23.400us  23.400us  cuDeviceGetName
  0.00%  5.8000us         3  1.9330us     200ns  5.1000us  cudaSetupArgument
  0.00%  2.1000us         1  2.1000us  2.1000us  2.1000us  cudaConfigureCall
  0.00%  1.4000us         2     700ns     600ns     800ns  cuDeviceGetCount
  0.00%     900ns         2     450ns     400ns     500ns  cuDeviceGet
And here is the optimised code.
Named, sample2.cu
# include <iostream>
# include <math.h>
// Kernel function to add the elements of two arrays
__global__
void add(int n, float *x, float *y)
{
  int index = threadIdx.x;
  int stride = blockDim.x;
  for (int i = index; i < n; i+= stride)
    y[i] = x[i] + y[i];
}

int main(void)
{
  int N = 1<<20;
  float *x, *y;

  // Allocate Unified Memory – accessible from CPU or GPU
  cudaMallocManaged(&x, N*sizeof(float));
  cudaMallocManaged(&y, N*sizeof(float));

  // initialize x and y arrays on the host
  for (int i = 0; i < N; i++) {
    x[i] = 1.0f;
    y[i] = 2.0f;
  }

  // Run kernel on 1M elements on the GPU
  add<<<1, 256>>>(N, x, y);

  // Wait for GPU to finish before accessing on host
  cudaDeviceSynchronize();

  // Check for errors (all values should be 3.0f)
  float maxError = 0.0f;
  for (int i = 0; i < N; i++)
    maxError = fmax(maxError, fabs(y[i]-3.0f));
  std::cout << "Max error: " << maxError << std::endl;

  // Free memory
  cudaFree(x);
  cudaFree(y);

  return 0;
}
$ nvcc sample2.cu
$ ./a.out
$ nvprof ./a.out
# output should be like below
==10195== NVPROF is profiling process 10195, command: ./a.out
Max error: 0
==10195== Profiling application: ./a.out
==10195== Profiling result:
Time(%)      Time     Calls       Avg       Min       Max  Name
100.00%  2.8100ms         1  2.8100ms  2.8100ms  2.8100ms  add(int, float*, float*)

==10195== API calls:
Time(%)      Time     Calls       Avg       Min       Max  Name
 98.22%  322.33ms         2  161.17ms  652.50us  321.68ms  cudaMallocManaged
  0.86%  2.8223ms         1  2.8223ms  2.8223ms  2.8223ms  cudaDeviceSynchronize
  0.48%  1.5644ms         1  1.5644ms  1.5644ms  1.5644ms  cudaLaunch
  0.33%  1.0846ms         2  542.30us  459.90us  624.70us  cudaFree
  0.05%  171.80us        83  2.0690us     100ns  73.700us  cuDeviceGetAttribute
  0.05%  163.90us         1  163.90us  163.90us  163.90us  cuDeviceTotalMem
  0.01%  24.800us         1  24.800us  24.800us  24.800us  cuDeviceGetName
  0.00%  7.2000us         3  2.4000us     100ns  6.6000us  cudaSetupArgument
  0.00%  2.1000us         1  2.1000us  2.1000us  2.1000us  cudaConfigureCall
  0.00%  1.3000us         2     650ns     600ns     700ns  cuDeviceGetCount
  0.00%     600ns         2     300ns     200ns     400ns  cuDeviceGet
So as you can see at profiling result, it is optimised from 426ms to 2.8ms!!
Very nice indeed. If you are interested, please try that link!
Since my purpose is using tensorflow, I would like to leave the elaboration to it!
5. Architecture of GPU
Please refer to this amazing post...
http://www.gdep.jp/page/view/252