Preface
Hello everyone, this is Norio from R robot club. I hope that you are exciting to be here today!
In this article, I would like to write about the introduction to Arduino.
Agenda
- Introduction ~ Setup the environment ~
- Blink your LED!
1. Introduction ~ Setup the environment ~
Reference to Official Website
welcome on board of the journey with Arduino!
First of all, let's prepare the environment to play with Arduino.
The Arduino Software (IDE) allows you to write programs and upload them to your board. With regard to the installation of the IDE, actually you have two options below.
- Code online on the Arduino Web Editor
To use the online IDE simply follow these instructions. Remember that boards work out-of-the-box on the Web Editor, no need to install anything. - Install the Arduino Desktop IDE
To get step-by-step instructions select one of the following link accordingly to your operating system.
Windows
Mac OS X
Linux
Portable IDE (Windows and Linux)
Choose your board in the list here on the right to learn how to get started with it and how to use it on the Desktop IDE.
Congrats!! Now, you have your weapon to control your Arduino!
** Further Interests on Arduino and its IDE, please refer to these links below.
What is Arduino??
Arduino Software
Additional Libraries
Trouble shooting
FYI, now I assume that you are ready for getting your hands dirty!!
So, lastly let's have a look of the faces of the real-world projects!
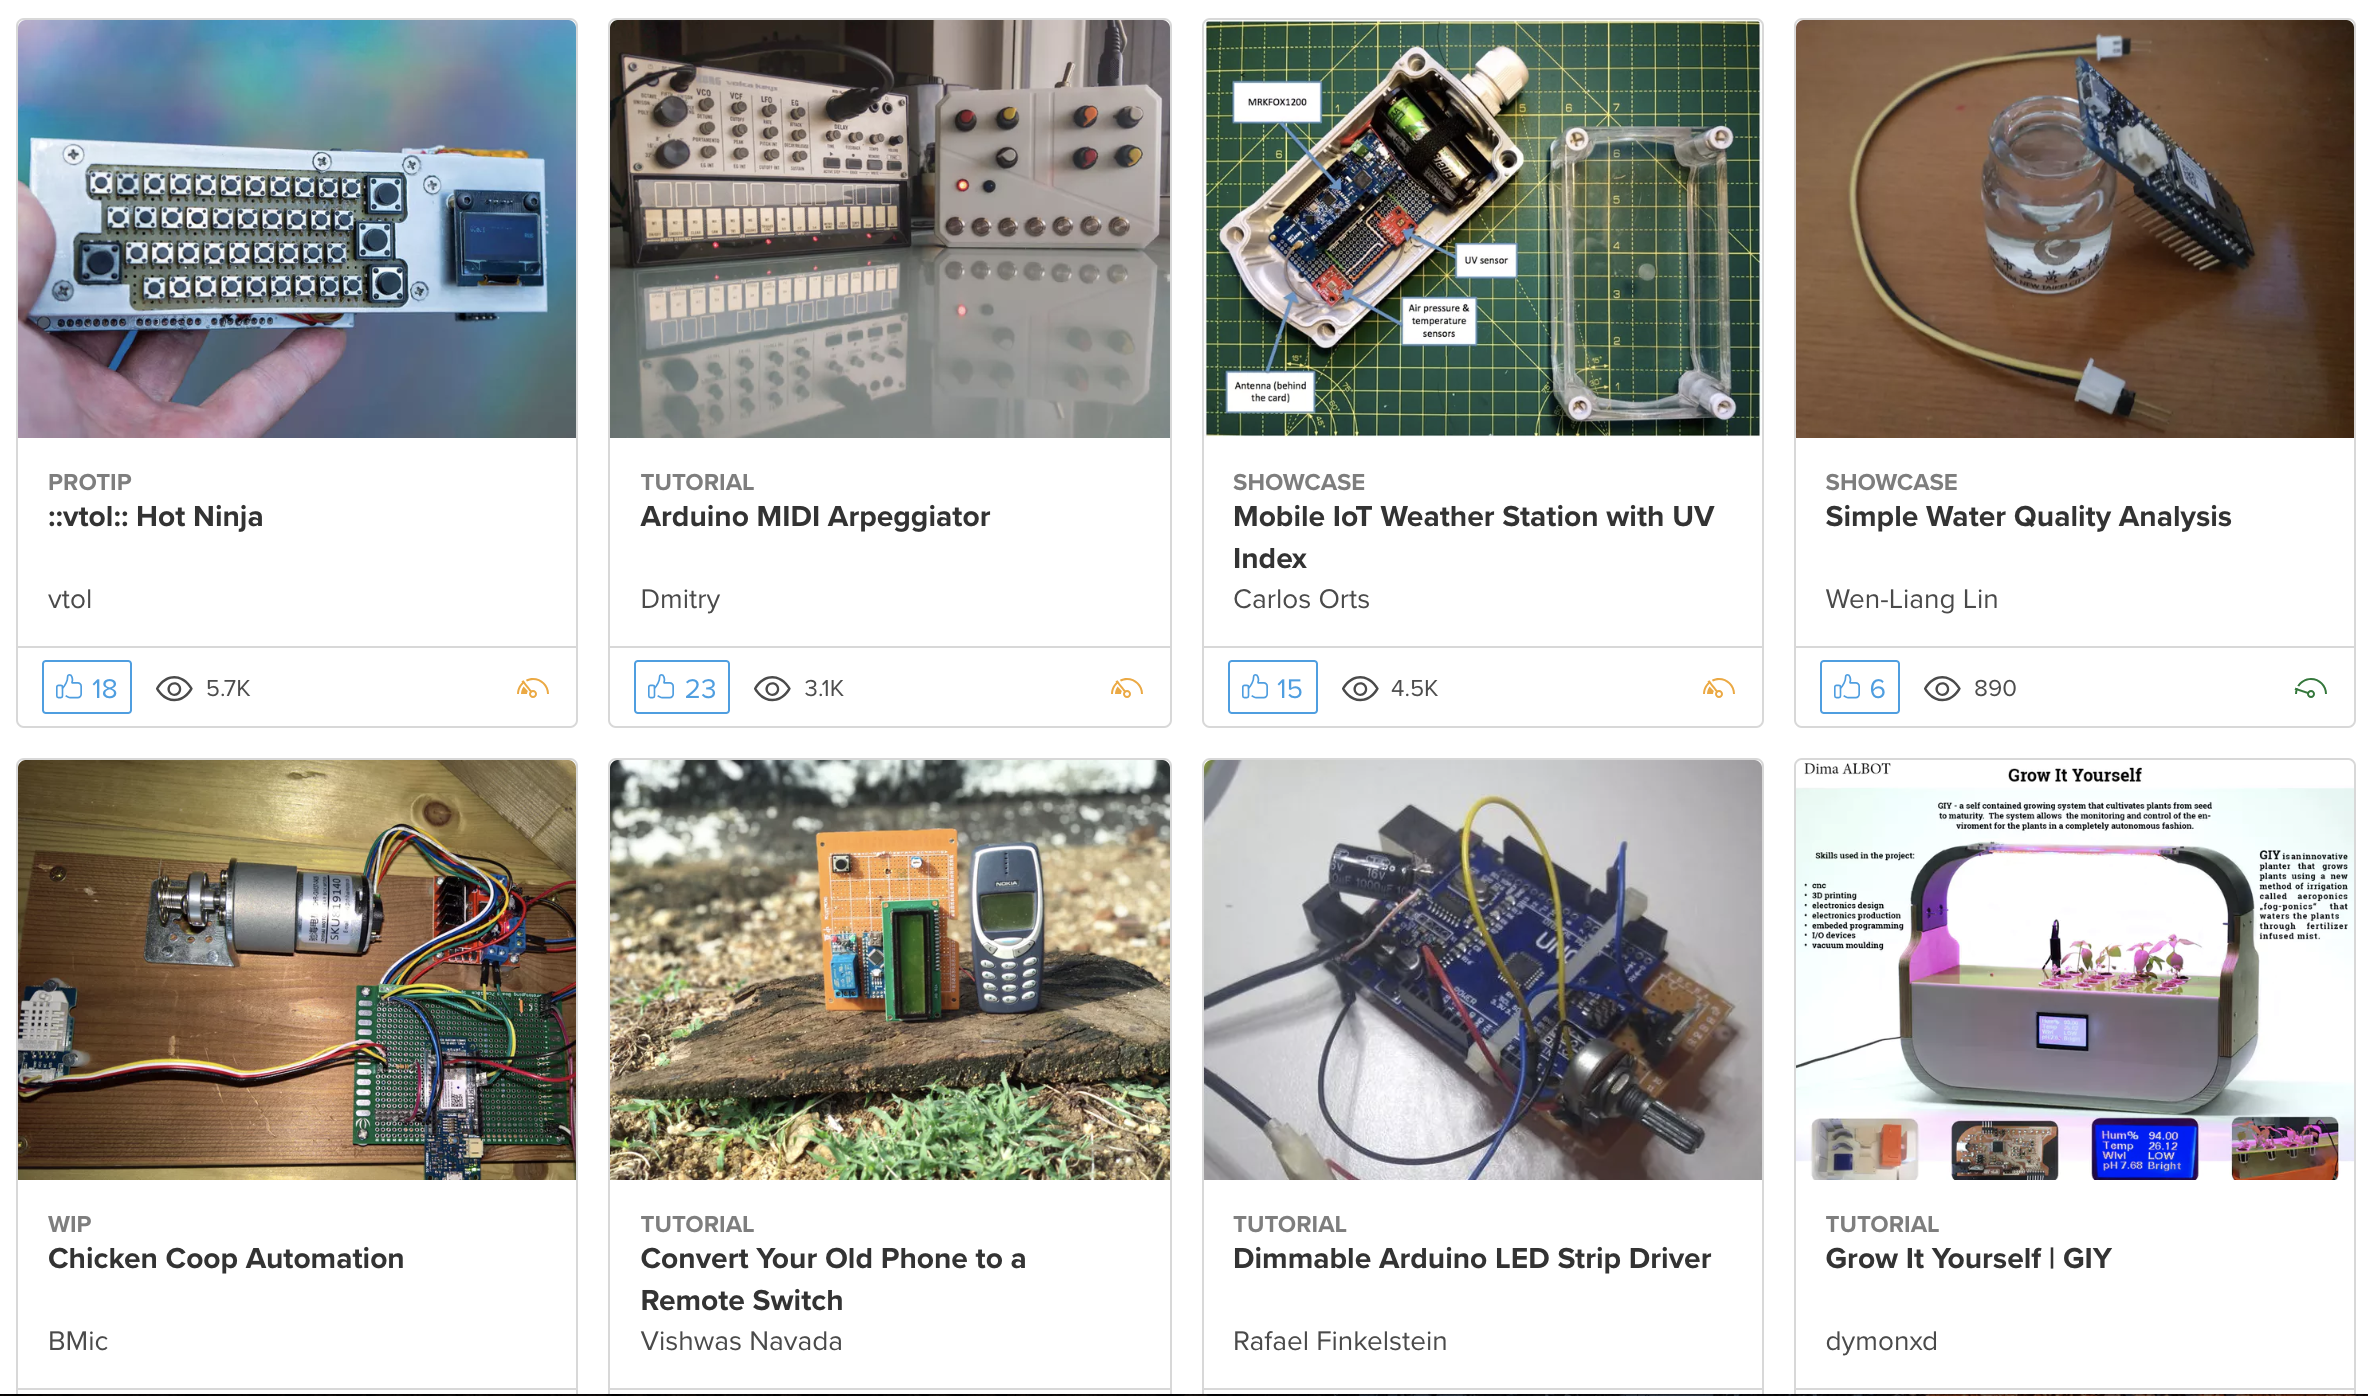
Image reference
Looks brilliant, doesn't it? Now it's your turn!
2. Blink your LED!
Now, let's jump into the actual hands-on lecture!
Before building your own circuit, firstly let's take a look at the parts embedded with Arduino. We believe that understanding of its parts enhances your knowledge.
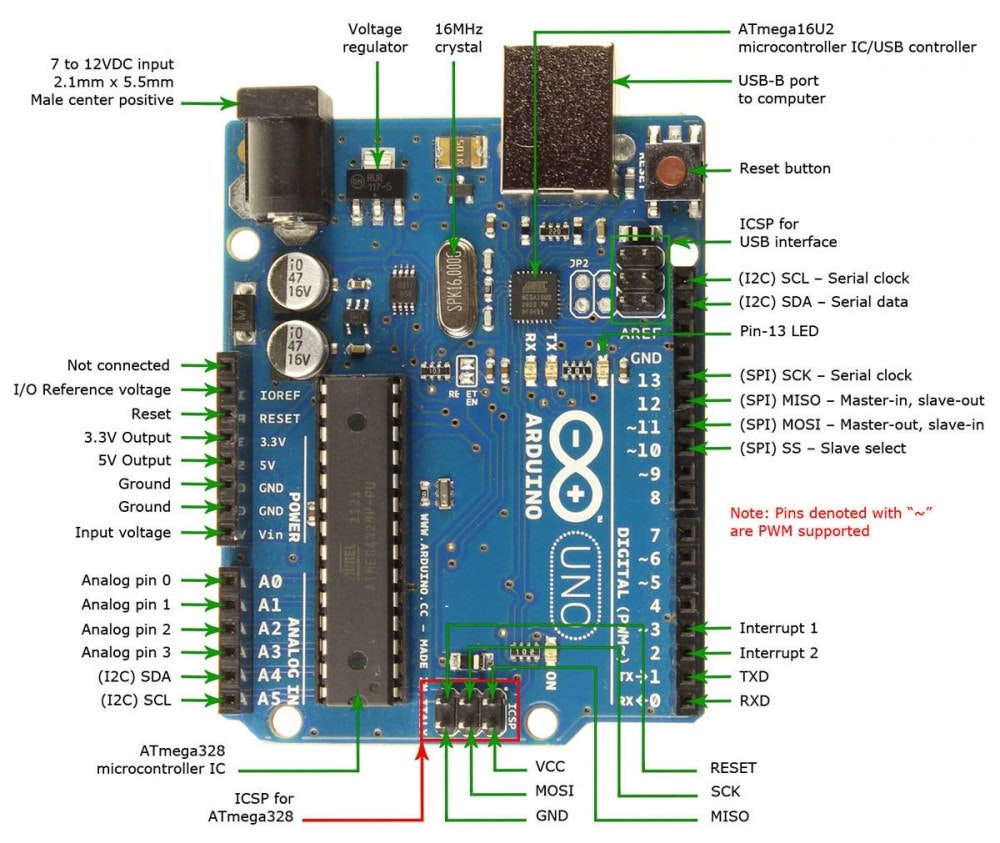
** Advanced Reference of the architecture of Arduino
https://www.tutorialspoint.com/arduino/arduino_board_description.htm
Circuit Image
 [Source of this image](https://matome.naver.jp/odai/2142565287041479101)
Schematic

Code
After you build the circuit following above, let's write the actual code.
In fact, as you can see below, it just a C programming language. So if you are familiar with it already, please skip this part, otherwise, save a time and investigate the code carefully.
// the setup function runs once when you press reset or power the board
void setup() {
  // initialize digital pin LED_BUILTIN as an output.
  pinMode(LED_BUILTIN, OUTPUT);
}

// the loop function runs over and over again forever
void loop() {
  digitalWrite(LED_BUILTIN, HIGH);   // turn the LED on (HIGH is the voltage level)
  delay(1000);                       // wait for a second
  digitalWrite(LED_BUILTIN, LOW);    // turn the LED off by making the voltage LOW
  delay(1000);                       // wait for a second
}
Output
Congratulations on your first Arduino application, for you maybe it looks quite easy though, this is "Hello World" in Arduino!
Conclusion
In this tutorial, through a "Hello World" project, we have equipped ourselves with the foundation of Arduino and have seen a procedure of Arduino development.
With regard to further development of Arduino, I would like to interact with many sensors which we bought beforehand. From now, I would like you to refer to this good guide in Arduino web-site.
LINK: https://www.arduino.cc/en/Tutorial/BuiltInExamples
The Sensors
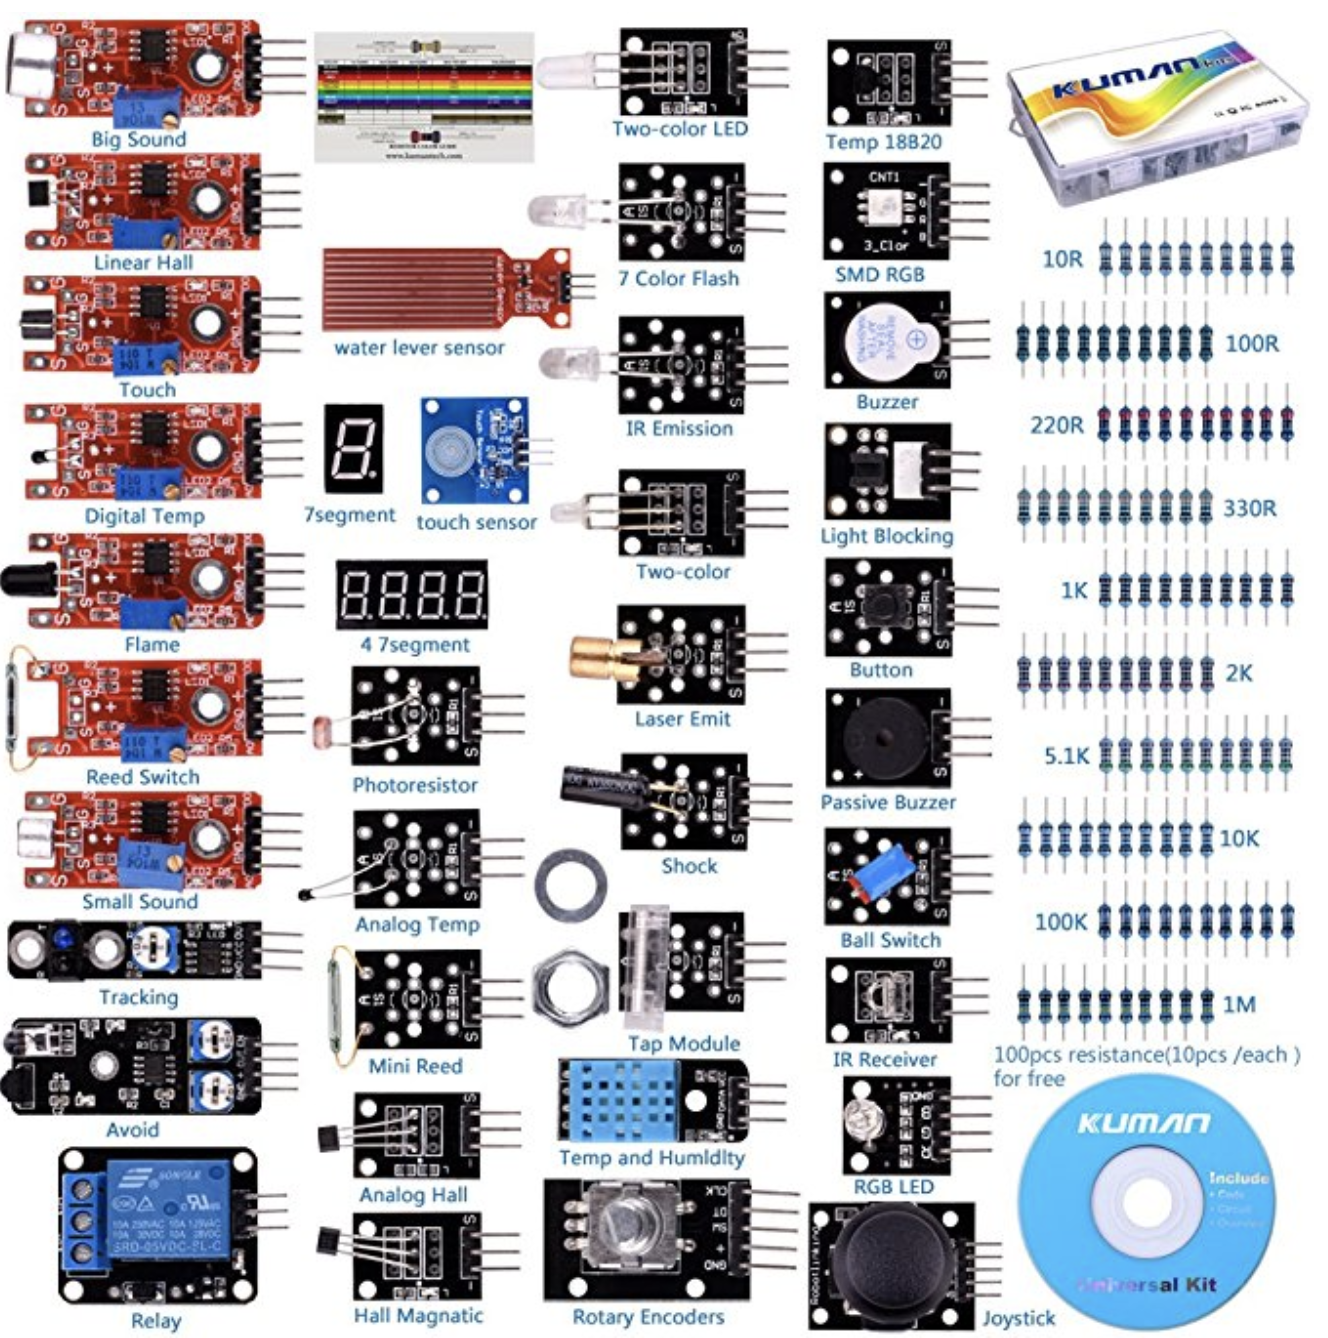
Link: https://www.amazon.com/kuman-Arduino-Raspberry-Projects-Tutorials/dp/B016D5L5KE