VScodeはインストールしていたのだが、C++の実行環境を整えていなかったので、
セットアップできるようにする。
<ゴール>
練習問題のコードをVScode上で実行できるようにする。
https://atcoder.jp/contests/practice/tasks/practice_1
include
using namespace std;
int main()
{
// 整数の入力
int a;
cin >> a;
// スペース区切りの整数の入力
int b,c;
cin >> b >> c;
// 文字列の入力
string s;
cin >> s;
// 出力
cout << (a+b+c) << " " << s << endl;
return 0;
}
1.以下ブログに従い実行。
https://ynucpc.github.io/blog/2018/04/15/cp_vscode/
<エラー>
g++ -std=c++14 Atcoder_20200328_1.cpp
Undefined symbols for architecture x86_64:
"_main", referenced from:
implicit entry/start for main executable
ld: symbol(s) not found for architecture x86_64
clang: error: linker command failed with exit code 1 (use -v to see invocation)
記事の後半にある、C/C++ClangCommandAdapterをインストール後、通った。
<変更前>
{
"editor.renderControlCharacters": true,
"terminal.integrated.inheritEnv": false,
"git.autofetch": true,
"editor.largeFileOptimizations": false,
"clang.executable": "",
"clang.cxxflags": [
"[ "-std=c++14"]"
],
"code-runner.runInTerminal": true
}
<変更後>
{
"editor.renderControlCharacters": true,
"terminal.integrated.inheritEnv": false,
"git.autofetch": true,
"editor.largeFileOptimizations": false,
"clang.executable": "",
"clang.cxxflags": [
"[ "-std=c++14"]"
],
"code-runner.runInTerminal": true,
"code-runner.executorMap": {
"cpp": "cd $dir && g++ -O2 -std=c++14 $fileName && ./a.out",
}
}
実行できる
include
int main(){
std::cout << "Hello, World" << std::endl;
return 0;
}
ーーーーー
include
using namespace std;
int main()
{
// 整数の入力
int a;
cin >> a;
// スペース区切りの整数の入力
int b,c;
cin >> b >> c;
// 文字列の入力
string s;
cin >> s;
// 出力
cout << (a+b+c) << " " << s << endl;
return 0;
}
実行できない
# include <iostream>
using namespace std;
int main(){
string s;
cin>>s;
if(s[2]==s[3]&&s[4]==s[5]){
cout<<"Yes"<<endl;
}
else{
 cout<<"No"<<endl;
}
}
"_main", referenced from:
implicit entry/start for main executable
ld: symbol(s) not found for architecture x86_64
clang: error: linker command failed with exit code 1 (use -v to see invocation)
VScode再起動したら直った。変更した設定が反映されていなかったのかもしれない。
デバッグ
PythonとC++のデバッグ環境を構築する。こちらの記事を参照した。
macのVSCodeでc++をデバッグする (AtCoderの解答をデバッグする事例つき)
https://qiita.com/tom_sapiens/items/c4c4b7de2201272a94db
作成ファイル
参考サイトのまま。
{
    "configurations": [
        {
            "name": "Mac",
            "includePath": [
                "${workspaceFolder}/**"
            ],
            "defines": [],
            "macFrameworkPath": [
                "/Library/Developer/CommandLineTools/SDKs/MacOSX.sdk/System/Library/Frameworks"
            ],
            "compilerPath": "/usr/bin/clang",
            "cStandard": "c11",
            "cppStandard": "c++14",
            "intelliSenseMode": "clang-x64"
        }
    ],
    "version": 4
}
以下、デバッガ設定のファイル。上段はPython、下段はC++。
{
    "version": "0.2.0",
    "configurations": [
        {
            "name": "Python: Current File",
            "type": "python",
            "request": "launch",
            "program": "${file}",
            "console": "integratedTerminal"
        },
        {
            "name": "(lldb) Launch",
            "type": "lldb",
            "request": "launch",
            "program": "${workspaceFolder}/a.out",
            "args": [],
            "cwd": "${workspaceFolder}",
        }
    ]
}
以下は、参考URLから、${file}とa.outだけ変更。
{
    "version": "2.0.0",
    "tasks": [
        {
            "label": "Build with Clang",
            "type": "shell",
            "command": "clang++",
            "args": [
                "-std=c++14",
                "-stdlib=libc++",
                "${file}",
                "-o",
                "a.out",
                "--debug"
            ],
            "group": {
                "kind": "build",
                "isDefault": true
            }
        }
    ]
}
使い分け
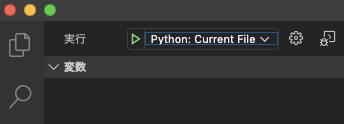
デバッグビューのプログラミング言語選択で切り替える。(図はPythonを選んだ場合)
C++デバッグの場合の手順
・デバッグする場合は、まずビルド: Command + Shift + B
・その後、F5でデバッグ開始
・cinなどの入力は、VSCode下のターミナルから
・F9でブレークポイント設置
・F11でステップイン実行
<bits/stdc++.h> をMacでincludeするには
Macでincludeするまで苦労したのでメモ
1.下記サイトに従って、C++コンパイラをインストール
https://qiita.com/EngTks/items/ffa2a7b4d264e7a052c6
$ which g++
で確認。
5.1 stdc++.hの準備
5.2 C/C++ Intellisenseの設定
これでVSCode上のエラー表示は消えたが、実行するとエラーになってしまう。
bits/stdc++.hを入れたら「/usr/local/include/bits/stdc++.h:57:10: fatal error: 'cstdalign' file not found」が表示されてしまう
https://qiita.com/dynamonda/items/3a2f5bd063cb5e457605
こちらの記事を参照し、stdc++.hをGitHubからダウンロードした。
ただ、置く場所はこの記事と異なり、Intellisenseにパスを記載している、
/usr/local/include/bits/ に配置した。以下の通り
/usr/local/include/bits/stdc++.h
これでコンパイルが通るようになった。
> ls -l /usr/local/include/bits
-rw-r--r--  1 user admin  2781 Sep 26 16:28 stdc++.h