Kotlinとは?
プログラミング言語Kotlinには以下のような特徴があります
- KotlinとはJavaと100%互換がある
- JavaとKotlinの混在が可能
- JavaからKotlinの呼び出し、KotlinからJavaの呼び出しが可能
- Null安全
- NullPointerExceptionをコンパイル段階で防げる
- 自然に簡単に記述することができる
- 開発元がJetBrainsでなおかつ、オープンソースなので、開発が止まるということが考えられにくい
この他にも様々な特徴があります。
Androidアプリでは、JavaからKotlinへの置き換えが進んでいるようです。
こうなったら、MinecraftでもKotlinへの置き換えを推進しようということで、この記事を書いてみました。
環境設定
IntelliJ IDEAのダウンロード
- IntelliJ IDEA the Java IDE
- Communityをダウンロードします
Minecraft Developmentプラグインのダウンロード
IntelliJ IDEAのプラグイン設定画面で、Browse Repositoryをクリック
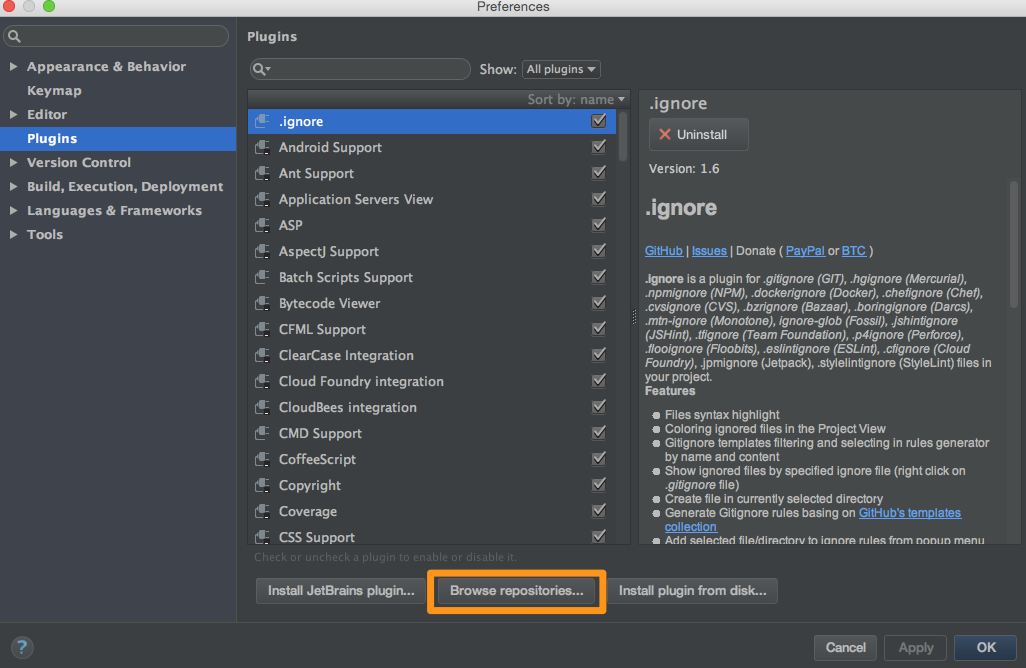
Minecraftと検索すると、MinecraftDevelopmentというプラグインが見つかるのでインストールして再起動します。
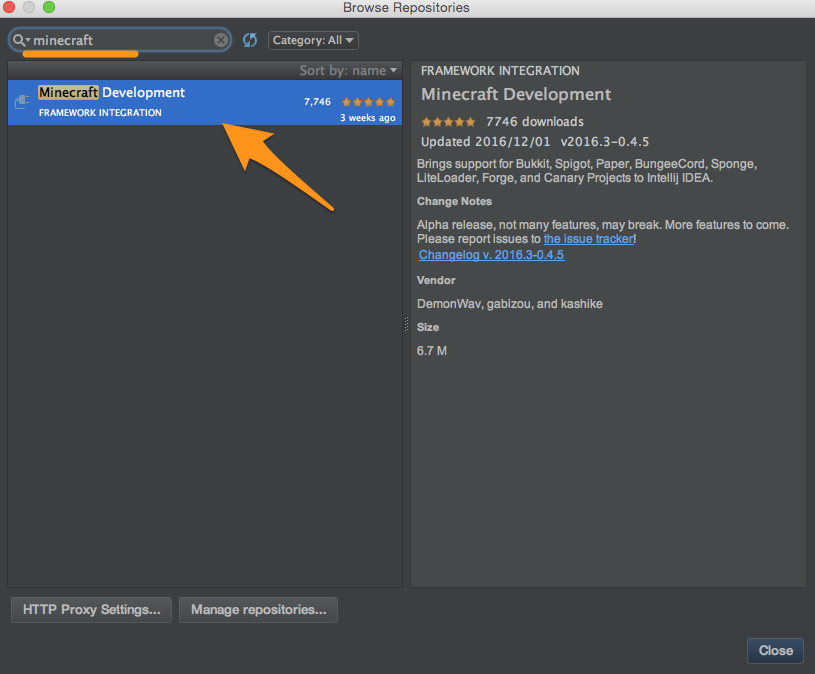
同様に、Kotlinのプラグインも導入しておいてください。
プロジェクト作成
IntelliJ IDEAをリスタートして、新規プロジェクトを作成します。
MinecraftDevelopmentプラグインをインストールすると、Minecraft Pluginという項目が増えています。
その中から今回はSpigotPluginを選択して次へ進みます。
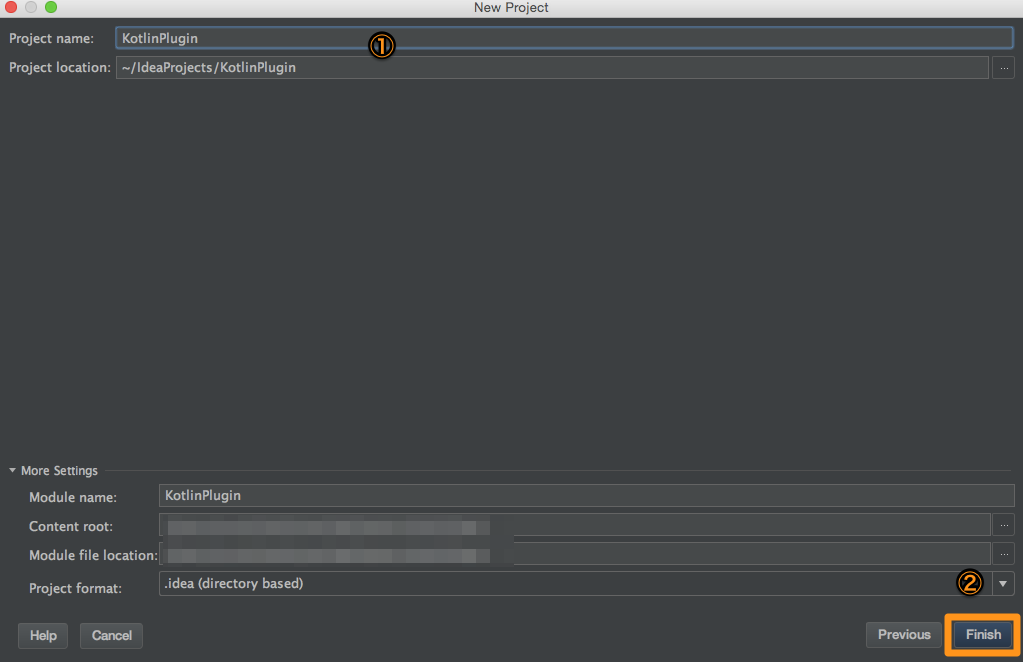
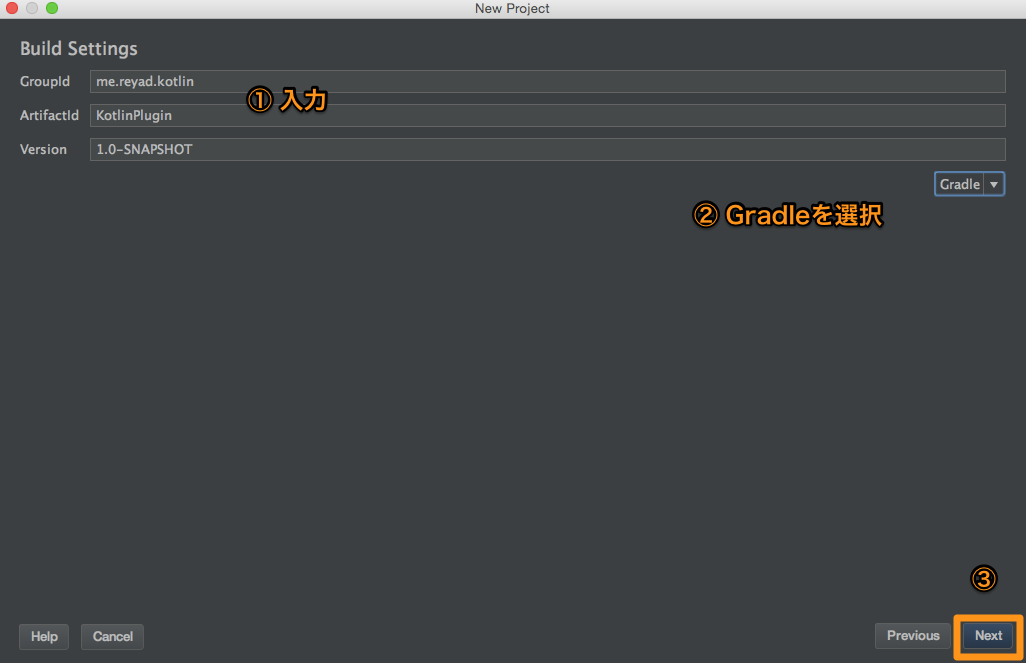
プロジェクトの情報を入力します。
Gradleを選択して次へ進んでください
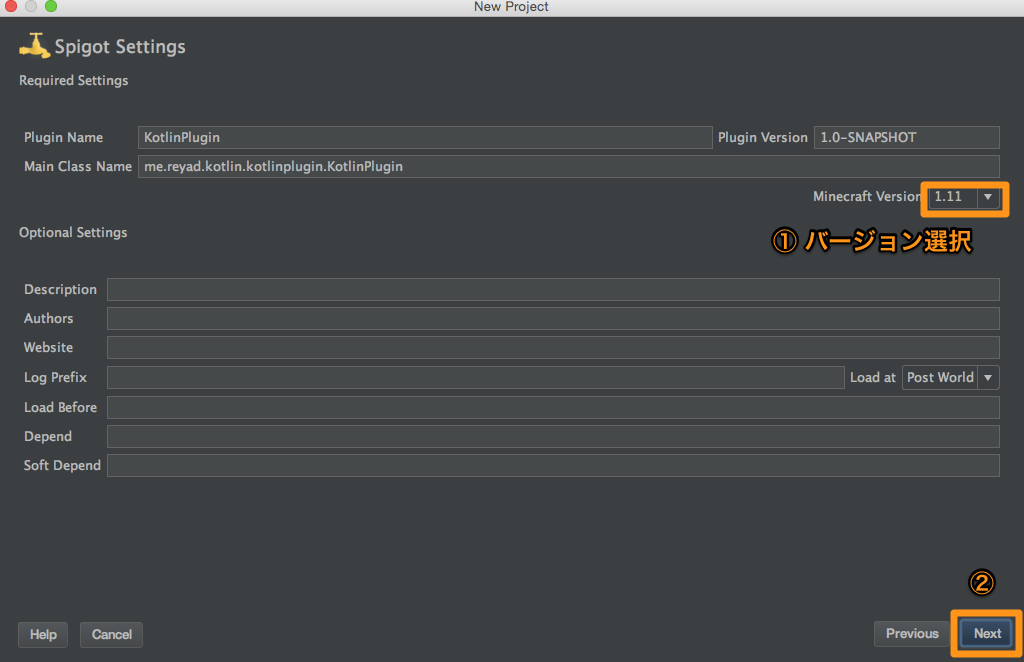
Minecraftのバージョンを選択します。今回は1.11にして次へ進みます。
Gradleの設定
Gradleは以下のように設定しました。
apply plugin: 'java'
apply plugin: 'kotlin'

group = pluginGroup
version = pluginVersion

sourceCompatibility = 1.8
targetCompatibility = 1.8

configurations {
    embed
    compile.extendsFrom(embed)
}

repositories {
    mavenCentral()
    maven {
        name = 'spigotmc-repo'
        url = 'https://hub.spigotmc.org/nexus/content/groups/public/'
    }
    maven {
        name = 'sonatype'
        url = 'https://oss.sonatype.org/content/groups/public/'
    }
}

dependencies {
    testCompile group: 'junit', name: 'junit', version: '4.11'
    compile 'org.spigotmc:spigot-api:1.11-R0.1-SNAPSHOT'
    embed "org.jetbrains.kotlin:kotlin-stdlib:$kotlin_version"
}

import org.apache.tools.ant.filters.ReplaceTokens

processResources {
    from(sourceSets.main.resources.srcDirs) {
        filter ReplaceTokens, tokens: [version: version]
    }
}
buildscript {
    ext.kotlin_version = '1.0.5-3'
    repositories {
        mavenCentral()
    }
    dependencies {
        classpath "org.jetbrains.kotlin:kotlin-gradle-plugin:$kotlin_version"
    }
}

sourceSets {
    main.java.srcDirs += 'src/main/kotlin'
}

jar {
    from { configurations.embed.collect { it.isDirectory() ? it : zipTree(it) } }
}
別の方も記事を書いているのでそちらも参考にしてみてください
Kotlin で Spigot プラグインを作るための build.gradle - Qiita
Kotlinへの変換
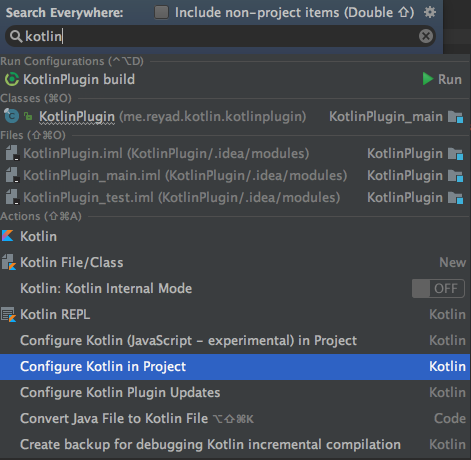
Shiftボタン2回押すとダイアログが出てくるので、Kotlinと入力して、
Convert Java File to Kotlin File
を押して変換してください
変換した後、以下のようにコードを変更してください。
package me.reyad.kotlin.kotlinplugin

import org.bukkit.plugin.java.JavaPlugin

class KotlinPlugin : JavaPlugin() {

    override fun onEnable() {
        // Plugin startup logic
        logger.info("Hello Kotlin!")
    }

    override fun onDisable() {
        // Plugin shutdown logic
    }
}
プラグインを有効にすると、サーバーログに「Hello Kotlin!」と出力されます。
Javaでは以下のように書いていました。
getLogger().info("Hello Kotlin!");
Kotlinでは以下のように書くことができます。
getLogger()をloggerとして書くことができます。
logger.info("Hello Kotlin!")
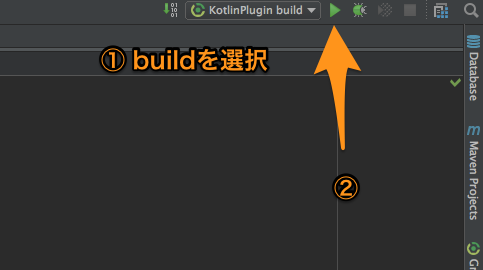
Build
実行後、buildディレクトリにJarファイルが出力されています。
これをspigotのpluginディレクトリに入れれば動作します。
終わりに
上記のようにして、MinecraftでKotlinライフをスタートすることができます。
みなさんもKotlinの素晴らしさを体験してください!

