最初に
これは私がゆめみさんのFlutterコーディングテストを受けたときにGithub認証を実装した手順です。未だ出したばっかりなので結果は帰ってきてないです。 コーディングの選考は通りましたが、すごいたくさん修正案が帰ってきてとても驚きました。
間違って動かなかったりしたらごめんなさい。自分の方では動きました。
あと全然FlutterでGithubOAuth認証する記事がなくて自分でも結構悩んだのでそれのメモも兼ねてます。
ちなみに実際のリポジトリはこれです。
https://github.com/Rerurate514/github_browser
パッケージのインストール
FlutterでGithubOAuthを使用するにはoauth2とurl_launcherとapp_linksパッケージを使用する。
flutter pub add oauth2
flutter pub add url_launcher
flutter pub add app_links
AndroidManifestへ追記
android\app\src\main\AndroidManifest.xmlへ以下を追記する。
<intent-filter>
	<action android:name="android.intent.action.VIEW" />
	<category android:name="android.intent.category.DEFAULT" />
	<category android:name="android.intent.category.BROWSABLE" />
	<data android:scheme="com.example.myApp.auth" android:host="callback" />
</intent-filter>
これは<activity>タグの中に入れる。
ここで書かれている、<data android:scheme="com.example.myApp.auth" android:host="callback" />は覚えておく。
デフォルトで存在している
<intent-filter>
	<action android:name="android.intent.action.MAIN"/>
	<category android:name="android.intent.category.LAUNCHER"/>
</intent-filter>
は消さないでおく。
おそらく以下のようになる。
...

<activity
	android:name=".MainActivity"
	android:exported="true"
	android:launchMode="singleTop"
	android:taskAffinity=""
	android:theme="@style/LaunchTheme"
	android:configChanges="orientation|keyboardHidden|keyboard|screenSize|smallestScreenSize|locale|layoutDirection|fontScale|screenLayout|density|uiMode"
	android:hardwareAccelerated="true"
	android:windowSoftInputMode="adjustResize">
	<!-- Specifies an Android theme to apply to this Activity as soon as
		 the Android process has started. This theme is visible to the user
		 while the Flutter UI initializes. After that, this theme continues
		 to determine the Window background behind the Flutter UI. -->
	<meta-data
	  android:name="io.flutter.embedding.android.NormalTheme"
	  android:resource="@style/NormalTheme"
	  />
	<intent-filter>
		<action android:name="android.intent.action.MAIN"/>
		<category android:name="android.intent.category.LAUNCHER"/>
	</intent-filter>
	<intent-filter>
		<action android:name="android.intent.action.VIEW" />
		<category android:name="android.intent.category.DEFAULT" />
		<category android:name="android.intent.category.BROWSABLE" />
		<data android:scheme="com.example.myApp.auth" android:host="callback" />
	</intent-filter>
</activity>]

...
Github OAuth Appを登録する。
以下のURL又は、左上のユーザアイコン-> Settings -> Developper settings -> OAuth Appsへ行く。
https://github.com/settings/developers
New OAuth Appをクリックする。
Application URLとHomepage URLには自分で決めたものを入れる。
正直何でもよい。homepageにはリポジトリのURLでもhhtps:example.comでもよい。
実際のアプリの場合はきちんとしたURLと名前を設定する。
そして、Authorization callback URLにはandroid.manifestの<data android:scheme="com.example.myApp.auth" android:host="callback" />の情報を入れる。
ここでschemaがcom.example.myApp.authと、ホスト名がcallbackとなっている。
これは
com.example.myApp.auth://callback
のことである。
これをAuthorization callback URLに入れる。
このURLはGithubで認証が終わった後に、アプリにリダイレクトするためのURLである。
そして、Register applicationをクリックし、GithubのOAuth Appを作成する。
ここに書かれているClient IDを覚えておく。
そして、Generate a new secretをクリックして出てきたClient secretも覚えておく。
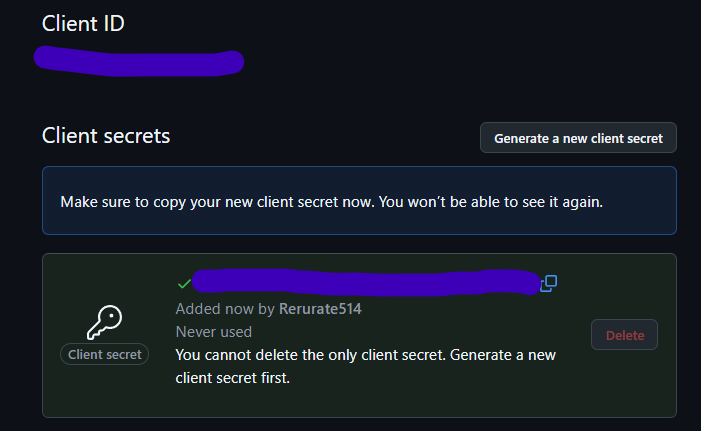
画像にある紫色部分である。
プログラム
認証URLを取得する。
まず、oauth2をインポートする。
import 'package:oauth2/oauth2.dart';
AuthorizationCodeGrantインスタンスを作成する。
このインスタンスはoauth2パッケージから提供されている、OAuth認証の手順を抽象化したものである。
final Uri authorizationEndpoint = Uri.parse('https://github.com/login/oauth/authorize');
final Uri tokenEndpoint = Uri.parse('https://github.com/login/oauth/access_token');

final clientId = ""; //ここに文字列でClient Idを入れる、もしくはenviedなどを使用する。
final clientSecret = ""; //ここに文字列でClient Secretを入れる、もしくはenviedなどを使用する。

//final clientId = Env.clientId; //enviedパッケージを使用した場合の例
//final clientSecret = Env.clientSecret; //enviedパッケージを使用した場合の例

final grant = AuthorizationCodeGrant(
	clientId,
	authorizationEndpoint,
	tokenEndpoint,
	secret: clientSecret,
	basicAuth: false,
);
通常、ClientIDなどは外部に公開してはいけないため、enviedパッケージなどで秘匿するべきである。
認証URLを取得する。
final scopes = ['repo', 'user'];
final authorizationUrl = grant.getAuthorizationUrl(redirectUrl, scopes: scopes);
これらのscopeの意味
-
repo: リポジトリの読み取り/書き込みアクセス権限(プライベートリポジトリを含む) -
user: ユーザープロフィール情報へのアクセス権限
外部ブラウザへ飛ばす。
url_launcherを使って外部ブラウザでGithub認証を行う。
import 'package:url_launcher/url_launcher.dart';
final _urlLauncher = UrlLauncher();

_urlLauncher.launch(
	authorizationUrl,
	mdoe: LaunchMode.externalApplication,
)
ここまで実行すると、外部ブラウザでOAuth2認証が行われる。
この時、アプリ内ブラウザなどでOAuth認証を行うのは非推奨である。
以下参照。
https://www.rfc-editor.org/rfc/rfc8252.txt
リダイレクトレスポンスを受信する。
外部ブラウザで認証が行われるとリダイレクトされる。
リダイレクトされた後の処理を記述する。
import 'package:app_links/app_links.dart';
Future<Uri> _listenForAppLink() async {
	final completer = Completer<Uri>();

	try {
	  final initialLink = await appLinks.getInitialLink();
	  if (initialLink != null && initialLink.queryParameters.containsKey('code')) {
		debugPrint('初期App Linkからコードを検出: ${initialLink.queryParameters['code']}');
		completer.complete(initialLink);
		return completer.future;
	  }
	} catch (e) {
	  debugPrint('初期App Linkの取得エラー: $e');
	}

	_linkSubscription = appLinks.uriLinkStream.listen((Uri uri) {
	  if (!completer.isCompleted && uri.queryParameters.containsKey('code')) {
		debugPrint('App Linkからコードを検出: ${uri.queryParameters['code']}');
		completer.complete(uri);
	  }
	}, onError: (error) {
	  debugPrint('App Linkエラー: $error');
	  if (!completer.isCompleted) {
		completer.completeError(error);
	  }
	});

	return completer.future;
}
主にモバイルアプリケーションでのDeep Linkingの仕組みを利用している。
動作を説明すると、まずCompleterインスタンスを作成している。
そして、リダイレクトによってアプリが起動された時点で既に存在するApp Linkがあるかチェックする。
appLinks.getInitialLink()で最初のDeep Linkを取得する。
そこにcodeパラメータが存在する場合、それをCompleterに渡す。
App Linkがない場合、その受信を継続的にリッスンする。
appLinks.uriLinkStream.listen()でDeep Linkの受信を監視する。
アプリがバックグラウンドにある状態だとしても、DeepLinkを受け取った時に処理を行うことができる。
リンクにcodeが含まれている場合、そのURIをCompleterに渡す。
この関数はawaitで実行する。
リダイレクト処理が行われた後で、その次の処理を行うためである。
  debugPrint('使用するリダイレクトURL: $redirectUrl');
  final authorizationUrl = grant.getAuthorizationUrl(redirectUrl, scopes: scopes);
  debugPrint('GitHub認証URL: $authorizationUrl');

  await _redirectToBrowser(authorizationUrl);

  debugPrint('リダイレクトを待機中...');
  final responseUrl = await _listenForAppLink();
  debugPrint('リダイレクトURLを受信: $responseUrl');
レスポンスを処理してアクセストークンを取得する。
受け取ったレスポンスUriをもとにアクセストークンを取得する。
以下の処理は OAuth 2.0 認証フローの「認可コードフロー」(Authorization Code Flow)と呼ばれる標準的な認証手順に従っている。
OAuth 2.0 の認可コードフローは大きく分けて2段階のプロセスで構成されている。
- 認可コードの取得
- ユーザーをGitHubの認証画面に誘導
- ユーザーが認可を許可すると、GitHubはリダイレクトURLに「認可コード(authorization code)」(ここでは
code)を付加してアプリに戻す - この時点では「認可コード」を取得しただけで、APIにアクセスするための「アクセストークン」はまだ取得できていない
- アクセストークンの取得
- 取得した認可コードを使用して、クライアントIDとクライアントシークレットと共にGitHubのトークンエンドポイントにPOSTリクエストを送信
- この通信によって初めて「アクセストークン」を取得できる。
この2番を実装する。
import 'package:http/http.dart';
import 'dart:convert';
final response = await post(
	tokenEndpoint,
	headers: {
	  'Accept': 'application/json',
	  'Content-Type': 'application/x-www-form-urlencoded',
	},
	body: {
	  'client_id': clientId,
	  'client_secret': clientSecret,
	  'code': code,
	  'redirect_uri': redirectUrl.toString(),
	},
);

if (response.statusCode == 200) {
	final data = json.decode(response.body);
	final accessToken = data['access_token'];

	print(accessToken);
} else {
	throw Exception('Failed to get access token: ${response.body}');
}
httpを使用して、tokenEndpointとheadersとbodyを含めてPOSTする。
以下の記事で言われているが、Githubはなぜかトークンレスポンスのデフォルトフォーマットが'application/x-www-form-urlencoded'形式で帰ってくるため、'Accept': 'application/json'を明示的に指定している。
GitHub の OAuth 実装の仕様違反とセキュリティ上の考慮事項 #Security - Qiita
そして、レスポンスのステータスコードが200であった場合、レスポンスのbodyをJSONから変換する。
そこでようやく、['access_token']でGithubのaccessTokenを取得することができる。
これを使用して、GithubAPIなどを使用することができる。
こうして取得した資格情報などはflutter_secure_storageなどを使用して保存することもできる。
一例も上げておく。
import 'package:flutter_secure_storage/flutter_secure_storage.dart';


class GithubSecureRepository{
  final FlutterSecureStorage _secureStorage;
  static const String _tokenKey = 'github_auth_token';

  GithubSecureRepository({FlutterSecureStorage? storage})
    : _secureStorage = storage ?? const FlutterSecureStorage();


  Future<void> saveToken(String token) async {
    await _secureStorage.write(key: _tokenKey, value: token);
  }

  Future<String?> getToken() async {
    return await _secureStorage.read(key: _tokenKey);
  }

  Future<void> deleteToken() async {
    await _secureStorage.delete(key: _tokenKey);
  }
}
全部合体したコード
import 'dart:async';

import 'package:app_links/app_links.dart';
import 'package:flutter/material.dart';
import 'package:自分のアプリ/features/github_auth/entities/auth_result.dart';
import 'package:oauth2/oauth2.dart';
import 'package:自分のアプリ/core/env/env.dart';
import 'package:url_launcher/url_launcher.dart';
// ignore: depend_on_referenced_packages
import 'package:http/http.dart';
import 'dart:convert';

class AuthResult {
  final bool isSuccess;
  final String? token;
  final String? errorMessage;
  final Map<String, dynamic>? userProfile;

  AuthResult({
    required this.isSuccess,
    this.token,
    this.errorMessage,
    this.userProfile
  });

  factory AuthResult.success(String token) {
    return AuthResult(
      isSuccess: true,
      token: token
    );
  }

  factory AuthResult.failure(String errorMessage) {
    return AuthResult(
      isSuccess: false,
      errorMessage: errorMessage,
    );
  }
}

class GithubAuthRepository {
  final Uri authorizationEndpoint = Uri.parse('https://github.com/login/oauth/authorize');
  final Uri tokenEndpoint = Uri.parse('https://github.com/login/oauth/access_token');

  final String clientId;
  final String clientSecret;
  final Uri redirectUrl;

  final List<String> scopes;

  final AppLinks appLinks;
  final UrlLauncher urlLauncher;

  StreamSubscription? _linkSubscription;

  GithubAuthRepository({
    String? clientId,
    String? clientSecret,
    String? redirectUrl,
    List<String>? scopes,
    AppLinks? appLinks,
    UrlLauncher? urlLauncher,
  }) :
    clientId = clientId ?? Env.clientId,
    clientSecret = clientSecret ?? Env.clientSecret,
    redirectUrl = Uri.parse(redirectUrl ?? Env.redirectUrl),
    scopes = scopes ?? ['repo', 'user'],
    appLinks = appLinks ?? AppLinks(),
    urlLauncher = urlLauncher ?? DefaultUrlLauncher();

  Future<AuthResult> signIn() async {

    if(Env.apiKey != ""){
      return AuthResult.success(Env.apiKey);
    }

    try {
      final grant = AuthorizationCodeGrant(
        clientId,
        authorizationEndpoint,
        tokenEndpoint,
        secret: clientSecret,
        basicAuth: false,
      );

      debugPrint('使用するリダイレクトURL: $redirectUrl');
      final authorizationUrl = grant.getAuthorizationUrl(redirectUrl, scopes: scopes);
      debugPrint('GitHub認証URL: $authorizationUrl');

      await _redirectToBrowser(authorizationUrl);

      debugPrint('リダイレクトを待機中...');
      final responseUrl = await _listenForAppLink();
      debugPrint('リダイレクトURLを受信: $responseUrl');

      debugPrint('認証レスポンスを処理中...');
      debugPrint('レスポンスパラメータ: ${responseUrl.queryParameters}');

      final code = responseUrl.queryParameters['code'];
      if (code == null) return AuthResult.failure("responseUrl.queryParameters code is null");

      final response = await post(
        tokenEndpoint,
        headers: {
          'Accept': 'application/json',
          'Content-Type': 'application/x-www-form-urlencoded',
        },
        body: {
          'client_id': clientId,
          'client_secret': clientSecret,
          'code': code,
          'redirect_uri': redirectUrl.toString(),
        },
      );

      if (response.statusCode == 200) {
        final data = json.decode(response.body);
        final accessToken = data['access_token'];

        return AuthResult.success(accessToken);
      } else {
        throw Exception('Failed to get access token: ${response.body}');
      }
    } catch (e, stackTrace) {
      debugPrint('認証プロセス中にエラーが発生しました: $e');
      debugPrint('スタックトレース: $stackTrace');
    } finally {
      await _linkSubscription?.cancel();
      _linkSubscription = null;
    }

    return AuthResult.failure("");
  }

  Future<Uri> _listenForAppLink() async {
    final completer = Completer<Uri>();

    try {
      final initialLink = await appLinks.getInitialLink();
      if (initialLink != null && initialLink.queryParameters.containsKey('code')) {
        debugPrint('初期App Linkからコードを検出: ${initialLink.queryParameters['code']}');
        completer.complete(initialLink);
        return completer.future;
      }
    } catch (e) {
      debugPrint('初期App Linkの取得エラー: $e');
    }

    _linkSubscription = appLinks.uriLinkStream.listen((Uri uri) {
      if (!completer.isCompleted && uri.queryParameters.containsKey('code')) {
        debugPrint('App Linkからコードを検出: ${uri.queryParameters['code']}');
        completer.complete(uri);
      }
    }, onError: (error) {
      debugPrint('App Linkエラー: $error');
      if (!completer.isCompleted) {
        completer.completeError(error);
      }
    });

    return completer.future;
  }

  Future<void> _redirectToBrowser(Uri url) async {
    debugPrint('以下のURLをブラウザで開いてGitHubにログインしてください:');
    debugPrint(url.toString());

    urlLauncher.launch(
      url,
      mode: LaunchMode.externalApplication,
    );
  }
}

abstract class UrlLauncher {
  Future<bool> launch(Uri url, {LaunchMode mode});
}

class DefaultUrlLauncher implements UrlLauncher {
  @override
  Future<bool> launch(Uri url, {LaunchMode mode = LaunchMode.platformDefault}) {
    return launchUrl(url, mode: mode);
  }
}
使用方法
これをWidgetなどで使用することができる
Future<void> _signIn() async {
	setState(() {
	  _isLoading = true;
	  _errorMessage = null;
	});

	try {
	  final result = await authRepository.signIn();

	  setState(() {
		_isLoading = false;
		if (result.isSuccess) {
		  _authToken = result.token;
		} else {
		  _errorMessage = result.errorMessage;
		}
	  });
	} catch (e) {
	  setState(() {
		_isLoading = false;
		_errorMessage = e.toString();
	  });
	}
}