Siv3D Advent Calendar 2015 1 日目の記事です。
Siv3D June 2015 v2 で使える、知っていると便利かもしれない 2D 描画のテクニックを 4 つ紹介します。
1. 図形描画関数の戻り値を使おう
2D 図形クラスの描画関数の多くは、戻り値として自身の参照を返します。
これを使って描画関数を連ねると、複雑な図形を 1 行のコードで表現できます。
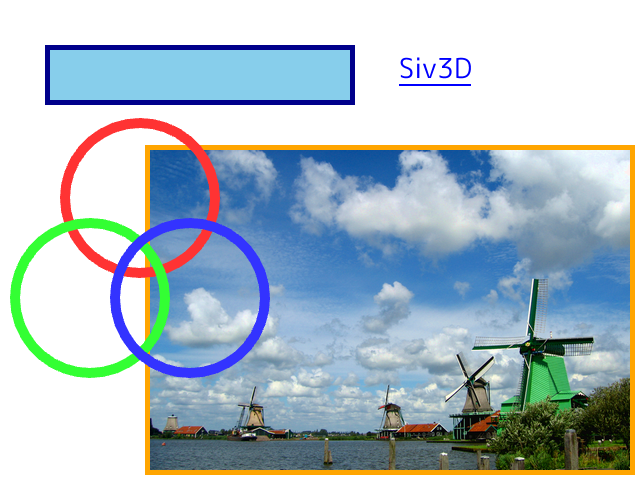
サンプル 1-1
Rect::draw() の戻り値を使い、枠を追加で描画します。

# include <Siv3D.hpp>

void Main()
{
	Graphics::SetBackground(Palette::White);

	const Rect rect(50, 50, 300, 50);

	while (System::Update())
	{
		rect.draw(Palette::Skyblue).drawFrame(0, 5, Palette::Darkblue);

		/*
		rect.draw(Palette::Skyblue);
		rect.drawFrame(0, 5, Palette::Darkblue);
		*/
	}
}
サンプル 1-2
# include <Siv3D.hpp>

void Main()
{
	Graphics::SetBackground(Palette::White);
	const Rect rect(50, 50, 300, 50);
	const Texture texture(L"Example/Windmill.png");
	const Font font(18);

	while (System::Update())
	{
		rect.draw(Palette::Skyblue).drawFrame(0, 5, Palette::Darkblue);

		texture.draw(150, 150).drawFrame(0, 5, Palette::Orange);

		font(L"Siv3D").draw(400, 50, Palette::Blue).bottom.draw(2, Palette::Blue);

		Circle(Mouse::Pos(), 80).drawFrame(10, 0, HSV(0, 0.8, 1))
			.movedBy(-50, 100).drawFrame(10, 0, HSV(120, 0.8, 1))
			.movedBy(100, 0).drawFrame(10, 0, HSV(240, 0.8, 1));
	}
}
2. 2D 図形で 3D を描こう
Graphics3D::ToScreen() を使うと、ある 3D 頂点を現在の 3D カメラの設定で描いたとき、どのスクリーン座標に描画されるのかを調べることができます。
この座標情報をもとに 2D 図形を描くと、2D 描画なのに 3D 感のある表現ができます。
サンプル 2-1
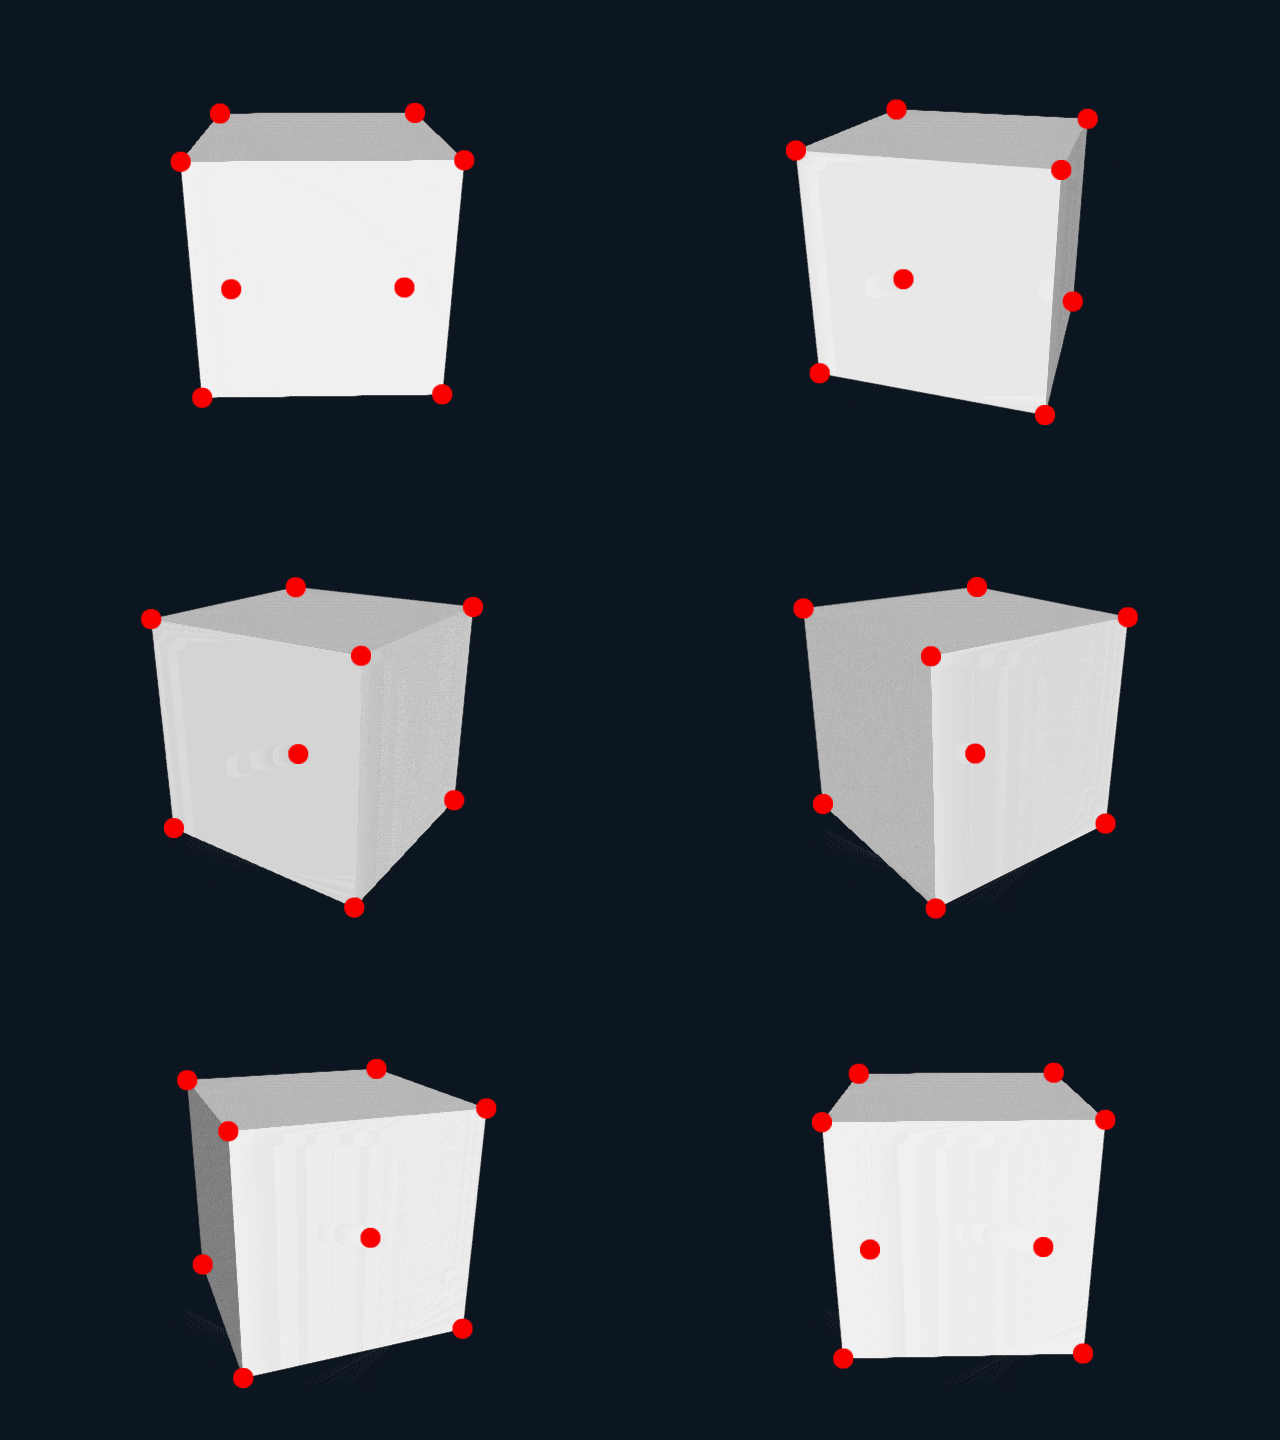
立方体の 1 つの頂点のスクリーン座標を調べます。この立方体はまだ 3D 描画です。

# include <Siv3D.hpp>

void Main()
{
	Camera camera;
	camera.lookat.set(0, 0, 0);
	camera.pos.set(0, 2, -5);
	Graphics3D::SetCamera(camera);

	const Vec3 vertex(1, 1, -1);

	while (System::Update())
	{
		Box(2).draw();

		Circle(Graphics3D::ToScreenPos(vertex).xy, 10).draw(Palette::Red);
	}
}
サンプル 2-2
# include <Siv3D.hpp>

void Main()
{
	Camera camera;
	camera.lookat.set(0, 0, 0);
	camera.pos.set(0, 2, -5);
	Graphics3D::SetCamera(camera);

	const Array<Vec3> vertices =
	{
		{ -1,  1, -1 },
		{  1,  1, -1 },
		{ -1, -1, -1 },
		{  1, -1, -1 },
		{ -1,  1,  1 },
		{  1,  1,  1 },
		{ -1, -1,  1 },
		{  1, -1,  1 },
	};

	Array<Vec3> vertices2(vertices.size());

	double yaw = 0.0;

	while (System::Update())
	{
		const Quaternion q = Quaternion::Yaw(yaw += 0.01);

		for (size_t i = 0; i < vertices.size(); ++i)
		{
			vertices2[i] = Graphics3D::ToScreenPos(q * vertices[i]);
		}

		Box(2).rollPitchYaw(q).draw();

		for (const auto& vertex : vertices2)
		{
			Circle(vertex.xy, 10).draw(Palette::Red);
		}
	}
}
サンプル 2-3
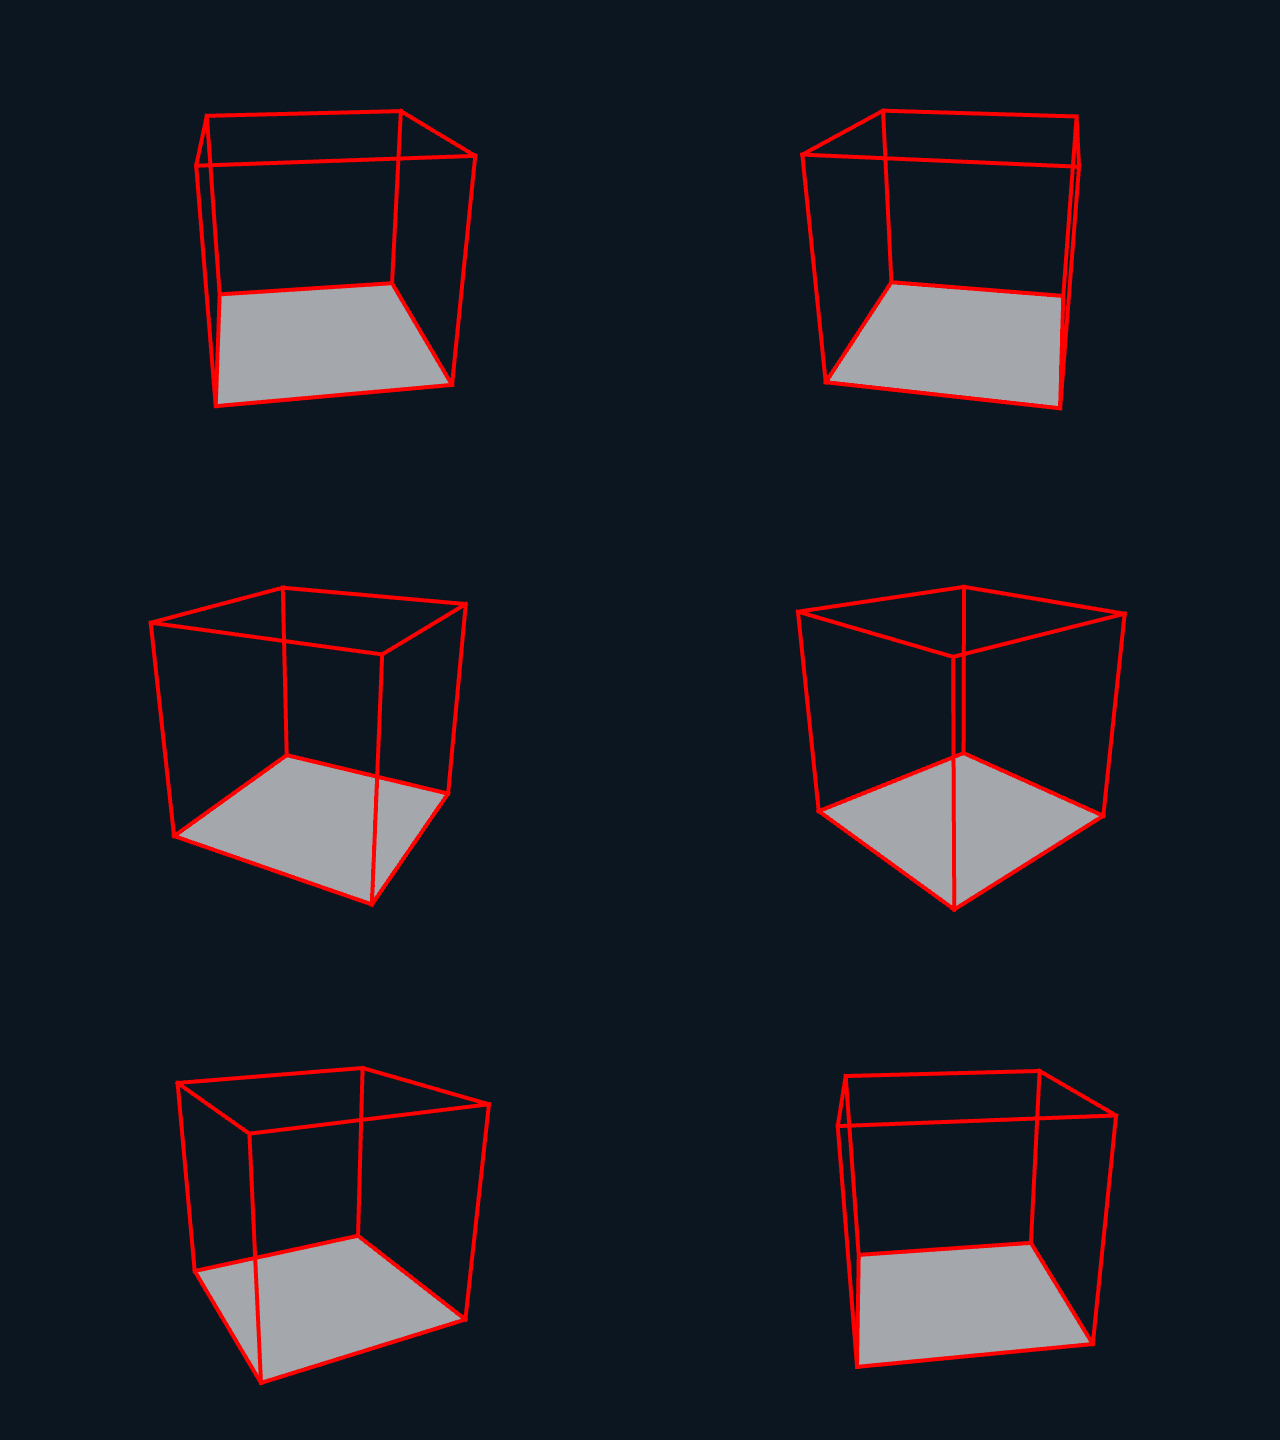
立方体の辺や面を 2D の Line と Quad で描画します。
# include <Siv3D.hpp>

void Main()
{
	Camera camera;
	camera.lookat.set(0, 0, 0);
	camera.pos.set(0, 2, -5);
	Graphics3D::SetCamera(camera);

	const Array<Vec3> vertices =
	{
		{ -1,  1, -1 },
		{  1,  1, -1 },
		{ -1, -1, -1 },
		{  1, -1, -1 },
		{  1,  1,  1 },
		{ -1,  1,  1 },
		{  1, -1,  1 },
		{ -1, -1,  1 },
	};

	Array<Vec3> vertices2(vertices.size());

	const Array<std::pair<int32, int32>> indices =
	{
		{ 0, 1 },
		{ 1, 4 },
		{ 4, 5 },
		{ 5, 0 },

		{ 0, 2 },
		{ 1, 3 },
		{ 4, 6 },
		{ 5, 7 },

		{ 2, 3 },
		{ 3, 6 },
		{ 6, 7 },
		{ 7, 2 },
	};

	double yaw = 0.0;

	while (System::Update())
	{
		const Quaternion q = Quaternion::Yaw(yaw += 0.01);

		for (size_t i = 0; i < vertices.size(); ++i)
		{
			vertices2[i] = Graphics3D::ToScreenPos(q * vertices[i]);
		}

		Quad(vertices2[0].xy, vertices2[1].xy, vertices2[3].xy, vertices2[2].xy).draw(Alpha(80));

		for (const auto& index : indices)
		{
			Line(vertices2[index.first].xy, vertices2[index.second].xy).draw(4, Palette::Red);
		}
	}
}
3. Color + HSV で色のバリエーションを作ろう
Color c と HSV hsv について、c + hsv は HSV(c) + h を返します。
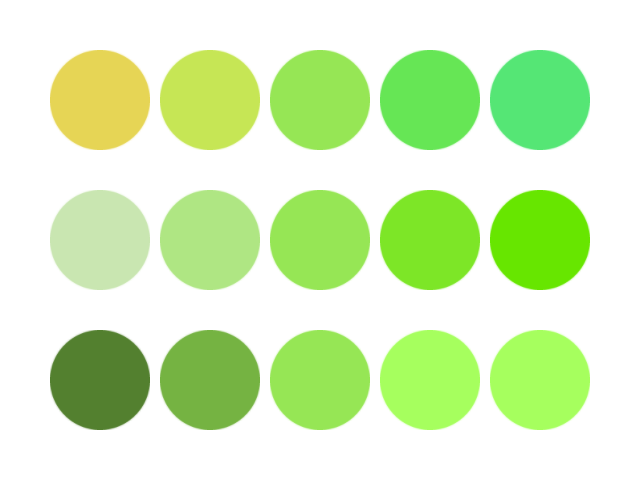
1 つの基本色に対して、少し色合いの違う複数の色を用意したいときにこの機能が便利です。
サンプル 3-1
# include <Siv3D.hpp>

void Main()
{
	Graphics::SetBackground(Palette::White);

	Color color;

	while (System::Update())
	{
		if (System::FrameCount() % 60 == 1)
		{
			color = HSV(Random(360), Random(0.5, 1.0), Random(0.6, 1.0));
		}

		for (auto i : step_to(-2, 2))
		{
			Circle(320 + i * 110, 100, 50).draw(color + HSV(i * 20, 0, 0));
		}

		for (auto i : step_to(-2, 2))
		{
			Circle(320 + i * 110, 240, 50).draw(color + HSV(0, i * 0.2, 0));
		}

		for (auto i : step_to(-2, 2))
		{
			Circle(320 + i * 110, 380, 50).draw(color + HSV(0, 0, i * 0.2));
		}
	}
}
4. テキストにルビを振ろう
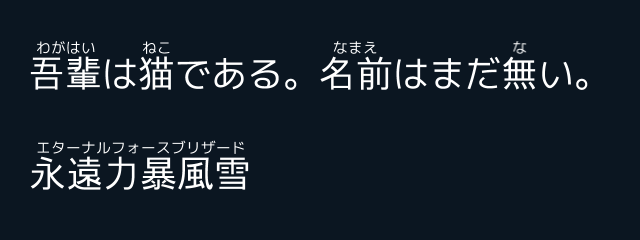
Font::drawKinetic() を使ったハックで、テキストにルビを振るプログラムを作れます。
各文字の座標を Font::drawKinetic() の最中に保存し、あとでその座標情報をもとにルビを描いていきます。
サンプル 4-1
ルビを振れるテキスト描画関数 DrawText() を実装しました。
# include <Siv3D.hpp>

struct Ruby
{
	uint32 indexBegin;
	uint32 indexEnd;
	String text;
};

void DrawText(const Font& font, const Font& fontRuby, const Vec2& pos, const String& text, const Array<Ruby>& rubyList, double yOffset = -2)
{
	Array<double> rubyPos;

	const auto f = [&](KineticTypography& k)
	{
		rubyPos.push_back(k.pos.x + font.getTexture(k.ch).size.x / 2);
	};

	font(text).drawKinetic(pos, f);

	for (const auto& ruby : rubyList)
	{
		const Vec2 center((rubyPos[ruby.indexBegin] + rubyPos[ruby.indexEnd]) / 2, pos.y + yOffset);

		fontRuby(ruby.text).drawCenter(center);
	}
}

void Main()
{
	const Font font(24), fontRuby(10);

	while (System::Update())
	{
		DrawText(font, fontRuby, { 30, 50 }, L"吾輩は猫である。名前はまだ無い。",
		{
			{ 0, 1, L"わがはい" },
			{ 3, 3, L"ねこ" },
			{ 8, 9, L"なまえ" },
			{ 13, 13, L"な" },
		});

		DrawText(font, fontRuby, { 30, 150 }, L"永遠力暴風雪",
		{
			{ 0, 5, L"エターナルフォースブリザード" },
		});
	}
}
明日の記事は @hamukun8686 さんです。
よろしくお願いします。
