OpenSiv3D では、Font を使ってテキストを描画する際、Glyph(グリフ) というクラスで表現される、個々の文字に関する情報を利用して、文字の配置や色などを自在にカスタマイズできます。
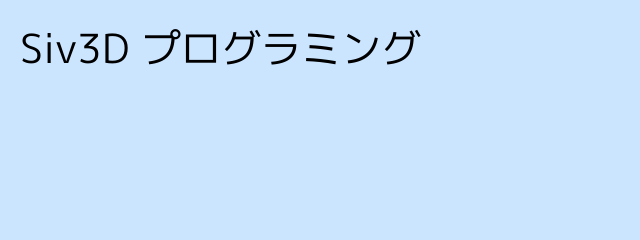
従来のテキスト描画
開始位置と色を指定して Font(text) を draw() します。
# include <Siv3D.hpp> // OpenSiv3D v0.2.0

void Main()
{
	Graphics::SetBackground(ColorF(0.8, 0.9, 1.0));

	const Font font(40);

	while (System::Update())
	{
		font(U"Siv3D プログラミング").draw(20, 20, Palette::Black);
	}
}
Glyph を使ったテキスト描画
range-based for で Font(text) の Glyph を 1 つずつ描画していきます。
# include <Siv3D.hpp> // OpenSiv3D v0.2.0

void Main()
{
	Graphics::SetBackground(ColorF(0.8, 0.9, 1.0));

	const Font font(40);

	while (System::Update())
	{
		Vec2 pos(20, 20);

		for (const auto& glyph : font(U"Siv3D プログラミング"))
		{
			glyph.texture.draw(pos + glyph.offset, Palette::Black);

			pos.x += glyph.xAdvance;
		}
	}
}
Glyph の基本
Glyph を使ったテキスト描画では、文字ごとに渡される TextureRegion や文字コード (char32 型)、オフセット、字間などの情報を使って、自前で 1 文字ずつ描画します。文字の位置の調整や改行も、すべて自分で実装しなければなりません(といっても、そんなに難しいことではありません)
まずは Glyph の中身から見ていきましょう。
struct Glyph
{
	TextureRegion texture;

	char32 codePoint;

	Point offset;

	int32 xAdvance;

	int32 index;
};
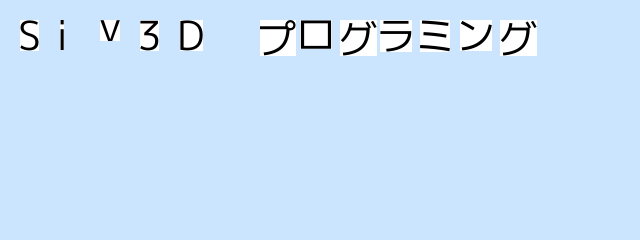
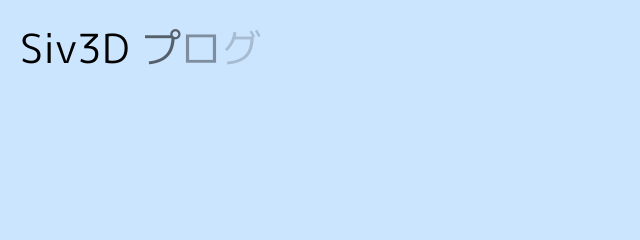
texture は、Siv3D エンジン内で確保されている、文字がたくさん格納された Texture から、該当する文字の部分を切り抜いた TextureRegion です。これを単純に描画するだけでも文字は出せますが、位置はめちゃくちゃです。
⚠️ わかりやすいように Texture の背景を白く塗っています。
# include <Siv3D.hpp> // OpenSiv3D v0.2.0

void Main()
{
	Graphics::SetBackground(ColorF(0.8, 0.9, 1.0));

	const Font font(40);

	while (System::Update())
	{
		Vec2 pos(20, 20);

		for (const auto& glyph : font(U"Siv3D プログラミング"))
		{
			glyph.texture.draw(pos, Palette::Black);

			pos.x += 40; // 適当な間隔
		}
	}
}
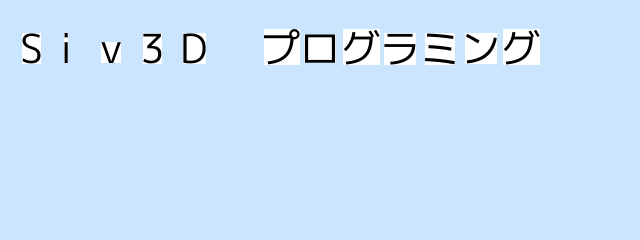
texture の描画位置を、それぞれの文字において offset だけずらすと、ベースラインがそろいます。
# include <Siv3D.hpp> // OpenSiv3D v0.2.0

void Main()
{
	Graphics::SetBackground(ColorF(0.8, 0.9, 1.0));

	const Font font(40);

	while (System::Update())
	{
		Vec2 pos(20, 20);

		for (const auto& glyph : font(U"Siv3D プログラミング"))
		{
			glyph.texture.draw(pos + glyph.offset, Palette::Black); // オフセットを足す

			pos.x += 40;
		}
	}
}
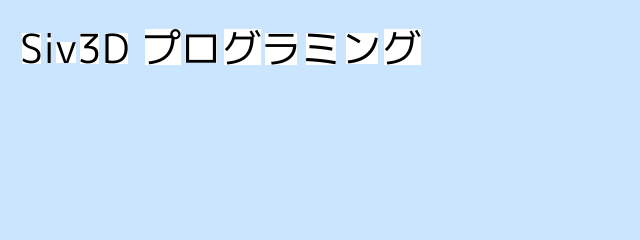
次の文字の書き始めの位置を決めるときには、xAdvance だけ字間を空けます。これで正しい位置に表示できました。
# include <Siv3D.hpp> // OpenSiv3D v0.2.0

void Main()
{
	Graphics::SetBackground(ColorF(0.8, 0.9, 1.0));

	const Font font(40);

	while (System::Update())
	{
		Vec2 pos(20, 20);

		for (const auto& glyph : font(U"Siv3D プログラミング"))
		{
			glyph.texture.draw(pos + glyph.offset, Palette::Black);

			pos.x += glyph.xAdvance; // xAdvance だけ字間を空ける
		}
	}
}
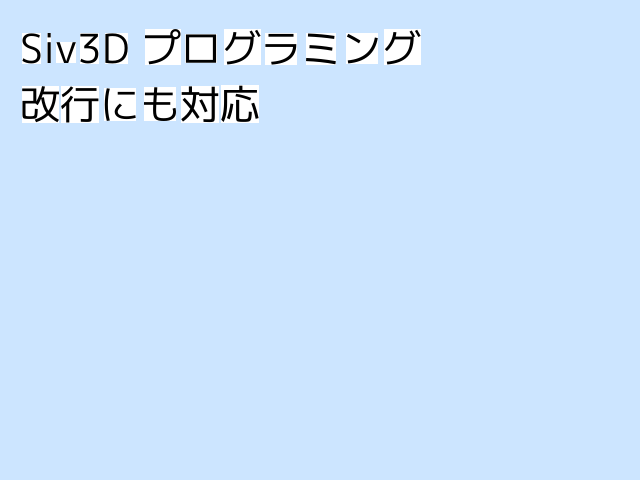
次は改行に対応させましょう。
codePoint は文字そのものを UTF-32 (char32 型) で表した値です。
if (glyph.codePoint == U'あ') のようにして、ある文字の時にだけ特別な処理をさせることができます。
ここでは、改行文字の場合にフォントの高さ分だけ y 座標を進めて x 座標をリセットするようにしましょう。
# include <Siv3D.hpp> // OpenSiv3D v0.2.0

void Main()
{
	Graphics::SetBackground(ColorF(0.8, 0.9, 1.0));

	const Font font(40);

	while (System::Update())
	{
		const Vec2 basePos(20, 20);

		Vec2 pos(basePos);

		for (const auto& glyph : font(U"Siv3D プログラミング\n改行にも対応"))
		{
			if (glyph.codePoint == U'\n')
			{
				pos.x = basePos.x;

				pos.y += font.height();

				continue;
			}

			glyph.texture.draw(pos + glyph.offset, Palette::Black);

			pos.x += glyph.xAdvance;
		}
	}
}
ここまででは扱いませんでしたが、index は、描こうとする Glyph がテキスト全体で何番目の文字であるかを表す 0 から始まるインデックス番号です。次の章からは index も使った Glyph の応用例を見ていきましょう。
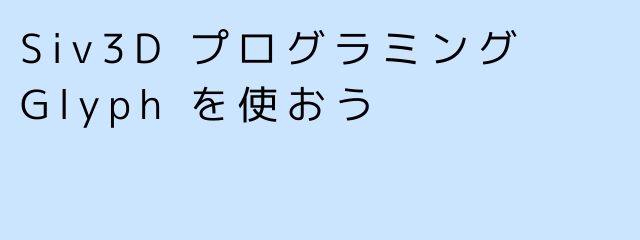
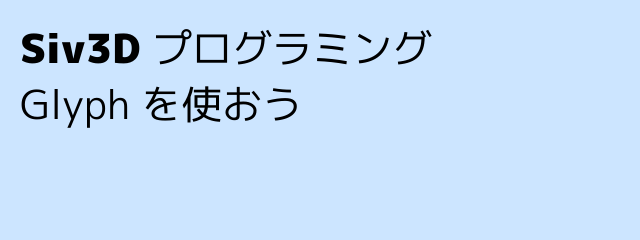
応用例 1: 字間を広げる
pos.x に加算する値を大きくし、字間を広げます。
# include <Siv3D.hpp> // OpenSiv3D v0.2.0

void Main()
{
	Graphics::SetBackground(ColorF(0.8, 0.9, 1.0));

	const Font font(40);

	while (System::Update())
	{
		const Vec2 basePos(20, 20);

		Vec2 pos(basePos);

		for (const auto& glyph : font(U"Siv3D プログラミング\nGlyph を使おう"))
		{
			if (glyph.codePoint == U'\n')
			{
				pos.x = basePos.x;

				pos.y += font.height();

				continue;
			}

			glyph.texture.draw(pos + glyph.offset, Palette::Black);

			pos.x += glyph.xAdvance + 8; // 字間を大きくする
		}
	}
}
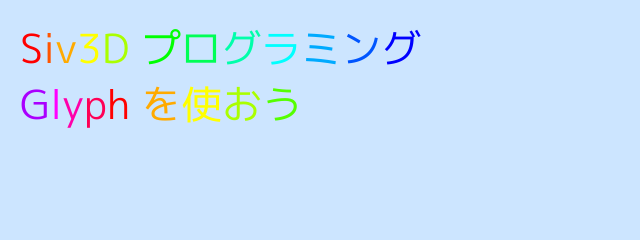
応用例 2: 文字の色を変える
index を使って虹色のテキストを作ります。
# include <Siv3D.hpp> // OpenSiv3D v0.2.0

void Main()
{
	Graphics::SetBackground(ColorF(0.8, 0.9, 1.0));

	const Font font(40);

	while (System::Update())
	{
		const Vec2 basePos(20, 20);

		Vec2 pos(basePos);

		for (const auto& glyph : font(U"Siv3D プログラミング\nGlyph を使おう"))
		{
			if (glyph.codePoint == U'\n')
			{
				pos.x = basePos.x;

				pos.y += font.height();

				continue;
			}

			glyph.texture.draw(pos + glyph.offset, HSV(glyph.index * 20)); // 色を文字ごとに変える

			pos.x += glyph.xAdvance;
		}
	}
}
応用例 3: ゆっくりと文字を出現させる
Stopwatch との組み合わせで、文字が少しずつフェードインするアニメーションを作ります。
# include <Siv3D.hpp> // OpenSiv3D v0.2.0

void Main()
{
	Graphics::SetBackground(ColorF(0.8, 0.9, 1.0));

	const Font font(40);

	Stopwatch stopwatch(true);

	while (System::Update())
	{
		const Vec2 basePos(20, 20);

		Vec2 pos(basePos);

		const double t = stopwatch.sF();

		for (const auto& glyph : font(U"Siv3D プログラミング\nGlyph を使おう"))
		{
			if (glyph.codePoint == U'\n')
			{
				pos.x = basePos.x;

				pos.y += font.height();

				continue;
			}

			const ColorF color(0.0, Math::Saturate(t - glyph.index * 0.2));

			glyph.texture.draw(pos + glyph.offset, color);

			pos.x += glyph.xAdvance;
		}
	}
}
応用例 4: 異なるフォントを文の途中で使う
特定の文字の描画に、異なる Font を使います。
Font::getGlyph(char32) を使うと、指定した文字の Glyph を作成して取得できます。
# include <Siv3D.hpp> // OpenSiv3D v0.2.0

void Main()
{
	Graphics::SetBackground(ColorF(0.8, 0.9, 1.0));

	const Font font(40);

	const Font fontBold(40, Typeface::Black);

	while (System::Update())
	{
		const Vec2 basePos(20, 20);

		Vec2 pos(basePos);

		for (const auto& glyph : font(U"Siv3D プログラミング\nGlyph を使おう"))
		{
			if (glyph.codePoint == U'\n')
			{
				pos.x = basePos.x;

				pos.y += font.height();

				continue;
			}

			if (glyph.index < 5)
			{
				const auto glyph2 = fontBold.getGlyph(glyph.codePoint);

				glyph2.texture.draw(pos + glyph2.offset, Palette::Black);

				pos.x += glyph2.xAdvance;
			}
			else
			{
				glyph.texture.draw(pos + glyph.offset, Palette::Black);

				pos.x += glyph.xAdvance;
			}
		}
	}
}
応用例 5: 特定の文字を別の画像に置き換える
特定の文字を別の画像の表示に置き換えます。
次のプログラムでは @ の文字を Siv3D-kun の画像に置き換えて表示します。
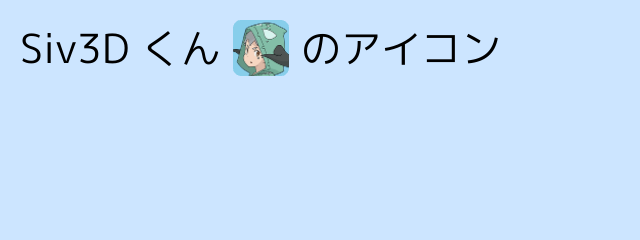
# include <Siv3D.hpp> // OpenSiv3D v0.2.0

void Main()
{
	Graphics::SetBackground(ColorF(0.8, 0.9, 1.0));

	const Font font(40);

	const Texture texture(U"example/siv3d-kun.png", TextureDesc::Mipped);

	while (System::Update())
	{
		const Vec2 basePos(20, 20);

		Vec2 pos(basePos);

		for (const auto& glyph : font(U"Siv3D くん @ のアイコン"))
		{
			if (glyph.codePoint == U'\n')
			{
				pos.x = basePos.x;

				pos.y += font.height();

				continue;
			}
			else if (glyph.codePoint == U'@')
			{
				const RoundRect rect(pos, font.height(), font.height(), 8);

				rect.draw(Palette::Skyblue);

				rect(texture(90, 5, 110)).draw();

				pos.x += rect.w;

				continue;
			}

			glyph.texture.draw(pos + glyph.offset, Palette::Black);

			pos.x += glyph.xAdvance;
		}
	}
}
もっと!
Glyph を応用すると、Markdown や HTML のように、文中の記号でフォントのスタイルを変更するマークアップ言語を実装できます。
例えば、次のプログラムでは、$ で囲んだ文字の色をオレンジにします。

# include <Siv3D.hpp> // OpenSiv3D v0.2.0

void Main()
{
	Graphics::SetBackground(ColorF(0.8, 0.9, 1.0));

	const Font font(40);

	bool isBalck = true;

	while (System::Update())
	{
		const Vec2 basePos(20, 20);

		Vec2 pos(basePos);

		for (const auto& glyph : font(U"$Siv3D$ プログラミング\n$Glyph$ を使おう"))
		{
			if (glyph.codePoint == U'\n')
			{
				pos.x = basePos.x;

				pos.y += font.height();

				continue;
			}
			else if (glyph.codePoint == U'$')
			{
				isBalck = !isBalck;

				continue;
			}

			glyph.texture.draw(pos + glyph.offset, isBalck ? Palette::Black : Palette::Orange);

			pos.x += glyph.xAdvance;
		}
	}
}
より実用的なマークアップの実装をしようとすると長くなるので、また別の記事で紹介したいと思います。
みなさんも新機能 Glyph を使って面白いテキスト表現を探求してみてください。