Windows で C++/OpenSiv3D を使ってアプリを開発し、リリースするまでの 8 ステップを解説します。
1. アプリのネタを考える
初めてアプリを開発する場合や、まだ 1, 2 個しかアプリを作ったことがない場合は、数十行のコードで実現できる小粒なアイデアから始めるのが安全です。今回は "乱数でアイデアを生成する" の記事で紹介した「アイデアを生成するためのアプリ」を例として作ります。
2. タイトルを決める
リリースしたあとの反響を SNS で検索できように、既存のサービスやアプリ、一般的な名詞と重複しない名前がおすすめです。今回は「RandomHints」にしました。完成後にタイトルを決めるのもありです。Window::SetTitle()でウィンドウのタイトルを設定できます。
# include <Siv3D.hpp> // OpenSiv3D v0.3.1

void Main()
{
	Window::SetTitle(U"RandomHints");

	while (System::Update())
	{

	}
}
3. プロトタイプを作る
アプリの見た目やコードの丁寧さは気にせず、コアとなるコンセプトを実現するプロトタイプを作ります。Main 関数に数十行で書ける規模が良いでしょう。今回は 20 行弱です。
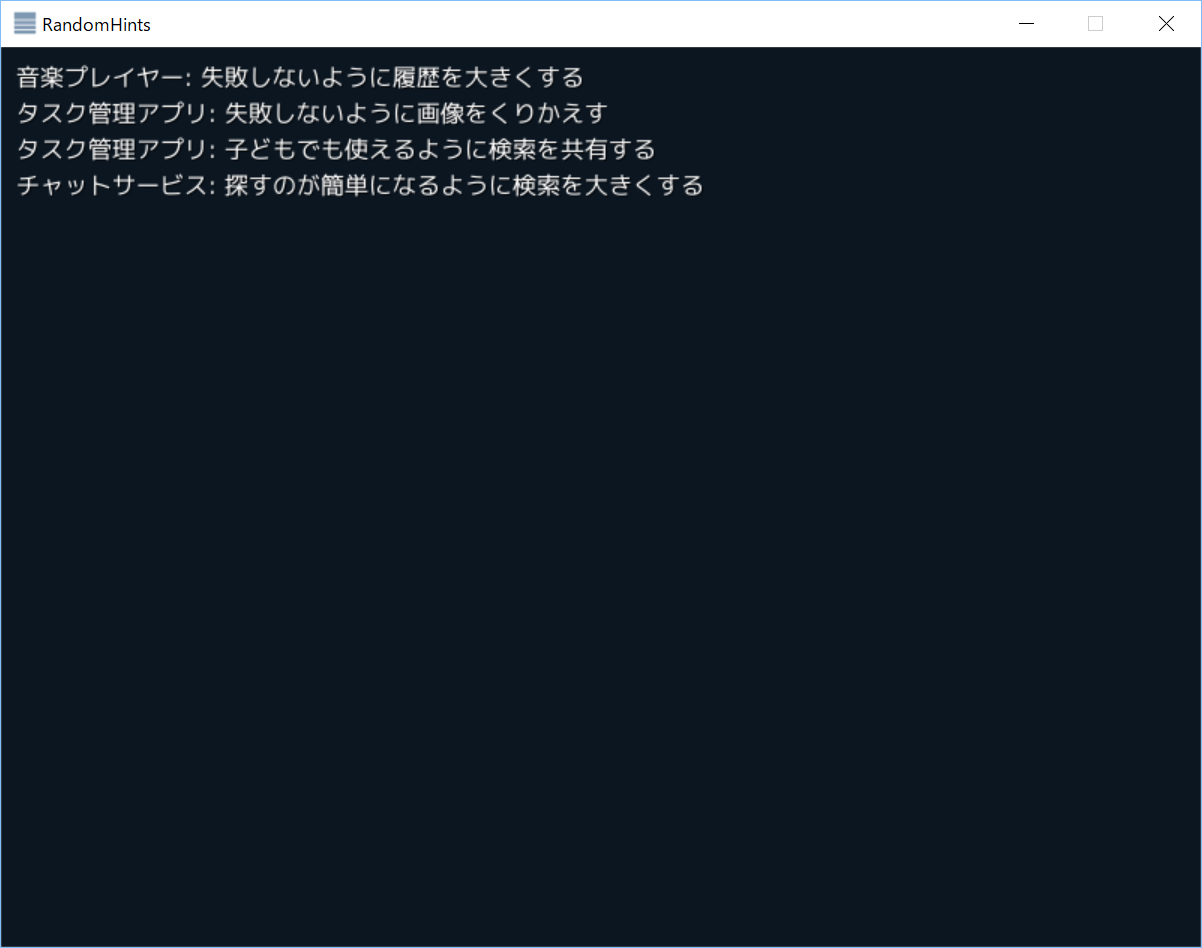
# include <Siv3D.hpp> // OpenSiv3D v0.3.1

void Main()
{
	Window::SetTitle(U"RandomHints");
	const Array<String> applications = { U"音楽プレイヤー", U"チャットサービス", U"タスク管理アプリ"};
	const Array<String> targets = { U"失敗しないように", U"探すのが簡単になるように", U"子どもでも使えるように" };
	const Array<String> objects = {	U"履歴を", U"画像を", U"検索を" };
	const Array<String> actions = {	U"共有する", U"くりかえす", U"大きくする" };

	while (System::Update())
	{
		if (MouseL.down())
		{
			Print << applications.choice() << U": " << targets.choice() << objects.choice() << actions.choice();
		}
	}
}
4. クオリティを上げる
プロトタイプを動かして「これはいける!」「面白い!」と思えたら、アプリのクオリティを高めるステップに進みます。ゲームの場合はステージを増やし、コンテンツデータがある場合はバリエーションを増やし、グラフィカルユーザインタフェースを用意してユーザが簡単に操作できるようにします。デザインに自信がない場合、ボタンなどのデザインは自作ではなく SimpluGUI などの標準搭載機能を使うとよいでしょう。
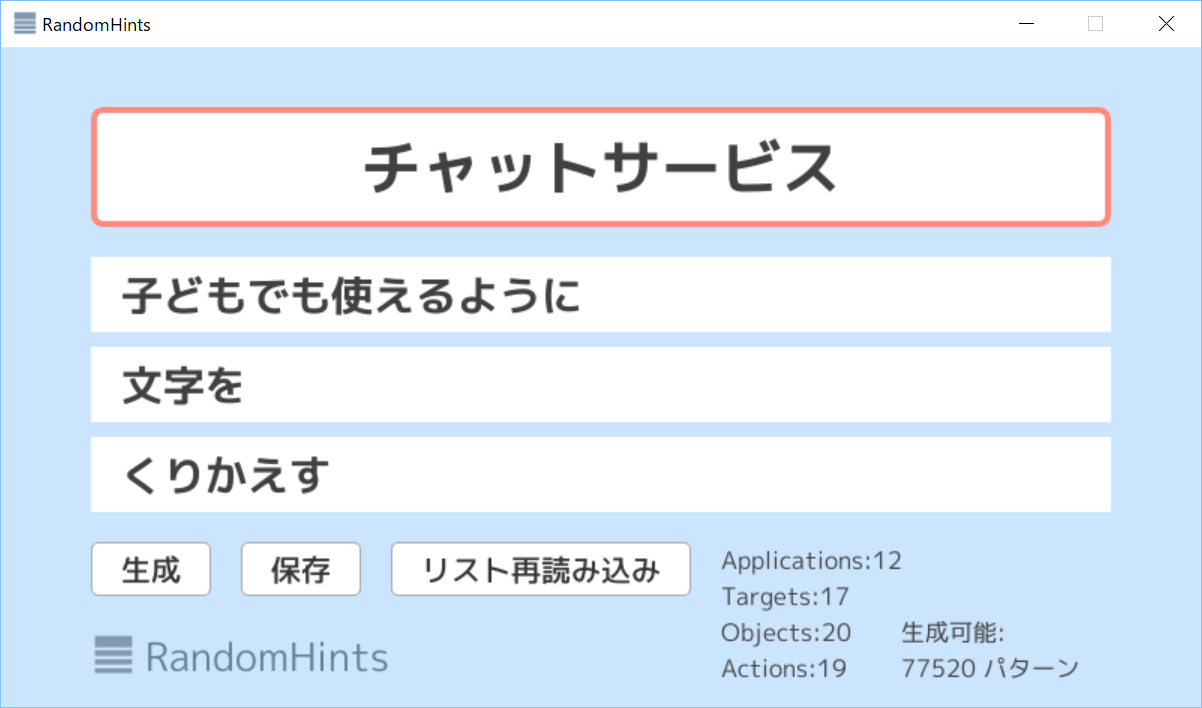
//-----------------------------------------------
//
//	RandomHints
//
//	Copyright (c) 2018 Ryo Suzuki
//
//	Licensed under the MIT License.
//
//-----------------------------------------------

# include <Siv3D.hpp> // OpenSiv3D v0.3.1

class Error
{
private:

	String m_what;

public:

	Error(const String& what)
		: m_what(what) {}

	const String& what() const
	{
		return m_what;
	}
};

// ロゴ画像をプログラムで作成
Image CreateLogo()
{
	Image image(400, 400, ColorF(255, 0));
	Rect(20, 20, 360, 120).overwrite(image, ColorF(0.5, 0.6, 0.7));
	Rect(20, 160, 360, 60).overwrite(image, ColorF(0.5, 0.6, 0.7));
	Rect(20, 240, 360, 60).overwrite(image, ColorF(0.5, 0.6, 0.7));
	Rect(20, 320, 360, 60).overwrite(image, ColorF(0.5, 0.6, 0.7));
	return image;
}

Array<String> ReadItems(const FilePath& path)
{
	TextReader reader(path);

	if (!reader)
	{
		throw Error(U"アイテムリスト `{}` が読み込めませんでした"_fmt(path));
	}

	Array<String> items;

	String line;

	while (reader.readLine(line))
	{
		if (line.trim())
		{
			items << line;
		}
	}

	if (!items)
	{
		throw Error(U"アイテムリスト `{}` の項目がありません"_fmt(path));
	}

	return items;
}

void Main()
{
	// アイコン用の画像を出力
	// CreateLogo().save(U"logo.png");

	// タイトル
	Window::SetTitle(U"RandomHints");

	// 背景色と文字
	Window::Resize(800, 440);
	Graphics::SetBackground(ColorF(0.8, 0.9, 1.0));
	const Font fontApp(40, Typeface::Bold);
	const Font fontItem(28, Typeface::Bold);
	const Font fontPattern(16);
	const Font fontTitle(26);
	const Texture textureLogo(CreateLogo(), TextureDesc::Mipped);

	const Rect applicationRect(60, 40, 680, 80);
	const Rect targetRect(60, 140, 680, 50);
	const Rect objectRect(60, 200, 680, 50);
	const Rect actionRect(60, 260, 680, 50);

	Array<String> applications, targets, objects, actions;

	// ファイルからアイテムを読み込む
	try
	{
		applications = ReadItems(U"applications.txt");
		targets = ReadItems(U"targets.txt");
		objects = ReadItems(U"objects.txt");
		actions = ReadItems(U"actions.txt");
	}
	catch (const Error& error)
	{
		System::ShowMessageBox(error.what(), MessageBoxStyle::Error);
		return;
	}

	String application = applications.choice();
	String target = targets.choice();
	String object = objects.choice();
	String action = actions.choice();
	ColorF color = RandomColorF();

	// 何パターン作れるかを計算 (A の個数 x B の個数 x C の個数 x D の個数)
	size_t patterns = (applications.size() * targets.size() * objects.size() * actions.size());

	while (System::Update())
	{
		// 「生成」ボタンを押したら再生成
		if (SimpleGUI::Button(U"生成", Vec2(60, 330)))
		{
			application = applications.choice();
			target = targets.choice();
			object = objects.choice();
			action = actions.choice();
			color = RandomColorF();
		}

		// 「保存」ボタンを押したらスクリーンショットを保存
		if (SimpleGUI::Button(U"保存", Vec2(160, 330)))
		{
			const FilePath path = U"Save/{}.png"_fmt(DateTime::Now().format(U"yyyy-MM-dd-HHmmss-SS"));
			ScreenCapture::SaveCurrentFrame(path);
		}

		// 「リスト再読み込み」ボタンを押したらアイテムファイルをリロード
		if (SimpleGUI::Button(U"リスト再読み込み", Vec2(260, 330)))
		{
			try
			{
				applications = ReadItems(U"applications.txt");
				targets = ReadItems(U"targets.txt");
				objects = ReadItems(U"objects.txt");
				actions = ReadItems(U"actions.txt");
				patterns = (applications.size() * targets.size() * objects.size() * actions.size());
			}
			catch (const Error& error)
			{
				System::ShowMessageBox(error.what(), MessageBoxStyle::Error);
			}
		}

		// 結果を表示
		applicationRect.rounded(8).draw().drawFrame(4, 0, ColorF(color, 0.5));
		targetRect.draw();
		objectRect.draw();
		actionRect.draw();

		fontApp(application)
			.drawAt(applicationRect.center(), ColorF(0.25));
		fontItem(target).draw(80, 145, ColorF(0.25));
		fontItem(object).draw(80, 205, ColorF(0.25));
		fontItem(action).draw(80, 265, ColorF(0.25));

		fontPattern(U"Applications:{}\nTargets:{}\nObjects:{}\nActions:{}"_fmt(
			applications.size(), targets.size(), objects.size(), actions.size()))
			.draw(480, 330, ColorF(0.25));

		fontPattern(U"\n\n生成可能:\n{} パターン"_fmt(patterns)).draw(600, 330, ColorF(0.25));

		Rect(60, 390, 30)(textureLogo).draw();
		fontTitle(U"RandomHints").draw(96, 388, ColorF(0.4, 0.5, 0.6));
	}
}
5. アイコンを作る
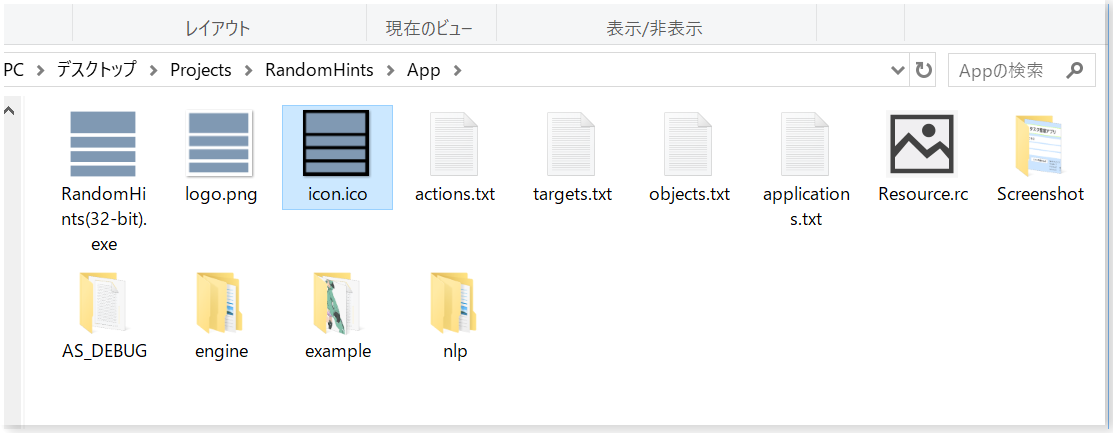
デフォルトの Siv3D アイコンでも悪くはありませんが、独自のアイコンがあると洗練されたアプリのように見えます。良いデザインが思いつかない場合は、アプリケーションに登場する象徴的なユーザインタフェースの形状を取り入れると、意外と良い感じになります。
今回は画面の構成をイメージしてアイコンをデザインしました。

アイコン画像から.icoファイルを作成し(変換してくれる Web サービスがあります)、プロジェクトにあるデフォルトのicon.ico を置き換えてリビルドします。このとき古いアイコンが Windows エクスプローラーのキャッシュに残っているので、アイコンの見た目が更新されていないように見えることがありますが、実際は更新されています。気になる場合は、実行ファイルの名前を変えるか、OS のディスククリーンアップで「縮小表示」を削除するとキャッシュが再構築されます。
6. リリースの準備をする
Visual Studio のビルド設定を Release にしてリリースビルドの実行ファイルを作成します。
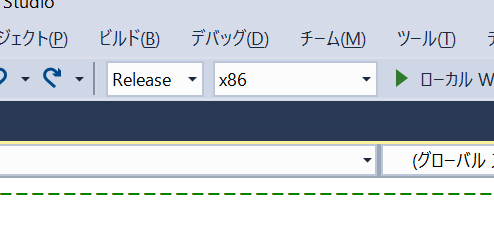
32-bit (x86) と 64-bit (x64) のビルドができますが、64-bit 版の実行ファイルは、一部でまだ使われている 32-bit 版 Windows で動作しないため、特別な理由がなければ 32-bit 版を配布しましょう。配布する実行ファイルのサイズを減らすために、プログラム中で使用していないリソースを .rc ファイルからコメントアウトすることもできます(よくわからない場合は変更しないほうが安全です)。
7. フォルダにまとめる
アプリの名前を付けたフォルダに、リリースビルドの実行ファイルを入れ、使い方などを記述したテキストファイルを同梱します。プログラムで読み込んでいるファイルがある場合は、プロジェクトの App フォルダと同じ構成で配置します。

最後に、配布のためにこれらを含む上位のフォルダを ZIP 圧縮して 1 つのファイルにまとめます。今回は RandomHints フォルダを圧縮して RandomHints.zip を作りました。
8. 公開する
Dropbox や GitHub に ZIP ファイルをアップロードし、アプリケーションの説明やスクリーンショットと合わせて SNS で宣伝の投稿をします。今回は GitHub にソースコードとセットで公開しました。
RandomHints: https://github.com/Reputeless/RandomHints
新規性を生み出せるアプリ「RandomHints」を公開しました https://t.co/Vvhdwa4nvz #OpenSiv3D #RandomHints pic.twitter.com/hfVOVQ521T
— Ryo Suzuki (@Reputeless) 25 December 2018
