HMSのプッシュ通知の種類
HMSのプッシュ通知を送るときに、Notification MessageまたはData Messageを選ぶことができます。
Notification Messageで送る場合、HMS Coreが受信処理をするので、ユーザーが受信処理を実装しなくても大丈夫です。
Data Messageで送る場合、ユーザーは受信処理を実装する必要があります。
そのため、Data Messageのほうが実装の難易度が高いです。
Data Messageの受信処理の実装方法
1. HmsMessageServiceを継承するクラスを作成
YourHmsMessageService.kt
class MainService: HmsMessageService() {
}
マニュフェストにサービスを追加することも忘れずに!
AndroidManifest.xml
<service
      android:name=".YourHmsMessageService"
      android:exported="false">
      <intent-filter>
            <action android:name="com.huawei.push.action.MESSAGING_EVENT" />
      </intent-filter>
</service>
2. onMessageReceivedをオーバーライド
YourHmsMessageService.kt
class MainService: HmsMessageService() {
    override fun onMessageReceived(message: RemoteMessage?) {
        super.onMessageReceived(message)
        message?.let {
            val jsonData = JSONObject(it.data)
            // ここで通知を出す
        }
    }
}
3. messageを解析
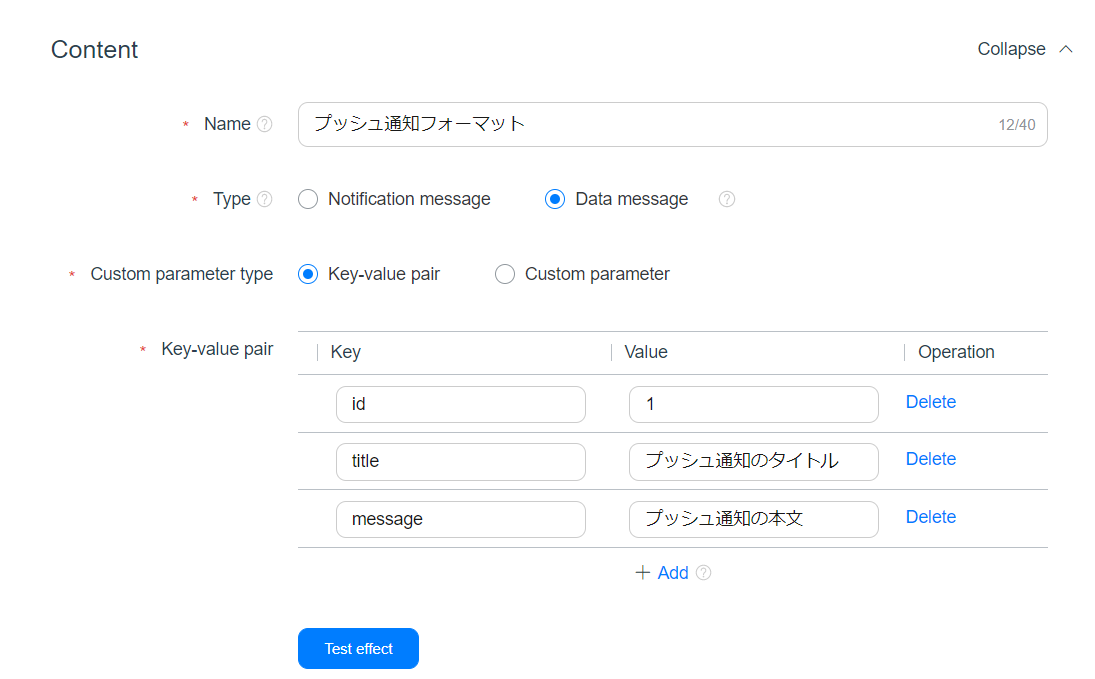
次のようなData Messageを送るとします。
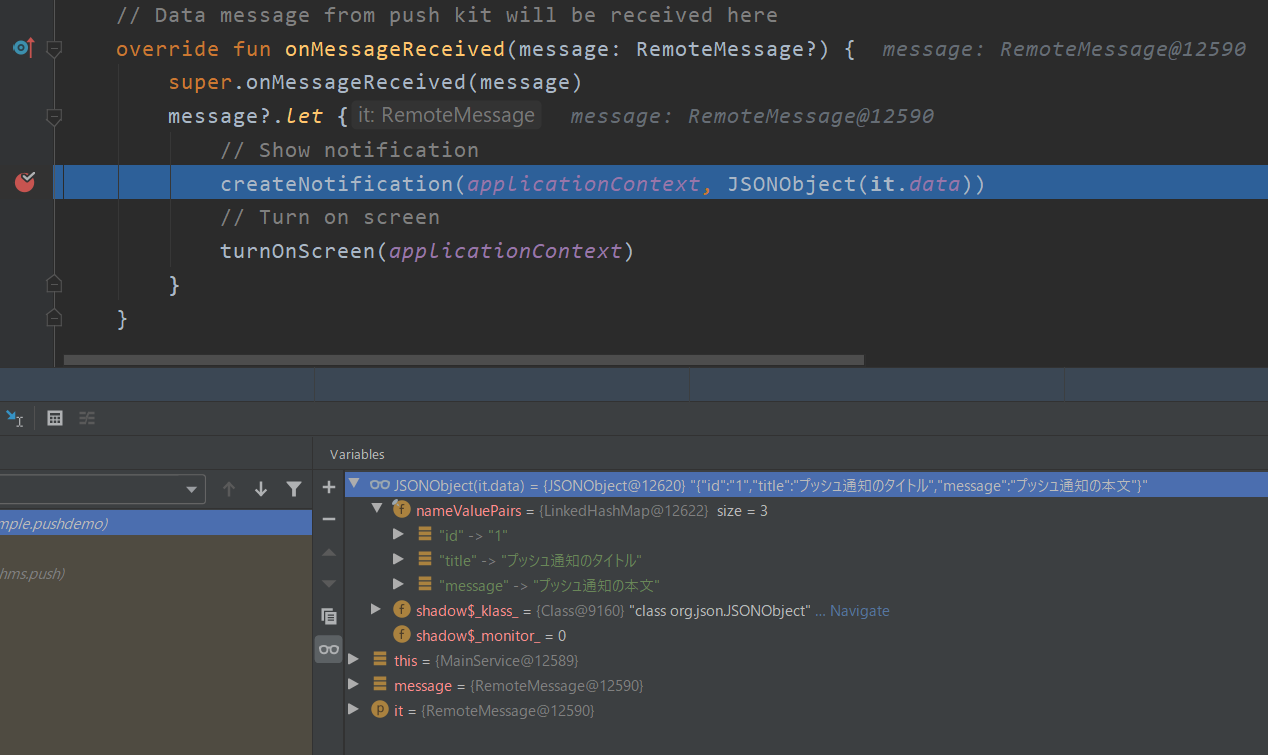
これを送ったら、Androidでは次のように受信します。
Data MessageをJSONで処理できます。
残りはデータを通知に出すだけです。
Androidのプッシュ通知の表示方法
HMS端末のOSバージョンは低くてもAndroid 9.0以上なので、通知を出すときに通知チャンネルが必須です。
次はAndroidのプッシュ通知を表示するサンプルです。
YourHmsMessageService.kt
private fun createNotification(context: Context, jsonObject: JSONObject) {
    val notificationManager: NotificationManager = context.getSystemService(Context.NOTIFICATION_SERVICE) as NotificationManager? ?: return

    // 通知クリック後に開くActivityを定義する
    val pendingIntent = PendingIntent.getActivity(
        context,
        jsonObject.optInt("id", 0),
        Intent(context, YourActivity::class.java).apply {
            flags = Intent.FLAG_ACTIVITY_NEW_TASK or Intent.FLAG_ACTIVITY_CLEAR_TASK
        },
        PENDING_INTENT_FLAG
    )

    // 通知に表示する内容を設定する
    val builder = NotificationCompat.Builder(context, CHANNEL_ID)
        // 通知アイコン
        .setSmallIcon(android.R.mipmap.sym_def_app_icon)
        // 通知タイトル
        .setContentTitle(jsonObject.optString("title"))
        // 通知本文
        .setContentText(jsonObject.optString("message"))
        // 通知の優先度やサウンドを設定するが、Android 8.0以上の場合は通知チャンネルを使うので、Android 7.1までしかこの設定が効かない
        // https://developer.android.com/training/notify-user/channels
        .setPriority(NotificationCompat.PRIORITY_HIGH)
        // 先ほど定義したpendingIntentをセットする
        .setContentIntent(pendingIntent)
        // 通知クリック後に通知を消す
        .setAutoCancel(true)

    // Android 8.0以上の場合、通知チャンネルが必要
    // HMS端末のAndroidバージョンは9.0以上なので、通知チャンネルは必須
    if (Build.VERSION.SDK_INT >= Build.VERSION_CODES.O) {
        val channel = NotificationChannel(
            CHANNEL_ID,
            CHANNEL_NAME,
            NotificationManager.IMPORTANCE_HIGH
        ).apply {
            description = CHANNEL_DESCRIPTION

            // バッジを表示する
            setShowBadge(true)

            // バイブレーションを有効にする
            enableVibration(true)

            // サウンドを有効にし、デフォルトのサウンドをセットする
            setSound(RingtoneManager.getDefaultUri(RingtoneManager.TYPE_NOTIFICATION), null)

            // ロックスクリーンに通知を表示する
            // VISIBILITY_PRIVATE : Show this notification on all lockscreens, but conceal sensitive or private information on secure lockscreens.
            // VISIBILITY_PUBLIC : Show this notification in its entirety on all lockscreens.
            // VISIBILITY_SECRET : Do not reveal any part of this notification on a secure lockscreen.
            lockscreenVisibility = Notification.VISIBILITY_PUBLIC
        }

        // 通知チャンネルを作る
        notificationManager.createNotificationChannel(channel)
    }

    // 最後は設定した
    notificationManager.notify(jsonObject.optInt(KEY_ID, 0), builder.build())
}
上記のサンプルを動かすと、通知チャンネルが作成され、その通知チャンネルで通知が出されます。
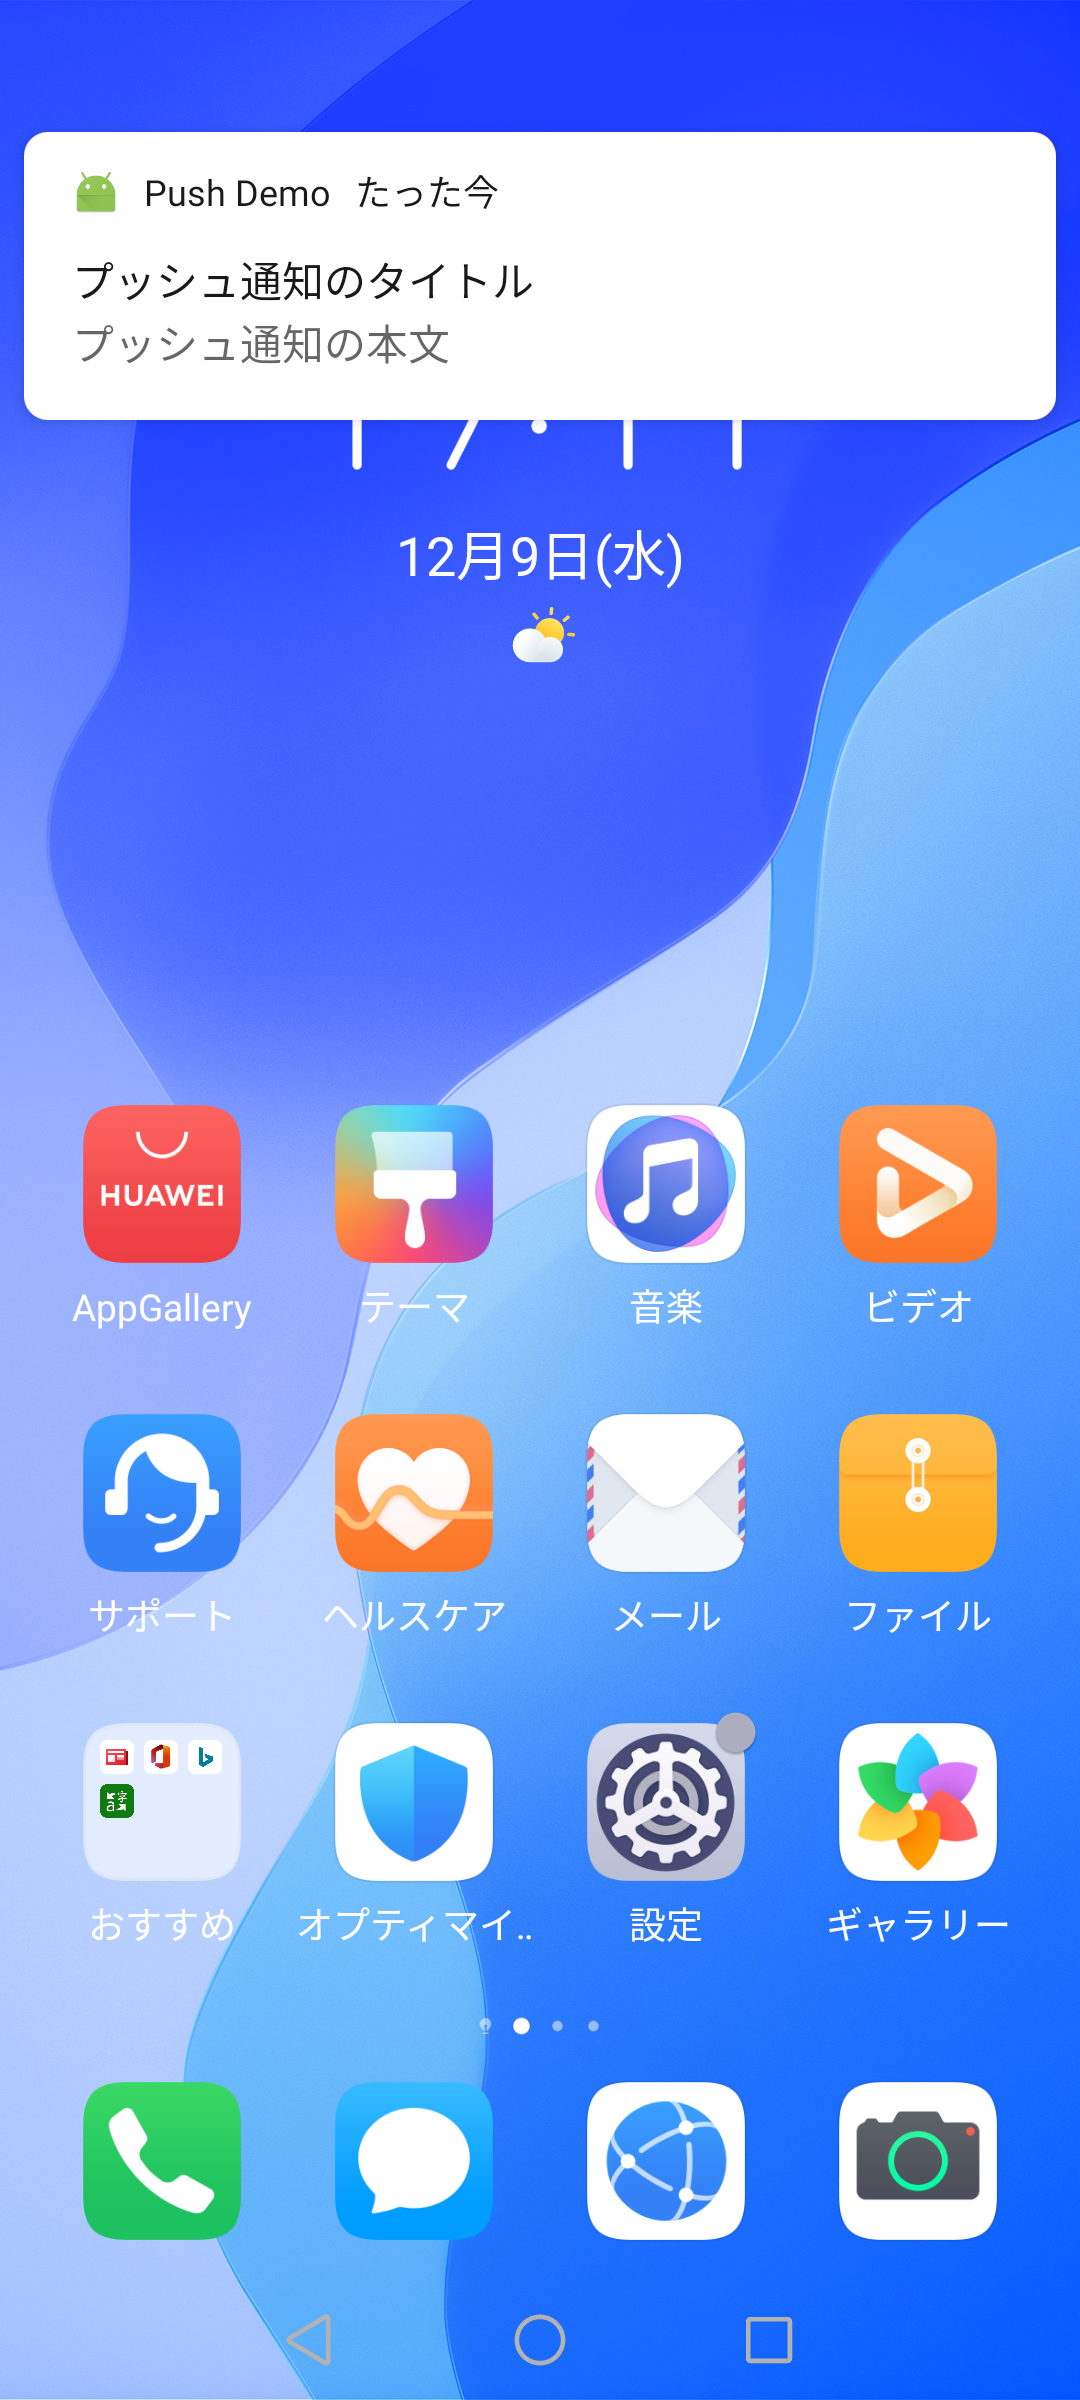
通知も表示できます。

GitHub
参考
- HMS:https://developer.huawei.com/consumer/jp/
- HMS Push Kitの紹介:https://developer.huawei.com/consumer/jp/hms/huawei-pushkit
- HMS Push Kitのドキュメント:https://developer.huawei.com/consumer/jp/doc/development/HMSCore-Guides-V5/android-dev-process-0000001050263396-V5
- Huawei Developers:https://forums.developer.huawei.com/forumPortal/en/home
- Facebook Huawei Developersグループ:https://www.facebook.com/Huaweidevs/


