7
3

Delete article

Deleted articles cannot be recovered.

Draft of this article would be also deleted.

Are you sure you want to delete this article?

More than 5 years have passed since last update.

Appium desktop のインスペクタをエミュレータで使うまでの覚書(Androidアプリ)

Last updated at Posted at 2018-01-05

環境については 前回の記事 を参照

ADVの準備

立ち上げておく。

インスペクタの起動

appiumを起動し、サーバをスタートさせたら右上の start inspector session をクリックする
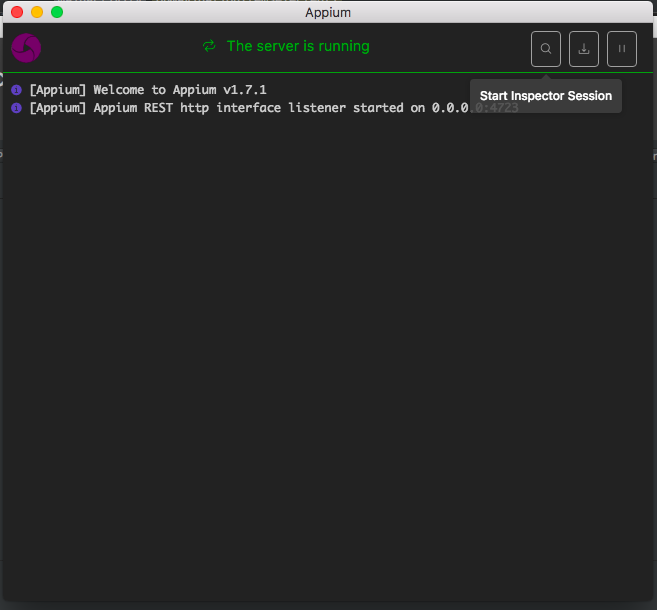
スクリーンショット 2018-01-05 14.03.13.png

こんな画面が出て来るので、 desired capabilities を選択し、接続情報を左下のフォームに入力していく。
一番したにドキュメントへのリンクがあるのでそれを見ると良い。(テンプレ的な物用意してくれてもいいのに……)
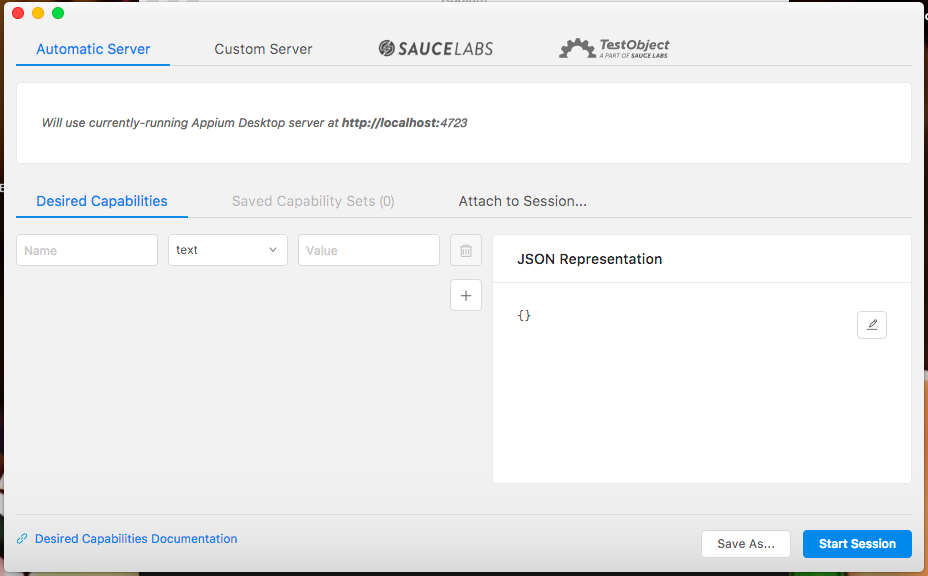
スクリーンショット 2018-01-05 14.06.57.png

ドキュメントみてもどんなときに何つかえばいいのかよくわからないので、とりあえず私が設定したのは以下のとおり。これも人の丸パクリ。
パッケージ名とかアプリパスとかプラットフォームバージョンとかはご自分のものに変えてちょ。

{
  "automationName": "Appium",
  "platformName": "Android",
  "appPackage": "jp.production765.minori.wevbiewtest",
  "appActivity": "jp.production765.minori.wevbiewtest.MainActivity",
  "platformVersion": "8.1.0",
  "deviceName": "Android Emulator",
  "app": "/Users/minori/AndroidStudioProjects/wevbiewtest/app/build/outputs/apk/debug/app-debug.apk"
}

右下の「Start Session」をクリックすると立ち上がってるエミュレータにアプリをインストールした上でインスペクタが起動する。これでネイティブアプリ内の要素名とかを直接見る事ができる。
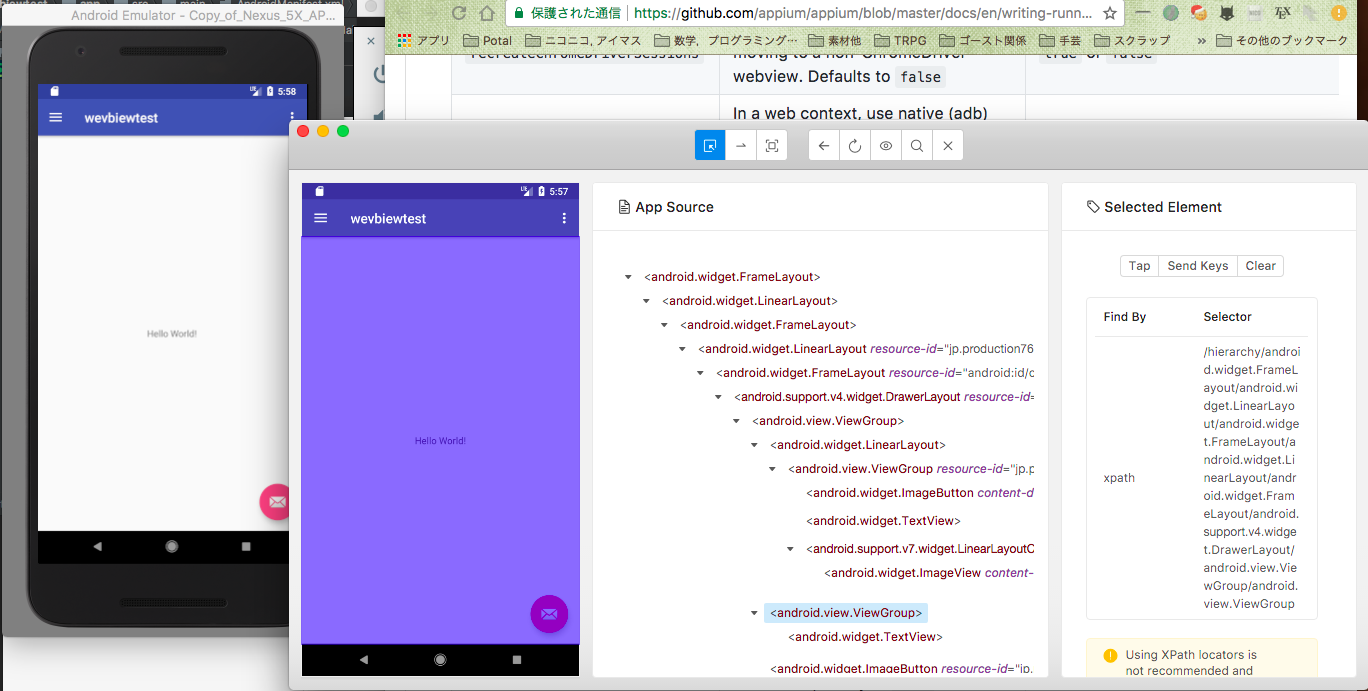
スクリーンショット 2018-01-05 17.58.43.png

7
3
0

Register as a new user and use Qiita more conveniently

  1. You get articles that match your needs
  2. You can efficiently read back useful information
  3. You can use dark theme
What you can do with signing up
7
3

Delete article

Deleted articles cannot be recovered.

Draft of this article would be also deleted.

Are you sure you want to delete this article?