はじめに
Vue3.jsの開発で「Vue Datepicker」というライブラリを使ってみたので、そのときのことをまとめます。
導入
インストール
npm
npm install @vuepic/vue-datepicker
yarn
yarn add @vuepic/vue-datepicker
初期設定
main.jsからコンポーネントの登録を行います。コードはドキュメントからそのまま引っ張ってきました。
import { createApp } from "vue";
import App from './App.vue';

// Vue Datepickerに関するimport
import VueDatePicker from '@vuepic/vue-datepicker';
import '@vuepic/vue-datepicker/dist/main.css'

const app = createApp(App);
// Vue Datepickerのコンポーネントを登録
app.component('VueDatePicker', VueDatePicker);

app.mount('#app');
実際に使ってみる
今回はVue Datepickerを使って、今月の日付のみ選択可能なカレンダーを作成してみます。
基本的な使い方
VueDatepickerは普通のVueコンポーネントなので、他のコンポーネントと使い方は同じです。
<template>
  <div class="date-picker">
    <!-- 他のコンポーネントと一緒 -->
    <VueDatePicker />
  </div>
</template>

<style scoped>
/* 最低限のstyle */
.date-picker {
  margin: 60px auto 0;
  width: 50%;
}
</style>
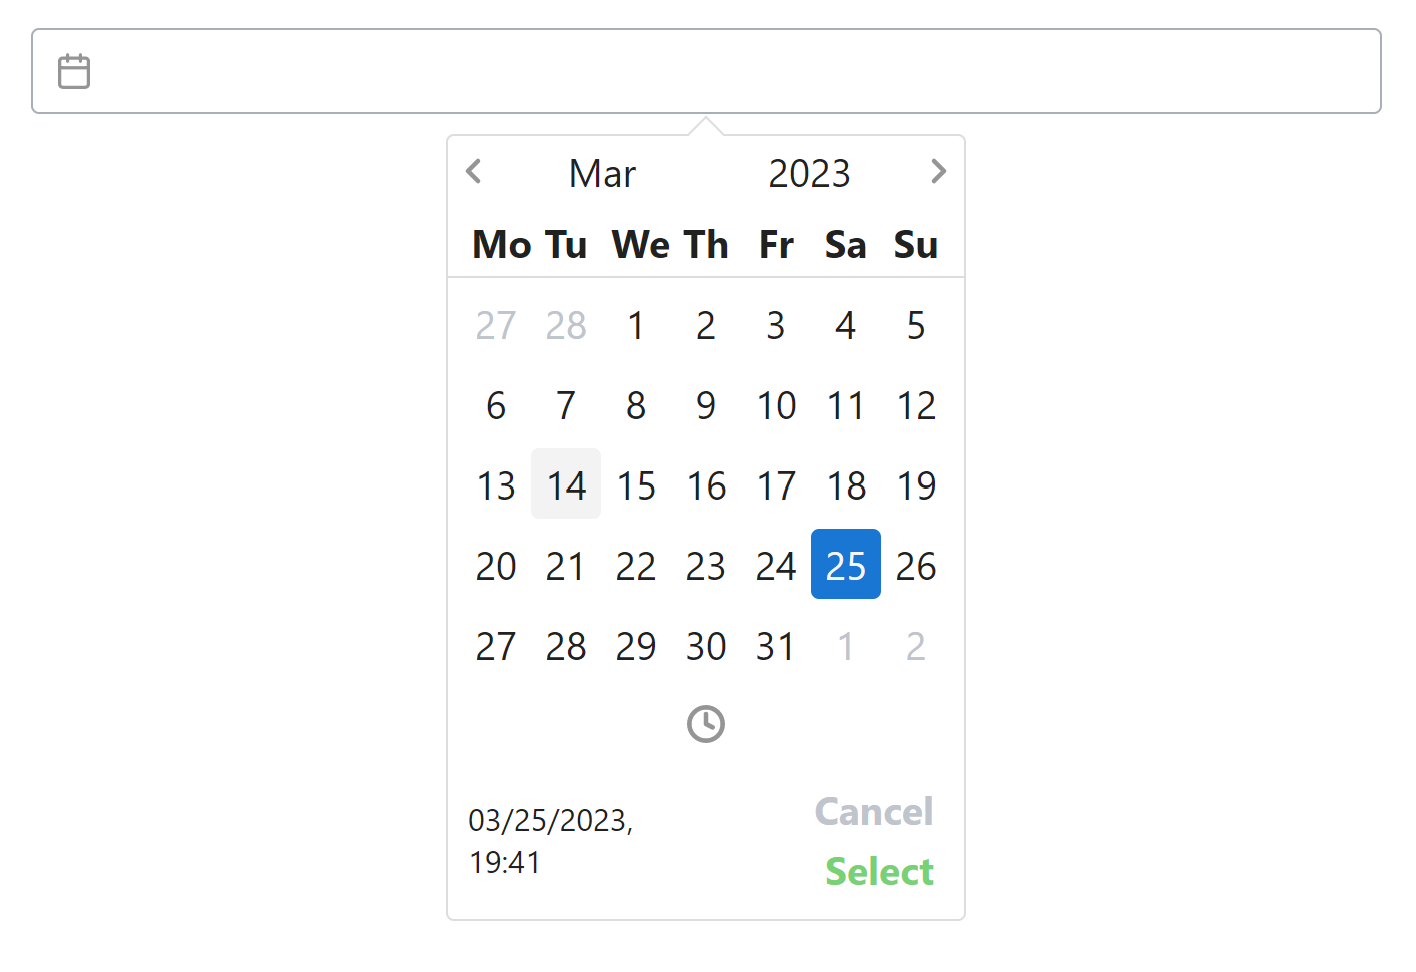
v-modelでバインドしてみる
inputタグと同様、v-modelで入力値をバインドすることができます。styleタグは今回のテーマに関係ないので、以降省略します。
<template>
  <div class="date-picker">
    <!-- v-modelを使ってバインド -->
    <VueDatePicker v-model="inputDate" />
    {{ inputDate }}
  </div>
</template>

<script>
import { defineComponent } from '@vue/composition-api';
import { ref } from 'vue';

export default defineComponent({
  setup() {
    const inputDate = ref();

    return {
      inputDate,
    };
  },
});
</script>

フォーマットを変更してみる
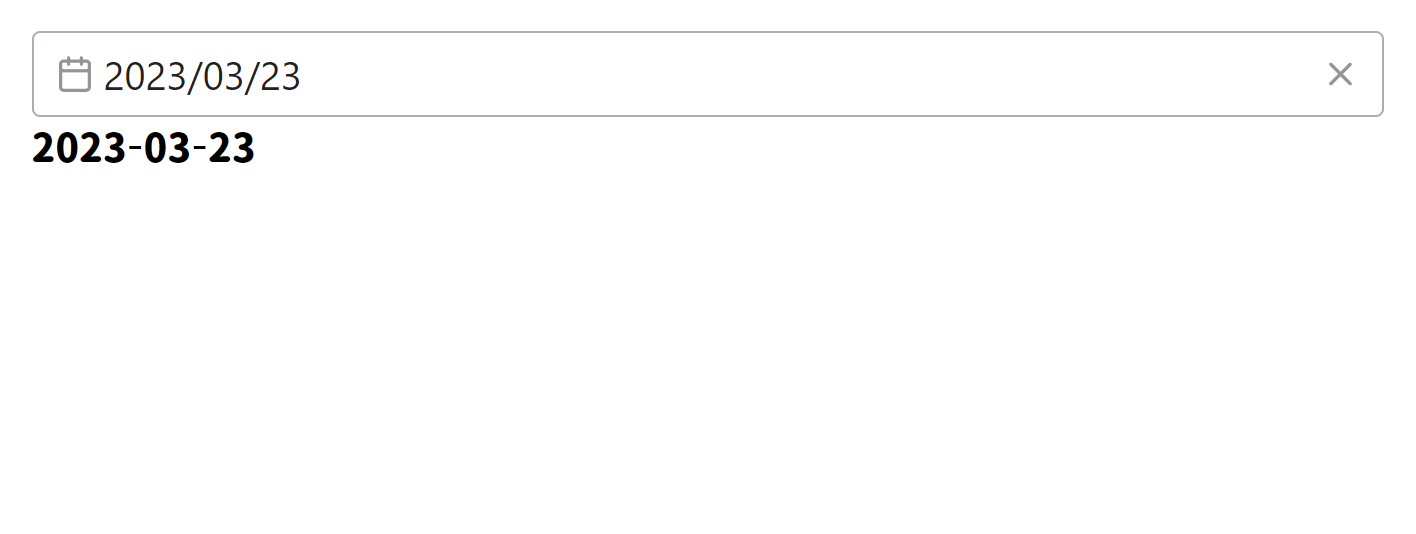
画面に表示される日付のフォーマットはformat、v-modelでバインドする値のフォーマットはmodel-typeで指定します。
コンポーネントの属性を指定するだけで簡単にカレンダーをカスタマイズできます。
<template>
  <div class="date-picker">
    <!-- 属性を指定するだけ -->
    <VueDatePicker
      v-model="inputDate"
      format="yyyy/MM/dd"
      model-type="yyyy-MM-dd"
    />
    {{ inputDate }}
  </div>
</template>

<script>
import { defineComponent } from '@vue/composition-api';
import { ref } from 'vue';

export default defineComponent({
  setup() {
    const inputDate = ref();

    return {
      inputDate,
    };
  },
});
</script>
カレンダーの見た目をカスタマイズする
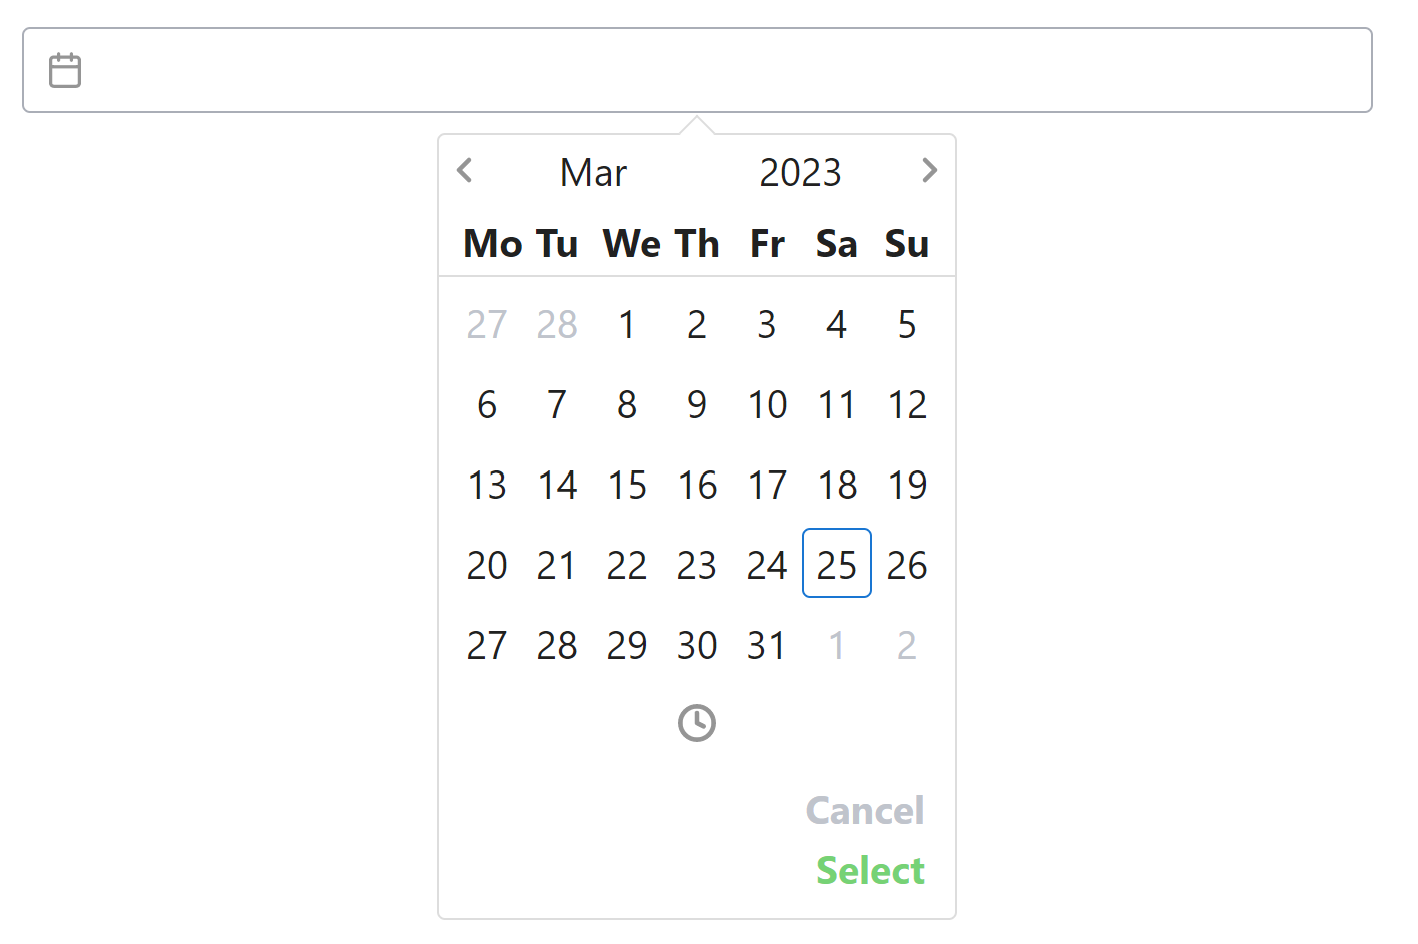
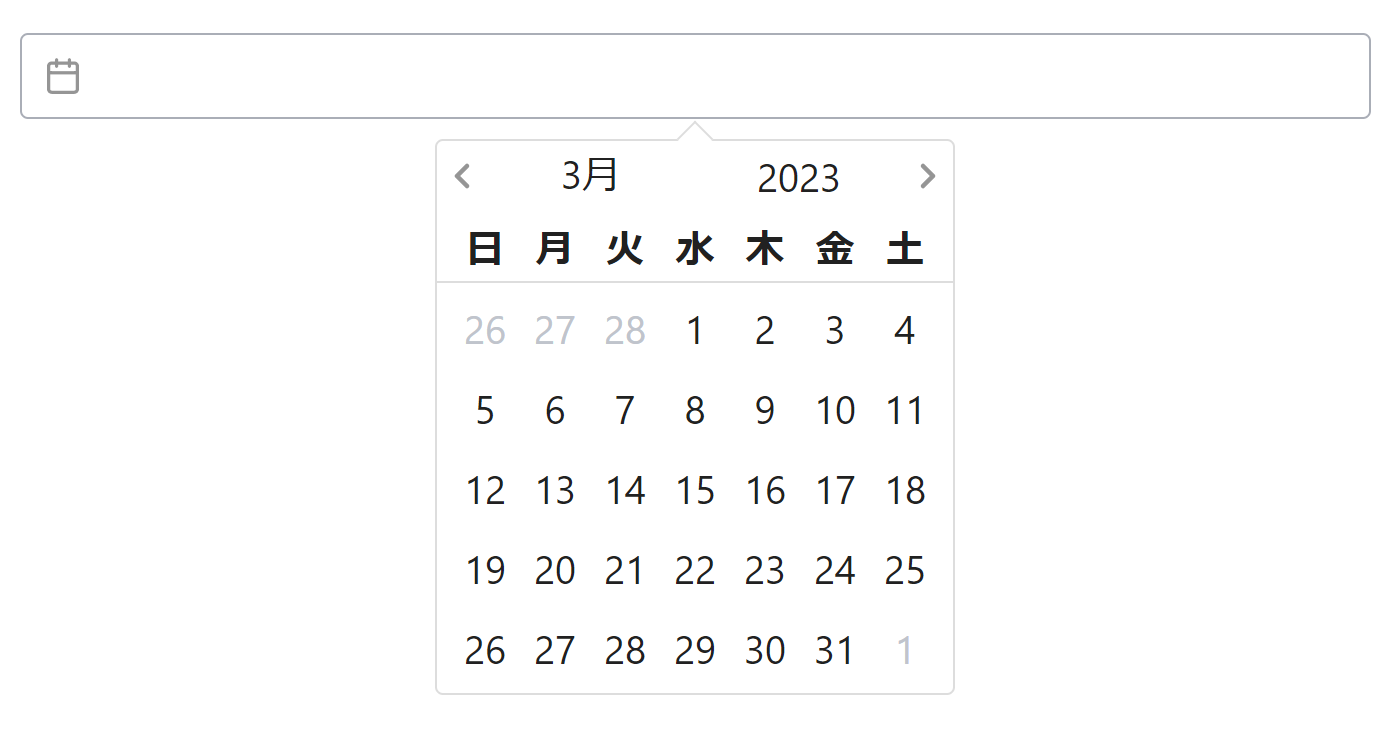
カレンダーを次のようにカスタマイズしてみます。
- 英語表記から日本語表記に変更する
- 日付をクリックするだけで自動的にカレンダーを閉じるようにする
- デフォルトの設定だと、「Select」ボタンを押さないと更新されない
- 日曜日が一番左に来るようにする
- 時間の入力は必要ないのでなくす
- 今日の日付のマークを外す
英語から日本語への表記変更
localeを指定することで実現できます。日本語の場合は"ja"と指定しましょう。
自動的にカレンダーを閉じるようにする
auto-applyを追加すると実現できます。
カレンダーの一番左に来る曜日の変更
week-startを指定することで実現できます。指定するときは、日曜日が"0"、月曜日が"1"、・・・という風に"0"から"6"の文字列で指定します。
時間入力の非表示
enable-time-pickerを指定することで実現できます。非表示にする場合はfalseにしましょう。
今日の日付のマークを外す
no-todayを追加すると実現できます。
<template>
  <div class="date-picker">
    <!-- 属性を指定するだけ -->
    <VueDatePicker
      v-model="inputDate"
      format="yyyy/MM/dd"
      locale="ja"
      model-type="yyyy-MM-dd"
      week-start="0"
      :enable-time-picker="false"
      no-today
    />
    {{ inputDate }}
  </div>
</template>

<script>
import { defineComponent } from '@vue/composition-api';
import { ref } from 'vue';

export default defineComponent({
  setup() {
    const inputDate = ref();

    return {
      inputDate,
    };
  },
});
</script>
変更前
変更後
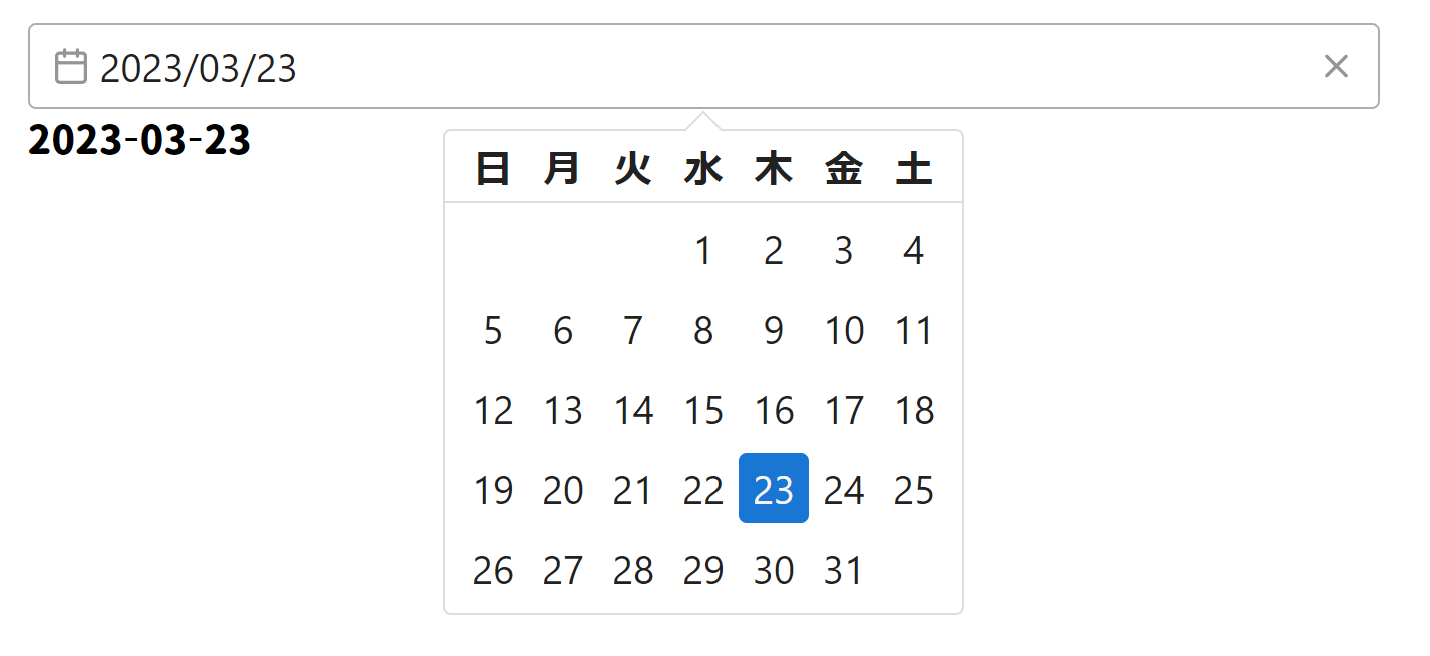
今月以外の日付を指定できないようにしてみる
disable-month-year-selectを追加することで、カレンダー上部の矢印が非表示になり移動できなくなります。
しかし、これだけだとスクロールによって前後の月に移動できるので、month-change-on-scrollにfalseを指定してスクロールも無効にします。
さらにhide-offset-datesを追加すると、前後の月の日付を非表示にできます。
<template>
  <div class="date-picker">
    <VueDatePicker
      v-model="inputDate"
      format="yyyy/MM/dd"
      locale="ja"
      model-type="yyyy-MM-dd"
      week-start="0"
      :enable-time-picker="false"
      :month-change-on-scroll="false"
      auto-apply
      disable-month-year-select
      hide-offset-dates
      no-today
    />
    {{ inputDate }}
  </div>
</template>

<script>
import { defineComponent } from '@vue/composition-api';
import { ref } from 'vue';

export default defineComponent({
  setup() {
    const inputDate = ref();

    return {
      inputDate,
    };
  },
});
</script>
土日の色を変更する
day-classにclass名を指定することで、日付の各要素に新しいclassを追加できます。今回は関数を使うことで、条件を満たす日付に特定のclassを追加します。
注意
新しく追加するstyleは、scopedのstyleタグに書かないでください。<VueDatePicker />は別のコンポーネントなので、styleが適用されません。
<template>
  <div class="date-picker">
    <VueDatePicker
      v-model="inputDate"
      format="yyyy/MM/dd"
      locale="ja"
      model-type="yyyy-MM-dd"
      week-start="0"
      :day-class="getDayClass"
      :enable-time-picker="false"
      :month-change-on-scroll="false"
      auto-apply
      disable-month-year-select
      hide-offset-dates
      no-today
    />
    {{ inputDate }}
  </div>
</template>

<script>
import { defineComponent } from '@vue/composition-api';
import { ref } from 'vue';

export default defineComponent({
  setup() {
    const inputDate = ref();

    // 条件分岐が必要なので、関数の戻り値を利用
    const getDayClass = (date) => {
      const weekDay = new Date(date).getDay();
      if (weekDay == 6) {
        // 土曜日の場合、classに"saturday"を追加
        return 'saturday';
      }
      if (weekDay == 0) {
        // 日曜日の場合、classに"sunday"を追加
        return 'sunday';
      }
      return '';
    };

    return {
      inputDate,
      getDayClass,
    };
  },
});
</script>

<style>
/* scopedの中には書かない */
.saturday {
  color: #0000ff;
}
.sunday {
  color: #ff0000;
}
</style>

<style scoped>
.date-picker {
  margin: 60px auto 0;
  width: 50%;
}
</style>
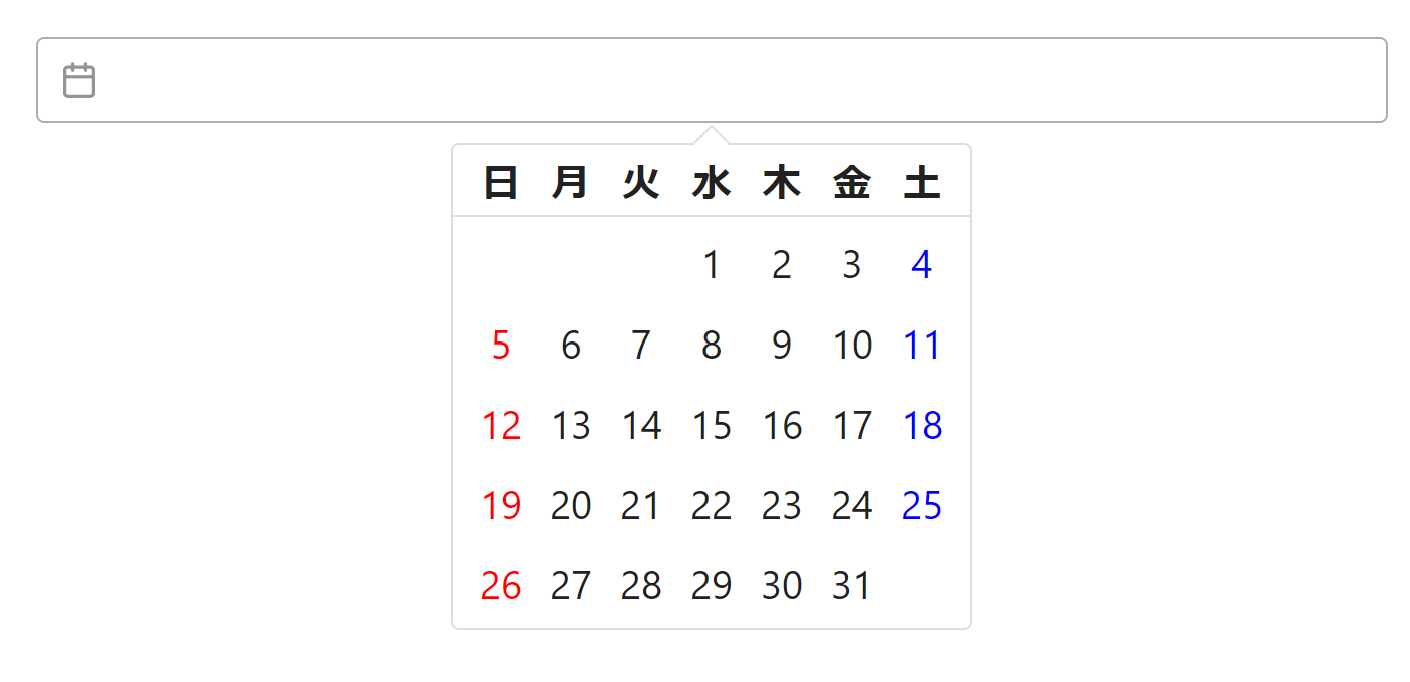
とりあえずこれで完成です。
終わりに
このようにVue Datepickerは、コンポーネントに属性を追加していくだけで簡単にカレンダーをカスタマイズできます。
その上、カスタマイズの幅がとても広く、望みのカレンダーを実現できる可能性が高いです。
この記事に書いたこと以外にもたくさんのことができるので、ドキュメントを見てぜひ使ってみてください。