UICollectionViewとは?
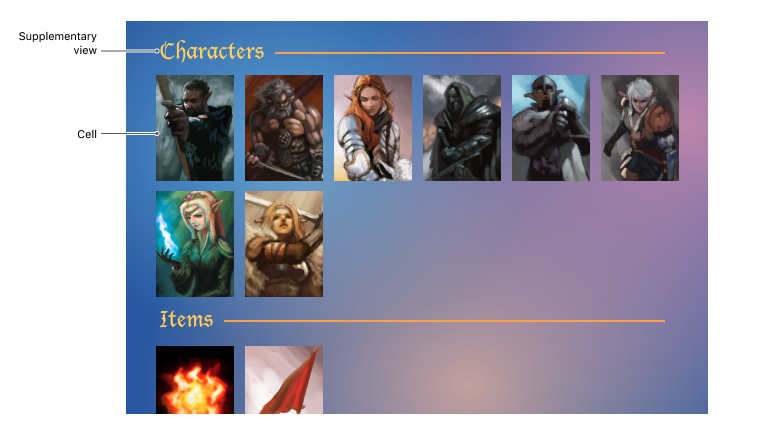
UICollectionViewは、複数の要素をグリッド状に配置し、スクロール可能なリストを作成するためのクラスである。
まt、UITableViewと同様にUICollectionViewはデータソースを介してデータを表示します。ただし、UITableViewでは通常、一列に一つの要素を表示するのに対して、UICollectionViewでは様々なレイアウトオプションが用意されており、要素を自由に配置することができます。
※イメージはこんなん
実装内容(構成要素)とソースコード
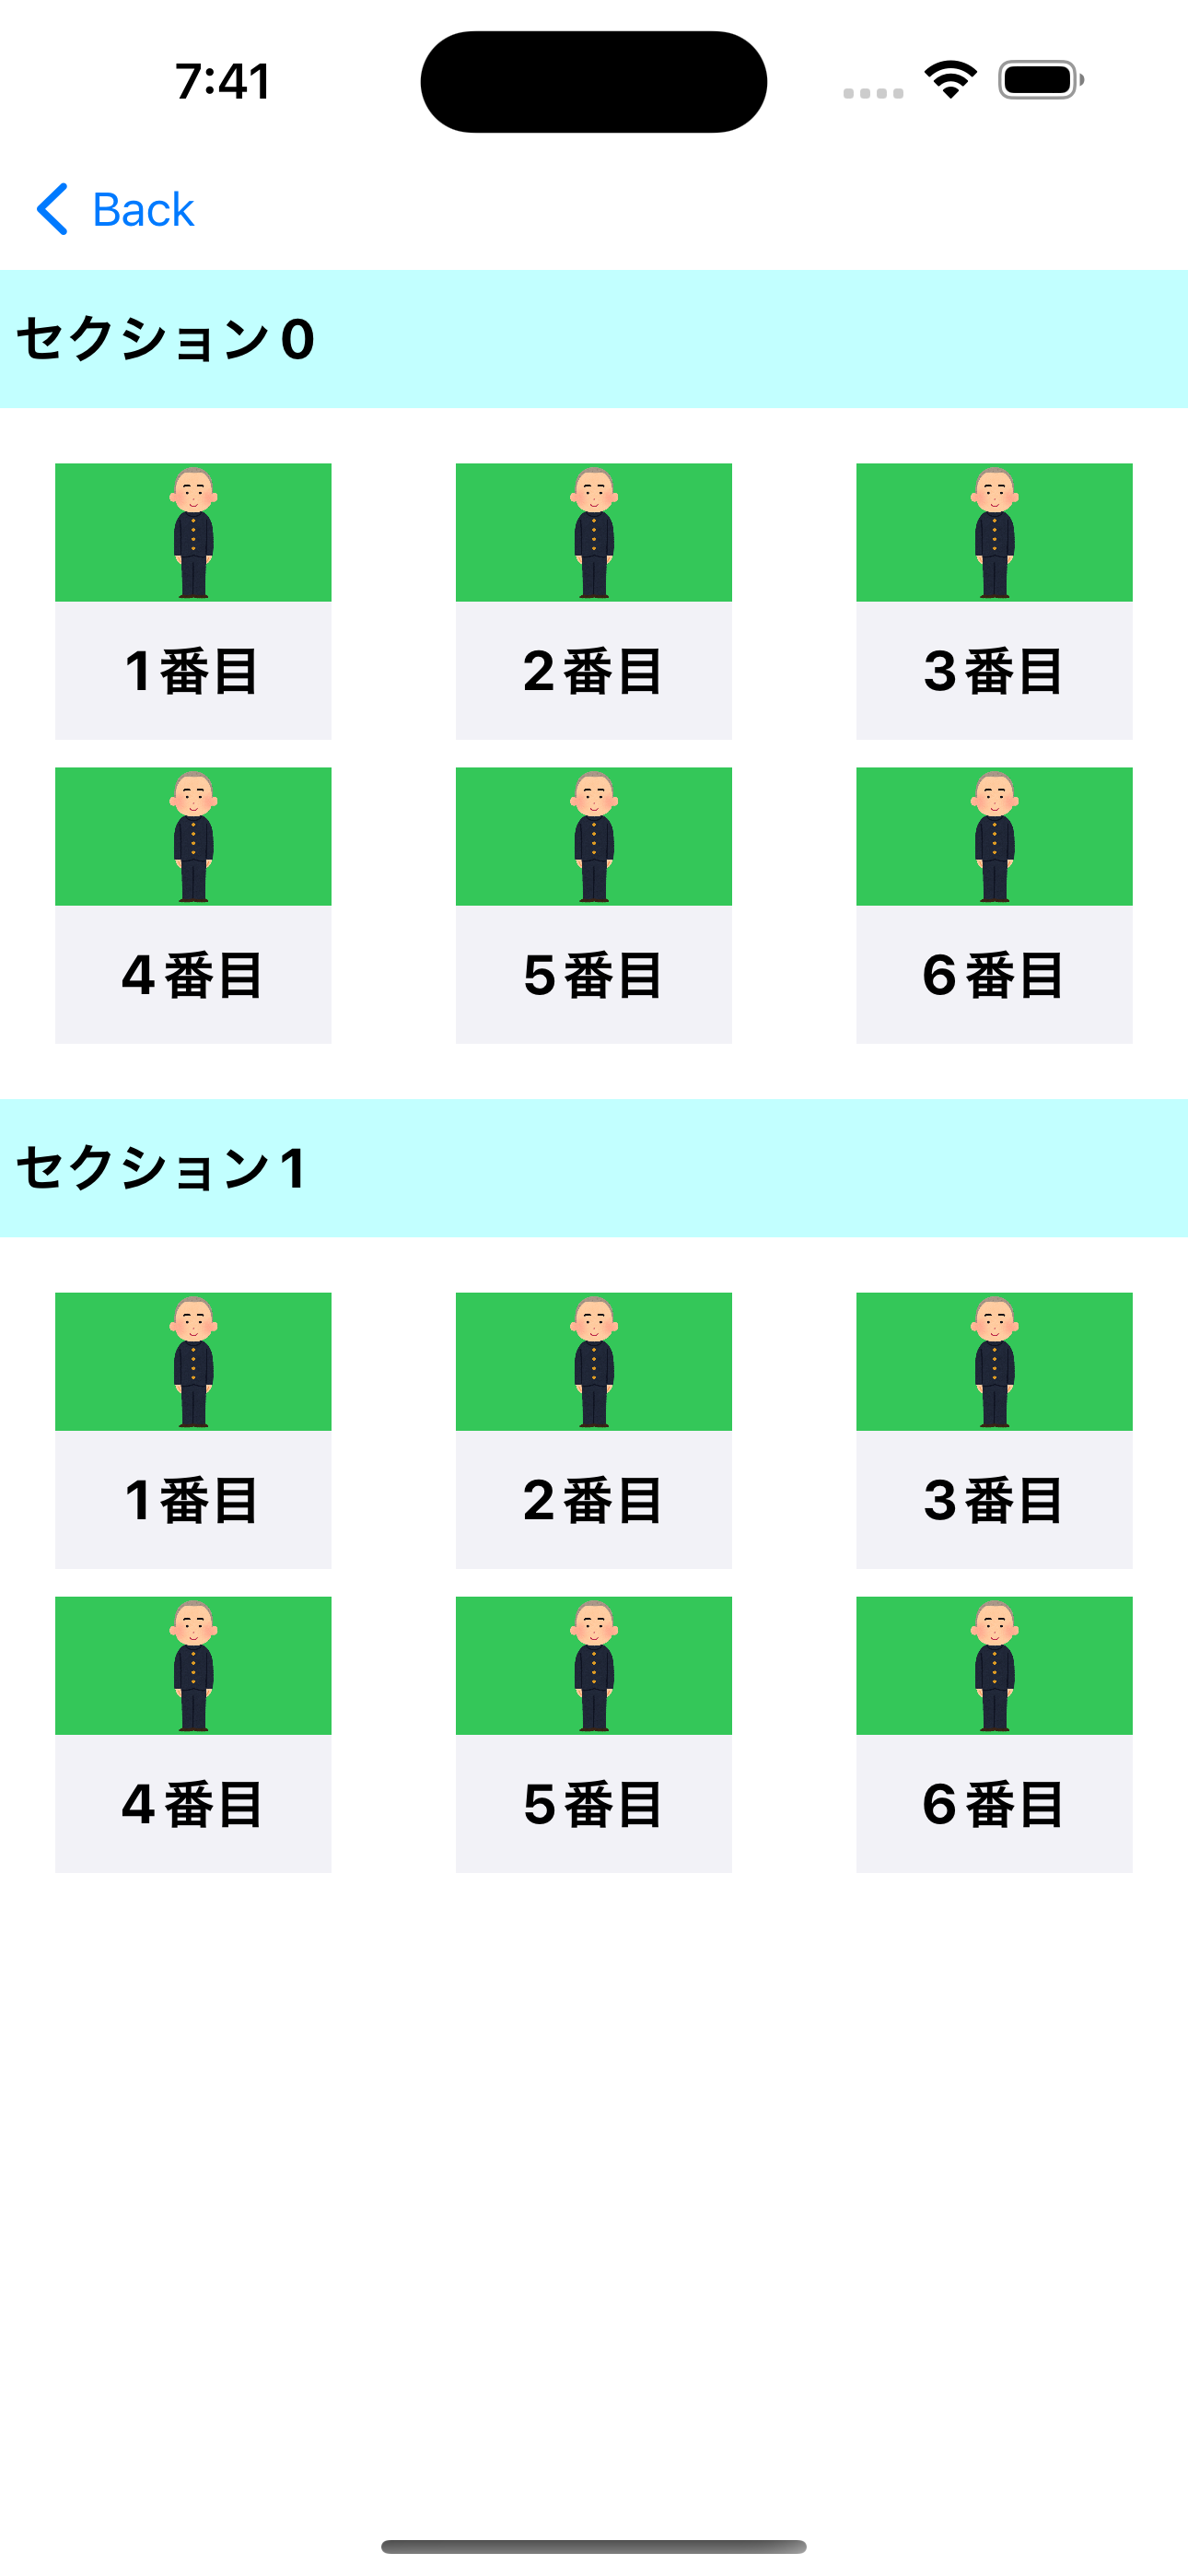
今回、UICollectionViewを実装するにあたって3つの構成のもと実装した。
- UICollectionview
- 今回の大元、ここにCollectionViewのCellなりHeaderなり組み合わせていく。
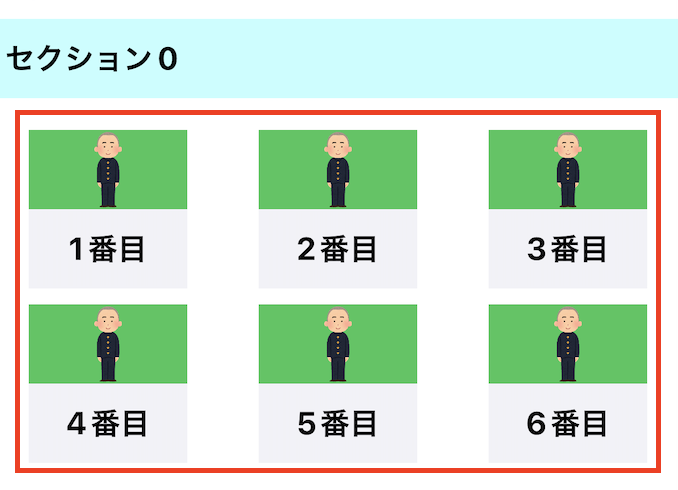
- UICollectionViewCell
- forCellWithReuseIdentifierを使って再利用可能なCellを再利用する。
- UICollectionViewCellのheader
- セクションごとに出てくる上(Header)のあれ
-
UICollectionViewの実装
Swift
class CollectionViewController: UIViewController {
    @IBOutlet var collectionView: UICollectionView!
    private let layout = UICollectionViewFlowLayout()

    private let titleLabelText = ["1番目","2番目","3番目","4番目","5番目","6番目"]
    private let headerSectionLabelText = "セクション"
    private let image = UIImage(named: "picture")

    override func viewDidLoad() {
        super.viewDidLoad()
        //このcollectionViewに、作成したcollectionViewCellとcollectionViewHeaderを登録する
        setupCollectionView()
    }

    //関数にしなくともViewDidLoadに直書きでも問題ない
    private func setupCollectionView() {
        //collectionViewのdelegateとdateSourceを定義
        collectionView.delegate = self
        collectionView.dataSource = self

        //このcollectionViewに、作成したcollectionView"Cell"を登録準備
        collectionView.register(UINib(nibName: "CollectionViewCell", bundle: nil), forCellWithReuseIdentifier: "CollectionViewCell")
        //このcollectionViewに、作成したcollectionView"Header"を登録準備
        collectionView.register(CollectionViewHeader.nib(), forSupplementaryViewOfKind: UICollectionView.elementKindSectionHeader, withReuseIdentifier: CollectionViewHeader.identifier)

        //セクションとcellの上下左右の位置を決めている
        layout.sectionInset = UIEdgeInsets(top: 20, left: 20, bottom: 20, right: 20)
        collectionView.collectionViewLayout = layout
    }
}

//Delegate: イベントの処理に関するメソッド
//例えば、registerしたセルをタップしたとき〜などの処理を担う
extension CollectionViewController: UICollectionViewDelegate {

    //タップしたを検知するメソッド
    func collectionView(_ collectionView: UICollectionView, didSelectItemAt indexPath: IndexPath) {
        print("セルがタップされました")
    }
}

//DataSource: データの提供に関するメソッド
//例えば、registerしたセルのセル数やセクション数、セルの内容などを決める
extension CollectionViewController: UICollectionViewDataSource {

    //セクション数を返すメソッド
    func numberOfSections(in collectionView: UICollectionView) -> Int {
        return 2
    }

    //セルの個数を返すメソッド
    func collectionView(_ collectionView: UICollectionView, numberOfItemsInSection section: Int) -> Int {
        return titleLabelText.count
    }

    //ヘッダーの設定
    func collectionView(_ collectionView: UICollectionView, viewForSupplementaryElementOfKind kind: String, at indexPath: IndexPath) -> UICollectionReusableView {
        let collectionViewHeader = collectionView.dequeueReusableSupplementaryView(ofKind: UICollectionView.elementKindSectionHeader,
                                                                                   withReuseIdentifier: CollectionViewHeader.identifier,
                                                                                   for: indexPath) as! CollectionViewHeader
        collectionViewHeader.headerSectionLabel.text = "\(headerSectionLabelText)" + "\(indexPath.section)"
        return collectionViewHeader
    }

    //このcollectionViewに表示するCellを返すメソッド
    func collectionView(_ collectionView: UICollectionView, cellForItemAt indexPath: IndexPath) -> UICollectionViewCell {

        //作成したセルを生成して返す
        //indexPathについて
        //各セルの位置を表すためのデータ型(TableViewやCollectionViewは複数の行や列を持ち、且つ、各行または列はそれぞれ一意の位置を持っている。これを表しているのがIndexPath構造体である。)
        //セクション番号とアイテム(行や列)番号の組み合わせで表されている(例えば、`2番目のセクション`で`3番目の行`を表す`IndexPath`は`IndexPath(item: 2, section: 1)`となる。)
        let cell = collectionView.dequeueReusableCell(withReuseIdentifier: "CollectionViewCell", for: indexPath) as! CollectionViewCell
        cell.label.text = titleLabelText[indexPath.row]
        cell.imageView.image = image
        return cell
    }
}

//DelegateFlowLayout: セルのサイズを変更するメソッド
//例えば、registerしたセルやヘッダーなどの高さや横幅を決める
extension CollectionViewController: UICollectionViewDelegateFlowLayout {

    //cellのサイズを定義
    func collectionView(_ collectionView: UICollectionView, layout collectionViewLayout: UICollectionViewLayout, sizeForItemAt indexPath: IndexPath) -> CGSize {
        return CGSize(width: 100, height: 100)
    }

    //headerのサイズを定義(コードでheaderを作成したとき、これ定義しなければheaderは表示されないので注意)
    func collectionView(_ collectionView: UICollectionView, layout collectionViewLayout: UICollectionViewLayout, referenceSizeForHeaderInSection section: Int) -> CGSize {
        return CGSize(width: self.view.bounds.width, height: 50)
    }
}
-
UICollectionViewCellの実装
Swift
//cellはStoryboardにidentifierやnib生成する際にnibNameなどを直書きしている
class CollectionViewCell: UICollectionViewCell {
    @IBOutlet var imageView: UIImageView!
    @IBOutlet var label: UILabel!
}
-
UICollectionViewCellのheaderの実装
Swift
class CollectionViewHeader: UICollectionReusableView {
    @IBOutlet var headerSectionLabel: UILabel!

    //ここから下はregisterする際、identifierやnib生成のあれこれをコードで定義している
    static let identifier: String = "CollectionViewHeader"
    static func nib() -> UINib {
        return UINib(nibName: CollectionViewHeader.identifier, bundle: nil)
    }
}

おわりに
間違い等ありましたらぜひコメント欄にてご指摘ください。
参考記事
UICollectionView | Apple Developer Documentation
[iPhone] UICollectionView で マス目表示
【Swift/Xcode】UICollectionViewの実装方法・コンプリートガイド
開発環境
- Xcode-13.4.1
- Swift version 5.7