Animation Nodes とは
Animation Nodes とはノードを制御してパラメータの変更でモデルを操れるようになるかもしれない便利なBlenderのAddonのこと。
今回はBlooming Flower の動画を参考にしてAnimation Nodesを使ってみたので備忘録として。
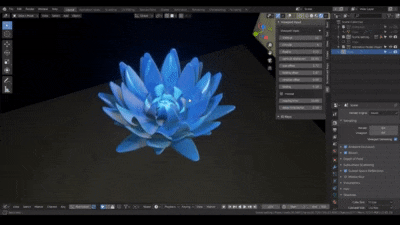
※youtubeより引用
| 参考サイト | |
|---|---|
| 完成形 | https://www.youtube.com/watch?v=h535HXeFgos |
| 作り方 | https://www.youtube.com/watch?v=CiQXTE8oNLA |
前提
動作環境
本記事の動作環境は以下の通りです。
| 項目 | 環境 |
|---|---|
| OS | Windows 10 |
| Blender | 2.82 |
| Animation Nodes | 2.1.7 |
Animation Nodesの公式サイトとか
Addonのダウンロードや各ノードのリファレンス、チュートリアルなどは以下のサイトが参考にできそうです。
(今回は公式チュートリアルの内容を扱うわけではありません)
ここでまとめる内容
以下の内容をめっちゃ簡単にまとめていきます。
- Addonの入れ方とAnimation Nodesの使い方
- Blooming Flowerの処理の流れ
- ノードの使い方
Animation NodesのAddonの入れ方と使い方
Addon方法は以下のサイトを参考に道なりに進めば追加可能です。
参考:https://eizo-help.hateblo.jp/entry/2019/09/15/022743
Addonの入れ方を簡単に説明
- Animation Nodesをhttps://animation-nodes.com/からダウンロード
- 編集>プリファレンス>アドオン>インストールからダウンロードしたzipファイルを選択
使い方を簡単に説明
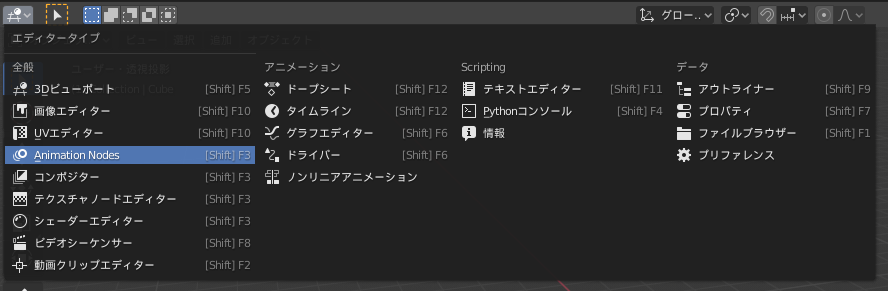
- エディタータイプをAnimation Nodesに変更
- Shift + A > 新規ノードツリーを作成
- あとは Shift + A なり、 Ctrl + Aなりで任意のノードを追加していく
Blooming Flowerの処理の流れ
Blooming Flowerの作成手順としては、ハンドルというAnimation Nodesで使う基本のモデルを作ってからノードを追加して制御していくといった手順です。
ノードツリー自体の処理の流れはだいたい以下のような処理の流れです。
- ANタブのデータをインポート
- オブジェクトを複製 + 基準の位置を決定
- ループで以下の処理を実行
- グラデーション要素を作成
- オブジェクトを分割
- 位置・回転・大きさを決定
- モディファイアーパラメータの反映
- モデルの出力
ノードの使い方
各ノードを簡単に説明します。
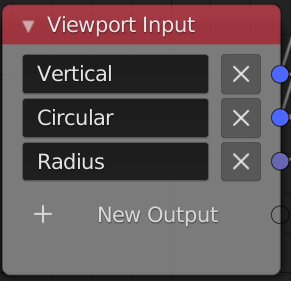
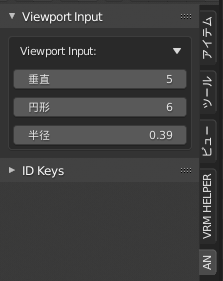
Viewport Input
ANバーの値をインポートするノード。
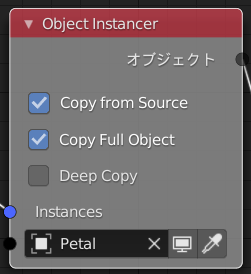
Object Instancer
オブジェクトを複製する。
リファレンス:https://animation-nodes-manual.readthedocs.io/en/latest/user_guide/nodes/object/object_instancer.html
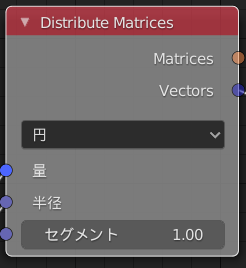
Distribute Matrices
設定に応じてVector ListsやMatricesを生成する。
Blooming FlowerではVector Listsを主に位置のリストとして使用している。
前述のObject Instancerと組み合わせて下みたいな感じで使う。
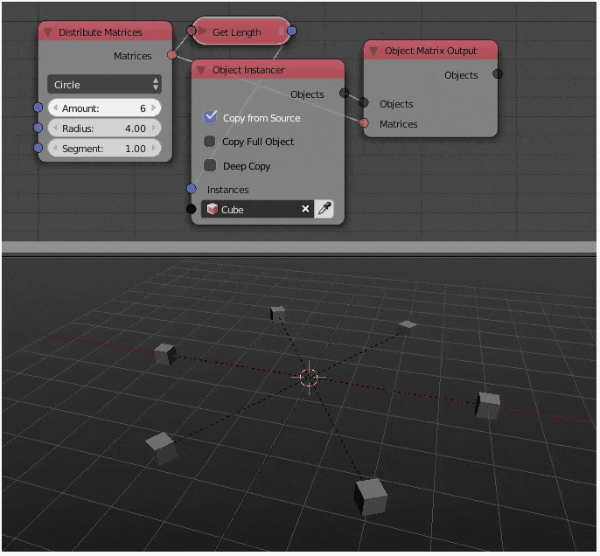
※リファレンスより引用
ちなみに、Distribute Matrices の Vector や Matrices の出力ポートからObject Instancerのinstanceの入力ポートに直接結線すると、自動的にGet Lengthノードが挿入される。
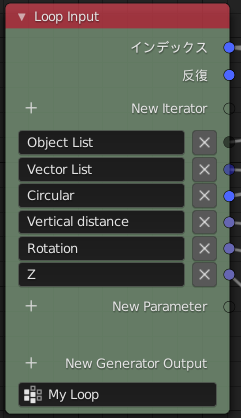
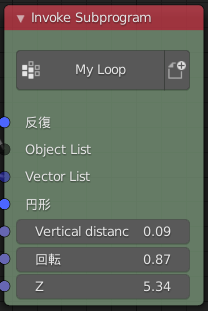
Loop Input
言わずとしれたループ処理。
wキーでInvoke Subprogramノードを生成して使用するのが慣例の模様。
インデックス:今何回目のループかを示す値
反復:合計で何回ループを繰り返すのかを示す値
Blooming Flowerではインデックスを有効活用して花びらの高さや大きさに変化をもたせてグラデーション要素を生成している。
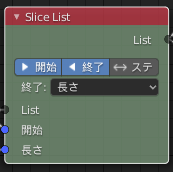
Slice List
オブジェクトを分割する。
Blooming FlowerではListを開始位置から任意の長さ分ずつ分割している。
つまり、ループインデクス(何回目のループかを示す番号)から一層の花びらの枚数ずつ取り出している。
リファレンス:https://animation-nodes-manual.readthedocs.io/en/latest/user_guide/nodes/list/slice_list.html
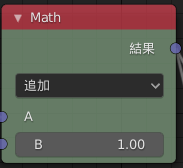
Math, Float Math
スカラーを計算するノード。
Blooming Flowerでの使用方法は以下の通り。
- 花びらの複製数 = Vertical(層数,ANバー設定値) × Circular(花びらの枚数,ANバー設定値)
- Slice Listの開始位置 = インデックス × Circular(花びらの枚数,ANバー設定値)
- インデックス' = インデックス + 1
Loop Inputのインデックスの出力ポートに1のオフセットを追加(インデックスは0から始まるため) - 各層の高さ = インデックス' × vertical(ANバー設定値)
- 各層の花びらの回転変化量 = インデックス' × 回転(ANバー設定値)
- 各層の花びらの大きさ率 = インデックス' × 拡大縮小(ANバー設定値)
- 花びらの縦曲げ量 = インデックス' / Vertical bending(ANバー設定値)
- 花びらの横曲げ量 = インデックス' / Horizontal bending(ANバー設定値)
リファレンス:https://animation-nodes-manual.readthedocs.io/en/latest/user_guide/nodes/number/math.html
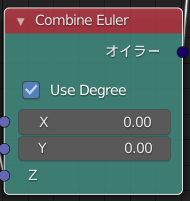
Combine Euler
別々の要素から回転のxyzの3要素を組み合わせるノード。
Blooming Flowerでは各層の花びらの回転量をパラメータからとってきている。
つまり各層の横回転量を決めている。
リファレンス:https://animation-nodes-manual.readthedocs.io/en/latest/user_guide/nodes/rotation/combine_euler.html
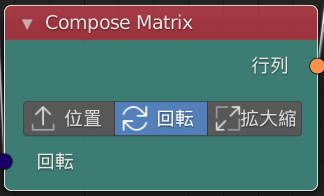
Compose Matrix
位置、回転、拡大縮小の変換行列を生成するノード。
Blooming Flowerでは回転量に応じてDistribute MatricesのVectorを変換するための行列を生成している。
つまり、各層の横回転量させるための変換行列を生成している。
リファレンス:https://animation-nodes-manual.readthedocs.io/en/latest/user_guide/nodes/matrix/compose_matrix.html
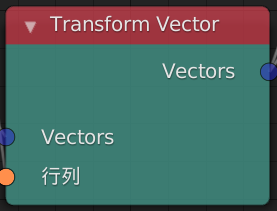
Transform Vector
変換行列に沿ってvectorを変換するノード。
Blooming Flowerでは各層の横回転をさせている処理。
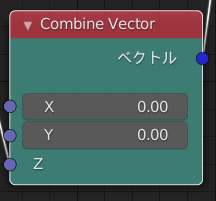
Combine Vector
別々の要素から回転のxyzの3要素を組み合わせるノード。
Blooming Flowerでは各層の高さをパラメータからとってきている。
リファレンス:https://animation-nodes-manual.readthedocs.io/en/latest/user_guide/nodes/vector/combine_vector.html
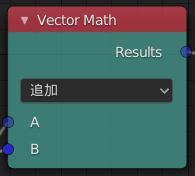
Vector Math
ベクトルの計算をするノード。
Blooming Flowerでの使用方法は以下の通り。
- 花びらの位置 = 横回転させたvactor + 縦方向の計算をしたvector
- 花びらの大きさ = 各層の花びらの大きさ率 × ( 1 , 1 , 1 )
リファレンス:https://animation-nodes-manual.readthedocs.io/en/latest/user_guide/nodes/vector/vector_math.html
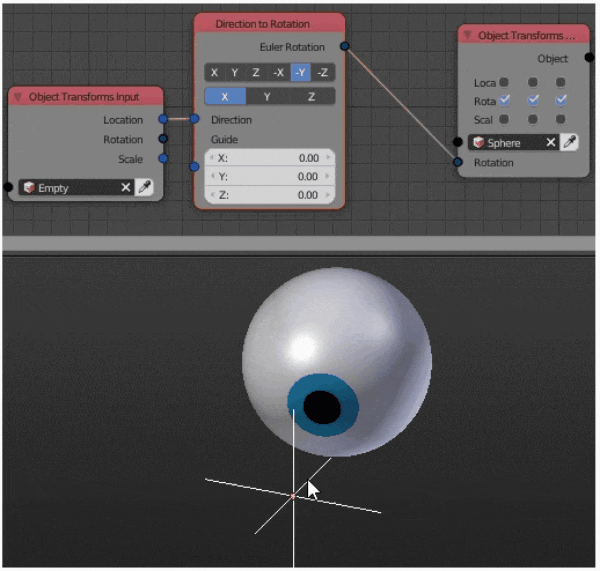
Direction To Rotation
ベクトルに向きを追従させる。(一番良くわかってないノード)
Blooming Flowerでは花びらを中央に向けるために使用している。
X,Y,Z,-X,-Y,-Z:追従させる軸
X,Y,Z:常に0°とする回転方向(追従させる軸を指定するだけだと回転方向の姿勢が定まらないための設定だと思われる)
Directions:追従させるVencor
ガイド:よくわかってない
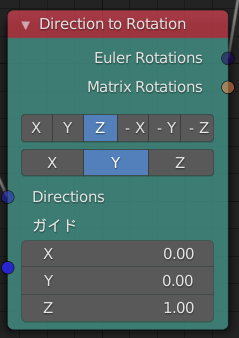
※リファレンスより引用
Euler Math
オイラー角の計算をするノード。
Blooming Flowerでの使用方法は以下の通り。
- 花びらの開き量 = 各層の花びらの回転変化量 × (-42, 0, 0)
- 花びらの回転成分 = 花びらの開き量 + 花びらの中央向き量
リファレンス:https://animation-nodes-manual.readthedocs.io/en/latest/user_guide/nodes/rotation/euler_math.html

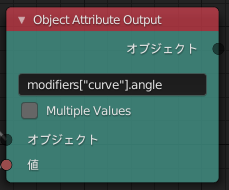
Object Attribute Output
任意のプロパティの値を変更させるノード。
以下の手順で設定。
- 任意のプロパティ上で右クリック
- データパスをコピー
- Object Attribute Outputノードの上段に貼り付け
- オブジェクトを設定
- 値を設定
Blooming Flowerでの使用方法は以下の通り。
- 横曲げ量の設定
- 縦曲げ量の設定
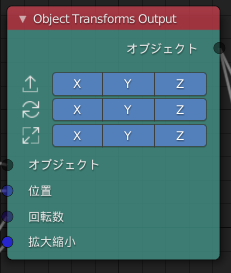
Object Transforms Output
オブジェクトを任意の位置・姿勢・大きさで出力させるノード。
以上。
どのノードや処理が位置、回転、大きさに関係しているかわかりやすくまとめられればよかったのだけど…
また機会があれば。