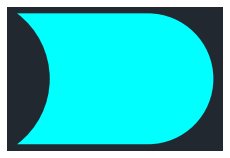
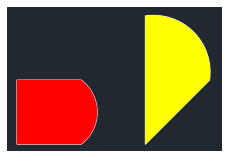
本章では実際に図形を描画するコードをまとめます。
前章はこちら:#1~図面作成と設定編~
次章はこちら:#3~レイヤー・dxfattribs 図形の属性・描画の補足編~
ezdxfで作図可能な図形は、以下で紹介されています。
参考:ezdxfで扱えるエンティティ 公式ドキュメント
ここでは以下の基本的な図形を紹介していきます。
- Line 線
- Text 文字
- Point 点
- Circle 円
- Arc 弧
- poliline ポリライン(連続線・多角形)
- hatch ハッチング
doc = ezdxf.new('R2010', setup=True)
msp = doc.modelspace()
#線の太さなどはmatplotlibで表現されないがdxfでは再現されている
dxfattribについて
色や線の太さやレイヤーなど、図形に付加する属性です。
本章では適用な可能な属性の紹介程度で、次章で詳細にまとめています。
Line 線分の描画
msp.add_line((0, 0), (5, 0), #始点・終点
dxfattribs={'layer':'mylayer', #レイヤー
'color': 2, #色
'lineweight':5, #線幅
'linetype':"PHANTOMX2" #線種
})
始点と終点をタプルで入力します。 わかりやすいですね。
線幅はCADがDXFを読み込んだ際に既定の近似の太さに変換されることが多いです。
座標の管理次第でpythonの優位性を発揮できそうです。それはまた別の章でまとめます。
Point 点の描画
#dxfのヘッダー部
doc.header['$PDMODE'] = 35 #点の種類 #✖matplotlib
doc.header['$PDSIZE'] = 10 #点の大きさ #✖matplotlib
#dxfのエンティティ部
msp.add_point([10, 10],
dxfattribs={'layer':'mylayer', #レイヤー
'color': 3, #色
})
点の種類と大きさは仕様上ヘッダーの点の設定を参照しており、全点がヘッダーの設定になります。 色とレイヤーは個別に指定できます。
なお、CADによっては反映されない場合もあります。matblotlibでは小さな点のみ確認可能です。
参考:点の種類 公式ドキュメント
Text 文字列の描画
msp.add_text(('Hello!'+'ezdxf!'),  #文字列
dxfattribs={'style': 'OpenSansCondensed-Bold', #フォント
'height':15, #文字高
'width':0.5, #文字幅 割合で書く
'rotation':45, #角度
'oblique':15, #傾斜 ✖matplotlib
'color':4} #色
).set_pos((1350, 61), #配置位置
align='TOP_RIGHT') #文字揃え
フォントは前賞でまとめた通りsetup =Trueでデフォルトを設定できます。
座標や位置情報はdxfattribsではなく、.set_posで後ろに添加します。 文字の揃えや配置は独特ですね。詳しくは次章#3:文字列の属性でまとめています。
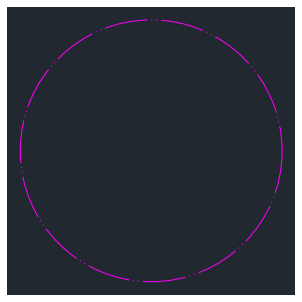
Circle 円の描画
msp.add_circle((10, 15), radius=2,
dxfattribs={'layer':'mylayer', #レイヤー
'color': 6, #色
'lineweight':18, #線幅
'linetype':"DIVIDEX2" #線種
})
中心点と半径(radius)で書けます。属性情報は線と同じ。
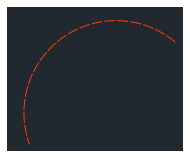
Arc 弧の描画
msp.add_arc(center=(10,10), radius=100, start_angle=50, end_angle=200,
dxfattribs={'layer':'mylayer', #レイヤー
'color': 20, #色
'linetype':"DASHED"
'lineweight':18 #線幅
})
中心点、半径、開始角、終了角で描画できます。属性情報は線と同じです。
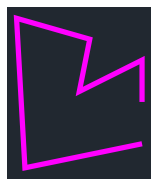
poliline ポリライン(連続線・多角形)の描画
点が複数ある連続線や多角形などを作成します。
可読性のため座標のタプルをリストに格納しています。もちろんほかの図形同様に座標は直打ちできます。
pointsss=[(120,70),(120,110),(60,80),(70,130),(0,150)]
msp.add_lwpolyline(pointsss, format="xy", close=False, #closeは連続線を閉じるかT/F
dxfattribs={'layer':'mylayer', #レイヤー
'color': 6, #色
'linetype':"Continuous",
'const_width':5
})
ポリラインのformat
タプル内は5つの引数まで渡すことが可能です。それぞれ 始点、終点、始点の線幅、終点の線幅、円弧の高さ(矢高) となります。
下記のformatに従って、必要な数値が変わります。
- formatは連続線内の起点と終点を"x","y"、
- 連続線内の各線の始点と終点の太さを指示する"s","e"、
- 連続線内の各線の始点から終点へ弧を描く時に"b"(高さ/半径で0~1.0のflort値)を使用します。
全部指定すると format="xyseb" 対応するタプルは(120,70,1,1,0.5)のようになります
試しに上の連続線にformatを全て指定するとこんな感じ。また、 close=Trueで線を閉じて今度は多角形にしてみます。
points=[(120,70,1,1,0.5),(120,110,2,5,1),(60,30,5,2,.2),(80,150,1,1,.1),(0,150,12,5,1)]
msp.add_lwpolyline(points, format="xyseb", close=True,
dxfattribs={'layer':'mylayer', #レイヤー
'color': 6, #色
'lineweight':18, #線幅
'linetype':"Continuous" #線種
#'const_width':5 #線幅を入れるとformatの"s","e"情報が上書きされるので消すorコメントアウト
})
なお、既存のポリラインに点を追加することもできます。 二つ上の連続線に点を追加してみます。
points=[(120,70),(120,110),(60,80),(70,130),(0,150)]
#ポリラインを変数に格納
poliline_1 = msp.add_lwpolyl
ine(points, format="xy", close=False, #closeは連続線を閉じるかT/F
dxfattribs={'layer':'mylayer', #レイヤー
'color': 6, #色
'linetype':"Continuous", #線種
'const_width':5
})
poliline_1.append_points([(8, 7), (120, 30)])
※補足
最後の点を最初の点と同一座標にすると結線され、close = Trueと同じ状態になります。
format="xyseb"は実はデフォルトで設定されており、(120,70)と入れればxyの型に応じて読み取ってくれます。
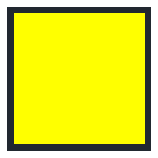
hatch ハッチングの描画
hatch = msp.add_hatch(color=2)
hatch.paths.add_polyline_path(
    [(0, 0), (10, 0), (10, 10), (0, 10)], is_closed=True
)
こちらが基本形になりますが、タプルに3つ目の要素を与えると
ポリラインと同様に円弧の高さを与えられます
hatch = msp.add_hatch(color=4)
hatch.paths.add_polyline_path(
    [(0, 0, 1), (10, 0), (10, 10, -0.5), (0, 10)], is_closed=True
)
上記のようにハッチングを単体で作図可能ですが、
以下のように実践的な操作法として、作図描画したポリラインの座標を活用することもできます。
#パターン1:座標をリストに格納する
polyline_1 = msp.add_lwpolyline(
    [(0, 0, 0), (10, 0, 0.5), (10, 10, 0), (0, 10, 0)],
    format="xyb", close=True)

hatch = msp.add_hatch(color=1) #ハッチングの定義
path = hatch.paths.add_polyline_path(
polyline_1.get_points(format="xyb"),
                      is_closed=True
)

#パターン2:ポリラインから座標を取得する
polyline2_points=[(20,0, 0), (30, 10, 0.75), (30, 10, 0.5), (20, 20, 0)]

polyline_2 = msp.add_lwpolyline(polyline2_points,
    format="xyb", close=True)

hatch = msp.add_hatch(color=2)
hatch.paths.add_polyline_path(polyline2_points,
                              is_closed=True
)
エッジパスを追加することで、ハンチングする直線や曲線などを作成・追加などもできます。
#ハッチの作成
hatch = msp.add_hatch(color=2)
hatch.paths.add_polyline_path(
    [(0, 0, 1), (10, 0), (10, 10, -0.5), (0, 10)], is_closed=True
)
#エッジパスの作成
edge_path = hatch.paths.add_edge_path()
add_points=[(5,0),(15,0),(25,0)] #使いするざ座標をリストに格納

#エッジパスで直線を描画
edge_path.add_line(add_points[0],add_points[1])
edge_path.add_line(add_points[2],add_points[0])
#エッジパスで円弧を描画、円弧の端点が直線の端点と一致する必要があるので、
#数式で中心点を表現してみる
edge_path.add_arc(((add_points[2][0]-add_points[1][0])*2,(add_points[2][1]-add_points[1][1])*2), 5, start_angle=180, end_angle=0, ccw=False)
エッジパスを使用する際の注意点として、エッジパス内で図形が連続して図形が閉じられないと、追加ハッチが生成されません。
直線だけでハッチングを構成する場合は、ポリラインベースがいいかなと思うのですが、
円弧が絡むと円弧の高さや中心座標を計算するより、例のように式を入力すると楽になりそうです。
ハッチングのパターンも紹介します
hatch.set_pattern_fill("ANSI31", scale=0.5, color=2)
この一文を追加するだけです。色もここで指定します。
for i, j in enumerate(range(31,39)):
  hatch = msp.add_hatch(color=5) #ここでカラーを指定しても無効
  k = i * 15

  print(j,k)
  hatch.paths.add_polyline_path(
      [(0+k, 0), (10+k, 0), (10+k, 10), (0+k, 10)], is_closed=True
      )
  hatch.set_pattern_fill(f"ANSI{j}", scale=0.5, color=i)
図形の描画についてはここまで。次章はレイヤー・dxfattribsなどに
ついて掘り下げ、図形の書式を研究します。


