やりたきこと
見出しタグ(h1~h6)を元に動的にアンカーリンク付きの目次を作成&表示する。
実装(HTML)
以下のような目次と見出しを用意します。
<details id="table-of-content" open>
    <summary>Table of Contents</summary>
</details>

<h1>Content 1</h1>
<p>Lorem ipsum ...</p>

<h2>Content 2</h2>
<p>Lorem ipsum ...</p>

<h3>Content 3</h3>
<p>Lorem ipsum ...</p>

<h4>Content 4</h4>
<p>Lorem ipsum ...</p>

<h5>Content 5</h5>
<p>Lorem ipsum ...</p>

<h6>Content 6</h6>
<p>Lorem ipsum ...</p>
<details></details> 内に各見出しへのアンカーリンクをJavaScriptで動的に作成します。
実装(JavaScript)
見出しタグ(h1~h6)を読み取って目次を作成します。
document.addEventListener('DOMContentLoaded', () => {
    const heads = document.querySelectorAll('h1, h2, h3, h4, h5, h6');
    if (heads && heads.length) {
        let contents = '';
        heads.forEach((head, i) => {
            contents += `<li><a href="#head${i}">${head.textContent}</a></li>`;
            head.innerHTML += `<a id="head${i}"></a>`;
        })
        document.querySelector('#table-of-content').innerHTML += `<ol>${contents}</ol>`;
    }
});
見出しを読み取る必要があるので、実行のタイミングは DOMContentLoaded にします。
querySelectorAll() はカンマ区切りとすることでタグを複数指定&取得できます。
取得した見出しの数だけ繰り返し、
- 目次のアンカータグ
- 各見出しに対応するアンカータグ
の2つを作成します。
最後に <summary>Table of Contents</summary> の直下に作成した目次のアンカータグを突っ込んだら目次の完成です。
表示確認
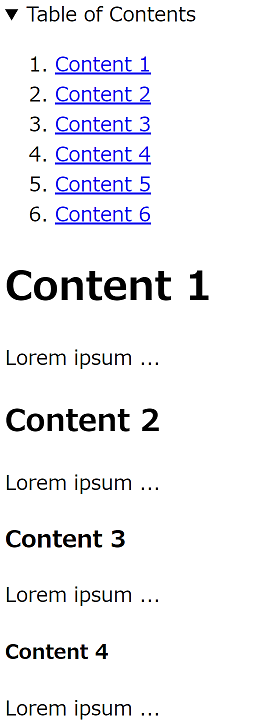
各見出しへのリンクが表示されました!
ただ、スタイルを何も当てていない目次の見栄えがよろしくないですね・・改善しましょう。
改善する
目次に対して以下の改善を行います。
- 番号を除去する
- 下線を除去する
- 段落を下げて階層を分ける
実装(JavaScript)
document.addEventListener('DOMContentLoaded', () => {
    const heads = document.querySelectorAll('h1, h2, h3, h4, h5, h6');
    if (heads && heads.length) {
        let contents = '';
        heads.forEach((head, i) => {
            let className = '';
            switch(head.localName) {
                case "h1":
                    className = `contents1`;
                    break;
                case "h2":
                    className = `contents2`;
                    break;
                case "h3":
                    className = `contents3`;
                    break;
                case "h4":
                    className = `contents4`;
                    break;
                case "h5":
                    className = `contents5`;
                    break;
                case "h6":
                    className = `contents6`;
                    break;
            }
            contents += `<li><a class="${className}" href="#head${i}">${head.textContent}</a></li>`;
            head.innerHTML += `<a id="head${i}"></a>`;
        })
        document.querySelector('#table-of-content').innerHTML += `<ol>${contents}</ol>`;
    }
});
取得したタグが h1 ~ h6 のいずれであるかを判定してクラス名として付与します。
実装(CSS)
li {
    list-style: none;
}
a {
    text-decoration: none;
}
.contents1 {
    margin-left: 0px;
}
.contents2 {
    margin-left: 15px;
}
.contents3 {
    margin-left: 30px;
}
.contents4 {
    margin-left: 45px;
}
.contents5 {
    margin-left: 60px;
}
.contents6 {
    margin-left: 75px;
}
li と a タグのスタイルを除去、
付与したクラスにはそれぞれ左側にmarginを設けて階層っぽく見えるようにします。
表示確認
ブラウザで確認してみましょう。
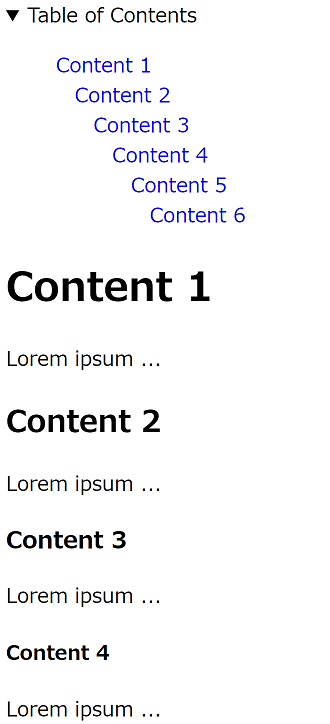
無駄な番号や下線も消え、階層化されました。
今回は h1 ~ h6 が1つずつで試していますが、見出しが増えるとより自然に見えるかと思います。

