概要
目次
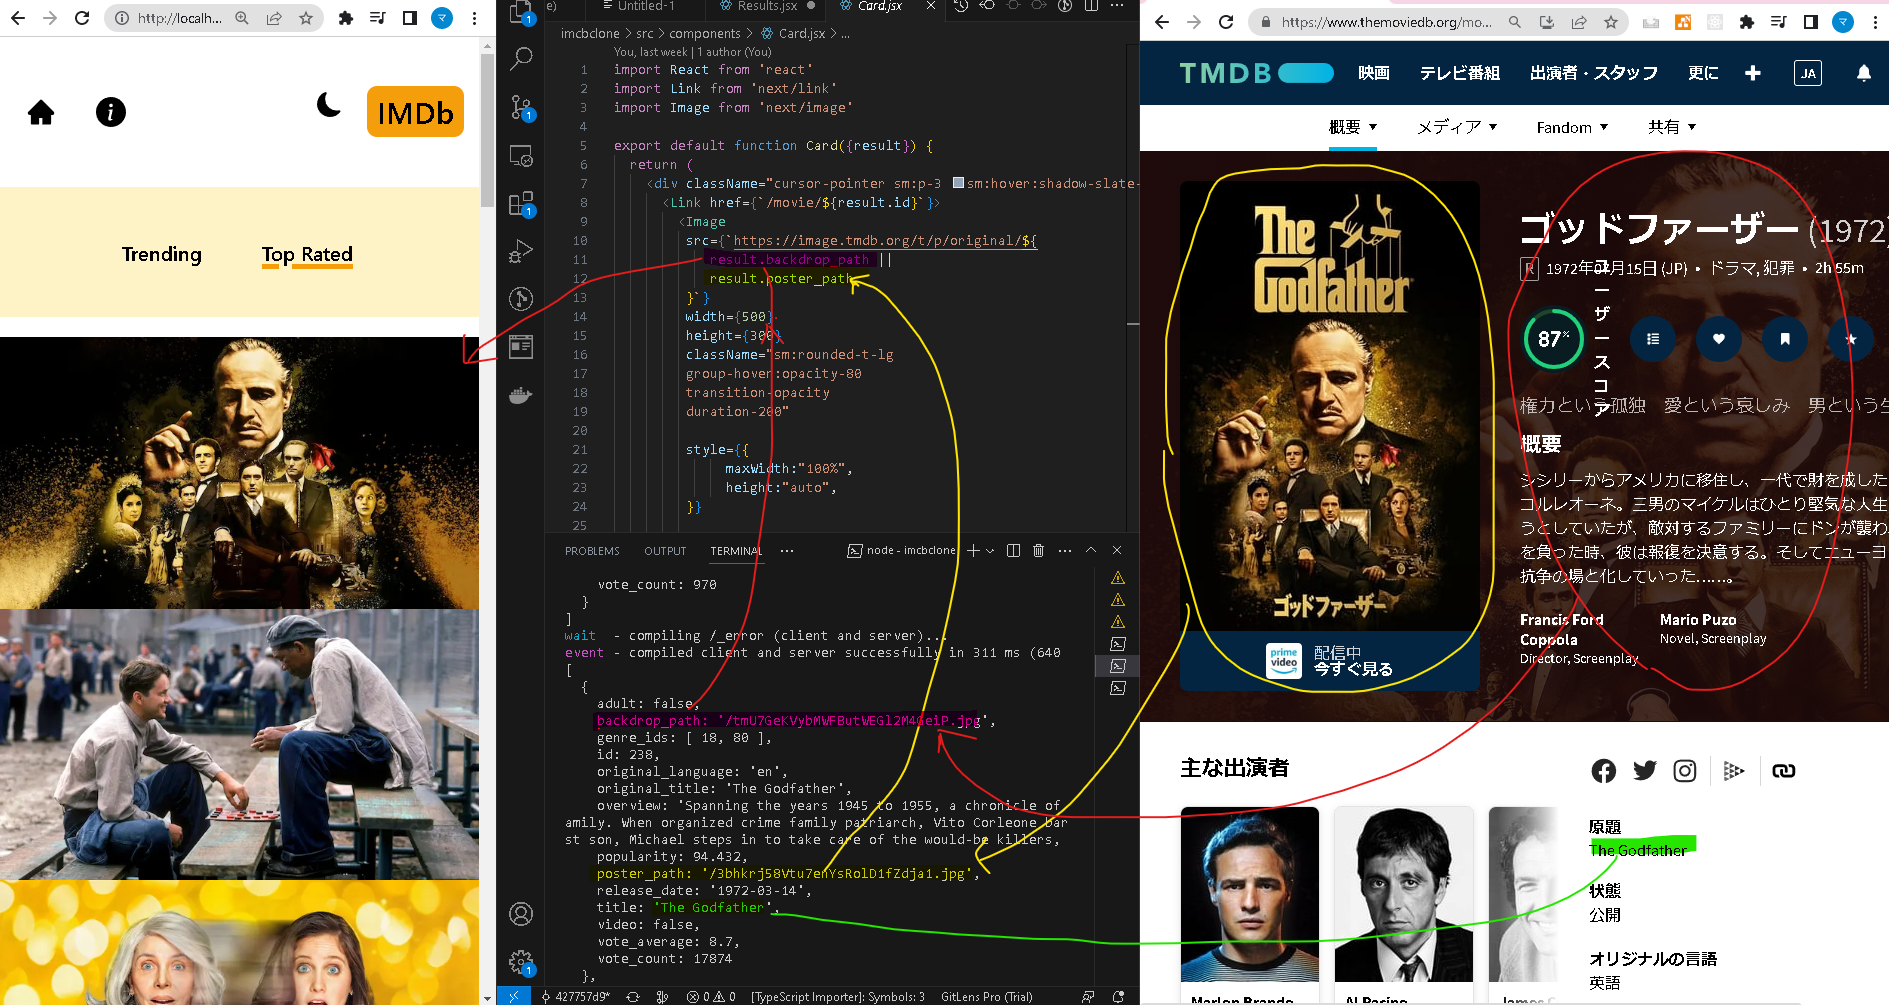
今回はNext.jsのImageコンポーネントを使ってカードに画像を追加しています。
下画像は実装後の様子です。

開発環境
OS:Windows10
IDE:VSCode
"@next/font": "13.1.5",
"autoprefixer": "10.4.14",
"eslint": "8.39.0",
"eslint-config-next": "13.3.1",
"next": "13.3.1",
"postcss": "8.4.23",
"react": "18.2.0",
"react-dom": "18.2.0",
"react-icons": "^4.8.0",
"tailwindcss": "3.3.2"
実装のポイント
Next.jsのドキュメントを参考にして実装します。
画像のURLは背景用のbackdrop_path(横長の画像)とPoster_path(縦長の画像)があり今回はbackdrop_pathを優先的に使うようにしています。
コード部分
Card
Card.jsx
import React from 'react'
+import Link from 'next/link'
+import Image from 'next/image'

export default function Card({result}) {
  return (
    <div className="cursor-pointer sm:p-3 sm:hover:shadow-slate-400 sm:shadow-md rounded-lg sm:border sm:border-slate-400 sm:m-2 transition-shadow duration-200 group">
+      <Link href={`/movie/${result.id}`}>
-      {result.id}
+        <Image
+         src={`https://image.tmdb.org/t/p/original/${
+            result.backdrop_path ||
+            result.poster_path
+         }`}
+         width={500}
+         height={300}
+         className="sm:rounded-t-lg
+         group-hover:opacity-80
+         transition-opacity
+         duration-200"
+         style={{
+             maxWidth:"100%",
+              height:"auto",
+         }}
+         placeholder="blur"
+         blurDataURL="/spinner.svg"
+         alt="image is not available"
+        ></Image>
+      </Link>
    </div>
  )
}
next.config.js
nextconfig.js
/** @type {import('next').NextConfig} */
const nextConfig = {
  experimental: {
    appDir: true,
  },
+  images:{
+    domains:["image.tmdb.org"]
  }
}

module.exports = nextConfig
参考
next Image
Prop

その他
API Response

Udemy
githubコミット分