概要
SpringBootで作ったRestAPi(ページネーション)を
フロントエンド側で実装していきます。
内容としては フロントエンドがメインです。
バックエンドはjsonのレスポンスぐらいしか出しません。
開発環境
開発環境
OS:windows10
バックエンド側:
IDE:IntelliJ Community
spring-boot-starter-parent 2.75
java : 11
データベース
mysql:8.0.29
クライアントソフト: MySQL Workbench
フロントエンド:
IDE:VScode
├── @types/node@18.11.15
├── @types/react-dom@18.0.9
├── @types/react@18.0.26
├── axios@1.2.1
├── eslint-config-next@13.0.6
├── eslint@8.29.0
├── next-auth@4.18.7
├── next@13.0.6
├── react-bootstrap@2.7.0
├── react-dom@18.2.0
├── react@18.2.0
├── styled-components@5.3.6
├── styled-jsx@5.1.1
└── typescript@4.9.4
ユースケース
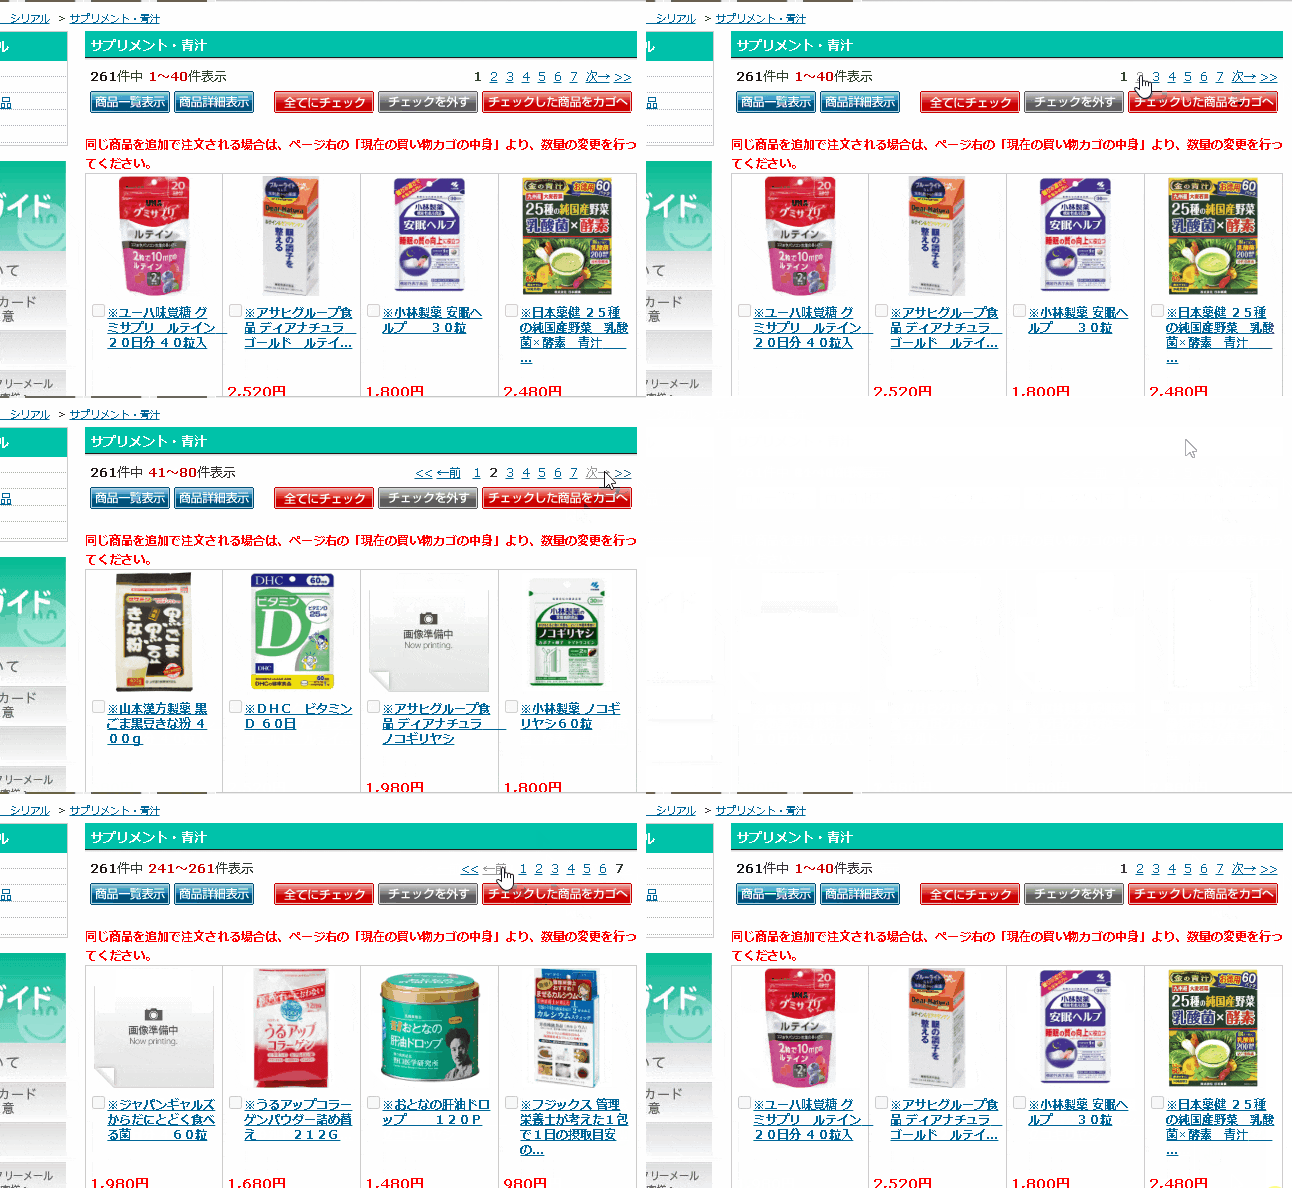
杏林堂ネットスーパーの商品一覧を動かしている様子なんですけど
文字で記しておくと以下の振る舞いを仕様とします。
1.「前へ」をクリックすると現在のページ-1に遷移します。但しページが1のときは表示されなく押せません。
2.「次へ」をクリックすると現在のページ+1に遷移します。但しページが最終ページのときは表示されません。
3.数字部分を押すとそのページに遷移します。
実装
バックエンド
レスポンス
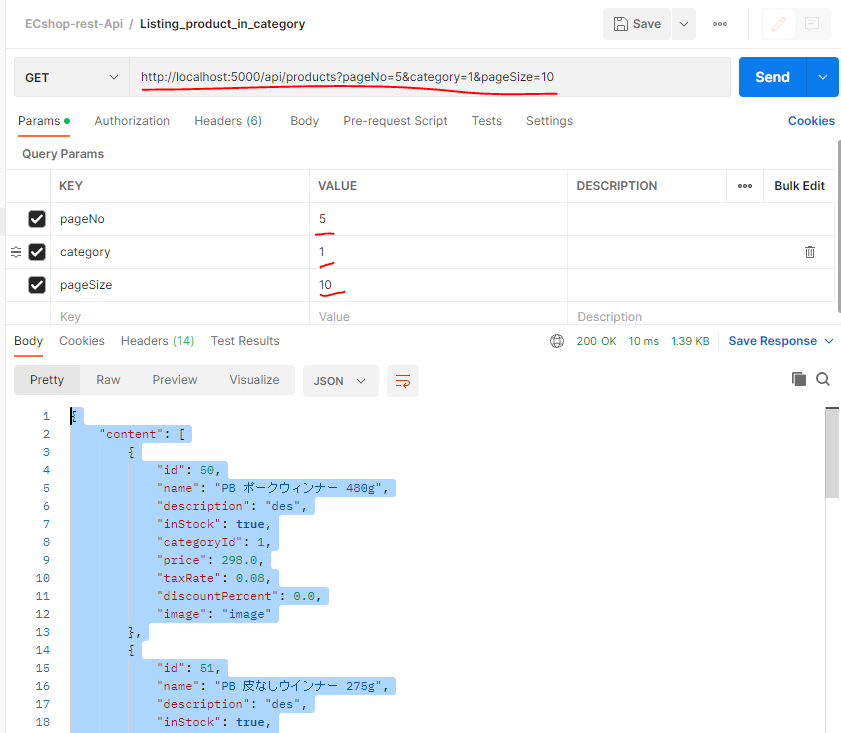
Postmanで検証する。
カテゴリーID1の ページサイズ10にして、ページ番号5時の情報を取得します。

{
    "content": [
        {
            "id": 50,
            "name": "PB ポークウィンナー 480g",
            "description": "des",
            "inStock": true,
            "categoryId": 1,
            "price": 298.0,
            "taxRate": 0.08,
            "discountPercent": 0.0,
            "image": "image"
        },
        {
            "id": 51,
            "name": "PB 皮なしウインナー 275g",
            "description": "des",
            "inStock": true,
            "categoryId": 1,
            "price": 258.0,
            "taxRate": 0.08,
            "discountPercent": 0.0,
            "image": "image"
        },
        {
            "id": 52,
            "name": "PB 特級あらびきポークウィンナー 260g",
            "description": "des",
            "inStock": true,
            "categoryId": 1,
            "price": 348.0,
            "taxRate": 0.08,
            "discountPercent": 0.0,
            "image": "image"
        },
        {
            "id": 53,
            "name": "PB チキンウインナー 281g",
            "description": "des",
            "inStock": true,
            "categoryId": 1,
            "price": 251.0,
            "taxRate": 0.08,
            "discountPercent": 0.0,
            "image": "image"
        },
        {
            "id": 54,
            "name": "PB 皮なしミニウインナー 80g",
            "description": "des",
            "inStock": true,
            "categoryId": 1,
            "price": 98.0,
            "taxRate": 0.08,
            "discountPercent": 0.0,
            "image": "image"
        }
    ],
    "pageNo": 5,
    "pageSize": 10,
    "totalElements": 55,
    "totalPages": 6,
    "last": true,
    "categoryId": 1,
    "categoryName": "食肉"
}
詳細はgithub参照
ドメイン
実装
フロント側
3ステップを得て実装していきます。
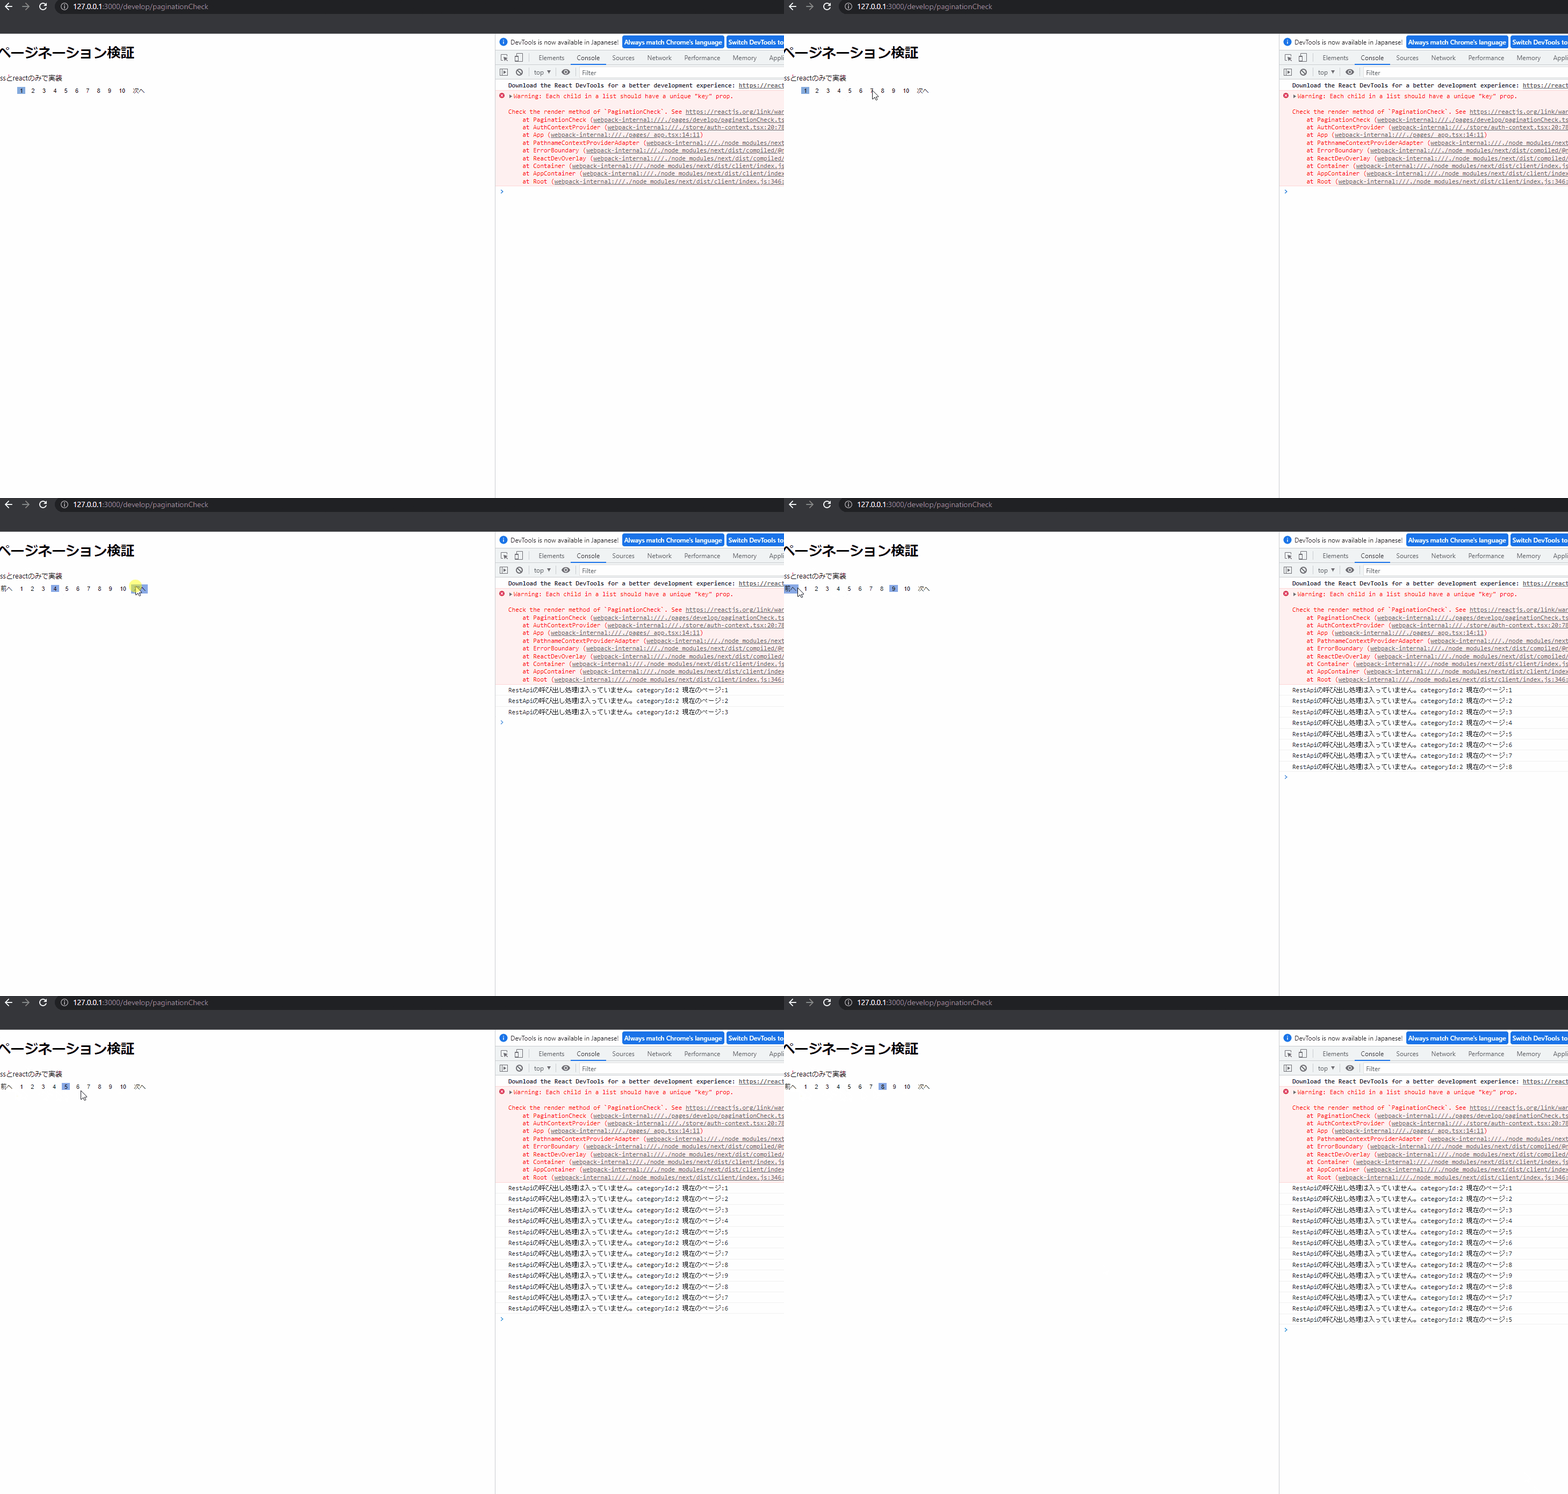
1.とにかく動くページネーションを実装する。一つのファイルで動く物を作る
コンポーネント化は考慮してないですね
ソースコード
import { useState, useEffect, useCallback, EventHandler } from "react";
// ページネーション実装 その1
// 一つのファイルで実装している→要リファクタリング
// コンポーネント化の必要あり RESTAPIは空にしている
import { MouseEventHandler } from "react";
export default function PaginationCheck() {
const [currentPageNo,setCurrentPageNo] = useState<number>(1);
const totalPage: number = 10;
const categoryId = 2;
let paginationContent: JSX.Element[] = [];
// 前へボタンを押したときの処理
const backHandler = () => {
setCurrentPageNo(currentPageNo-1);
getPaginationProduct(currentPageNo)
};
// 次へボタンを押したときの処理
const nextHandler = () => {
setCurrentPageNo(currentPageNo+1);
getPaginationProduct(currentPageNo)
};
// ページ番号を押したときの処理
const selectNumberHandler = (pg: number) => {
setCurrentPageNo(pg);
getPaginationProduct(currentPageNo)
};
// RestApiを呼ぶ関数
const getPaginationProduct = (page: number) => {
// 実装前
console.log(`RestApiの呼び出し処理は入っていません。categoryId:${categoryId} 現在のページ:${currentPageNo}`)
}
return (
<>
<h1>ページネーション検証</h1>
<div>cssとreactのみで実装</div>
<div className="Layout">
{/* 前のページに戻る-ページ数が最初の場合は表示されない */}
<div className="Child">
{currentPageNo != 1 ?
<button className="Font" onClick={backHandler}>前へ</button>
:<div className="Font">    </div> // 「前へ」ボタンが非表示でもレイアウトを維持するための処置。(何もしないと崩れる)
}
</div>
{/* 即時関数を使って1からtotalNumberの数字を作成する。クリックすると押した番号のデータを取得するrestapiを呼ぶ関数を実行する */}
{(() => {
for (let i = 0; i < totalPage; i++) {
paginationContent.push(
<>
<button
className= { currentPageNo== i+1 ? 'SelectedChild' :'Child'}
onClick={()=>selectNumberHandler(i+1)}
>
{i + 1}
</button>
</>
);
}
return <div>{paginationContent}</div>;
})()}
{/* 次のページへ進む-ページ数が最後の場合は表示されない */}
<div className="Child">
{currentPageNo != totalPage ?
<button className="Font" onClick={nextHandler}>次へ</button>
:<div className="Font">    </div> // レイアウトを維持するために空欄を入れる
}
</div>
 
</div>
<style jsx>{`
// 大枠 要素を横並びにする
.Layout {
display: flex;
flex-wrap: wrap;
align-items: center;
}
// 子の幅 間隔を決定する
.Child {
flex-basis: auto;
align-items: center;
background-color: white;
margin: 3px;
border: none;
}
// 現在のページを明示するために背景色を変える 透明な青色とする
.SelectedChild{
flex-basis: auto;
align-items: center;
background-color: #1c5bcf85;
margin: 5px;
border: none;
}
// 文字のフォントサイズ 背景色設定
.Font {
align-items: center;
background-color: white;
text-align: center;
}
// マウスオーバー時の背景色は透明な灰色
button.Font:hover {
background-color: #1c5bcf85;
}
// 子要素のボタン感を無くすために 色と境界線を無くす
button {
background-color: white;
border: none;
}
`}</style>
</>
);
}
動作結果
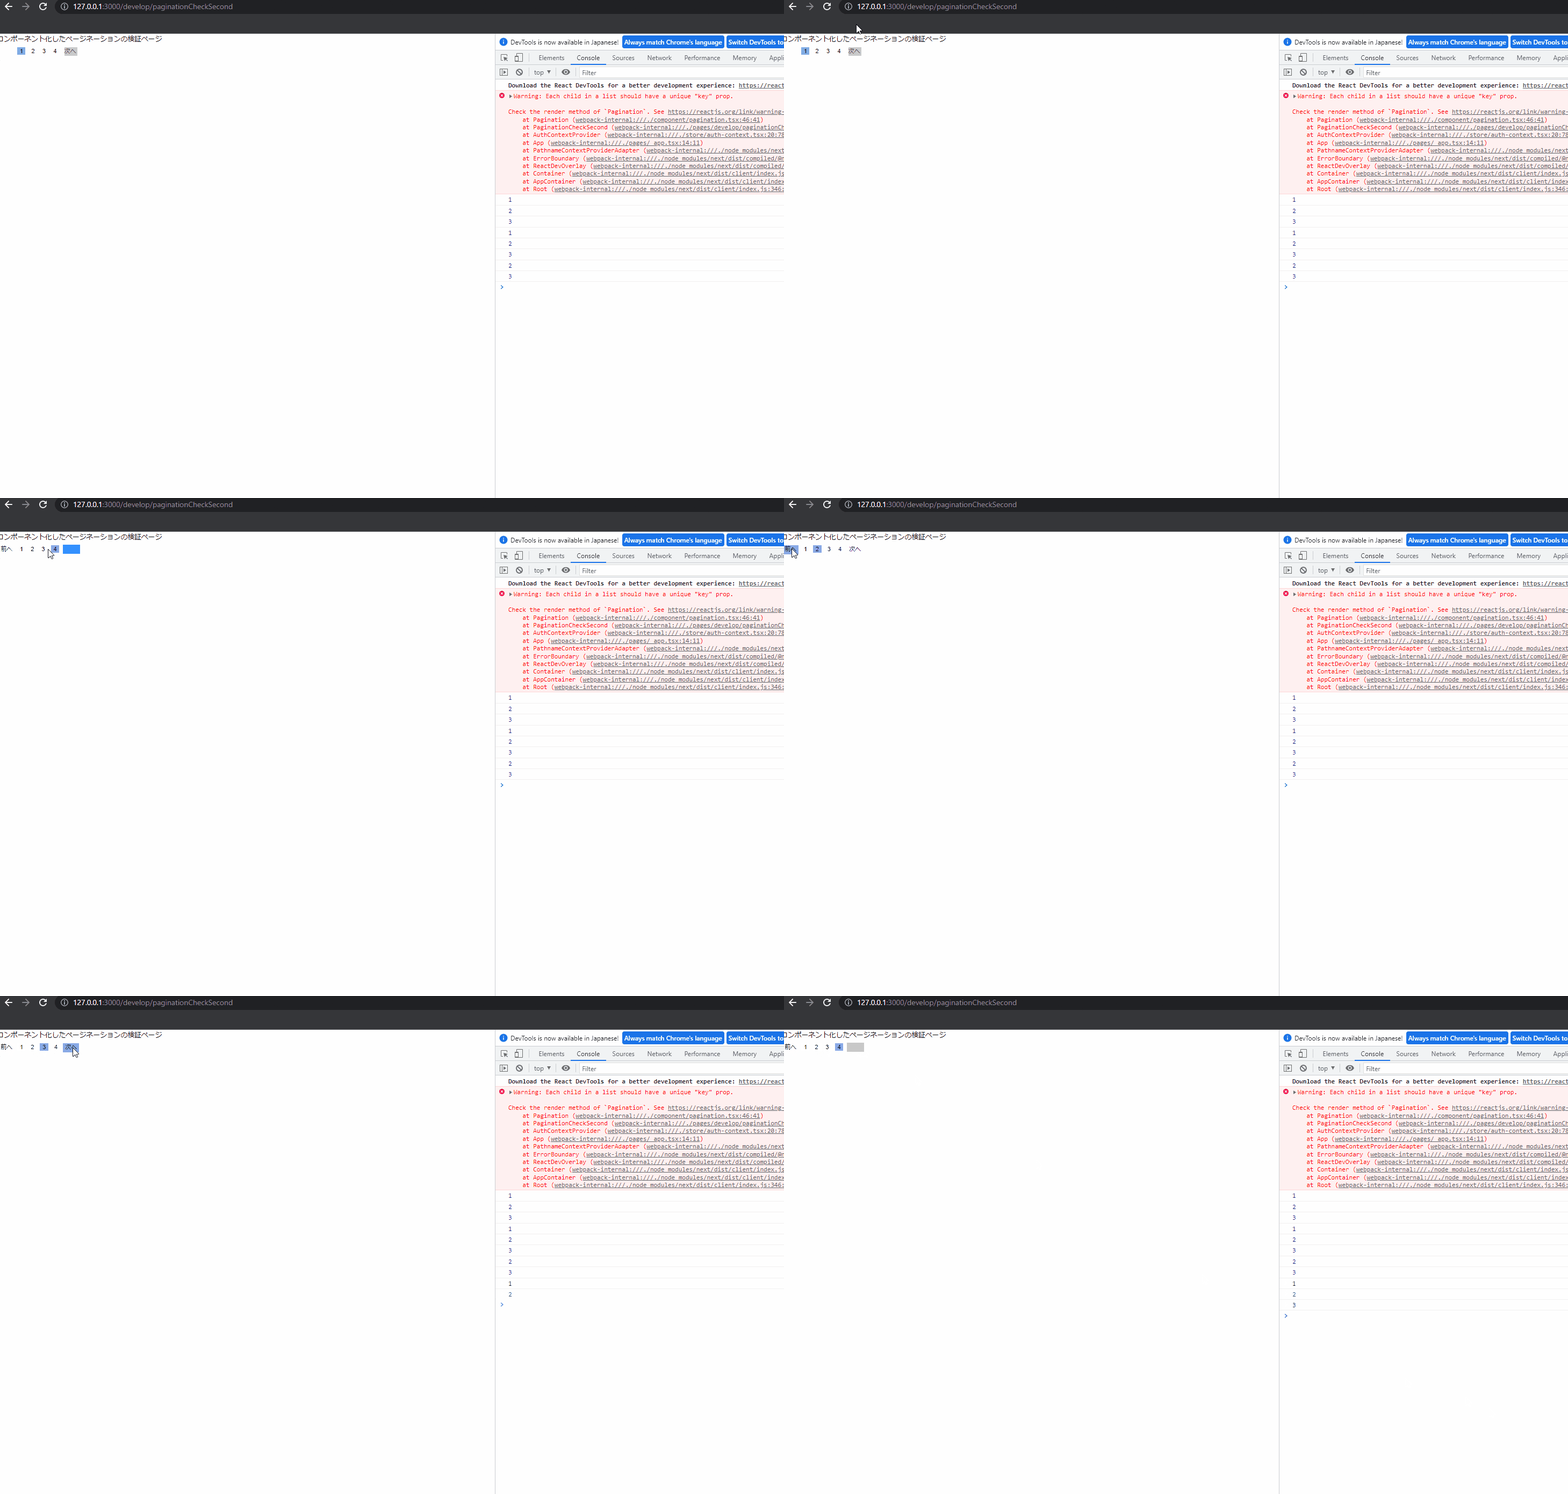
2. 1に基づいてコンポーネント化する RestApiは呼ばない
ソースコード
import { setHttpClientAndAgentOptions } from "next/dist/server/config";
import { useState, useEffect, useCallback, EventHandler, SetStateAction, Dispatch } from "react";
import { MouseEventHandler } from "react";
/**
* @remarks ページネーション コンポーネント
* 親コンポーネントに現在のページ数を渡します。
* RestApiを呼ぶ関数は親コンポーネント側で行います。
*
* @param totalPage: 総ページ数:固定値として使われる想定
* @param pageNo:現在のページ番号を取得する useState[pageNo, setPageNo]の1つ目の引数
* @param setPageNo:現在のページ番号を更新する useState[page,setPage]の2つ目の引数
*/
// 参考URL
//
export default function Pagination(props:{totalPage:number ,pageNo:number, setPageNo:Dispatch<SetStateAction<number>>}) {
// const [currentPageNo,setCurrentPageNo] = useState<number>(1);
let currentPageNo = 1;
const totalPage: number = 10;
let paginationContent: JSX.Element[] = [];
// 前へボタンを押したときの処理
const backHandler = () => {
props.setPageNo( props.pageNo - 1)
};
// 次へボタンを押したときの処理
const nextHandler = () => {
props.setPageNo(props.pageNo + 1)
console.log(props.pageNo);
};
// ページ番号を押したときの処理
const selectNumberHandler = (pg: number) => {
props.setPageNo(pg)
};
return (
<>
<div className="Layout">
{/* 前のページに戻る-ページ数が最初の場合は表示されない */}
<div className="Child">
{props.pageNo != 1 ?
<button className="Font" onClick={backHandler}>前へ</button>
:<div className="Font">    </div> // 「前へ」ボタンが非表示でもレイアウトを維持するための処置。(何もしないと崩れる)
}
</div>
{/* 即時関数を使って1からtotalNumberの数字を作成する。クリックすると押した番号のデータを取得するrestapiを呼ぶ関数を実行する */}
{(() => {
for (let i = 0; i < props.totalPage; i++) {
paginationContent.push(
<>
<button
className= { props.pageNo== i+1 ? 'SelectedChild' :'Child'}
onClick={()=>selectNumberHandler(i+1)}
>
{i + 1}
</button>
</>
);
}
return <div>{paginationContent}</div>;
})()}
{/* 次のページへ進む-ページ数が最後の場合は表示されない */}
<div className="Child">
{props.pageNo != props.totalPage ?
<button className="Font" onClick={nextHandler}>次へ</button>
:<div className="Font">    </div> // レイアウトを維持するために空欄を入れる
}
</div>
 
</div>
<style jsx>{`
// 大枠 要素を横並びにする
.Layout {
display: flex;
flex-wrap: wrap;
align-items: center;
}
// 子の幅 間隔を決定する
.Child {
flex-basis: auto;
align-items: center;
background-color: white;
margin: 3px;
border: none;
}
// 現在のページを明示するために背景色を変える 透明な青色とする
.SelectedChild{
flex-basis: auto;
align-items: center;
background-color: #1c5bcf85;
margin: 5px;
border: none;
}
// 文字のフォントサイズ 背景色設定
.Font {
align-items: center;
background-color: white;
text-align: center;
}
// マウスオーバー時の背景色は透明な灰色
button:hover {
background-color: #1c5bcf85;
}
// 子要素のボタン感を無くすために 色と境界線を無くす
button {
background-color: white;
border: none;
}
`}</style>
</>
);
}
// ページネーション検証用ページ その2
// コンポーネント化したページネーションを呼び出す
// SpringBootのRestApiは呼び出さない

import { useState } from "react";
import Pagination from "../../component/pagination";

export default function PaginationCheckSecond() {
	const [pageNo,setPageNo] =  useState<number>(1)
	const totalPage :  number = 4;
	let tempPageNo : number = 1;
	return(
		<>
			コンポーネント化したページネーションの検証ページ
			<Pagination totalPage={totalPage} pageNo={pageNo} setPageNo={setPageNo}/>
		</>
	)
}
動作結果
1.の場合と同じ挙動ができております。
3. 2の処理にrestApiの処理を追加する。
ソースコード
親コンポーネント側にapiを実行する処理を加えます
import { SetStateAction, useEffect, useState } from 'react';
import Pagination from "../../component/pagination";
import * as productService from '../../service/productService';
import { Product } from '../../types/product/product';
import { ProductRequest } from '../../types/product/productRequest';

// ページネーション検証用ページ その3
// コンポーネント化したページネーションを呼び出す
// SpringBootのRestApiを呼び出して使えるか確認する。

export default function PaginationCheckThird() {
	const [pageNo,setPageNo] =  useState<number>(1)
	const [pagingProduct, setPagingProduct] = useState<ProductRequest | undefined>()
	const totalPage :  number = 4;
	const pageSize : number = 10;
	let tempPageNo : number = 1;

	//  pageNo変更後にRestApiを呼ぶ関数が実行される
	useEffect(() =>{
		getProductByCategory()
	} ,[pageNo])

	//
	const getProductByCategory =() =>{
		console.log(`pageNo  ${pageNo} .Rest api is executed.`)
		productService.getProductsByCategoryId(pageNo-1,pageSize,1)
		.then((response: { data: SetStateAction<ProductRequest | undefined>; })=>{
			setPagingProduct(response.data)
			console.log(pagingProduct)
	  })}
	return(
		<>
			コンポーネント化したページネーションの検証ページ
			RESTAPIを使う
				{
			pagingProduct?.content.map((product: Product) => {
				return (
					<div key={product.id}>
						{product.name} ,{Math.floor(product.price * (1 + product.taxRate))} 円
					</div>
				)
			})
			}


			<Pagination totalPage={pagingProduct?.totalPages} pageNo={pageNo} setPageNo={setPageNo}/>
		</>
	)
}
axiosを使ってapiを呼び出しています。
import axios from 'axios';

export const getProductById = ( productId : number) =>{
	return axios.get(`http://127.0.0.1:5000/api/products/?id=`+ productId,
	{ headers: {
		'Access-Control-Allow-Origin': '*',
	} }
	);
};

export const getProductsByCategoryId = ( pageNo : number,pageSize:number, categoryId:number) =>{
	return axios.get(`http://127.0.0.1:5000/api/products?`
					+`pageNo=`+ pageNo
					+`&pageSize=`+ pageSize
					+`&category=`+ categoryId,
					);
};
動作結果
左側:ブラウザ 右側:mySql workbench
参考
杏林堂ネットスーパー
実装方法
子コンポーネントの値渡し


