概要
今回は、インベントリにアイテムを追加する処理を実装します。
以下実装後の様子です。

開発環境
IDE:Rider
Unity:2020.3.42(LTS)
OS:Windows10
UnityEditor上の設定
無し
実装のポイント
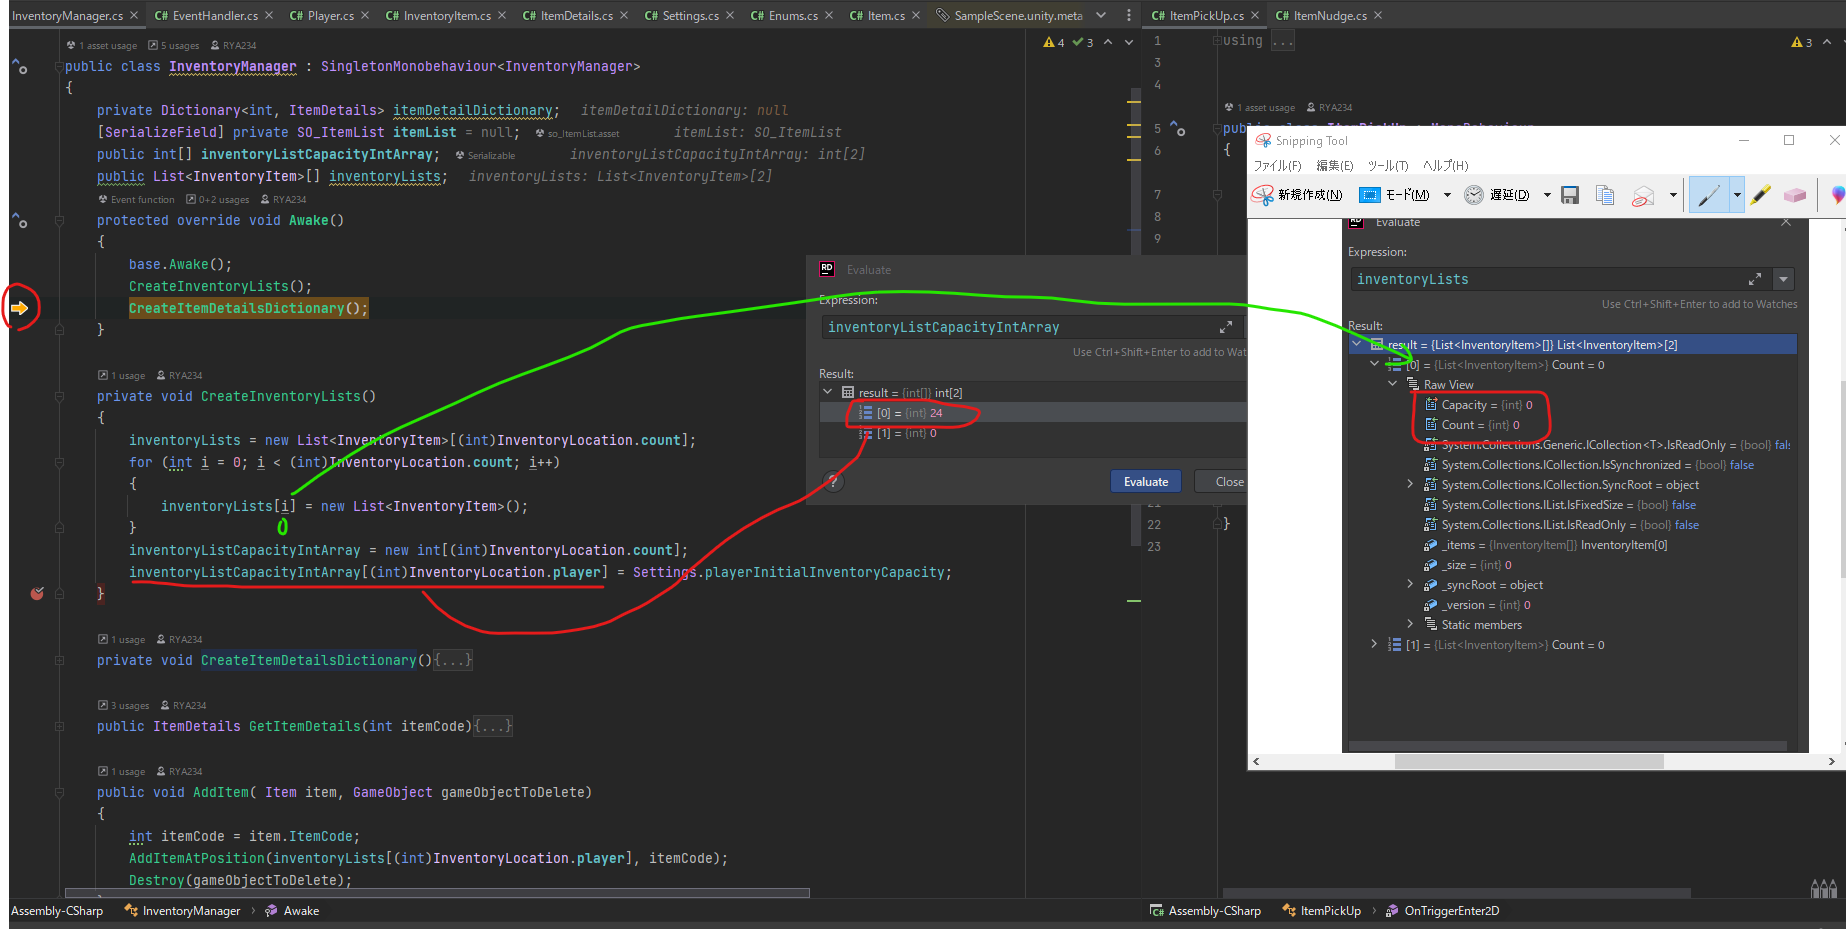
起動時にインベントリを作成する処理
| 変数名 | 型 | 説明 |
|---|---|---|
| inventoryListCapacityIntArray[0] | int | プレイヤーのインベントリの容量 値は24 |
| inventoryListCapacityIntArray[0] | int | 箱のインベントリの容量 値は0(まだ未設定) |
| inventoryLists[0] | List<InventoryItem> | プレイヤーのインベントリ情報 |
| inventoryLists[1] | List<InventoryItem> | 箱のインベントリ情報(未実装) |
下図 デバッグモードで変数の状態を確認
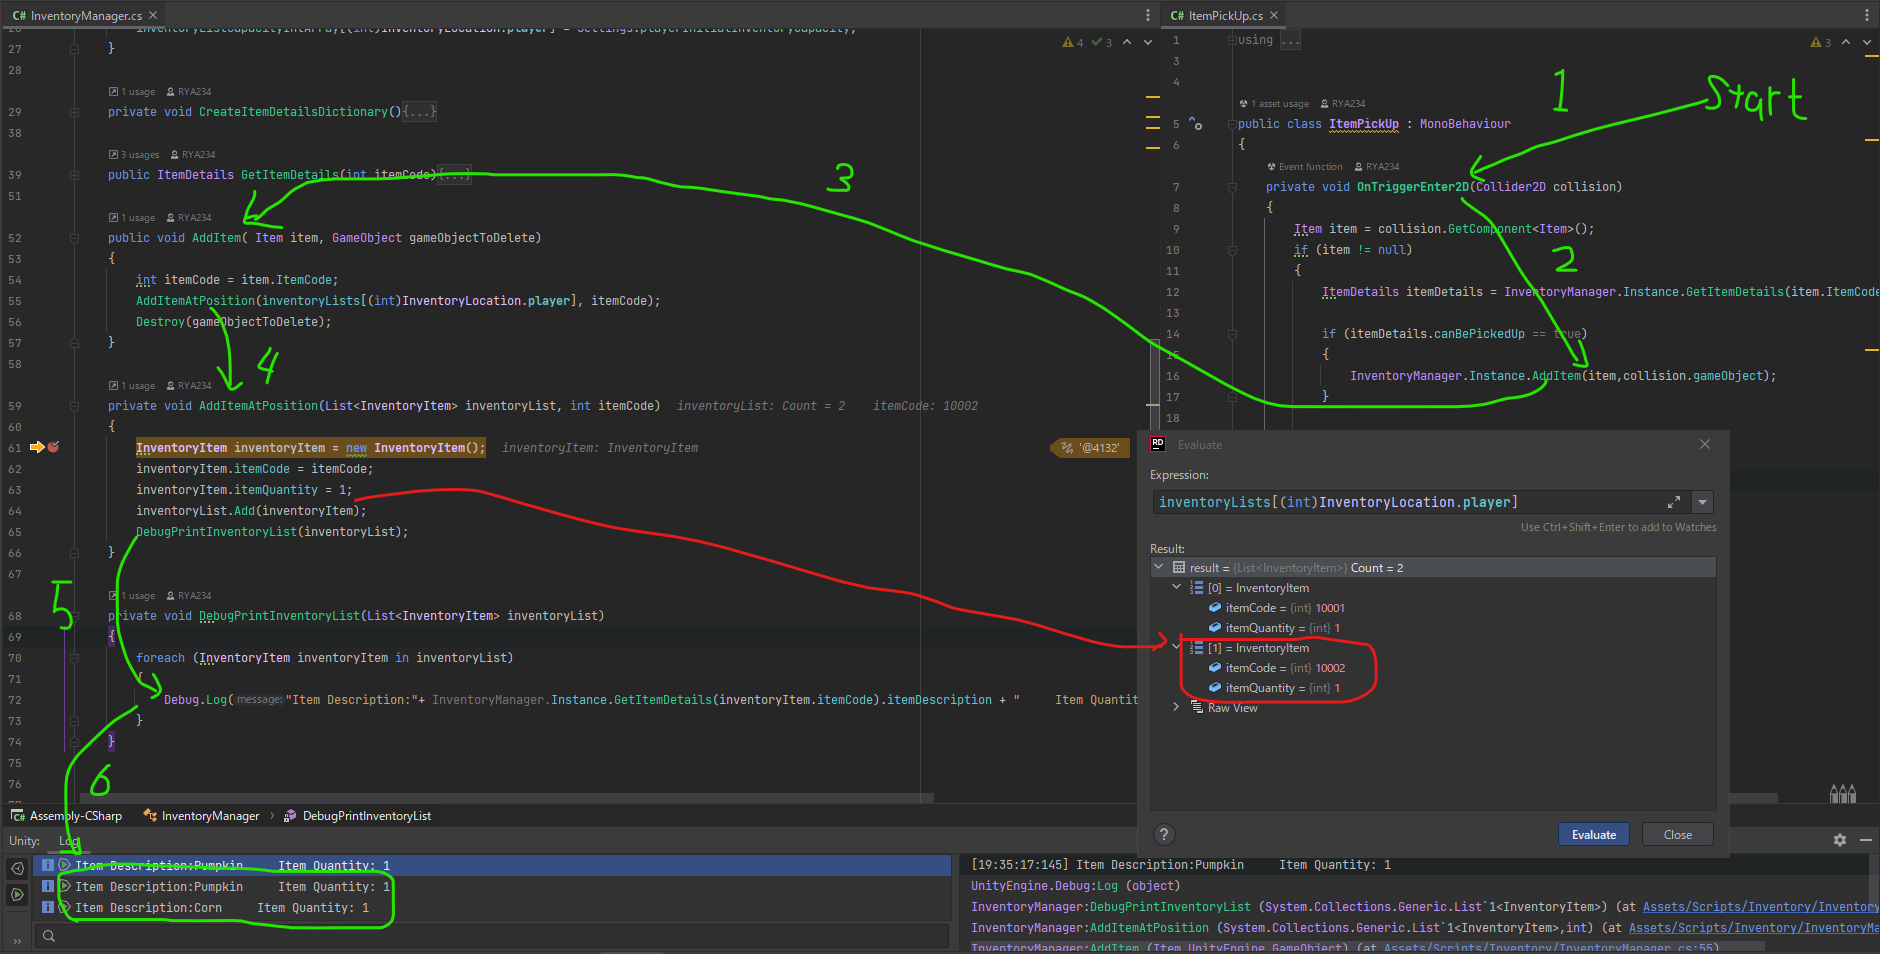
Playerがアイテムに接触してインベントリに加えるときの処理
コード部分
InventoryManager
InventoryManager.cs
using System.Collections.Generic;
using UnityEngine;


public class InventoryManager : SingletonMonobehaviour<InventoryManager>
{
    private Dictionary<int, ItemDetails> itemDetailDictionary;
    [SerializeField] private SO_ItemList itemList = null;
    public int[] inventoryListCapacityIntArray;
    public List<InventoryItem>[] inventoryLists;
    protected override void Awake()
    {
        base.Awake();
        CreateInventoryLists();
        CreateItemDetailsDictionary();
    }

    private void CreateInventoryLists()
    {
        inventoryLists = new List<InventoryItem>[(int)InventoryLocation.count];
        for (int i = 0; i < (int)InventoryLocation.count; i++)
        {
            inventoryLists[i] = new List<InventoryItem>();
        }
        inventoryListCapacityIntArray = new int[(int)InventoryLocation.count];
        inventoryListCapacityIntArray[(int)InventoryLocation.player] = Settings.playerInitialInventoryCapacity;
    }

    private void CreateItemDetailsDictionary()
    {
        itemDetailDictionary = new Dictionary<int, ItemDetails>();

        foreach (ItemDetails itemDetails in itemList.itemDetails)
        {
            itemDetailDictionary.Add(itemDetails.itemCode,itemDetails);
        }
    }

    public ItemDetails GetItemDetails(int itemCode)
    {
        ItemDetails itemDetails;
        if (itemDetailDictionary.TryGetValue(itemCode, out itemDetails))
        {
            return itemDetails;
        }
        else
        {
            return null;
        }
    }

    public void AddItem( Item item, GameObject gameObjectToDelete)
    {
        int itemCode = item.ItemCode;
        AddItemAtPosition(inventoryLists[(int)InventoryLocation.player], itemCode);
        Destroy(gameObjectToDelete);
    }

+    private void AddItemAtPosition(List<InventoryItem> inventoryList, int itemCode)
+    {
+        InventoryItem inventoryItem = new InventoryItem();
+        inventoryItem.itemCode = itemCode;
+        inventoryItem.itemQuantity = 1;
+        inventoryList.Add(inventoryItem);
+        DebugPrintInventoryList(inventoryList);
+    }

+    private void DebugPrintInventoryList(List<InventoryItem> inventoryList)
+    {
+        foreach (InventoryItem inventoryItem in inventoryList)
+        {
+            Debug.Log("Item Description:"+ InventoryManager.Instance.GetItemDetails(inventoryItem.itemCode).itemDescription + "     Item Quantity: " + inventoryItem.itemQuantity);
+        }
+    }


}
ItemPickUp
ItemPickUp.cs
using System;
using UnityEngine;


public class ItemPickUp : MonoBehaviour
{
    private void OnTriggerEnter2D(Collider2D collision)
    {
        Item item = collision.GetComponent<Item>();
        if (item != null)
        {
            ItemDetails itemDetails = InventoryManager.Instance.GetItemDetails(item.ItemCode);

+            if (itemDetails.canBePickedUp == true)
+            {
+                InventoryManager.Instance.AddItem(item,collision.gameObject);
+            }


        }
    }
}
参考
C#
Unity Editor コンポーネント
Unity スクリプト
その他
Section1
github コミット分(個人確認用 privateなので見れません)
スタート時の処理
インベントリをアイテムに加える