はじめに
Ethereumフォークで国産の仮想通貨「Nekonium」のマイニングプールを構築する方法を記載します。
オープンソースのEthereumマイニングプール「Open Ethereum Pool」をNekonium用に独自にカスタマイズした「Open Nekonium Pool」を使用します。
手順
サーバーの準備
ドメインの取得
ドメインが必要な場合は、ドメイン取得代行サイトで任意のドメインを取得してください。
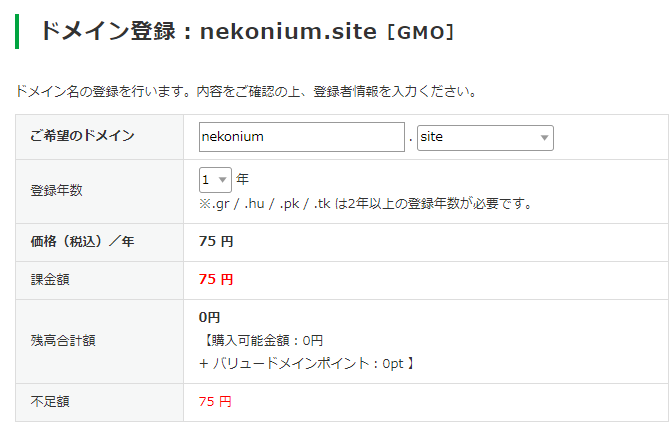
以前「Nekoniumのパブリックノードを立ててみよう その1」において、バリュードメインで「nekonium.site」というドメインを取得しましたので、そちらを活用します。
サーバーの用意
Linuxサーバーを立ち上げます。
今回AWSの「Ubuntu Server 16.04 LTS (HVM), SSD Volume Type」を選びました。
インスタンスタイプはとりあえず「t2.small」にしておきます。

固定IPの取得
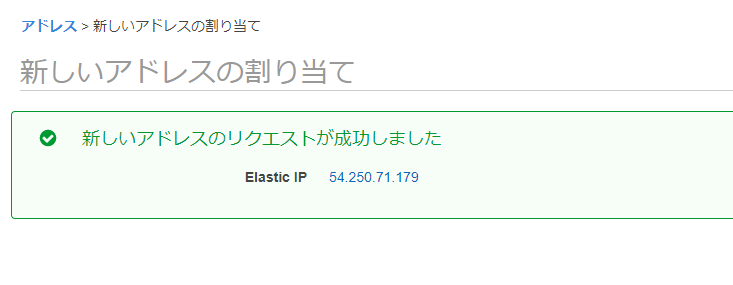
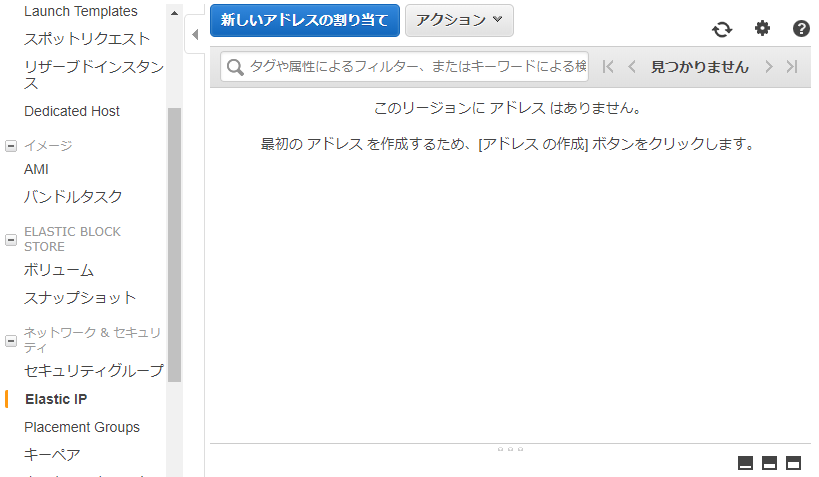
インスタンスが立ち上がったら、「Elastic IP」でグローバル固定IPを取得します。
今回は「54.250.71.179」が割り当てられました。
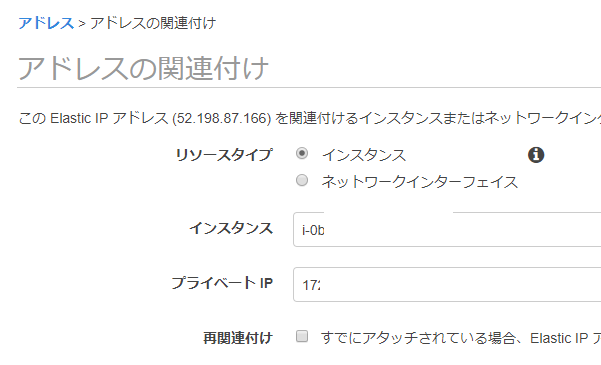
固定IPを関連付ける
「アクション」から、先ほど作成したインスタンスにグローバル固定IPを割り当てます。

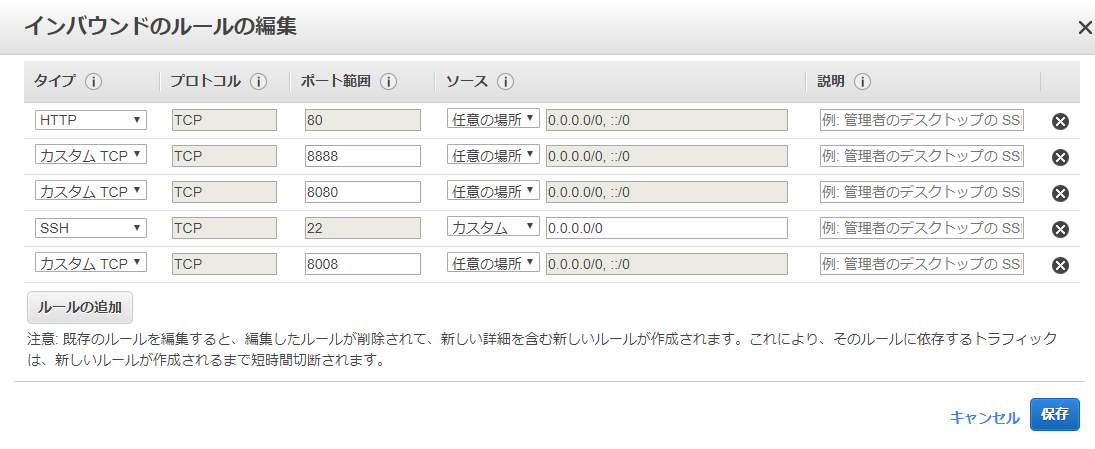
ファイアウォールの設定
「セキュリティグループ」のインバウンド設定から、今回マイニングプール用に公開する「80」「8080」「8008」「8888」ポートを空けておきます。

DNSの設定
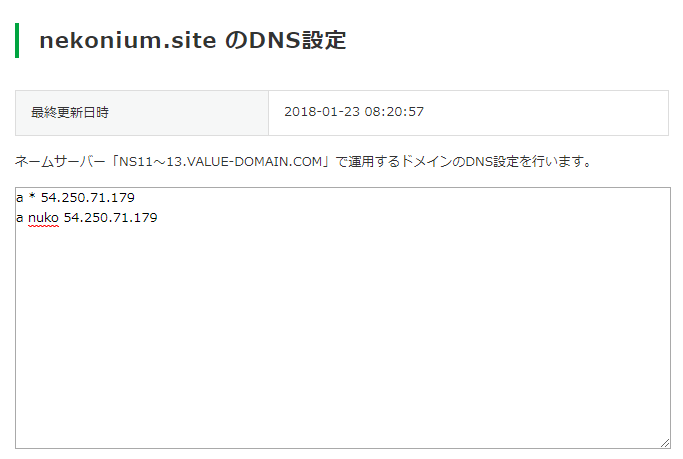
今回割り当てられたグローバル固定IPをドメイン名に紐付けます。
バリュードメインのDNS設定からAレコードの「nuko」を「54.250.71.179」に設定します。
サーバーの設定
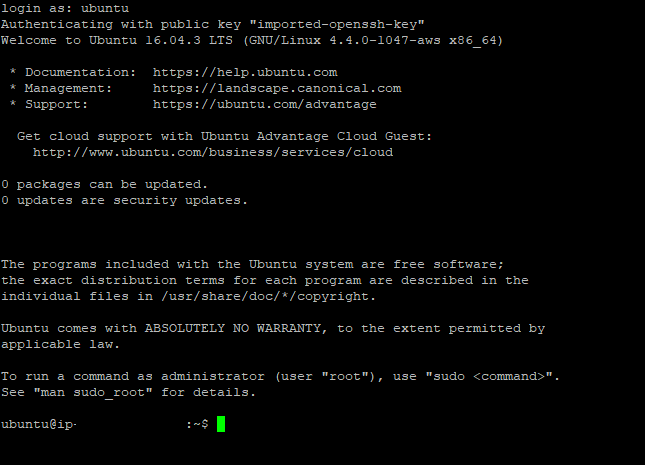
インスタンスへの接続
Windowsの場合は「PuTTY」を使用します。詳しい接続方法はAWSのページを参照してください。
Linux インスタンスへの接続 - AWS Documentation

Ubuntuのアップデート
ログインができたら、まずUbuntuをアップデートして再起動します。
sudo apt-get update
sudo apt-get dist-upgrade
sudo reboot
build-essentialとmakeのインストール
下記コマンドを実行してbuild-essentialおよびmakeをインストールします。
sudo apt-get install build-essential make
GoLangのインストール
下記コマンドを実行してGoをインストールします。
wget https://storage.googleapis.com/golang/go1.9.2.linux-amd64.tar.gz
sudo tar -xvf go1.9.2.linux-amd64.tar.gz
sudo mv go /usr/local
export GOROOT=/usr/local/go
export PATH=$GOPATH/bin:$GOROOT/bin:$PATH
export GOPATH=$HOME/go
go version と入力してgo version go1.9.2 linux/amd64と出力されればインストール成功です。
Redisのインストール
wget http://download.redis.io/redis-stable.tar.gz
tar xvzf redis-stable.tar.gz
cd redis-stable
make
sudo cp src/redis-server /usr/local/bin/
sudo cp src/redis-cli /usr/local/bin/
sudo mkdir /etc/redis
sudo mkdir /var/redis
sudo cp utils/redis_init_script /etc/init.d/redis_6379
sudo cp redis.conf /etc/redis/6379.conf
sudo vi /etc/redis/6379.conf 6379.confを編集します。
<中略>

daemonize no → daemonize yes に変更

<中略>

dir ./ → dir /var/redis/6379 に変更
sudo mkdir /var/redis/6379
sudo update-rc.d redis_6379 defaults
sudo /etc/init.d/redis_6379 start
これでRedisサーバーが起動します。
redis-cliと入力して、pingと打つとPONGが表示されれば正常に稼働しています。
redis-cliを終了する場合はexitと入力します。
nginxのインストール
下記コマンドを実行してnginxをインストールします。
cd ~/
sudo apt-get install nginx
nodejsのインストール
下記コマンドを実行してnodejsをインストールします
cd ~/
sudo apt-get install nodejs
sudo ln -s `which nodejs` /usr/bin/node
nodejs -vと入力すると、バージョンが確認できます。
npmのインストール
下記コマンドを実行してnpmをインストールします
sudo apt-get install npm
gnekoniumのインストール
下記コマンドを実行してgnekoniumをインストールします。
cd ~/
mkdir nekonium
cd nekonium
git clone https://github.com/nekonium/go-nekonium
※もしgitがインストールされていない場合は、sudo apt-get install gitを実行して下さい。
cd go-nekonium
export GOROOT=/usr/local/go
export PATH=$GOPATH/bin:$GOROOT/bin:$PATH
export GOPATH=$HOME/go
make gnekonium
gnekoniumの初回起動
ブロックチェーンの同期
下記コマンドを実行してブロックチェーンの同期を行います。
build/bin/gnekonium --fast --cache=512 console
少し時間がかかります。(15分くらい)
同期終了
Fast sync complete, auto disablingと表示されれば同期が成功したことになります。
プール用アドレスの作成
上記セッションを維持したまま、別セッションで下記コマンドを実行してプール用のNekoniumアドレスを作成します。
cd nekonium/go-nekonium
build/bin/gnekonium account new
パスワードを求められますので、入力して忘れないようにしてください。
Address: {c96e68c38de383e78a48419469ead845bd4b9161}
のように表示されれば、プール用アドレスの作成は完了です。
※この場合、実際のアドレスは頭に「0x」をつけ、「0xc96e68c38de383e78a48419469ead845bd4b9161」となります
マイニングプールの設定
Open Nekonium Pool のインストール
下記コマンドを実行してOpen Nekonium Poolをインストールします。
cd ~/
git clone https://github.com/ROZ-MOFUMOFU-ME/open-nekonium-pool.git
cd open-nekonium-pool
export GOROOT=/usr/local/go
export PATH=$GOPATH/bin:$GOROOT/bin:$PATH
export GOPATH=$HOME/go
make
cp config.example.json config.json
vi config.json 必要に応じてconfig.jsonファイルを編集します。
<中略>

 "unlocker": {
                "enabled": true,
                "poolFee": 1.0,
                "poolFeeAddress": "0xで始まるFee(手数料)を受け取るアドレス",
                "donate": true,
                "depth": 120,
                "immatureDepth": 20,
                "keepTxFees": false,
                "interval": "10m",
                "daemon": "http://127.0.0.1:8293",
                "timeout": "10s"
        },

        "payouts": {
                "enabled": true,
                "requirePeers": 5,
                "interval": "120m",
                "daemon": "http://127.0.0.1:8293",
                "timeout": "10s",
                "address": "0xで始まるプールのアドレス",
                "gas": "21000",
                "gasPrice": "30000000000",
                "autoGas": true,
                "threshold": 500000000,
                "bgsave": false
        },

<中略>
vi www/config/environment.js environment.jsファイルを編集します。
<中略>

    APP: {
      // API host and port
      ApiUrl: '//nuko.nekonium.site:8080/',

      // HTTP mining endpoint
      HttpHost: 'http://nuko.nekonium.site',
      HttpPort: 8888,

      // Stratum mining endpoint
      StratumHost: 'nuko.nekonium.site',
      StratumPort: 8008,

<中略>
プールの起動
gnekoniumパスワードファイルの作成
一度全てのセッションを閉じて、新しくセッションを開き、下記コマンドでパスワードファイルを作成しておきます。
cd nekonium/go-nekonium/
vi password
<プール用アドレス作成時のパスワード>
gnekoniumの起動
仮想ターミナルなどを使用してgnekoniumを起動します。
tmux new -s gnekonium
./build/bin/gnekonium --rpc --rpcaddr 0.0.0.0 --rpcport 8293 --unlock 0 --password password
Open Nekonium Pool の起動
仮想ターミナルなどを使用してOpen Nekonium Poolを起動します。
cd ~/
cd open-nekonium-pool
tmux new -s open-nekonium-pool
./build/bin/open-nekonium-pool config.json
フロントエンドの構築
下記コマンドを実行して、フロントエンドの設定をします。
cd www
sudo npm install -g ember-cli@2.9.1
sudo npm install -g bower
npm install
bower install
./build.sh
nginxの設定
defaultファイルの設定
下記コマンドを実行して、nginxの設定をします。
cd ~/
cd /etc/nginx/sites-enabled
sudo vi default defaultファイルを編集します。
upstream api {
     server 127.0.0.1:8080;
}

server {
        listen 80 default_server;
        listen [::]:80 default_server;

        root /home/ubuntu/open-nekonium-pool/www/dist;

        index index.html index.htm index.nginx-debian.html;

        server_name _;

        location / {
                try_files $uri $uri/ index.html =404;
        }

        location /api {
            proxy_pass http://api;
        }
}
nginxの再起動
下記コマンドを実行してnginxを再起動します。
sudo nginx -s reload
http://nuko.nekonium.site/ にアクセスして、
下記のような画面になればプール構築成功です。

おわりに
今回は1インスタンスのみでの簡易的なプール構築方法を記載しましたが、
payoutやunlocker、APIなどはモジュールとして独立して起動することができ、
負荷分散やセキュリティ等の観点から、複数インスタンスでそれぞれ起動することが望ましいです。
また、プール手数料や払い出し間隔、デザインなど、好みで自由にカスタマイズしてみて下さい。
もしプールを構築された場合は、NekoniumのDiscordチャンネルまでご一報頂けますと幸いです。

