はじめに
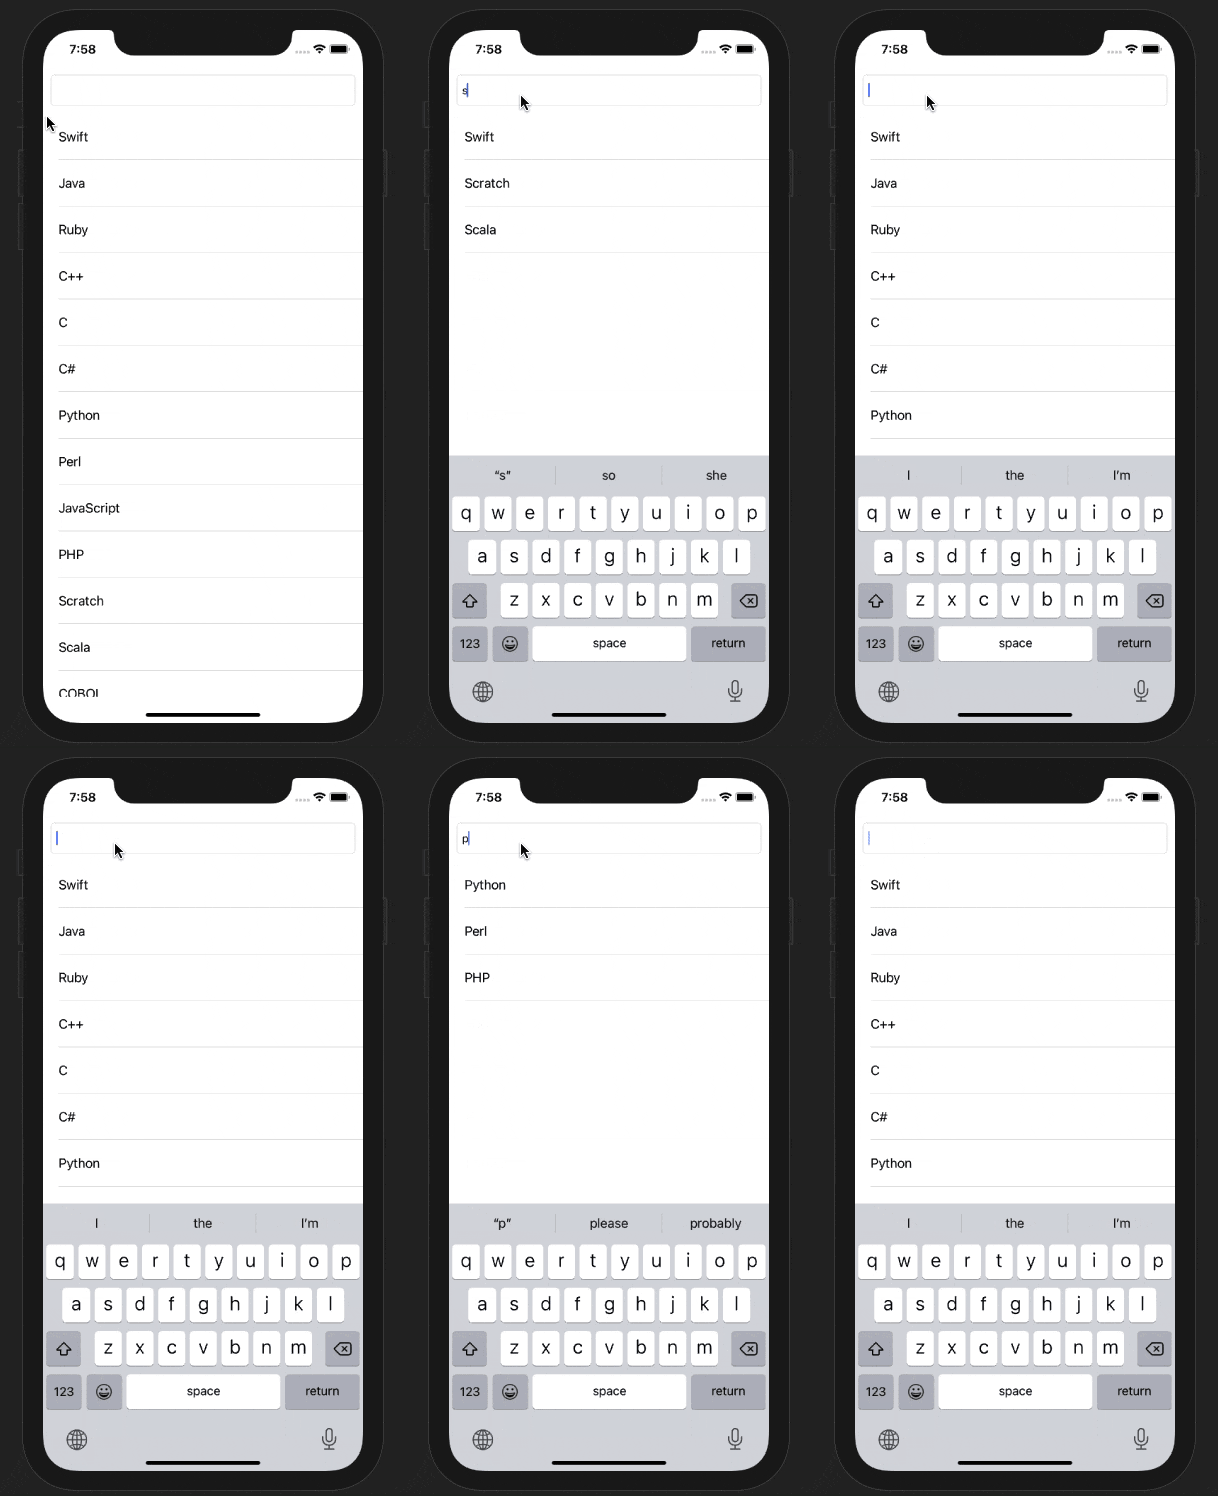
今回は検索した文字列のみTableViewで表示させてます。以下のようなものを作ってみます。

GitHub
実装
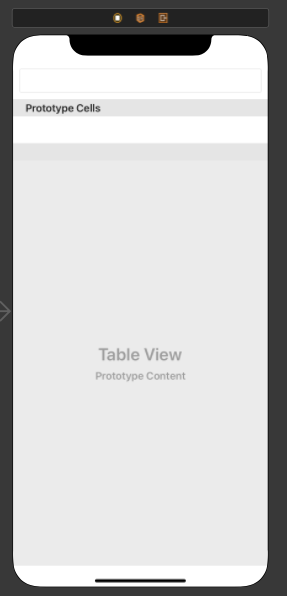
1.Main.storyboardで以下のようにUITextFieldとUITableViewを配置する。

2.文字列を入れておく配列と、検索されたものを入れておく配列を用意する。
private var datas = [String]()
private var filterdDatas = [String]()
3.先ほど用意した配列にviewDidLoad()でデータを格納する。
datas.append("Swift")
datas.append("Java")
datas.append("Ruby")
datas.append("C++")
datas.append("C")
datas.append("C#")
datas.append("Python")
datas.append("Perl")
datas.append("JavaScript")
datas.append("PHP")
datas.append("Scratch")
datas.append("Scala")
datas.append("COBOL")
datas.append("Curl")
datas.append("Dart")
datas.append("HTML")
datas.append("CSS")
4.delegateを使う
tableView.delegate = self
tableView.dataSource = self
tableView.tableFooterView = UIView() // 不要なセパレーターが表示されなくなります
textField.delegate = self
5.UITableViewDelegateを実装
extension ViewController: UITableViewDelegate {
    func tableView(_ tableView: UITableView, heightForRowAt indexPath: IndexPath) -> CGFloat {
        return 60 // 適当に高さを60にしておきます
    }
}
6.UITableViewDataSourceを実装
extension ViewController: UITableViewDataSource {
    func tableView(_ tableView: UITableView, numberOfRowsInSection section: Int) -> Int {
        if !filterdDatas.isEmpty {
            return filterdDatas.count
        }
        return datas.count
    }

    func tableView(_ tableView: UITableView, cellForRowAt indexPath: IndexPath) -> UITableViewCell {
        let cell = tableView.dequeueReusableCell(withIdentifier: "cell", for: indexPath)
        cell.textLabel?.text = filterdDatas.isEmpty ? datas[indexPath.row] : filterdDatas[indexPath.row]
        return cell
    }
}
filterdDatasが空だったら、datas.countを、何かしら入っていたらfilterdDatas.countを返してあげます。
7.UITextFieldDelegateを実装
extension ViewController: UITextFieldDelegate {
    func textField(_ textField: UITextField, shouldChangeCharactersIn range: NSRange, replacementString string: String) -> Bool {
        if let text = textField.text {
            (string.count == 0) ? filterText(String(text.dropLast())) : filterText(text+string)
        }
        return true
    }

    func filterText(_ query: String) {
        filterdDatas.removeAll()
        datas.forEach { data in
            if data.lowercased().starts(with: query.lowercased()) {
                filterdDatas.append(data)
            }
        }
        tableView.reloadData()
    }
}
textFieldのデリゲートメソッドであるshouldChangeCharactersInは文字が入力される度に処理が呼ばれるメソッドです(参考記事)
(string.count == 0) ? filterText(String(text.dropLast())) : filterText(text+string)のstringは入力した文字が一文字です。これが0つまり、textFieldの文字を消去した時にtext.dropLast()します。(参考記事)
lowercased()で大文字を全て小文字に変換しています。(参考記事)
starts(with: )でシーケンスの最初の要素が別のシーケンスの要素と同じであるかどうかをブール値で返します。つまり、大文字小文字を区別せずに、入力された値のqueryにdataが完全に含まれていればtrueになります。
そして、文字が入力されるたびにtableViewを更新してあげます。
8.フラグを立てる
このままだと、検索結果がない時には全て表示されてしまいます。
なので、フラグを立てて該当する文字があるかどうか判断します。
private var isFilterd = false
そして、tableView.reloadData()の下にisFilterd = trueを追加して、numberOfRowsInSectionをreturn isFilterd ? 0 : datas.countに変更します。
おわりに
おわりです。