はじめに
テキストビューにもテキストフィールドのようにプレースホルダーをつけたい時があるかと思います。
なので、今回はテキストビューにプレースホルダーをつけるにはどうすればいいのかを解説します。
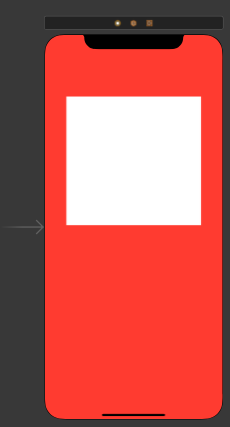
完成するもの
GitHub
実装
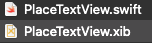
まずは、PlaceTextViewというカスタムクラスを作るためのswiftファイルとxibファイルを作成してください。
コードを書いていきます。
final class PlaceTextView: UITextView {

    var placeHolder: String = "" {
        willSet {
            self.placeHolderLabel.text = newValue
            self.placeHolderLabel.sizeToFit()
        }
    }

    private lazy var placeHolderLabel: UILabel = {
        let label = UILabel()
        label.lineBreakMode = .byWordWrapping
        label.numberOfLines = 0
        label.font = self.font
        label.textColor = .gray
        label.backgroundColor = .clear
        label.translatesAutoresizingMaskIntoConstraints = false
        self.addSubview(label)
        return label
    }()

    override func awakeFromNib() {
        super.awakeFromNib()

        NotificationCenter.default.addObserver(self,
                                               selector: #selector(textDidChanged),
                                               name: UITextView.textDidChangeNotification,
                                               object: nil)

        NSLayoutConstraint.activate([
            placeHolderLabel.topAnchor.constraint(equalTo: self.topAnchor, constant: 7),
            placeHolderLabel.bottomAnchor.constraint(equalTo: self.bottomAnchor, constant: 7),
            placeHolderLabel.leadingAnchor.constraint(equalTo: self.leadingAnchor, constant: 5),
            placeHolderLabel.trailingAnchor.constraint(equalTo: self.trailingAnchor, constant: 5)
        ])

    }

    @objc private func textDidChanged() {
        let shouldHidden = self.placeHolder.isEmpty || !self.text.isEmpty
        self.placeHolderLabel.alpha = shouldHidden ? 0 : 1
    }

}
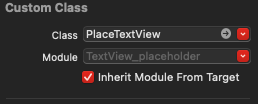
Main.storyboardでUITextViewを配置します。
配置したUITextViewのカスタムクラスに先ほど書いたカスタムクラスを継承させます。n
ViewControllerではどのようなプレースホルダーを表示させるのかを設定します。
final class ViewController: UIViewController {

    @IBOutlet private weak var textView: PlaceTextView!

    override func viewDidLoad() {
        super.viewDidLoad()

        textView.placeHolder = "入力してください。"

    }

}
解説
表示させるプレースホルダーのテキストをこちらで指定し、入ってきた値をラベルのテキストにします。
    var placeHolder: String = "" {
        willSet {
            self.placeHolderLabel.text = newValue
            self.placeHolderLabel.sizeToFit()
        }
    }
ラベルの設定をします。
    private lazy var placeHolderLabel: UILabel = {
        let label = UILabel()
        label.lineBreakMode = .byWordWrapping
        label.numberOfLines = 0
        label.font = self.font
        label.textColor = .gray
        label.backgroundColor = .clear
        label.translatesAutoresizingMaskIntoConstraints = false
        self.addSubview(label)
        return label
    }()
オブザーバーを追加します。UITextView.textDidChangeNotificationなので、このオブザーバーはテキストが入力または消去された時に通知されます。
    NotificationCenter.default.addObserver(self,
                                           selector: #selector(textDidChanged),
                                           name: UITextView.textDidChangeNotification,
                                           object: nil)
先ほど追加したオブザーバーで通知されるたびに呼ばれるメソッドです。
初回で入力されたまたは全てテキストが消去されたときにalphaを変更することで表示非表示を切り替えます。
    @objc private func textDidChanged() {
        let shouldHidden = self.placeHolder.isEmpty || !self.text.isEmpty
        self.placeHolderLabel.alpha = shouldHidden ? 0 : 1
    }
オートレイアウトの指定です。これを指定しないと左上つめつめになってしまうので余白として制約を貼りました。
    NSLayoutConstraint.activate([
        placeHolderLabel.topAnchor.constraint(equalTo: self.topAnchor, constant: 7),
        placeHolderLabel.bottomAnchor.constraint(equalTo: self.bottomAnchor, constant: 7),
        placeHolderLabel.leadingAnchor.constraint(equalTo: self.leadingAnchor, constant: 5),
        placeHolderLabel.trailingAnchor.constraint(equalTo: self.trailingAnchor, constant: 5)
    ])
あとはViewControllerでIBOutlet接続をしてプレースホルダーを設定してあげましょう。
final class ViewController: UIViewController {

    @IBOutlet private weak var textView: PlaceTextView!

    override func viewDidLoad() {
        super.viewDidLoad()

        textView.placeHolder = "入力してください。"

    }

}
おわりに
公式でサポートしてほしいですね、、、