Seleniumのver上がっていたので初心者の方向けに詳しく書いていきます
環境
windows10 64bit
google chrome(80.0.3987.106)
eclipse (Version: 2019-12 (4.14.0))
Seleniumのダウンロード
まずこちらのサイトからzipファイルをダウンロードします。
https://selenium.dev/downloads/
下の方へ行くとここにたどり着きます
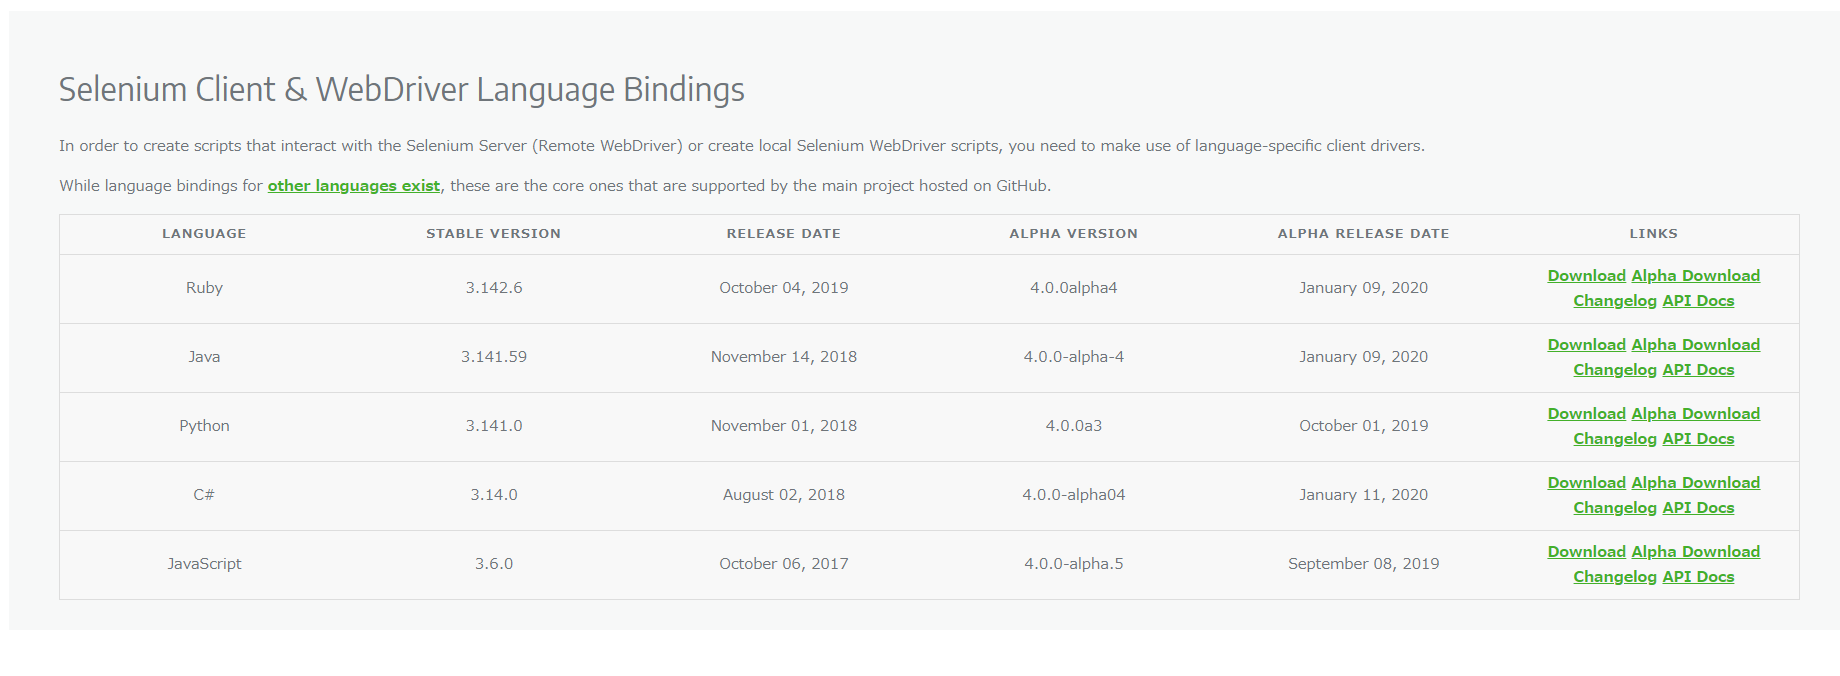
対象の言語のものをダウンロードします。
ダウンロードボタンを押すとzipファイルがダウンロードされます。
どこかに保存してzipを解凍する。
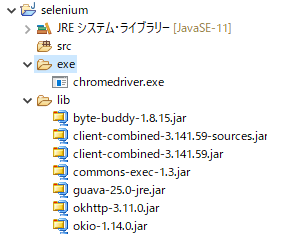
解凍すると中身がこんな感じになってます。

解凍したら昔のverとかなり中身が違ってました
chromedriverのダウンロード
次にテストするブラウザのWebDriverをダウンロード
私はGoogleChorme使うのでここにアクセス。
https://sites.google.com/a/chromium.org/chromedriver/downloads
サイトの中を見るとchromeのversionが書いてあります。
今のchromeと同じversionを選択してクリック
クリックするとここに飛びます。
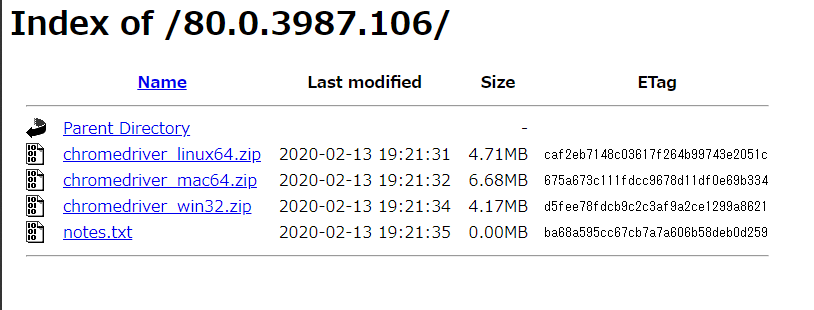
windowsの64bit版が無いので32bitのものをダウンロードします。
これもzipになってたので解凍します。
解凍すると1つだけファイルが入っているのを確認してください。

ここで必要なものを揃いました。
eclipseで動かす
ではeclipseでプロジェクト作って動かしてみます。
ワークススペースと選んで新規プロジェクト作成。
プロジェクトの下に"lib", "exe"のフォルダを作成
"lib"には
・解凍した"lib"フォルダの中身全部
・"client-combined-3.141.59-sources.jar"
・"client-combined-3.141.59.jar"
"exe"には
・chomredriver.exe
をimportで配置。
ビルドパスを通す
では追加したjarをビルドパスに追加していきます。
ビルド・パスの構成を開きましょう
(プロジェクトを右クリック -> ビルド・パス -> ビルド・パスの構成)
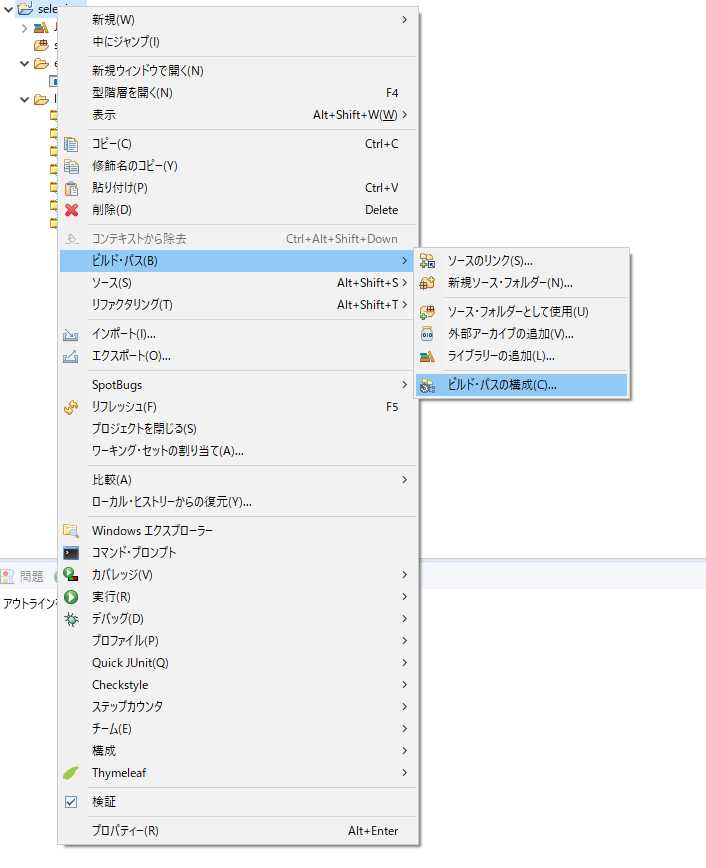
開いたあとは"ライブラリ"タブに移動します。
"クラスパス"をクリックして"jarの追加"を選択
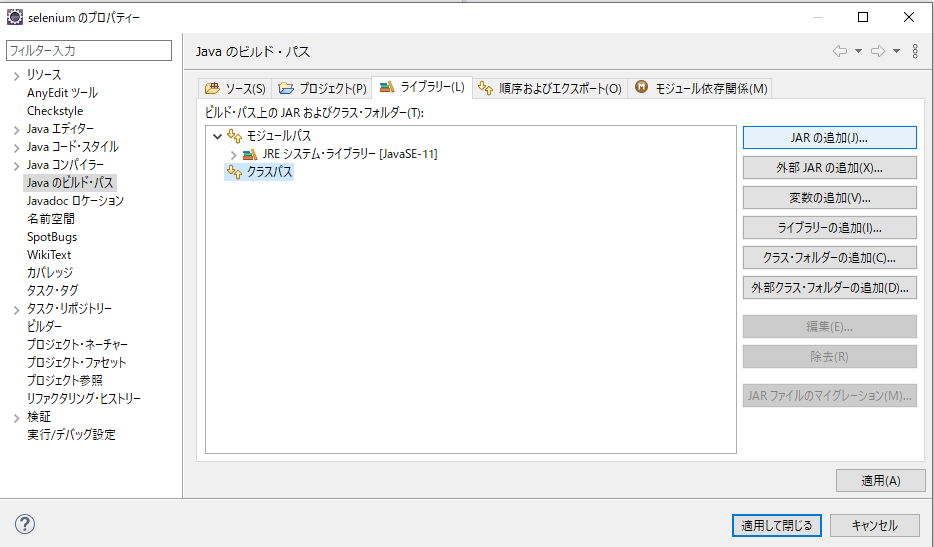
追加するものは先ほど"lib"フォルダに追加したものです。(shift + 左クリックで一気に選択できるぜ)
追加するとこんな感じ
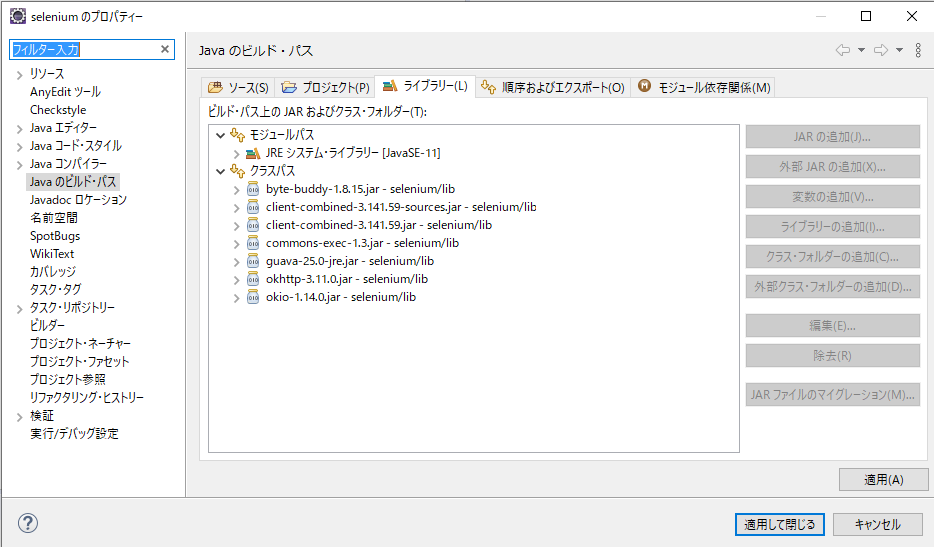
適用して閉じる。
これでjarファイルやらの設定は完了!
実行するファイルを作る
次に実行するファイル作ります。
"src"フォルダに新しいクラスを作成します。
クラス名は何でもいいです。
とりあえずsampleはこんな感じ
import org.openqa.selenium.By;
import org.openqa.selenium.WebDriver;
import org.openqa.selenium.WebElement;
import org.openqa.selenium.chrome.ChromeDriver;

public class Sample {

	public static void main(String[] args) throws InterruptedException {
		// TODO 自動生成されたメソッド・スタブ
	      // Optional, if not specified, WebDriver will search your path for chromedriver.
	      System.setProperty("webdriver.chrome.driver", "./exe/chromedriver.exe");

	      WebDriver driver = new ChromeDriver();
	      driver.get("http://www.google.com/xhtml");
	      Thread.sleep(5000);  // Let the user actually see something!
	      WebElement searchBox = driver.findElement(By.name("q"));
	      searchBox.sendKeys("ChromeDriver");
	      searchBox.submit();
	      Thread.sleep(5000);  // Let the user actually see something!
	      driver.quit();
	}

}
javaアプリケーションで実行すると動作が確認できます
以上です。
ほとんど参考のものを引っ張っただけですけどね
Seleniumのzipファイルの中身が違いすぎてビックリした私のような初心者向けだと思って頂ければ...
参考
