Android StudioのButtonによる「表示↔非表示」切り替えについて学習していく。
##ボタンの実装
###ボタン配置
以前書いたHello World表示サンプルをもとに進めていく。
まずはボタンを配置する。
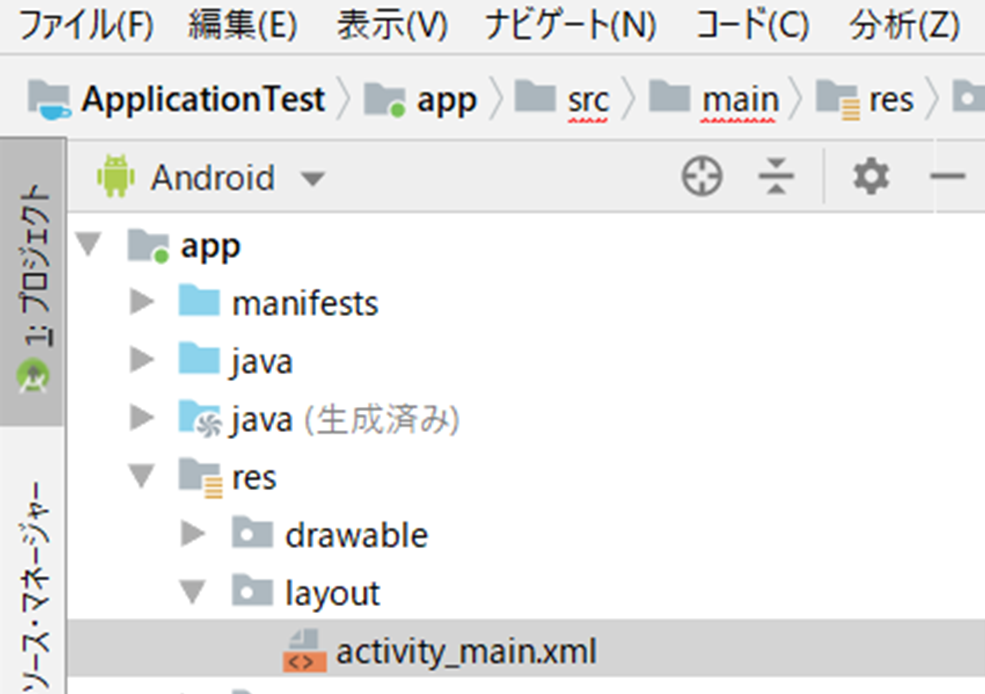
プロジェクトの「app」→「res」→「layout」→「activity_main.xml」でxmlファイルを開く。
左下の「デザイン」or「テキスト」で「デザイン」を選択したまま、全画面表示で左真ん中あたりにある
「Common」→「Button」の「Button」を画面上でドラッグ。
今回は表示用、非表示用の二種類作るので、2回ドラッグ。
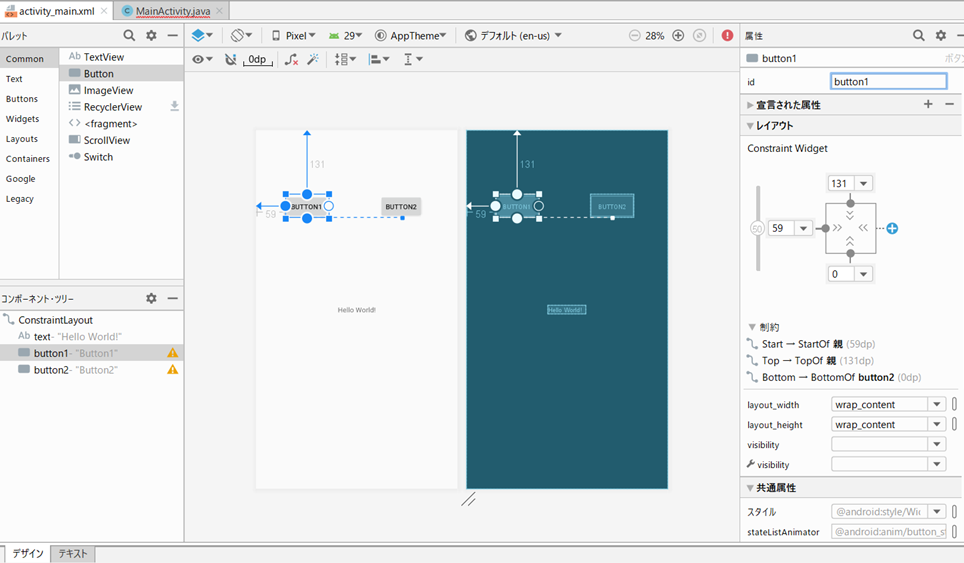
上記の画面で、それぞれButtonを左クリックで選択し、右画面の一番上idでプログラムで使うidを決めておく。
(左下の「デザイン」を「テキスト」にしてソースコードいじって変更も可能)
とりあえず
- Button1はbutton1(表示用)
- Button2はbutton2(非表示用)
にする。
Buttonを右クリックして「Constrain」→「parent top(なんでもよい)」を選択。
(これしないとエラー出ます。)
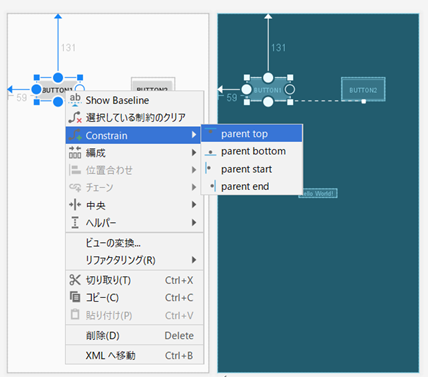
これでボタン設置完了。
###プログラム
まずクリックイベントを取得するボタンを決める。
先ほどのidをここで使う。
またテキストについても表示変更のため加えておく。
        //クリックイベントを取得するボタン
        Button button1 = (Button) findViewById(R.id.button1);
        Button button2 = (Button) findViewById(R.id.button2);
        TextView text = (TextView) findViewById(R.id.text);
後は、buttonごとにクリックイベントを取得するためのプログラムを書いて終了。
ネットでよく出るテンプレートは古く、ラムダ式で書くのが現代のやり方、らしい…
        //ボタンにOnClickListenerインターフェースを実装
        button1.setOnClickListener((View v)-> {
            text.setVisibility(View.VISIBLE);
        });

        button2.setOnClickListener((View v2)-> {
            text.setVisibility(View.INVISIBLE);
        });
試してみる。
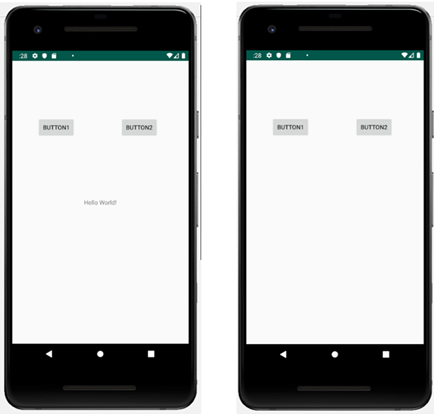
成功。
##まとめ
以下がサンプルプログラム。
MainActivity.java
package com.example.applicationtest;

import androidx.appcompat.app.AppCompatActivity;

import android.app.Activity;
import android.os.Bundle;
import android.view.View;
import android.widget.Button;
import android.widget.TextView;


public class MainActivity extends Activity {

    @Override
    protected void onCreate(Bundle savedInstanceState) {
        super.onCreate(savedInstanceState);
        setContentView(R.layout.activity_main);

        //クリックイベントを取得するボタン
        Button button1 = (Button) findViewById(R.id.button1);
        Button button2 = (Button) findViewById(R.id.button2);
        TextView text = (TextView) findViewById(R.id.text);

        //ボタンにOnClickListenerインターフェースを実装
        button1.setOnClickListener((View v)-> {
            text.setVisibility(View.VISIBLE);
        });

        button2.setOnClickListener((View v2)-> {
            text.setVisibility(View.INVISIBLE);
        });
    }
}
途中エラー出まくりだったが何とか解決。
次は画像表示切替に挑戦しようと思う。
以上。