このプロジェクトには2つのセクションがあります。
- バックエンド (Flask, Stripe)
- フロントエンド (React.JS, Stripe)
バックエンド設定
実装
Flaskアプリの作成
$ mkdir backend
$ cd backend
$ python3 -m venv .venv
環境を活性化する
$ . .venv/bin/activate
Flaskのインストール
$ pip install Flask
$ pip install flask_cors
Stripeのインストール
$ pip install stripe
app.pyファイルを作成する
app.py
from flask import Flask, jsonify, request
from flask_cors import CORS
import stripe

app = Flask(__name__)
CORS(app)
stripe.api_key = 'sk_test_51MANwNC9Zc5SrDqSV7naWEKpw8MZ1iGKcLxaAZivufUBleJ6sxJSKfdOck3jDmhle0UpOQvWBXFtTIXxNogaaqLW00J0dVpsnu'

@app.route('/create-payment-intent', methods=['POST'])
def create_payment_intent():
    try:
        intent = stripe.PaymentIntent.create(
            amount=1000,
            currency='usd',
        )
        return jsonify({'clientSecret': intent.client_secret})
    except stripe.error.StripeError as e:
        return jsonify(error=str(e)), 403


if __name__ == '__main__':
   app.run()
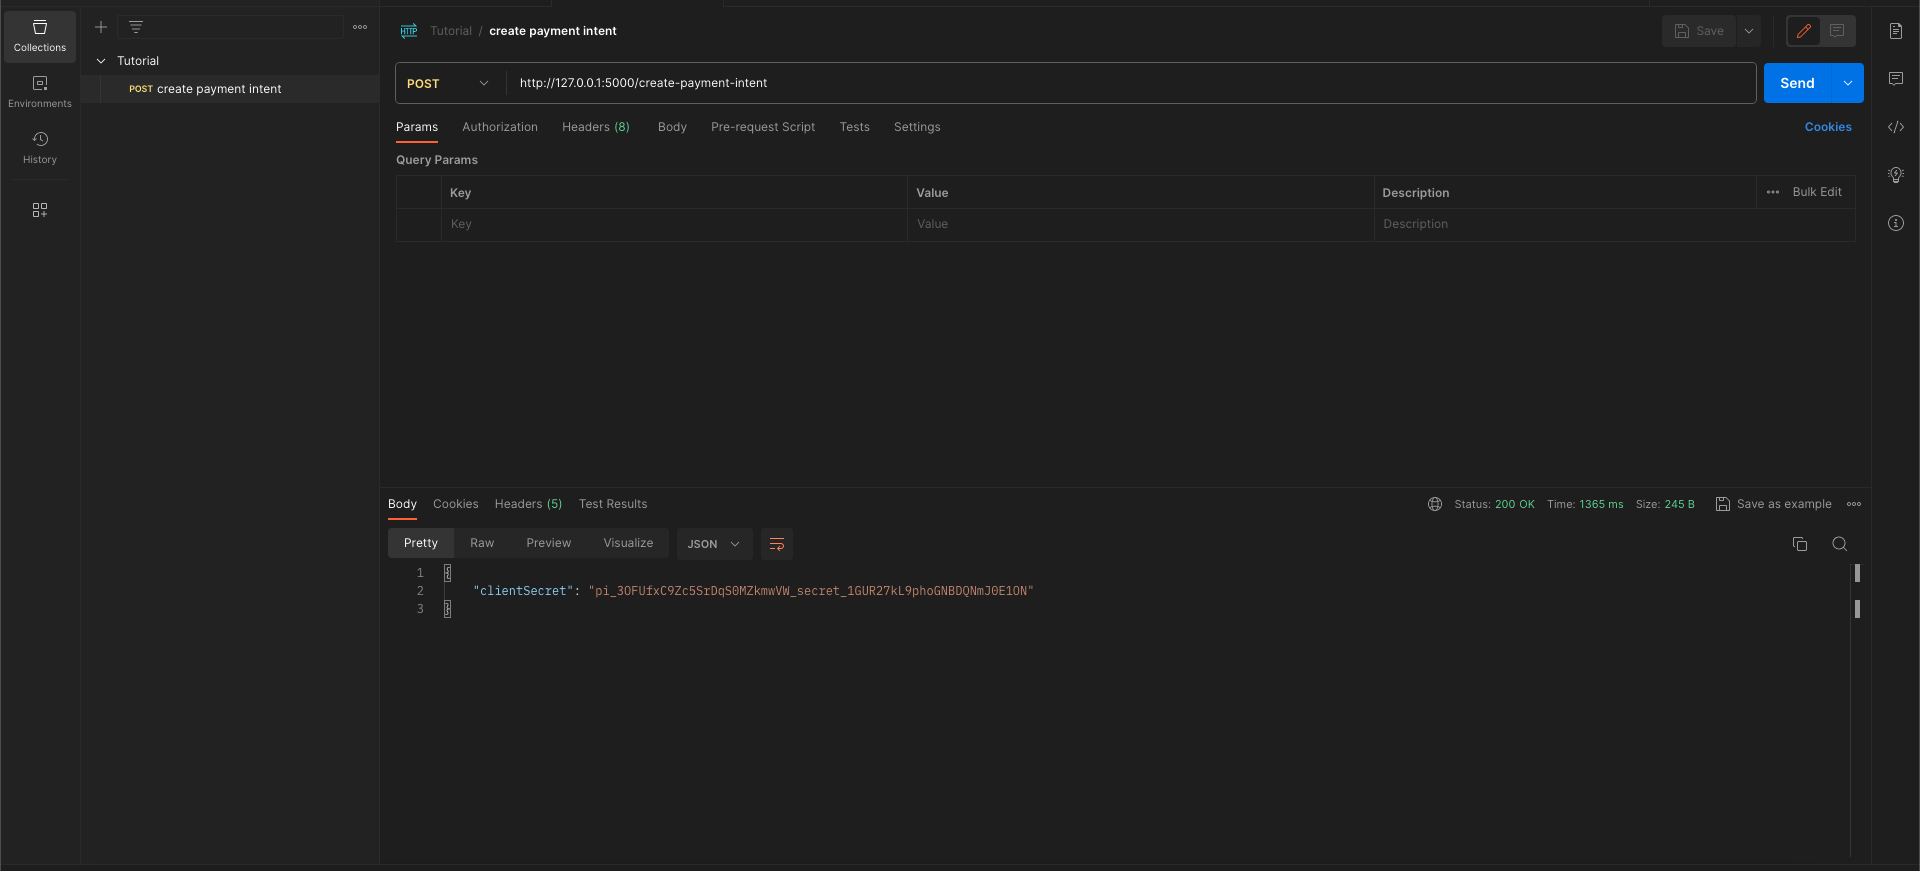
create-payment-intentというファンクションを作ります。テストの製品を作って、そのclientSecretをフロントエンドに送ります。
アプリケーションを実行する
$ flask --app app run
このAPIをチェックすると
フロントエンド設定
実装
Reactアプリの作成をする
以下コマンドを実行
$ npx create-react-app frontend
$ cd frontend
$ npm start
Stripeをインストール
$ npm install --save @stripe/react-stripe-js @stripe/stripe-js
Tailwindをインストール
$ npm install -D tailwindcss
$ npx tailwindcss init
テンプレートパスの設定
tailwind.config.jsファイルにすべてのテンプレートファイルのパスを追加します。
tailwind.config.js
module.exports = {
  content: [
    "./src/**/*.{js,jsx,ts,tsx}",
  ],
  theme: {
    extend: {},
  },
  plugins: [],
}
CSSにTailwindディレクティブを追加する
Tailwindの各レイヤーの@tailwindディレクティブを./src/index.cssファイルに追加します。
index.css
@tailwind base;
@tailwind components;
@tailwind utilities;
app.jsファイルを変更する
app.js
import React, { useEffect, useState } from "react";
import { Elements } from "@stripe/react-stripe-js";
import { loadStripe } from "@stripe/stripe-js";
import axios from "axios";
import CheckoutForm from "./CheckoutForm";

const stripePromise = loadStripe(
  "pk_test_51MANwNC9Zc5SrDqSNxR2FIBeESFEhhz8ZpHCn8RgWpPEK4IPjDLVoRoAWjsDU1oKfit83VqlT9NLtCymaI26mqNh004oWXDOPG"
);

export default function App() {
  const urlParams = new URLSearchParams(window.location.search);
  const payment_intent = urlParams.get("payment_intent");
  const [clientSecret, setClientSecret] = useState("");

  useEffect(() => {
    const fetchClientSecret = async () => {
      try {
        const response = await axios.post(
          "http://127.0.0.1:5000/create-payment-intent"
        );
        setClientSecret(response.data.clientSecret);
      } catch (error) {
        console.error("Error fetching client secret:", error);
      }
    };

    fetchClientSecret();
  }, []);
  if (payment_intent)
    return (
      <div className="flex justify-center h-screen items-center">
        <div className="max-w-sm">Successfully paid</div>
      </div>
    );
  return (
    <div className="flex justify-center h-screen">
      <div className="max-w-sm mt-24">
        {clientSecret && (
          <Elements
            stripe={stripePromise}
            options={{
              clientSecret: clientSecret,
            }}
          >
            <CheckoutForm clientSecret={clientSecret} />
          </Elements>
        )}
      </div>
    </div>
  );
}
StripePromiseの設定をして、前に作ったAPIから製品のclientSecretを取ります。そして、そのclientSecretをstripeのElementsのところに使います。Elementsの設定をすると、stripeはPaymentElementを表示することができます。
CheckoutForm.jsファイルを作成する
CheckoutForm.js
import React from "react";
import {
  PaymentElement,
  useElements,
  useStripe,
} from "@stripe/react-stripe-js";

const CheckoutForm = (props) => {
  let { clientSecret } = props;
  const stripe = useStripe();
  const elements = useElements();

  const handleSubmit = async (e) => {
    e.preventDefault();

    if (!stripe || !elements || !clientSecret) {
      // Stripe.js has not yet loaded.
      // Make sure to disable form submission until Stripe.js has loaded.
      return;
    }
    const BASE_URL = window.location.protocol + "//" + window.location.host;

    const { error } = await stripe.confirmPayment({
      elements: elements,
      confirmParams: {
        // Make sure to change this to your payment completion page
        return_url: BASE_URL + "/complete",
        payment_method_data: {
          billing_details: {
            address: {
              country: "JP",
            },
          },
        },
      },
    });

    if (error.type === "card_error" || error.type === "validation_error") {
      console.log(
        "🚀 ~ file: CheckoutForm.js:42 ~ handleSubmit ~ error?.message:",
        error?.message
      );
    }
  };

  return (
    <form>
      <PaymentElement />
      <button
        onClick={handleSubmit}
        type="button"
        class="bg-blue-500 hover:bg-blue-700 text-white font-bold py-2 px-4 rounded mt-4 float-right"
      >
        Submit
      </button>
    </form>
  );
};

export default CheckoutForm;
ユーザーのクレジットカード情報を取得するためにstripeのPaymentコンポーネントを使用します。ユーザーが送信ボタンをクリックすると、stripe.confirmPaymentを使用して、カードや支払トークンのような支払方法情報などの必要な詳細を提供し、このインテントを確認します。確認されると、支払いインテントがサーバー側で処理および確定できるステータスに遷移します。
結果