概要
初投稿です。
SpringアプリケーションをCircleCIを使ってCI/CDしてみたいと思います。デプロイ先にはHerokuを使用します。
環境
- Java 11
- Spring Boot 2.2.8
前提条件
- GitHubのアカウントがあり、CLIからpushなどができる
- Herokuのアカウントがあり、CLIからcreateなどができる
Spring プロジェクトの作成
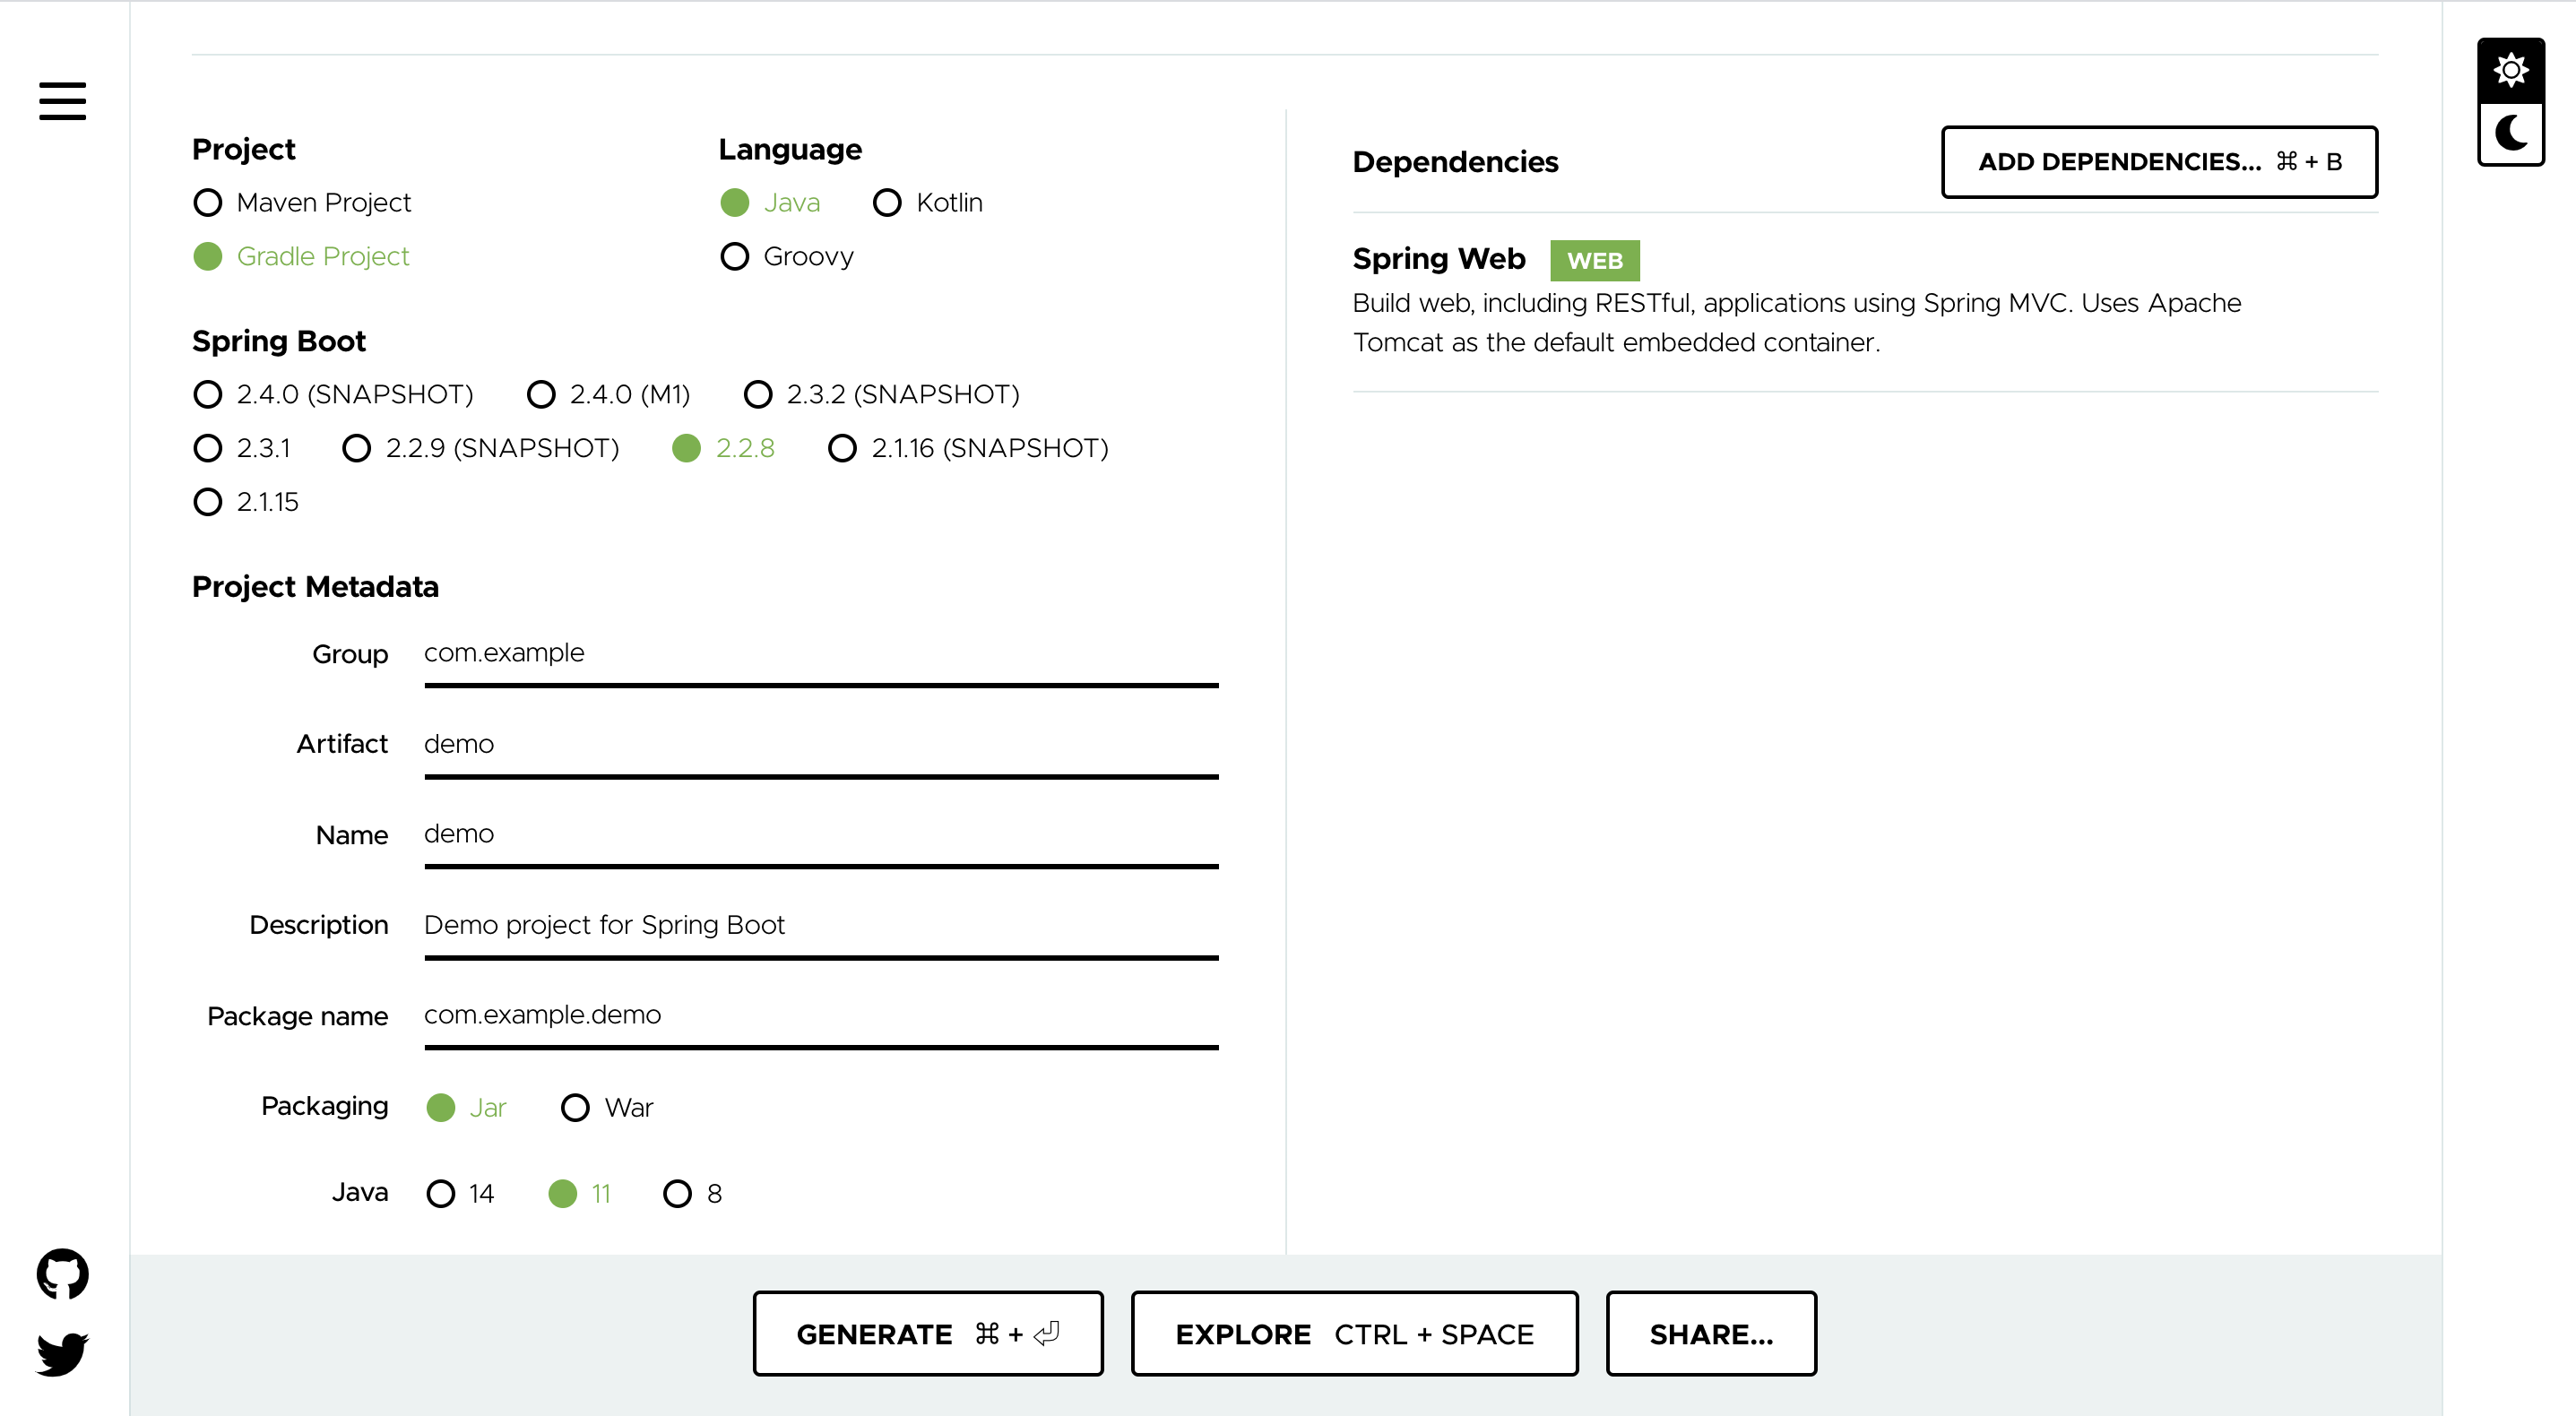
まずSpring Initializrを使用してSpringアプリケーションを作成します。Springアプリケーションの雛形を作成してくれる便利なサイトです。
以下の画像のように設定をしてGENERATEをクリックします。DependenciesにSpring Webを追加することを忘れないでください。

demo.zipというようなファイルがダウンロードされるので好きな場所に展開してください。
テスト作成
次にシンプルなControllerの実装と、テストを作成します。
まず、demo/src/main/java/com/example/demo/controller/HelloController.javaを作成します。
package com.example.demo.controller;

import org.springframework.web.bind.annotation.GetMapping;
import org.springframework.web.bind.annotation.RestController;

@RestController
public class HelloController {

    @GetMapping(path = "/hello")
    public String hello() {
        return "hello";
    }

}
とてもシンプルな、/helloにアクセスすると"hello"と返してくれるだけのControllerです。
次に、demo/src/test/java/com/example/demo/controller/HelloControllerTest.javaを作成します。
package com.example.demo.controller;

import org.junit.jupiter.api.BeforeEach;
import org.junit.jupiter.api.Test;
import org.springframework.beans.factory.annotation.Autowired;
import org.springframework.boot.test.autoconfigure.web.servlet.AutoConfigureMockMvc;
import org.springframework.boot.test.context.SpringBootTest;
import org.springframework.test.web.servlet.MockMvc;
import org.springframework.test.web.servlet.setup.MockMvcBuilders;
import org.springframework.web.context.WebApplicationContext;

import static org.junit.jupiter.api.Assertions.assertEquals;
import static org.springframework.test.web.servlet.request.MockMvcRequestBuilders.get;
import static org.springframework.test.web.servlet.result.MockMvcResultHandlers.print;
import static org.springframework.test.web.servlet.result.MockMvcResultMatchers.status;

@SpringBootTest
@AutoConfigureMockMvc
class HelloControllerTest {
    @Autowired
    private MockMvc mockMvc;

    @Autowired
    WebApplicationContext webApplicationContext;

    @BeforeEach
    void setUp() {
        this.mockMvc = MockMvcBuilders.webAppContextSetup(webApplicationContext).build();
    }

    @Test
    void helloページにアクセスしたらhelloが返ること() throws Exception {
        final var mvcResult = this.mockMvc.perform(get("/hello"))
                .andDo(print()).andExpect(status().isOk()).andReturn();
        String content = mvcResult.getResponse().getContentAsString();
        assertEquals(content, "hello");
    }
}
先ほどのシンプルなControllerをMockMvcというライブラリを使用してテストしています。環境が整っている方はここでテストを実行するとGREENになるはずです。
CIできるようにする
続いて、先ほど作成したテストをGitHubにPushするたびにCircleCIで自動で走るようにしていきます。.circleci/config.ymlを作成します。
version: 2.1

workflows:
  java-ci:
    jobs:
      - test

jobs:
  test:
    docker:
      - image: circleci/openjdk:11-jdk

    working_directory: ~/repo
    environment:
      JVM_OPTS: -Xmx3200m
      TERM: dumb

    steps:
      - checkout
      - restore_cache:
          keys:
            - v1-dependencies-{{ checksum "build.gradle" }}
            - v1-dependencies-
      - run: gradle dependencies
      - save_cache:
          paths:
            - ~/.gradle
          key: v1-dependencies-{{ checksum "build.gradle" }}
      - run: ./gradlew test
circleci/openjdk:11-jdkのimageを使用して./gradlew testを走らせるようにしています。
GitHub上にRepositoryを作成して、ここまでの変更をPushします。
続いて、CircleCIのLoginページからLog In With GitHubを選択してLoginします。GitHubのアカウント情報を入力した後にSelect an organizationの画面が表示されたら、自分のGitHubアカウントを選択します。
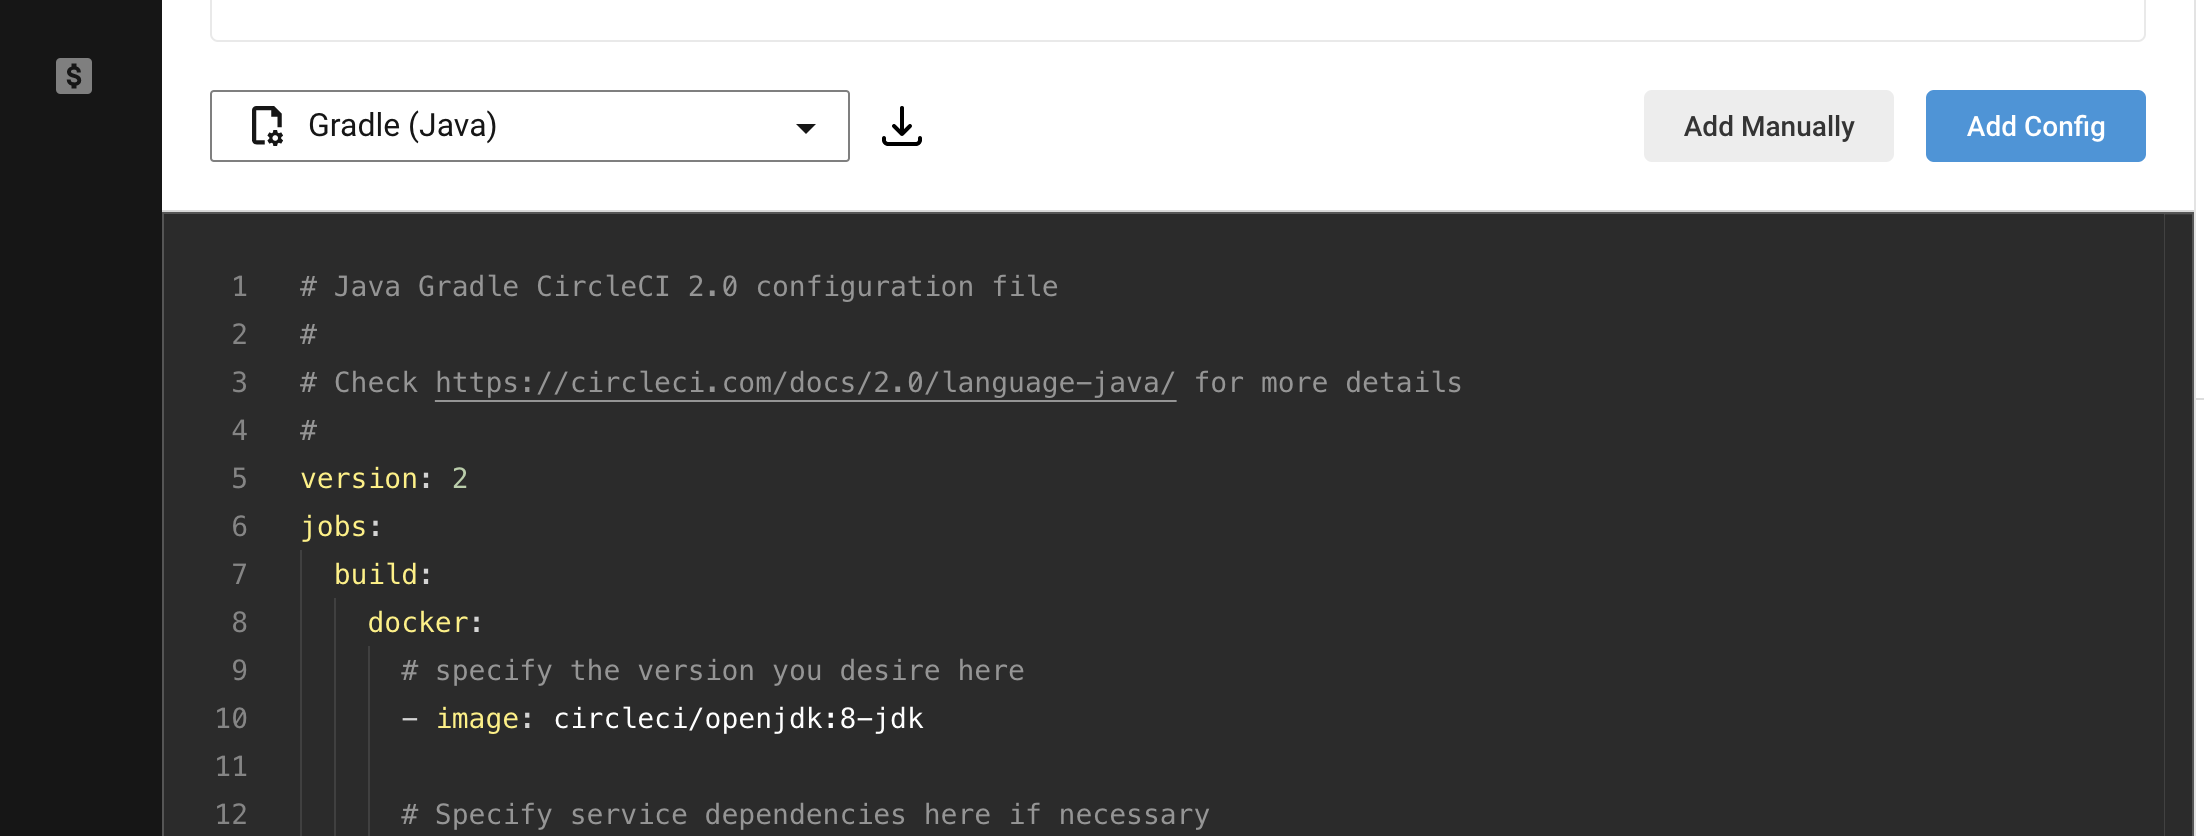
Projectsのページが表示されたら、今回作成したRepositoryのSet Up Projectを選択します。以下のような画面が表示されたら、今回はすでに.circleci/config.ymlを作成してあるので、Add Manuallyを選択します。

これでPipelinesのページに遷移し、テストが実行されればCIは完了です。
CircleCIのビルドの始め方の詳しい情報は公式ページも参考にしてみてください。
CDできるようにする
最後に、アプリケーションを継続的にデプロイし続けられるようにしていきます。.circleci/config.ymlを以下のようにします。circleci/herokuというOrbsを使用してHerokuにデプロイできるようにします。
version: 2.1

orbs:
  heroku: circleci/heroku@1.0.1

workflows:
  java-ci-cd:
    jobs:
      - test
      - start_deploy:
          type: approval
          requires:
            - test
      - heroku/deploy-via-git:
          requires:
            - start_deploy

jobs:
  test:
    docker:
      - image: circleci/openjdk:11-jdk

    working_directory: ~/repo
    environment:
      JVM_OPTS: -Xmx3200m
      TERM: dumb

    steps:
      - checkout
      - restore_cache:
          keys:
            - v1-dependencies-{{ checksum "build.gradle" }}
            - v1-dependencies-
      - run: gradle dependencies
      - save_cache:
          paths:
            - ~/.gradle
          key: v1-dependencies-{{ checksum "build.gradle" }}
      - run: ./gradlew test
次にHeroku側の作成を行います。今回作成しているSpringアプリケーションのルートディレクトリでHerokuのAppsを作成します。
$ heroku create
createの後に任意の文字列を渡してお好きなドメインにしても構いません。
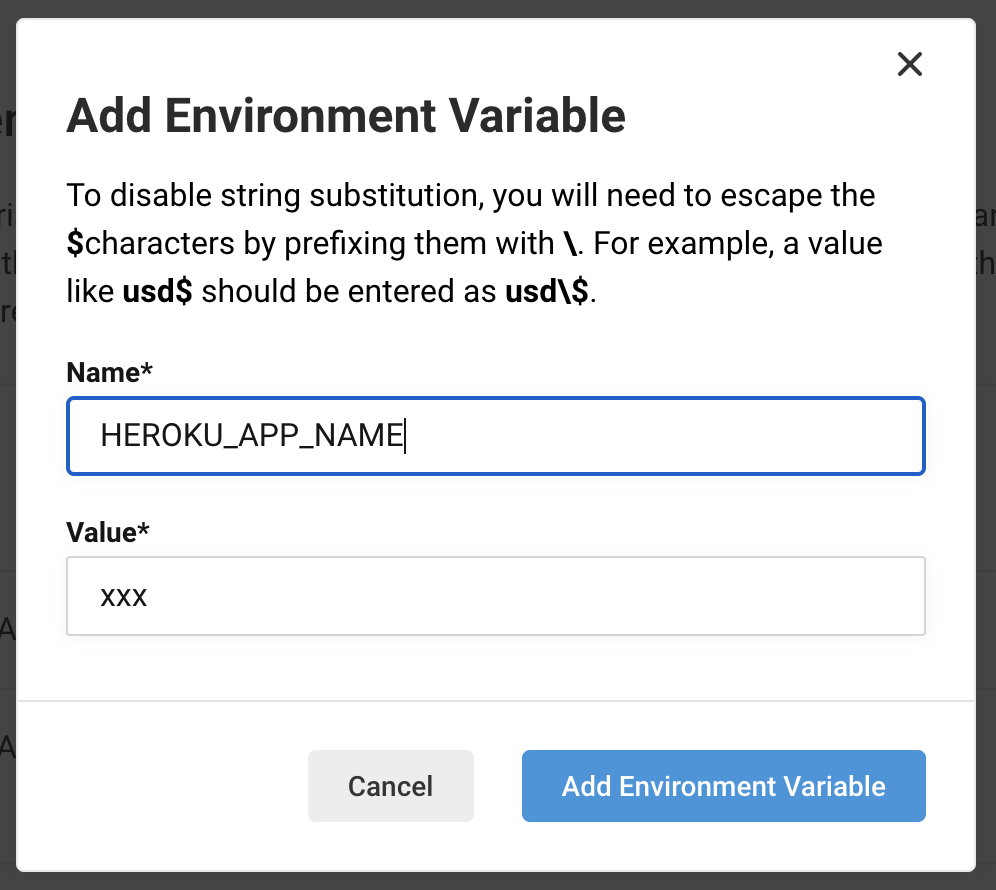
これによって作成されたhttps://xxx.herokuapp.com/のxxxの部分をメモしておきます。
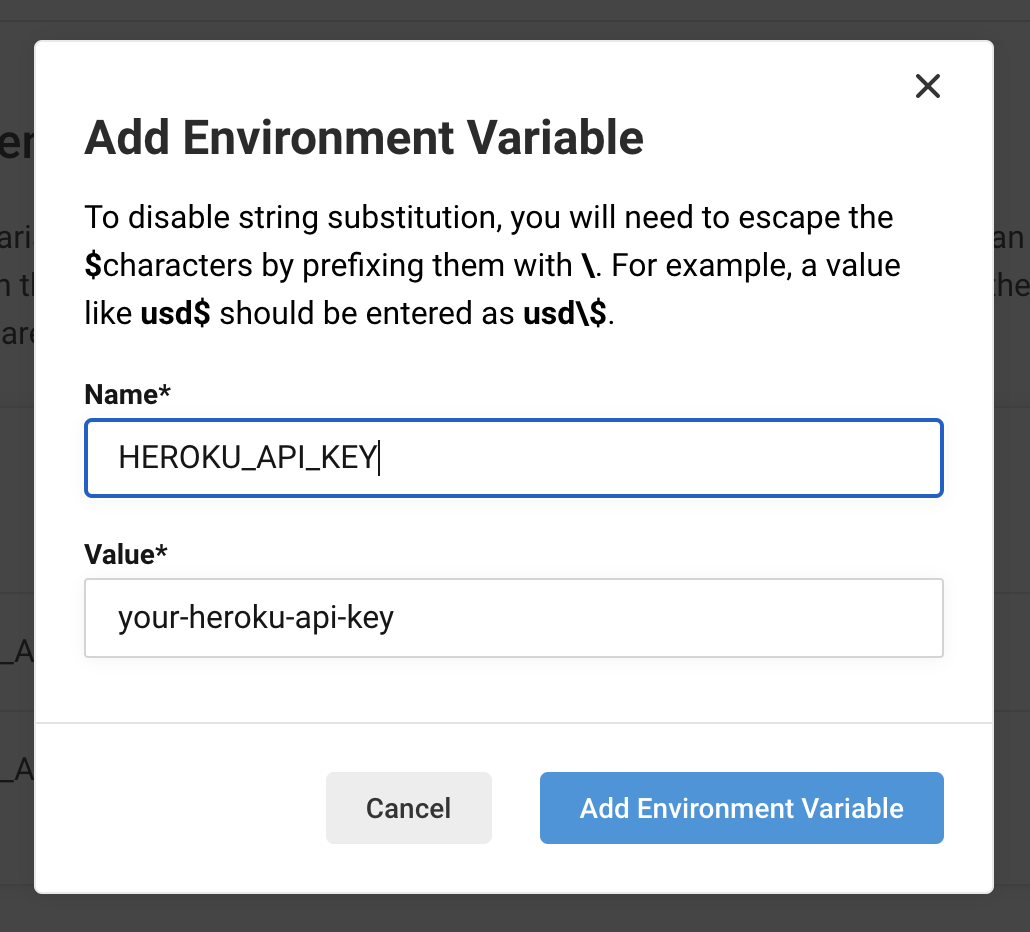
また、HerokuのAccountページの真ん中辺りにあるAPI Keyの値もメモしておきます。
この2つの値を、CircleCIのEnvironment Variablesに設定します。
Pipelines のページから、Project Settings→Environment Variablesです。以下の画像のように、ドメインの1部分をHEROKU_APP_NAMEとして、API Keyの値をHEROKU_API_KEYとして追加します。

最後に、Heroku用の設定ファイルを追加します。
ルートディレクトリにProcfileを追加します。
web: java -jar build/libs/demo-0.0.1.jar --server.port=$PORT
さらに、ルートディレクトリにsystem.propertiesを追加します。
java.runtime.version=11
これでここまでの差分をGitHubにPushします。
するとPipelinesのページでtest成功後にJobが止まるので、On_holdを選択してApprove Jobをクリックするとデプロイが走ります。

最終的にheroku/deploy-via-gitまでSuccessになればCDは完了です。
こちらに今回作成したコードがありますので良ければ参考にしてみてください。
