①はじめに
なにかアウトプットがあるとAIをやった気になって楽しいですよね。今回はちまたで話題のDeepFakeをやってみたいと思います。
②DeepFakeとは
DeepFakeとは、深層学習と偽物を組み合わせた造語で、人工知能にもとづく人物画像合成技術のことです。サンプルを見ると楽しさが分かると思いますが、今回は「first-order-model」を利用して、静止画のワンコを喋らせてみたいと思います。
③TRY
では、早速やってみましょう!
環境は、プログラムを動作させるのはGPUが使えるのでGoogle Colab、データの格納はGoogle Driveでやります。
■事前準備
Google Driveで実施してください。
事前準備として、各種データ(チェックポイント、動画、静止画)をGoogle Driveへ格納します。
➊データ格納フォルダ作成
Google Driveのマイドライブ直下に「first-order-motion-model」のフォルダを作ってください。
➋チェックポイントのDL
共有されている「トレーニングされたチェックポイント」を自分のGoogle Driveに格納してください。チェックポイントのリンクを開いて、先程作った「first-order-motion-model」へドラッグ・アンド・ドロップすれば良いです。この方法だと実際はショートカットが作成されますが、これでも大丈夫です。
ダウンロードはこちら ▶ Google Drive or Yandex Disk
ショートカットで実施している場合、チェックポイント読み込みでエラーとなる場合がありますが、これは共有フォルダからのダウンロード制限がかかってしまっていることが原因です。その場合は、1日くらい待ってから再度実施してください。こういうのが嫌な場合はローカルPCへ一旦ダウンロードし、Google Driveへ実態ファイルをアップロードしてください。実態ファイルは700MBくらいのサイズです。
➌動画データ、静止画データの格納
撮影やトリミングは、携帯電話などで簡単にできます。
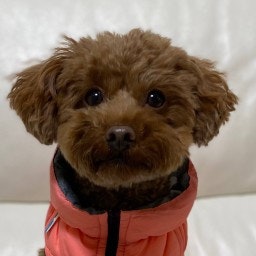
- 喋らせたいワンコの静止画を撮影します。
- 人が喋っている動画を撮影します。(目をパチクリさせたり首を縦横に振ると、より面白くなります)
正方形にトリミングした動画と静止画を「first-order-motion-model」フォルダに置いてください。ファイル名は以下の様にしてください。
- 動画 :movie001.mp4
- 静止画:pic001.png
■DeepFake処理
Google Colabで実施してください。
Google Driveに格納したデータを利用して、DeepFake処理を行います。
➊git clone
まずは、「first-order-model」をgit cloneします。
!git clone https://github.com/AliaksandrSiarohin/first-order-model
➋カレントディレクトリ移動
「first-order-model」配下へ移動します。
%cd first-order-model
➌リサイズ
静止画と動画を256x256へリサイズするために以下を実行します。
import imageio
import numpy as np
import matplotlib.pyplot as plt
import matplotlib.animation as animation
from skimage.transform import resize
from IPython.display import HTML
import warnings
warnings.filterwarnings("ignore")

source_image = imageio.imread('/content/drive/My Drive/first-order-motion-model/pic001.png')
reader = imageio.get_reader('/content/drive/My Drive/first-order-motion-model/movie001.mp4')


# Resize image and video to 256x256

source_image = resize(source_image, (256, 256))[..., :3]

fps = reader.get_meta_data()['fps']
driving_video = []
try:
    for im in reader:
        driving_video.append(im)
except RuntimeError:
    pass
reader.close()

driving_video = [resize(frame, (256, 256))[..., :3] for frame in driving_video]

def display(source, driving, generated=None):
    fig = plt.figure(figsize=(8 + 4 * (generated is not None), 6))

    ims = []
    for i in range(len(driving)):
        cols = [source]
        cols.append(driving[i])
        if generated is not None:
            cols.append(generated[i])
        im = plt.imshow(np.concatenate(cols, axis=1), animated=True)
        plt.axis('off')
        ims.append([im])

    ani = animation.ArtistAnimation(fig, ims, interval=50, repeat_delay=1000)
    plt.close()
    return ani


HTML(display(source_image, driving_video).to_html5_video())
➍チェックポイント読み込み
事前にトレーニングしたチェックポイントを読み込みます。
from demo import load_checkpoints
generator, kp_detector = load_checkpoints(config_path='config/vox-256.yaml',
                            checkpoint_path='/content/drive/My Drive/first-order-motion-model/vox-cpk.pth.tar')
➎DeepFake作成
DeepFakeを作成します。作成した動画は「../generated.mp4」となります。
from demo import make_animation
from skimage import img_as_ubyte

predictions = make_animation(source_image, driving_video, generator, kp_detector, relative=True)

# save resulting video
imageio.mimsave('../generated.mp4', [img_as_ubyte(frame) for frame in predictions], fps=fps)
# video can be downloaded from /content folder

HTML(display(source_image, driving_video, predictions).to_html5_video())
④以上
お疲れ様でした。
なんかアウトプットがあると出来た感があって超楽しいですね。こんなにも簡単にDeepFakeができるなんてびっくりです。全ては「first-order-model」さまのお力なんですけどね。