0
0

Delete article

Deleted articles cannot be recovered.

Draft of this article would be also deleted.

Are you sure you want to delete this article?

More than 1 year has passed since last update.

RspberryPiにSVNServerを導入する。

Posted at

RspberryPiにSVNServerを導入した際の覚え書き

Apatch連携はせずにsvnだけで運用する。

以下のサイトを参考にさせてもらった。
https://www.softel.co.jp/blogs/tech/archives/5455

  1. subversionのインストール

    sudo apt install subversion
    
  2. 設定
    2-1. SVN用のグループを作成する。

        groupadd svn
    

    2-2. リポジトリを作成する。

        mkdir -p /home/svn/repos
        sudo svnadmin create /home/svn/repos/project
        sudo chown -R :svn /home/svn/repos
        sudo chmod -R g+wr /home/svn/repos
    

    2-3. ユーザを追加する。  

        sudo adduser svnuser
        sudo usermod -G svn svnuser
    

    2-4. 設定ファイルの編集
    /home/svn/repos/project01/conf配下のsvnserve.confとpasswdを修正する。
    svnserve.confの以下の部分をコメントアウトする。

        anon-access = read
        auth-access = write
        
        password-db = passwd
    

    passwdにユーザーとパスワードを追加する。

        [ユーザ名] = [パスワード]
    
  3. サーバの起動

        sudo svnserve -d -r /home/svn/repos/project01/
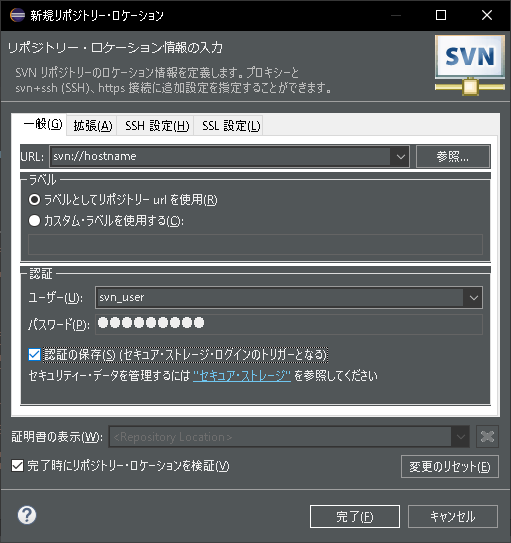
    
  4. 接続
    url(svn://[ホスト名 又は IPアドレス])とユーザ名、パスワードを指定して接続する。
    image.png

0
0
0

Register as a new user and use Qiita more conveniently

  1. You get articles that match your needs
  2. You can efficiently read back useful information
  3. You can use dark theme
What you can do with signing up
0
0

Delete article

Deleted articles cannot be recovered.

Draft of this article would be also deleted.

Are you sure you want to delete this article?