はじめに
DockerとPythonを使ってログイン認証のサービスを作成しました。
今回はPythonのWebフレームワークの一つであるFlaskを使ってHTMLページを表示します。
昨年にDockerとPythonで"Hello World"した記事の延長のような形です。
以前の記事はこちら
Flaskとは
Pythonにはいくつか有名なWebフレームワークがありますが、Flaskを使って進めていきます。
Flaskは他のWebフレームワークよりもフレームワークの仕様に縛られることなく、アプリ開発が可能です。
環境
macOS Sonoma 14.1
Docker Desktop for Mac
Docker version 24.0.6
Docker Compose version v2.22.0
VS code
ゴール
今回のゴールはFlaskでHTMLページを読み込んで、localhost上でログイン画面を表示することです。
構成
.
├── Dockerfile
├── docker-compose.yml
├── app.py
├── requirements.txt
└── templates
    ├── top.html
    ├── login.html
作業ディレクトリの作成
初めに作業ディレクトリを用意します。
mkdir docker_python_flask_auth && cd docker_python_flask_auth
Dockerfile
dockerコンテナをbuildするDockerfileを作成します。
FROM python:3.9.10

WORKDIR /

ENV FLASK_APP=app.py
ENV FLASK_RUN_HOST=0.0.0.0

COPY requirements.txt ./

RUN pip install --upgrade pip
RUN pip install --upgrade setuptools
RUN pip install -r requirements.txt

COPY . .
CMD ["flask", "run"]
Dockerfileの説明に関しては以前の記事でも触れているため割愛します。
docker-compose.yml
version: '3.9'
services:
  python3:
    restart: always
    build: .
    container_name: 'python3'
    working_dir: '/'
    tty: true
    ports:
      - "8000:5000"
ymlファイルも変更はありません。
requirements.txt
Flaskのインストールを記述します。
flask
app.py
from flask import Flask, render_template, request, redirect, url_for, session

app = Flask(__name__)
app.secret_key = 'your_secret_key'

# ダミーのユーザーデータベース
users = {'admin': 'password'}

@app.route('/')
def index():
    if 'username' in session:
        return render_template('top.html', username=session['username'])
    return redirect(url_for('login'))

@app.route('/login', methods=['GET', 'POST'])
def login():
    if request.method == 'POST':
        username = request.form['username']
        password = request.form['password']

        if username in users and users[username] == password:
            session['username'] = username
            return redirect(url_for('index'))
        else:
            return 'Invalid username/password'

    return render_template('login.html')

@app.route('/logout')
def logout():
    session.pop('username', None)
    return redirect(url_for('index'))

if __name__ == '__main__':
    app.run(debug=True)
中身を解説していきます。
app.secret_key = 'your_secret_key'
始めにセッションの設定です。
アプリケーションで使う秘密の鍵を設定しています。
これは、アプリケーションのセッションと呼ばれる機能を使うために必要です。
# ダミーのユーザーデータベース
users = {'admin': 'password'}
ユーザーの情報を格納するためのデータベース(今回はダミーデータベース)を作っています。
例えば、'admin'というユーザーがいて、そのパスワードが'password'だと設定しています。
※今後はDBも用意して記事をアップグレードしていく予定です。
@app.route('/')
@app.route('/login', methods=['GET', 'POST'])
@app.route('/logout')
特定のURLに対してどの関数を実行するかを設定しています。
def login():
    if request.method == 'POST':
        username = request.form['username']
        password = request.form['password']

        if username in users and users[username] == password:
            session['username'] = username
            return redirect(url_for('index'))
        else:
            return 'Invalid username/password'

    return render_template('login.html')
ユーザーがログインするための処理です。
ユーザー名とパスワードを入力すると、それがusersデータベースにある情報と一致するかを確認し、一致すればログイン成功となります。
login.html
app.pyファイルが保存してある場所と同じディレクトリに「templates」という名前でフォルダを作成します。
作成したフォルダの中にlogin.htmlファイルを用意します。
今回は「username」と「password」を入力し、「Login」ボタンを押すだけの画面です。
ログインに成功すれば「top.html」を表示します。
<!-- templates/login.html -->
<html>
<body>
    <h2>Login</h2>
    <form method="post" action="/login">
        <label for="username">Username:</label>
        <input type="text" id="username" name="username" required><br>
        <label for="password">Password:</label>
        <input type="password" id="password" name="password" required><br>
        <input type="submit" value="Login">
    </form>
</body>
</html>
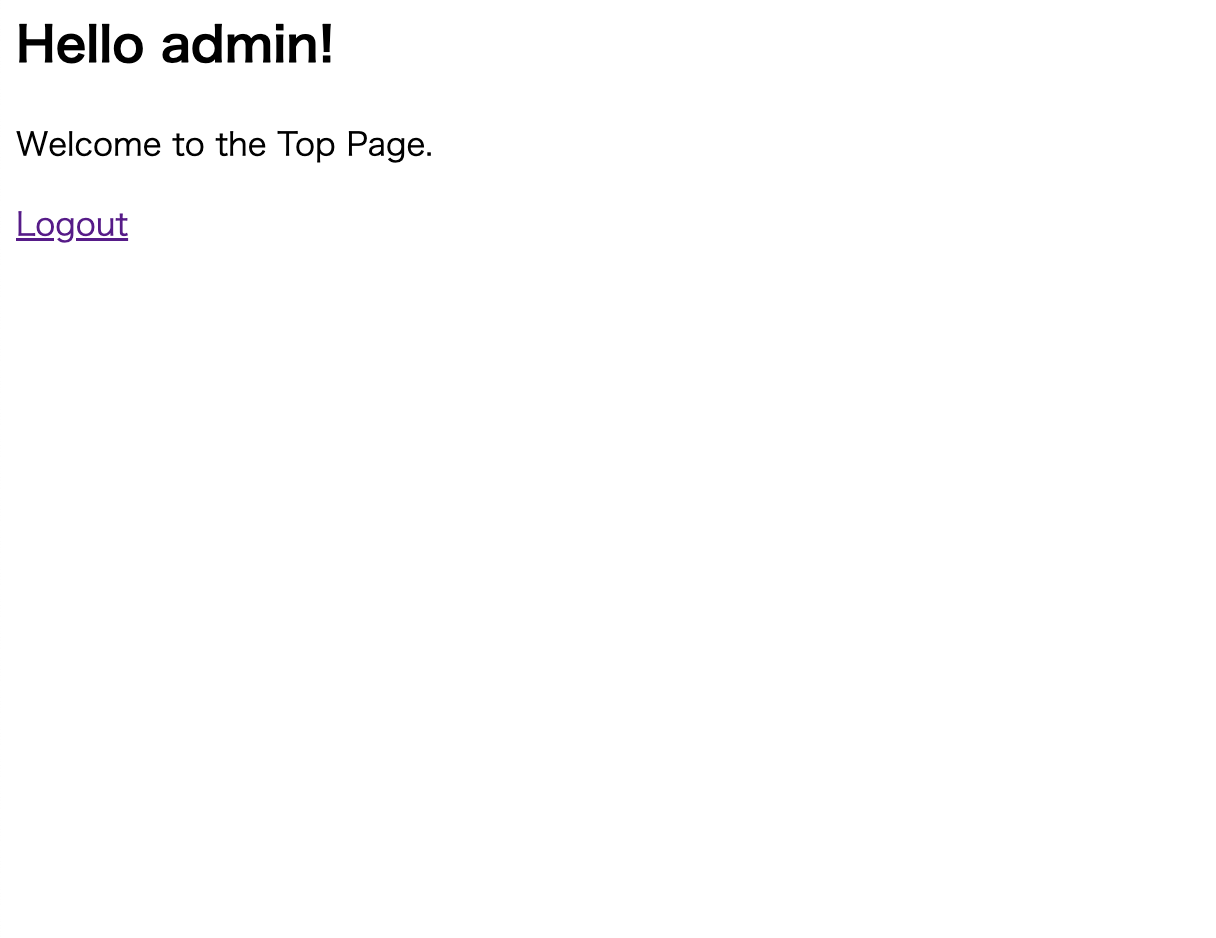
top.html
<!-- templates/top.html -->
<html>
<body>
    <h2>Hello {{ username }}!</h2>
    <p>Welcome to the Top Page.</p>
    <a href="/logout">Logout</a>
</body>
</html>
実行
実際に動かしてみましょう。
まずビルドします。
docker-compose build
ビルドができたら、docker-compose upします。
docker_python_flask_auth % docker-compose up
[+] Building 0.0s (0/0)                                    docker:desktop-linux
WARN[0000] Found orphan containers ([postgres]) for this project. If you removed or renamed this service in your compose file, you can run this command with the --remove-orphans flag to clean it up.
[+] Running 1/0
 ✔ Container python3  Created                                              0.0s
Attaching to python3
python3  |  * Serving Flask app 'app.py'
python3  |  * Debug mode: off
python3  | WARNING: This is a development server. Do not use it in a production deployment. Use a production WSGI server instead.
python3  |  * Running on all addresses (0.0.0.0)
python3  |  * Running on http://127.0.0.1:5000
python3  |  * Running on http://172.20.0.2:5000
python3  | Press CTRL+C to quit
上記のようになりましたら、
http://localhost:8000/ にアクセスしてみましょう。
login.html画面が表示されたと思います。

ログインに成功すると下記の画面となります。
最後に
今回シンプルなログイン画面を作成しましたが、今後はDBを使ってログインの認証を行うことや、フロント側もVueなどを使って整えていけたらと考えてます。