いつもお世話になっております。
前回、**こちらのメモ**でVuforia StudioにIonicを使って画面を装飾する方法についてを書きました。
先日私がVuforia StudioでARエクスペリエンスを作成した際は、それに加えてIonicのJAVASCRIPTを組み合わせて画面を作成したので、今回はそちらの内容になります。
はじめに
使った環境は以下です。
- Vuforia Studio : Version 8.4.7 (8.4.7.4459)
- Vuforia View : Version 8.4.60(1729)
- iPad Pro (10.5 inch)
わかったこと
Vuforia StudioのMobile向けのARコンテンツではIonic framework 1.3.3のJAVASCRIPT UI Libraryを利用して画面の表現を拡張できました。
私が試したのはAction Sheet、Modal、そしてSlide Boxですが、それ以外のJAVASCRIPTも同様に利用できると思います。
手順
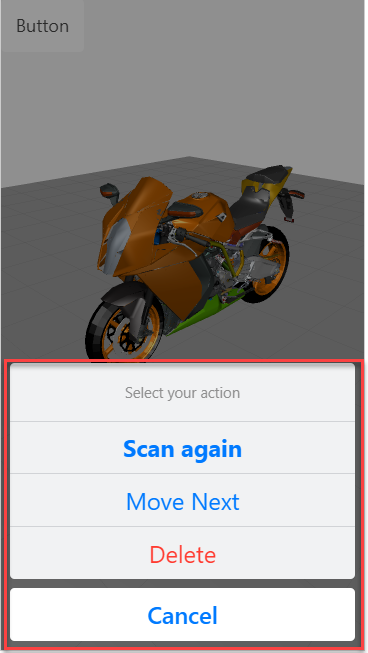
モバイルでよくある下記赤枠の様なメニューはVuforia StudioのVIEW > VIEW名.jsに*$ionicActionSheet*を追加する事で利用できるようになります。

//これは後述する手順1の内容
var $ionicActionSheet = $injector.get('$ionicActionSheet');

// ここから下が手順2の内容
 $scope.show = function() {
   // Show the action sheet
   var hideSheet = $ionicActionSheet.show({
     buttons: [
       { text: '<b>Scan again</b> ' },
       { text: 'Move Next' },
     ],
     destructiveText: 'Delete',
     titleText: 'Select your action',
     cancelText: 'Cancel',
     cancel: function() {
          // add cancel code..
        },
     buttonClicked: function(index) {
       console.log(index);
       if(index ==0){
       // Scan againが押されたら、Vuforia Studioの画面に配置した"scan-1"という名前のScan WidgetのstartScan(スキャン開始)を実行
         twx.app.fn.triggerWidgetService("scan-1", 'startScan');
       }else if (index == 1){
    //Move Nextが押されたらnextpageに遷移する
         twx.app.fn.navigate("nextpage");
       }
       return false;
     }
   });
 };
-
$injectorを使って$ionicActionSheetを追加する
-
$ionicActionSheetのUsageを参考に、ActionSheetへ追加したいボタンメニューをVIEW名.js記述する
-
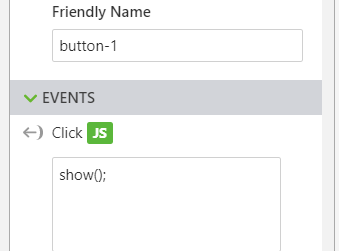
ActionSheetを表示するためのイベントをVuforia Studio側で準備する(とりあえずここではボタンのイベントにつける・・)

まとめ
Ionic FrameworkのライブラリにあるJAVASCRIPTをVuforia StudioのJavascriptに記述し、Vuforia Studio側のEventを使って呼び出すだけで機能を利用することができるので、便利です。
以下はionicModalとionicSlideBoxDelegateを使って、Modal表示されるポップアップに画像(step1.jpg~step4.jpg)をスライド表示する場合のサンプルです。
Vuforia Studio側でImage WidgetやButton WidgetのEventから*openModal();*を呼び出す様にすればOKです。
var $ionicModal = $injector.get('$ionicModal');
var imagesContent = '<ion-slide><img ng-src="app/resources/Uploaded/steps/step1.jpg" class="fullscreen-image"/></ion-slide><ion-slide><img ng-src="app/resources/Uploaded/steps/step2.jpg" class="fullscreen-image"/></ion-slide><ion-slide><img ng-src="app/resources/Uploaded/steps/step3.jpg" class="fullscreen-image"/></ion-slide><ion-slide><img ng-src="app/resources/Uploaded/steps/step4.jpg" class="fullscreen-image"/></ion-slide>';
$scope.modal = $ionicModal.fromTemplate('<div class="modal image-modal transparent" ng-click="closeModal()"><ion-slide-box show-pager="false">' + imagesContent + '</ion-slide-box></div>', {
    scope: $scope,
    animation: 'slide-in-up'
});
var $ionicSlideBoxDelegate = $injector.get('$ionicSlideBoxDelegate');
$scope.openModal = function() {
    $ionicSlideBoxDelegate.slide(0);
    $scope.modal.show();
};
$scope.closeModal = function() {
    $scope.modal.hide();
};
$scope.$on('$destroy', function() {
    $scope.modal.remove();
});
リンク
Ionic frameworkのドキュメントへのリンク
https://ionicframework.com/docs/v1/overview/#css-sass