Neumorphismの電卓
Neumorphismのデザインが素敵だったので,練習で仲間と一緒に電卓を作ってみました!
とりあえず動くようになったので公開しようと思います。
ほとんど彼につくってもらいましたが...
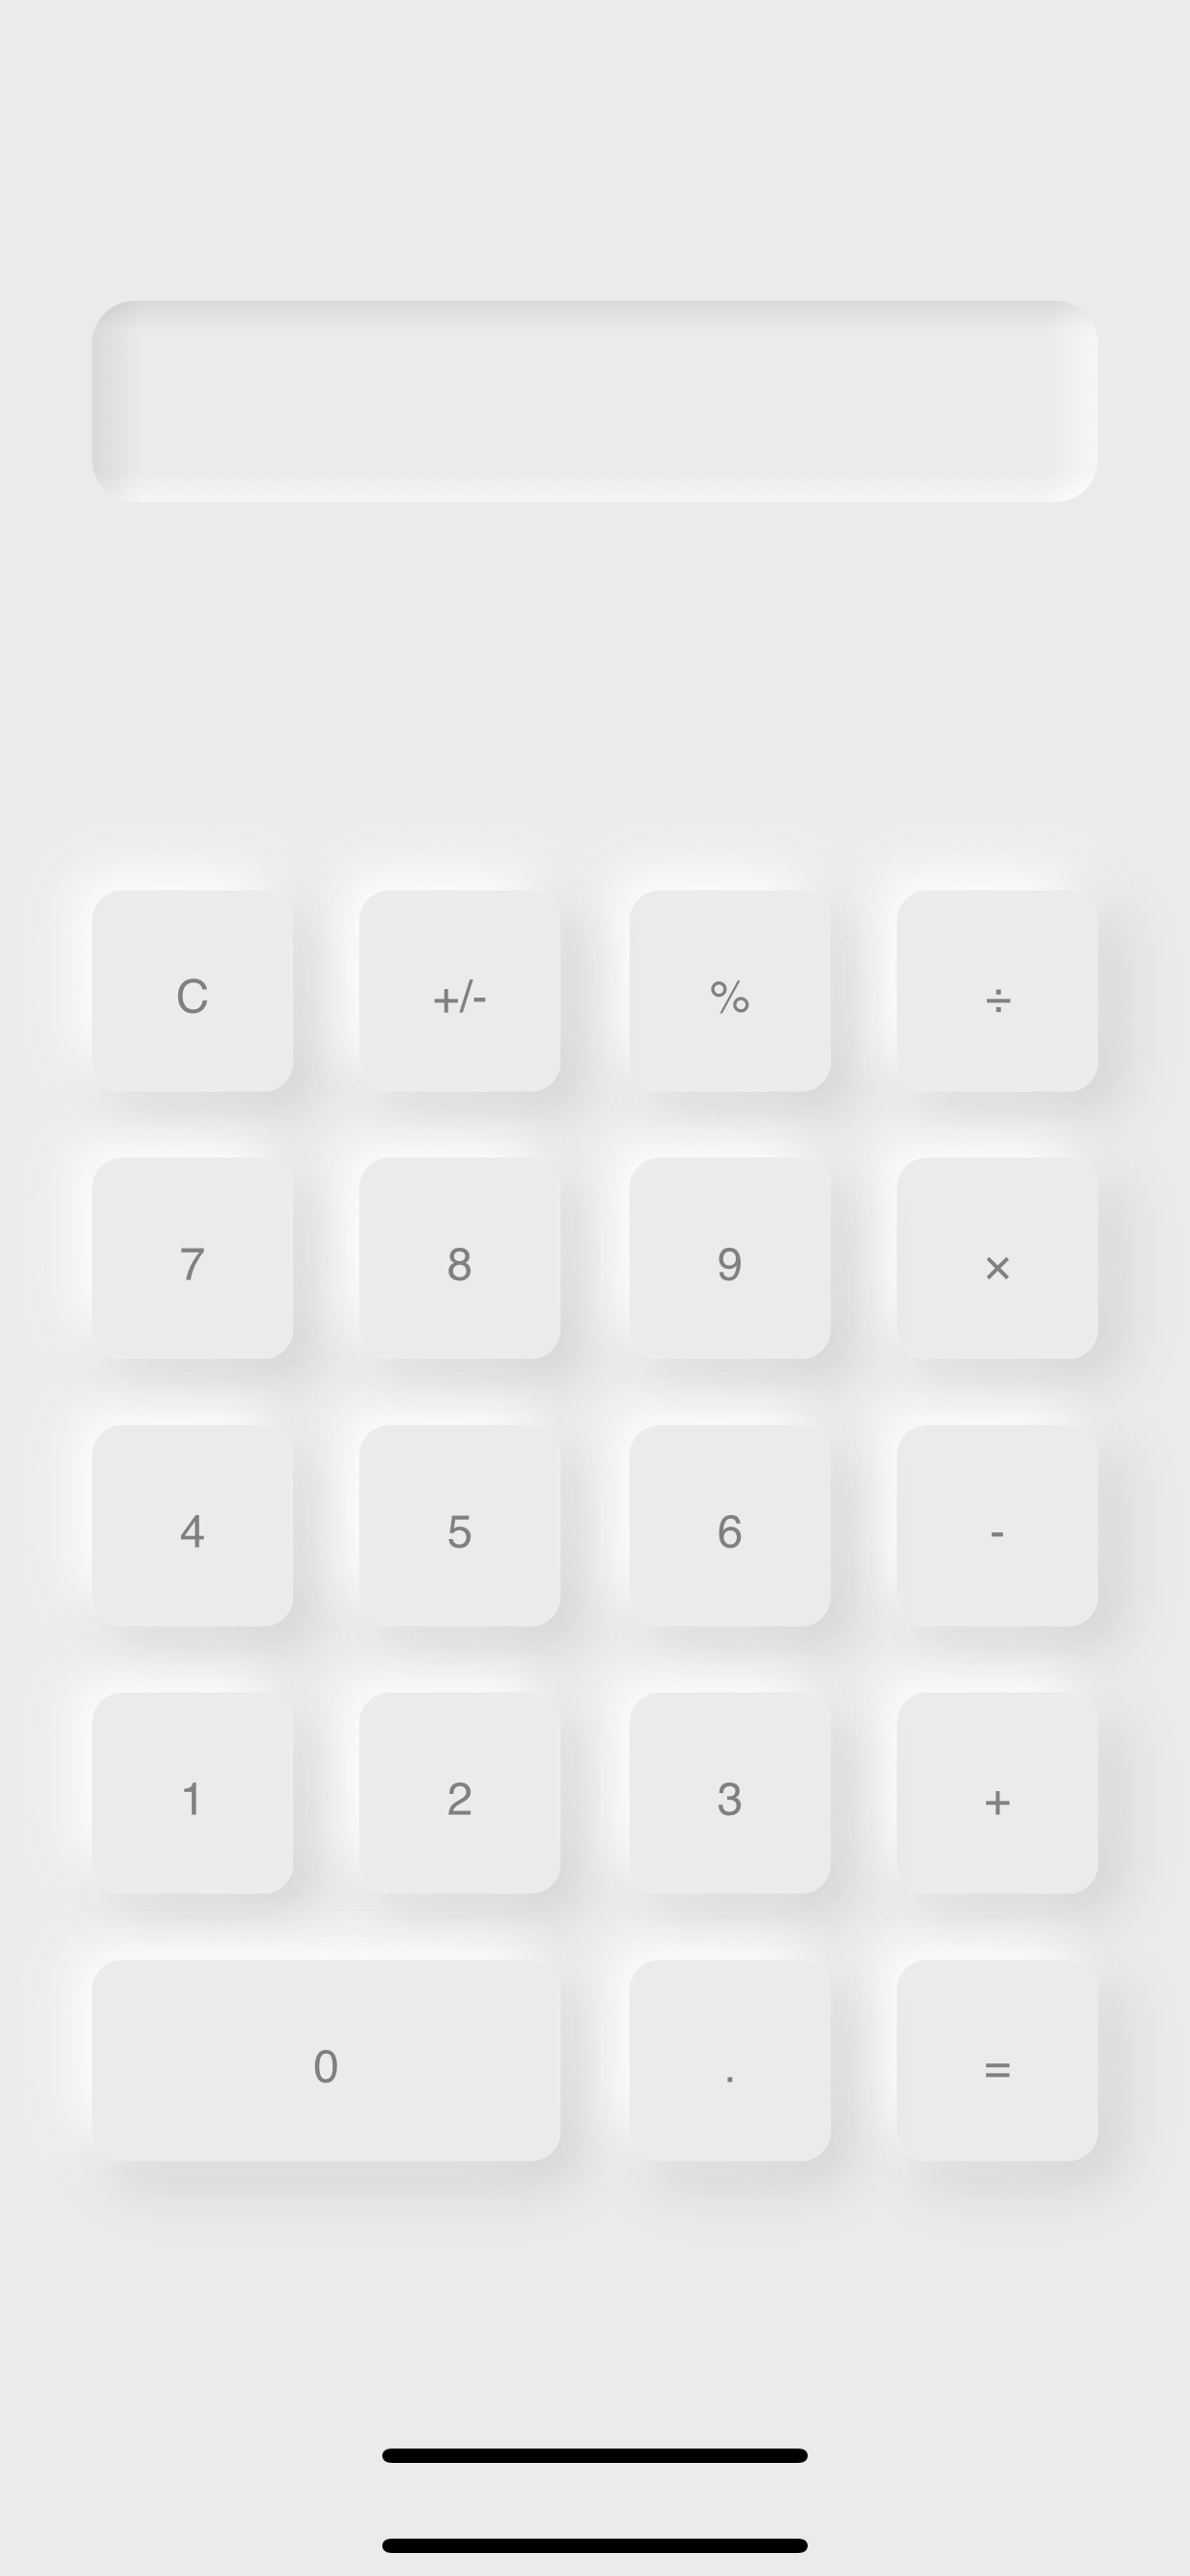
この電卓は,主にNeumorLabelとNeumorButtonの2つから作られています。
Neumorphismとは
参考
ボタンなどの要素が凹凸で表現されている,新しいスキューモーフィックデザインのことみたいです。
NeumorLabel
コード全体
swift/NeumorLabel.swift
import Foundation
import UIKit

class NeumorLabel: UILabel {
    override init(frame: CGRect) {
        super.init(frame: frame)
        label()
    }
    required init?(coder aDecoder: NSCoder) {
        super.init(coder: aDecoder)
        label()
    }

    private let params = Params()

    private let topAndBottomLayer = CAGradientLayer(),
                leftAndRightLayer = CAGradientLayer(),
                calcResultLabel = UILabel()

    private func label() {
        putTopAndBottom()
        putLeftAndRight()
        addSubview(calcResultLabel)
    }
    private func putTopAndBottom() {
        topAndBottomLayer.cornerRadius = params.LABEL_CORNER_RADIUS
        topAndBottomLayer.frame = self.bounds
        topAndBottomLayer.colors = [
            params.BACKGROUND_COLOR.darker().cgColor,
            params.NORMAL_BUTTON_BGCOLOR.cgColor,
            params.NORMAL_BUTTON_BGCOLOR.cgColor,
            params.BACKGROUND_COLOR.brighter().cgColor
        ]
        topAndBottomLayer.locations = [
            0,
            0.15,
            0.85,
            1
        ]
        topAndBottomLayer.opacity = 1
        layer.insertSublayer(topAndBottomLayer, at: 0)
    }
    private func putLeftAndRight() {
        leftAndRightLayer.cornerRadius = params.LABEL_CORNER_RADIUS
        leftAndRightLayer.frame = self.bounds
        leftAndRightLayer.colors = [
            params.BACKGROUND_COLOR.darker().cgColor,
            params.NORMAL_BUTTON_BGCOLOR.cgColor,
            params.NORMAL_BUTTON_BGCOLOR.cgColor,
            params.BACKGROUND_COLOR.brighter().cgColor
        ]
        leftAndRightLayer.locations = [
            0,
            0.05,
            0.95,
            1
        ]
        leftAndRightLayer.startPoint = CGPoint(x: 0, y: 0)
        leftAndRightLayer.endPoint = CGPoint(x: 1, y: 0)
        leftAndRightLayer.opacity = 0.5
        layer.insertSublayer(leftAndRightLayer, at: 1)
    }
    func putUILabel(text: String) {
        calcResultLabel.text = text
        calcResultLabel.frame = CGRect(
            x: 15,
            y: 0,
            width: self.bounds.width * 0.9,
            height: self.bounds.height
        )
        calcResultLabel.textAlignment = .right
        calcResultLabel.font = UIFont(name: "Roboto-Bold", size: 30)
    }
}
コードのざっくりとした解説
storyboardで指定するためのクラスNeumorLabel.swiftを作成しました。
CAGradientLayerをただ上につけるだけだと文字が隠れちゃって表示されない現象が起きてしまったので,putUILabel()でさらに上にUILabelを載せられるようにしています。(ViewControllerからputUILabel()は参照しています)
Layerは影と光を表現するために使っています。左ななめ上から光があたってる感じになっているます。それぞれ白色と黒色で再現しています。
NeumorSquareButton
練習で円いボタンも作成していたので,名前にわざと"Square"がついています。
コード全体
swift/NeumorSquareButton.swift
import Foundation
import UIKit

let FONT_SIZE = 16

class NeumorSquareButton: UIButton {
    override init(frame: CGRect){
        super.init(frame: frame)
        button()
    }
    required init?(coder aDecoder: NSCoder) {
        super.init(coder: aDecoder)
        button()
    }
    private let params = Params()

    let highlightLayer = CALayer(),
        shadowLayer = CALayer(),
        textLayer = CATextLayer()

    func button() {
        setTitleColor(UIColor.clear, for: .normal)
        textLayer.string = currentTitle
        textLayer.foregroundColor = UIColor.gray.cgColor
        textLayer.contentsScale = UIScreen.main.scale
        textLayer.fontSize = CGFloat(FONT_SIZE)
        textLayer.alignmentMode = .center

        [highlightLayer, shadowLayer, textLayer].forEach {
            $0.masksToBounds = false
            $0.frame = layer.bounds
        }

        textLayer.frame = CGRect(
            x: CGFloat(0),
            y: self.bounds.height/2 - CGFloat(FONT_SIZE/2),
            width: self.bounds.width,
            height: CGFloat(FONT_SIZE)
        )

        putHighlight()
        putShadow()

        layer.addSublayer(shadowLayer)
        layer.addSublayer(highlightLayer)
        layer.addSublayer(textLayer)
    }

    private func putHighlight() {
        highlightLayer.backgroundColor = params.NORMAL_BUTTON_BGCOLOR.cgColor
        highlightLayer.shadowColor = params.BACKGROUND_COLOR.brighter().cgColor
        highlightLayer.cornerRadius = layer.frame.size.height * 0.15
        highlightLayer.shadowOpacity = 1
        highlightLayer.shadowOffset = CGSize(width: -6, height: -6)
        highlightLayer.shadowRadius = 10
    }
    private func putShadow() {
        shadowLayer.backgroundColor = UIColor.white.cgColor
        shadowLayer.shadowColor = UIColor.black.cgColor
        shadowLayer.cornerRadius = layer.frame.size.height * 0.15
        shadowLayer.shadowOpacity = 0.15
        shadowLayer.shadowOffset = CGSize(width: 6, height: 6)
        shadowLayer.shadowRadius = 10
    }

    func buttonPush() {
        highlightLayer.shadowOpacity = 0
        shadowLayer.shadowOpacity = 0

        let frame = CGRect(x: 0, y: 0, width: layer.frame.size.width, height: layer.frame.size.height)
        let gradColors = [
            params.BACKGROUND_COLOR.darker().cgColor,
            params.NORMAL_BUTTON_BGCOLOR.cgColor,
            params.NORMAL_BUTTON_BGCOLOR.cgColor,
            params.BACKGROUND_COLOR.brighter().cgColor
        ]
        let gradLocations = [0, 0.15, 0.85, 1]
        let shadowOpacity: Float = 0.5
        let cornerRadius = layer.frame.size.height * 0.15

        let virticalGradLayer = CAGradientLayer()
            virticalGradLayer.opacity = shadowOpacity
            virticalGradLayer.frame = frame
            virticalGradLayer.colors = gradColors
            virticalGradLayer.locations = gradLocations as [NSNumber]
            virticalGradLayer.cornerRadius = cornerRadius
        let horizonGradLayer = CAGradientLayer()
            horizonGradLayer.opacity = shadowOpacity
            horizonGradLayer.frame = frame
            horizonGradLayer.startPoint = CGPoint(x: 0, y: 0)
            horizonGradLayer.endPoint = CGPoint(x: 1, y: 0)
            horizonGradLayer.colors = gradColors
            horizonGradLayer.locations = gradLocations as [NSNumber]
            horizonGradLayer.cornerRadius = cornerRadius

        layer.addSublayer(horizonGradLayer)
        layer.addSublayer(virticalGradLayer)
        layer.addSublayer(textLayer)
    }
}
コードのざっくりとした解説
押されたときのアニメーションを地道につけていってます...
押されたときのアニメーション↓
Labelのときと同じように影と光を配置しています。
おわりに
ただ電卓を公開したかっただけだったので,一応githubのリポジトリを貼っておきます。
https://github.com/Papillon6814/neumor-calculator/blob/master/README.md