1. Introduction
自分用の開発メモです。 RaspberryPi4のディープラーニングプログラムの前処理と後処理を部分的に高速化するために Python から C++ の共有ライブラリをコールする方法を学んだ結果を書き留めます。 今回は boost_python3 というライブラリを使用してPython実行用の共有ライブラリを作成します。 ヘッダファイルのインクルードと共有ライブラリ間の依存関係を調べるために少しだけ時間を要しますが、対象が分かってしまえばものすごく簡単に実施できました。
2. Environment
- RaspberryPi4 Ubuntu 19.10 aarch64 (eoan)
- 作業用PC Ubuntu 18.04 x86_64 (bionic)
- OpenCV 4.2.0 (self-build)
- libboost-python-dev 1.67.0.2
3. Procedure
3-1. Tutorial implementation
環境の下準備
Install_boost-python
$ sudo apt-get update
$ sudo apt-get install libboost-all-dev python3-dev
味見プログラムの作成
$ nano CModule.cpp
CModule.cpp
# include <boost/python.hpp>

std::string hello() {
    return "hello world";
}

BOOST_PYTHON_MODULE(CModule) {
    using namespace boost::python;
    def("hello", &hello);
}
味見プログラムのコンパイル
compile
$ g++ -I/usr/include/aarch64-linux-gnu/python3.7m \
      -I/usr/include/python3.7m \
      -DPIC \
      -shared \
      -fPIC \
      -o CModule.so \
      CModule.cpp \
      -lboost_python3
Pythonから味見用共有ライブラリ(CModule.so)の呼び出しテスト
test
$ python3
>>> import CModule
>>> CModule.hello()
'hello world'
3-2. Pre-processing test implementation and operation verification
前処理用のプログラムをC++で簡易実装
Edit
$ nano preprocessing.cpp
preprocessing.cpp
# include <string>
# include <stdio.h>
# include <boost/python.hpp>
# include <opencv2/opencv.hpp>
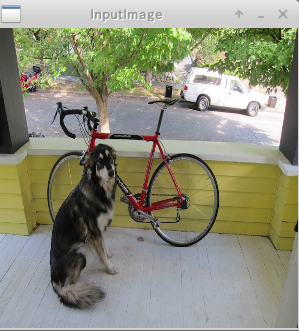
void resize_and_normalize(std::string image_file, int width, int height) {
cv::Mat image = cv::imread(image_file, 1), prepimage;
cv::resize(image, prepimage, cv::Size(width, height));
cv::imshow("InputImage", prepimage);
cv::waitKey(0);
}
BOOST_PYTHON_MODULE(preprocessing) {
using namespace boost::python;
def("resize_and_normalize", &resize_and_normalize);
}
作成した前処理用プログラムをコンパイル
共有ライブラリ(.so) が生成される
compile_ubuntu1910_aarch64
$ g++ -I/usr/include/aarch64-linux-gnu/python3.7m \
      -I/usr/include/python3.7m \
      -I/usr/local/include/opencv4 \
      -DPIC \
      -shared \
      -fPIC \
      -o preprocessing.so \
      preprocessing.cpp \
      -lboost_python3 \
      -L/usr/local/lib \
      -lopencv_core \
      -lopencv_imgcodecs \
      -lopencv_highgui
compile_ubuntu1804_x86_64
$ g++ -I/usr/include/x86_64-linux-gnu/python3.6m/ \
      -I/usr/include/python3.6m \
      -I/opt/intel/openvino_2019.3.376/opencv/include \
      -DPIC \
      -shared \
      -fPIC \
      -o preprocessing.so \
      preprocessing.cpp \
      -lboost_python3 \
      -L/opt/intel/openvino_2019.3.376/opencv/lib \
      -lopencv_core \
      -lopencv_imgcodecs \
      -lopencv_highgui

テスト用Pythonプログラムの作成
Edit
$ nano test.py
test.py
import preprocessing
preprocessing.resize_and_normalize("dog.jpg", 300, 300)
Execution
$ python3 test.py
4. Reference articles
- ubuntuでC++をpython3に公開する - Qiita - mink0212さん
- C++ で Python 用ライブラリーを作成する
- Python Tips:ライブラリ・モジュールの場所を調べたい
- Linux共有ライブラリの簡単なまとめ
- https://stackoverflow.com/questions/51308292/swig-linker-undefined-symbol-zn2cv8fastfreeepv-cvfastfreevoid
- cv::Matの基本処理
- CV_Assert, CV_DbgAssert, CV_StaticAssert
- 画像処理で2重ループをなるべく書くな - Qiita - nonbiri15さん