問題14
問題13~15は問題9がベースとなっています。まず問題9を実装してください。
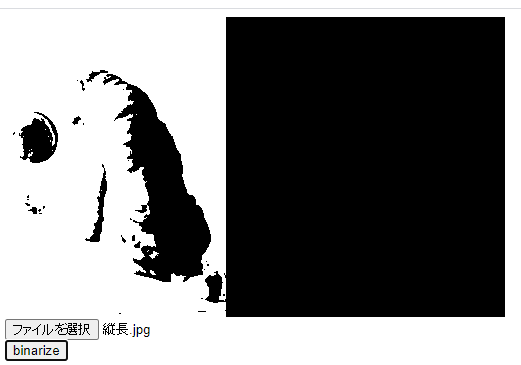
画像読み込み後、binarize押下時に2値化処理をせよ。
2値化処理はグレースケール後、127より大きい場合は255,それ以外の場合は0となるように処理すること。
グレースケールとは以下の式で表せる。
Gray = 0.299 * Red + 0.587 * Green + 0.114 * Blue;
以下のHTMLを使用すること。
<!DOCTYPE html>
<html lang="ja">
<head>
<meta charset="utf-8">
<title>問題14</title>
<script src="https://code.jquery.com/jquery-3.5.1.min.js"></script>
<script>
$(() => {

    $('#my-file').on('change', e => {
        const img = new Image();
        $(img).on('load', e => {
        });
        img.src = URL.createObjectURL(e.target.files[0]);
    });

    $('#binarize-button').click(e => {
    });

});
</script>
</head>
<body>
<canvas id="my-canvas" width="500" height="300"></canvas>
<br>
<input id="my-file" type="file" />
<br>
<input id="binarize-button" type="button" value="binarize" />
</body>
</html>
解答
問題9の分の回答も併せて貼っておきます。
<!DOCTYPE html>
<html lang="ja">
<head>
<meta charset="utf-8">
<title>問題14</title>
<script src="https://code.jquery.com/jquery-3.5.1.min.js"></script>
<script>
$(() => {

    $('#my-file').on('change', e => {
        const img = new Image();
        $(img).on('load', e => {
            // コンテキストを取得
            const ctx = $('#my-canvas')[0].getContext('2d');

            // canvasを黒色で塗りつぶす
            ctx.fillStyle = '#000000';
            ctx.fillRect(0, 0, ctx.canvas.width, ctx.canvas.height);

            // canvasと画像のアスペクト比を求める
            const canvasWidth = $('#my-canvas').prop('width'),
                canvasHeight = $('#my-canvas').prop('height');
                canvasAspect = canvasWidth / canvasHeight;  // canvasのアスペクト比
                imgAspect = img.width / img.height; // imgのアスペクト比

            // canvasと画像のアスペクト比を比較し、貼り付ける領域を決定する
            let dstWidth, dstHeight;
            if(canvasAspect > imgAspect) {// canvasの方が横長
                dstHeight = canvasHeight;
                dstWidth = dstHeight * imgAspect;
            } else {// canvasの方が縦長
                dstWidth = canvasWidth;
                dstHeight = dstWidth / imgAspect;
            }

            // 画像を貼り付ける
            ctx.drawImage(img, 0, 0, img.width, img.height, 0, 0, dstWidth, dstHeight);
        });
        img.src = URL.createObjectURL(e.target.files[0]);
    });

    $('#binarize-button').click(e => {
        const canvas = $('#my-canvas')[0],
            ctx = canvas.getContext('2d');

        ctx.save();

        const imgData = ctx.getImageData(0, 0, canvas.width, canvas.height),
            data = imgData.data;

        for(let p = 0; p < data.length; p += 4) {
            // rgbを求める
            const red = data[p],
                green = data[p + 1],
                blue = data[p + 2];

            // グレースケールの値を求める
            let gray = 0.299 * red + 0.587 * green + 0.114 * blue;
            // 2値化する
            if(gray > 127) {
                gray = 255;
            } else {
                gray = 0;
            }

            // グレースケール化する(グレーで塗りつぶす)
            for (let i = 0; i < 3; i += 1) {
                data[p + i] = gray;
            }
        }

        // imageDataをcanvasに貼り付ける
        ctx.putImageData(imgData, 0, 0);

        ctx.restore();
    });

});
</script>
</head>
<body>
<canvas id="my-canvas" width="500" height="300"></canvas>
<br>
<input id="my-file" type="file" />
<br>
<input id="binarize-button" type="button" value="binarize" />
</body>
</html>
解説
問題13と酷似しているのでポイントだけ説明します。
グレースケール化するときの値を計算して、閾値(今回は127)より大きい場合は255,それ以外は0にします。
// グレースケールの値を求める
let gray = 0.299 * red + 0.587 * green + 0.114 * blue;
// 2値化する
if(gray > 127) {
    gray = 255;
} else {
    gray = 0;
}
発展
2値化の閾値は手動で決める場合と、計算して求める場合があります。
計算で2値化の閾値を求める方法として「大津の2値化」というロジックが有名です。
興味のある方は調べてみてください。
